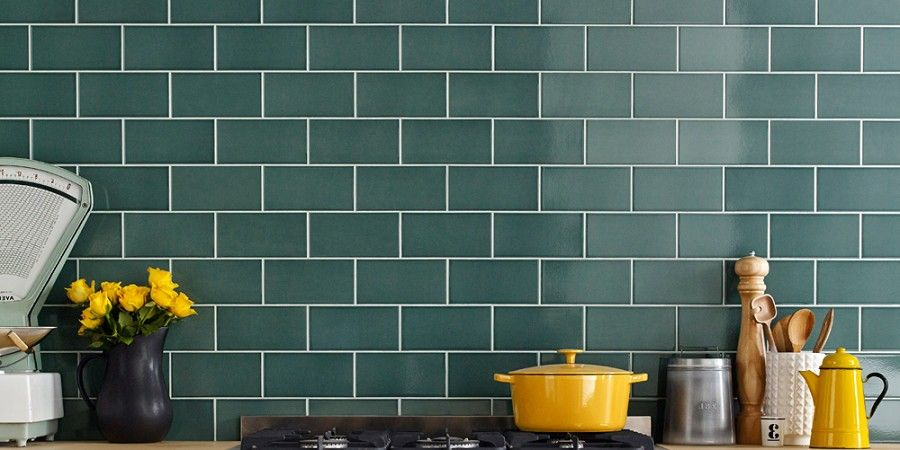
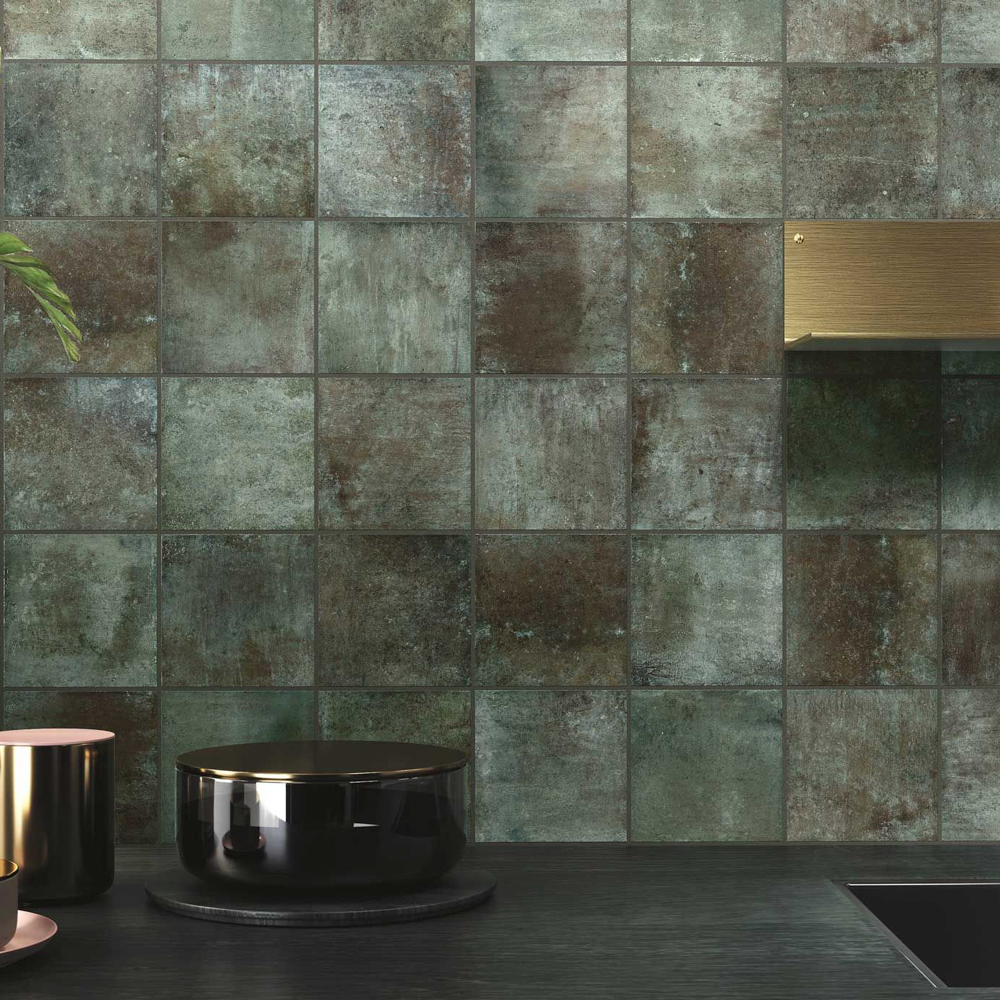
Welcome to the era of emerald green, a trend that’s making waves in interior design! Let’s explore how easy it is to bring this luxurious color into your home, from your bathroom to your kitchen and beyond.
branch locations
cape town
showroom
43 Paarden Eiland Road, Paarden Eiland Cape Town 7405
warehouse
Corner Wallflower & Carlisle Roads Paarden Eiland Cape Town 7405
johannesburg
showroom/warehouse
Erf 210 Boundary Park Extension 4 Malibongwe Road
durban
showroom/warehouse
5 Tottum Road, Unit 17 Vision Business Park, Cornubia, Ethekwini
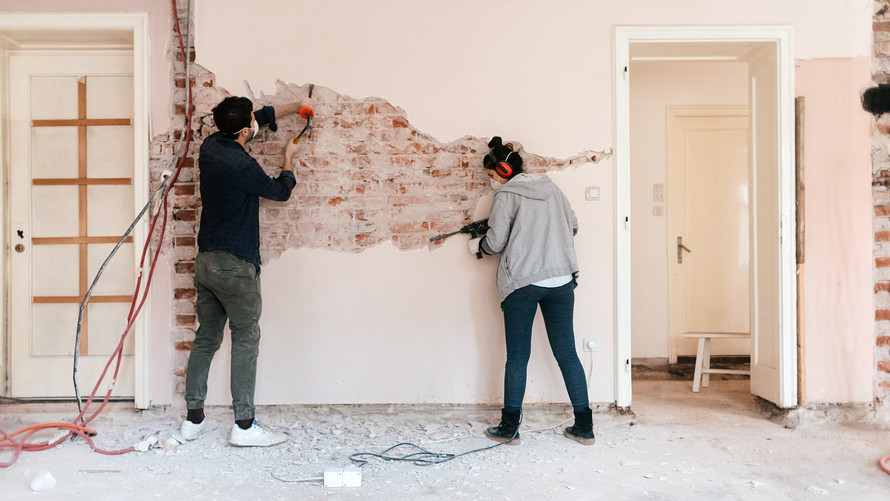
Dreaming of a new space for you and your family to create new memories? Renovations are exciting however, the reality is that renovations can be stressful and dangerous without the right precautions! Let’s dive into our top 10 tips to keep in mind before you start your home makeover.
Before you pick up that hammer, consider whether your project is better suited for DIY or if you should bring in a professional. This will depend on the complexity of the renovation project. Keep in mind that if you install equipment or appliances yourself and something goes wrong, many manufacturers won’t honour the warranty unless a licensed pro did the job. This could end up costing you more than you anticipated. A professional contractor can also catch issues you might not notice, like past water damage to your foundation. Save DIY for tasks you’re confident in, and let the pros handle the more complex parts of your renovation.
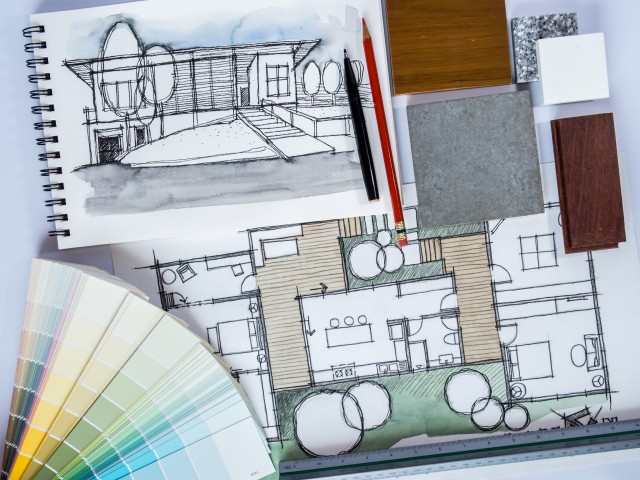
Tip #2: Have a plan
Knowing exactly what needs to be done will help you set a realistic budget and timeline. It’s easy to underestimate costs, so speak with a contractor to get accurate estimates for labour, materials, and any necessary permits.
Pro tip: Always budget extra for unexpected expenses and add some cushion to your timeline for unforeseen delays, like waiting on materials or dealing with unexpected issues like uneven flooring.
Tip #3: Plan Where to Live During Renovation
Renovations can turn your home upside down, so consider where you and your family will stay. If your project affects essential areas like bedrooms or the kitchen, you might need to arrange alternative living arrangements. Whether that’s staying with friends or family, or finding a short-term rental, make sure you’ve got a plan that keeps everyone safe and comfortable.
Tip #4: Understand Building Regulations
If your renovation involves structural changes, you’ll need to get your plans approved before you start. For homes older than 60 years, there might be extra restrictions if your home is considered historic. If you’re just updating things like cupboards, flooring, or bathroom fixtures, you can usually skip the approval process.
Tip #5: Use Proper Protective Gear
Safety first! Ensure everyone on-site has the right protective gear and that the area is clean and easy to navigate. A safe work environment is key to preventing accidents.
Tip #6: Keep Safety Equipment Ready
Check that all household safety items, like fire extinguishers and blankets, are in working order. You want to be prepared in case of an emergency during your renovation.
Tip #7: Wear a Mask
Wearing a mask might stir up some COVID-era flashbacks, but trust us, it’s important! Renovations kick up a lot of dust and allergens, so keeping your mask on is key to protecting your lungs. It might not be the most comfortable, but it’s crucial for keeping your respiratory system safe. If you notice any worsening symptoms, seek medical advice.
Tip #8: Treat Mold
If you spot black mold, treat it immediately with strong bleach or mold-specific paint. For serious cases, it’s best to call in a specialist. Mold can pose significant health risks, so it’s important to deal with it properly.
Tip #9: Turn Off the Electricity
Before working on anything electrical, make sure to turn off the electricity at the circuit breaker. Place a tag on the circuit board to prevent anyone from accidentally turning it back on while you’re working — safety first!
Tip #10: Maintain Your Routine
Renovations can be overwhelming, so it’s important to keep up with your regular routine. Exercise, eat well, and take breaks to maintain your mental health. Also, have a designated spot for everyday items so they don’t get lost in the chaos.
Pro Tip: Be ready to adapt. Unexpected obstacles are part of the renovation process, so stay flexible and consider lower-cost alternatives if needed.
Remember, renovations rarely go exactly as planned, so stay calm and enjoy the journey. For more expert advice, visit your nearest Tiletoria showroom and let the professionals guide you through your next project!
Prefer to watch?
Ryan and Deon discuss renovation tips in the 2 part videos below:
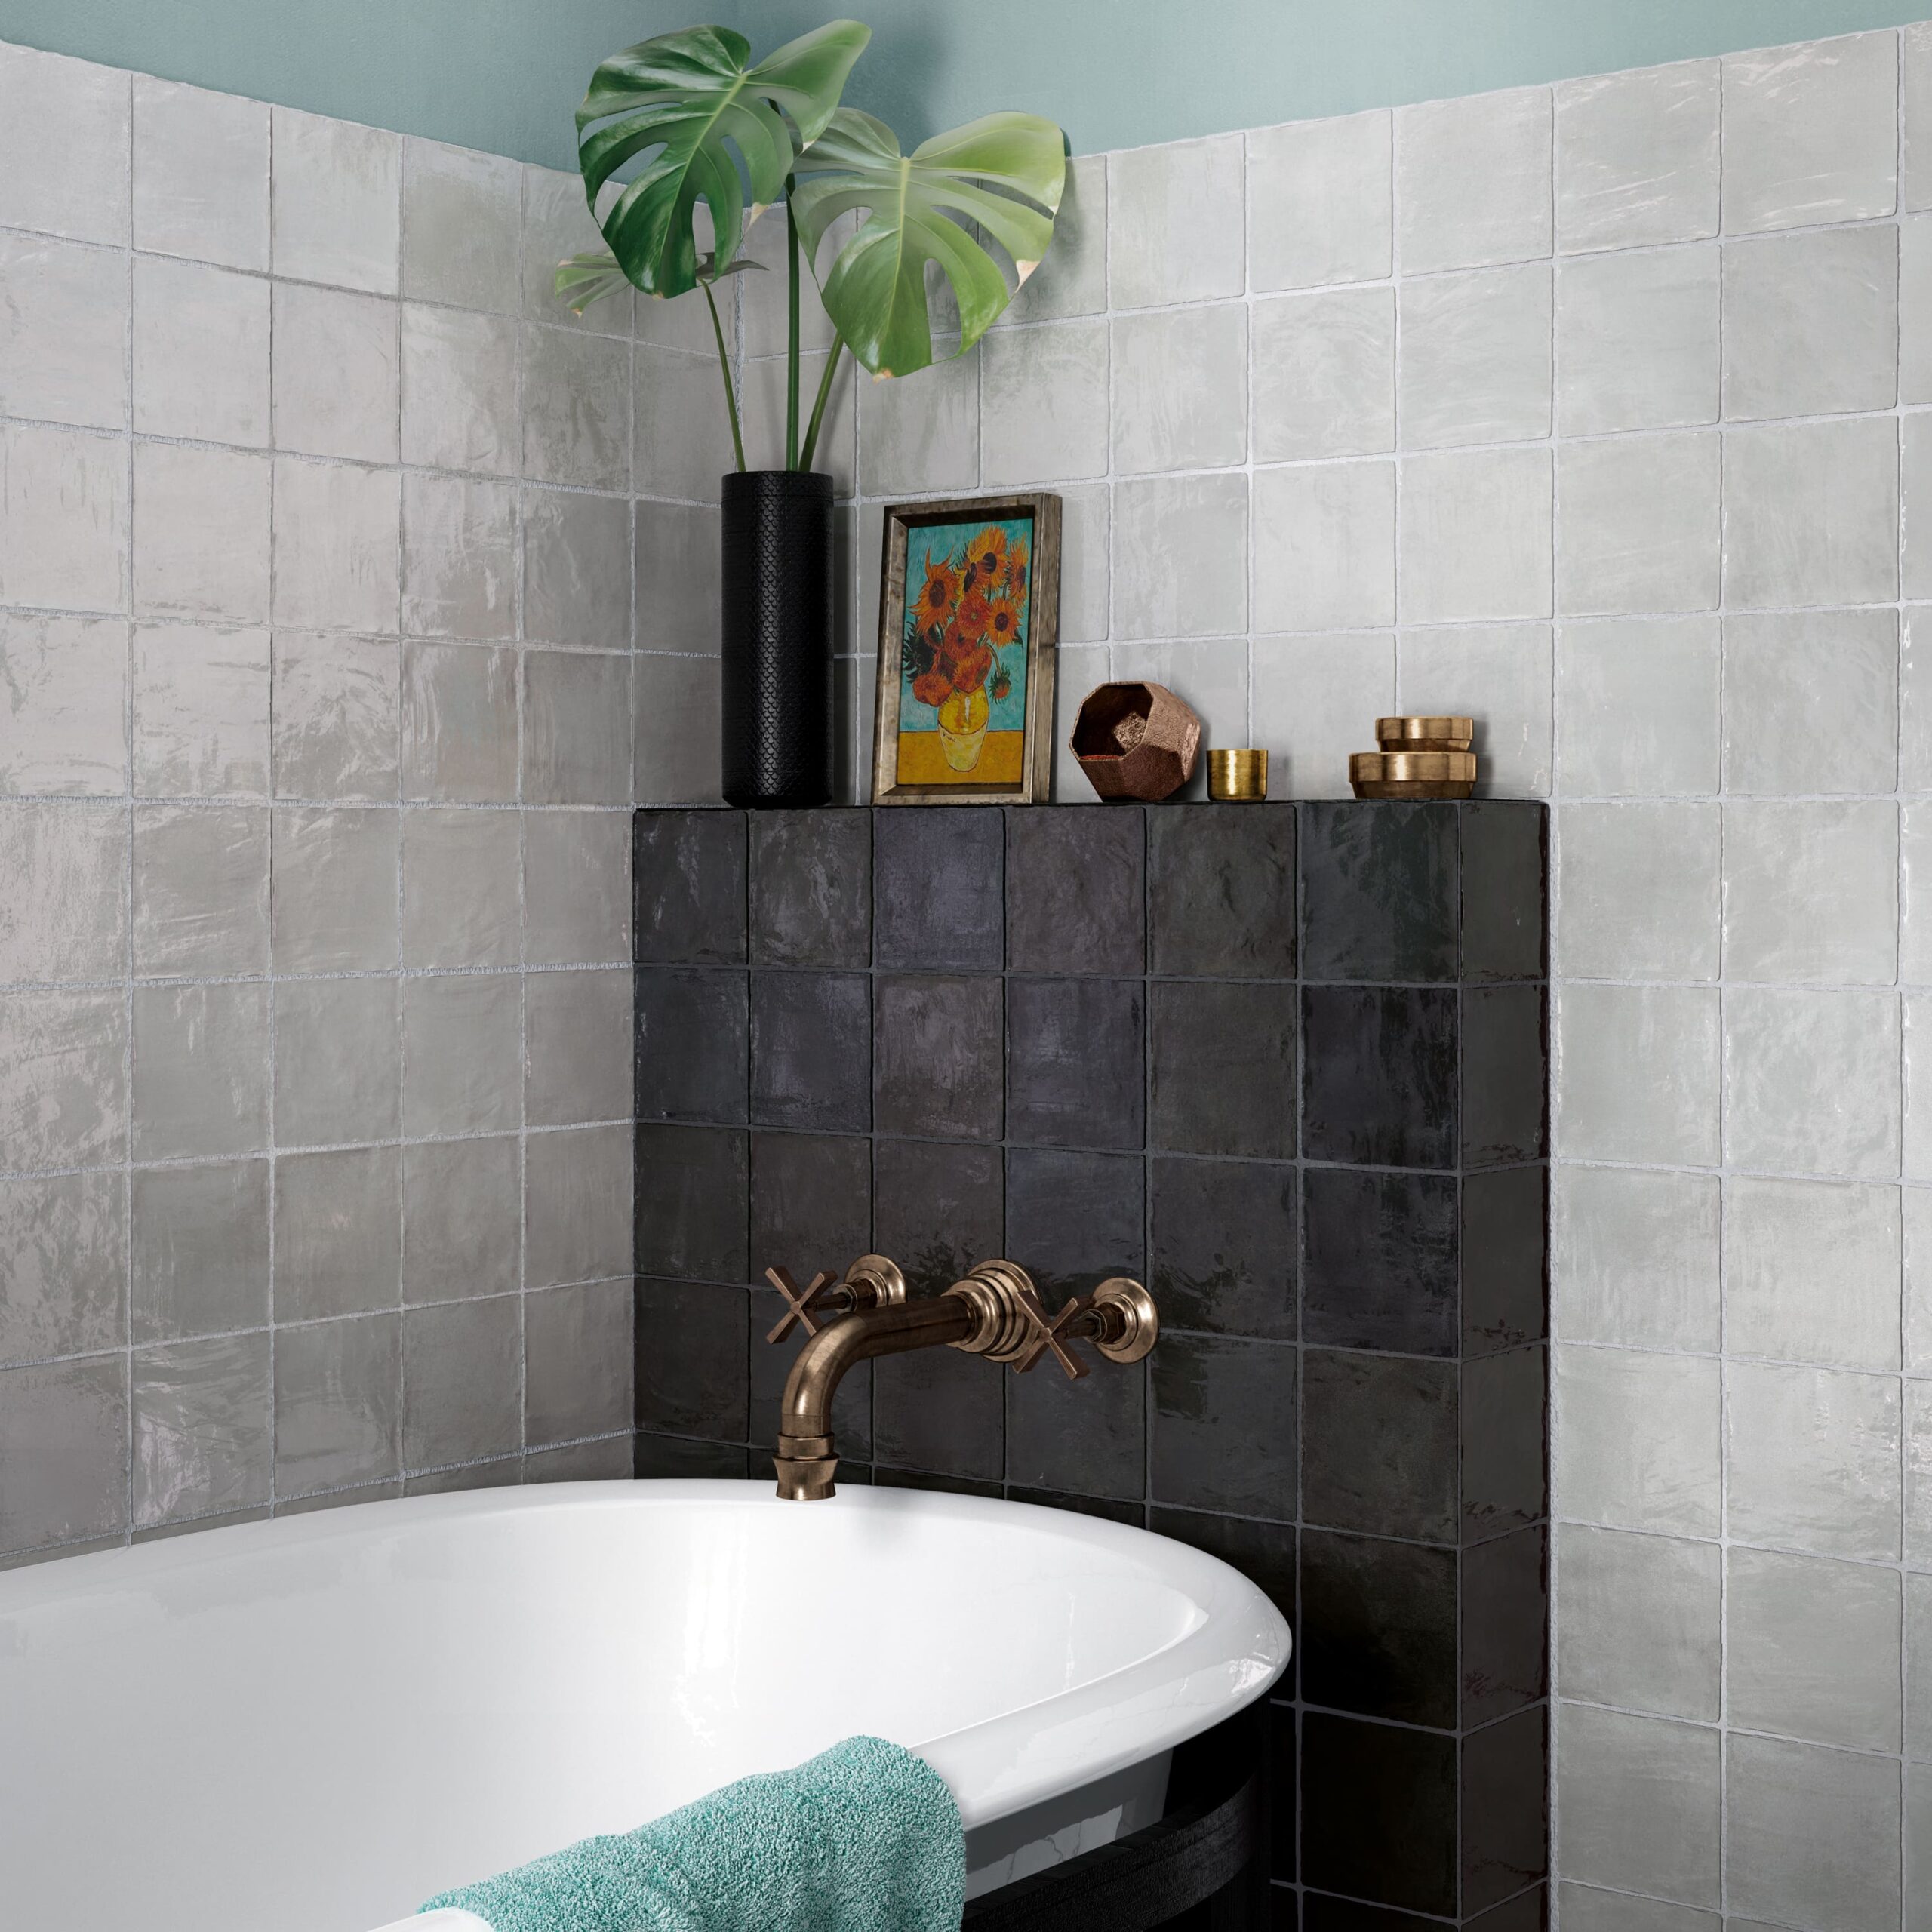
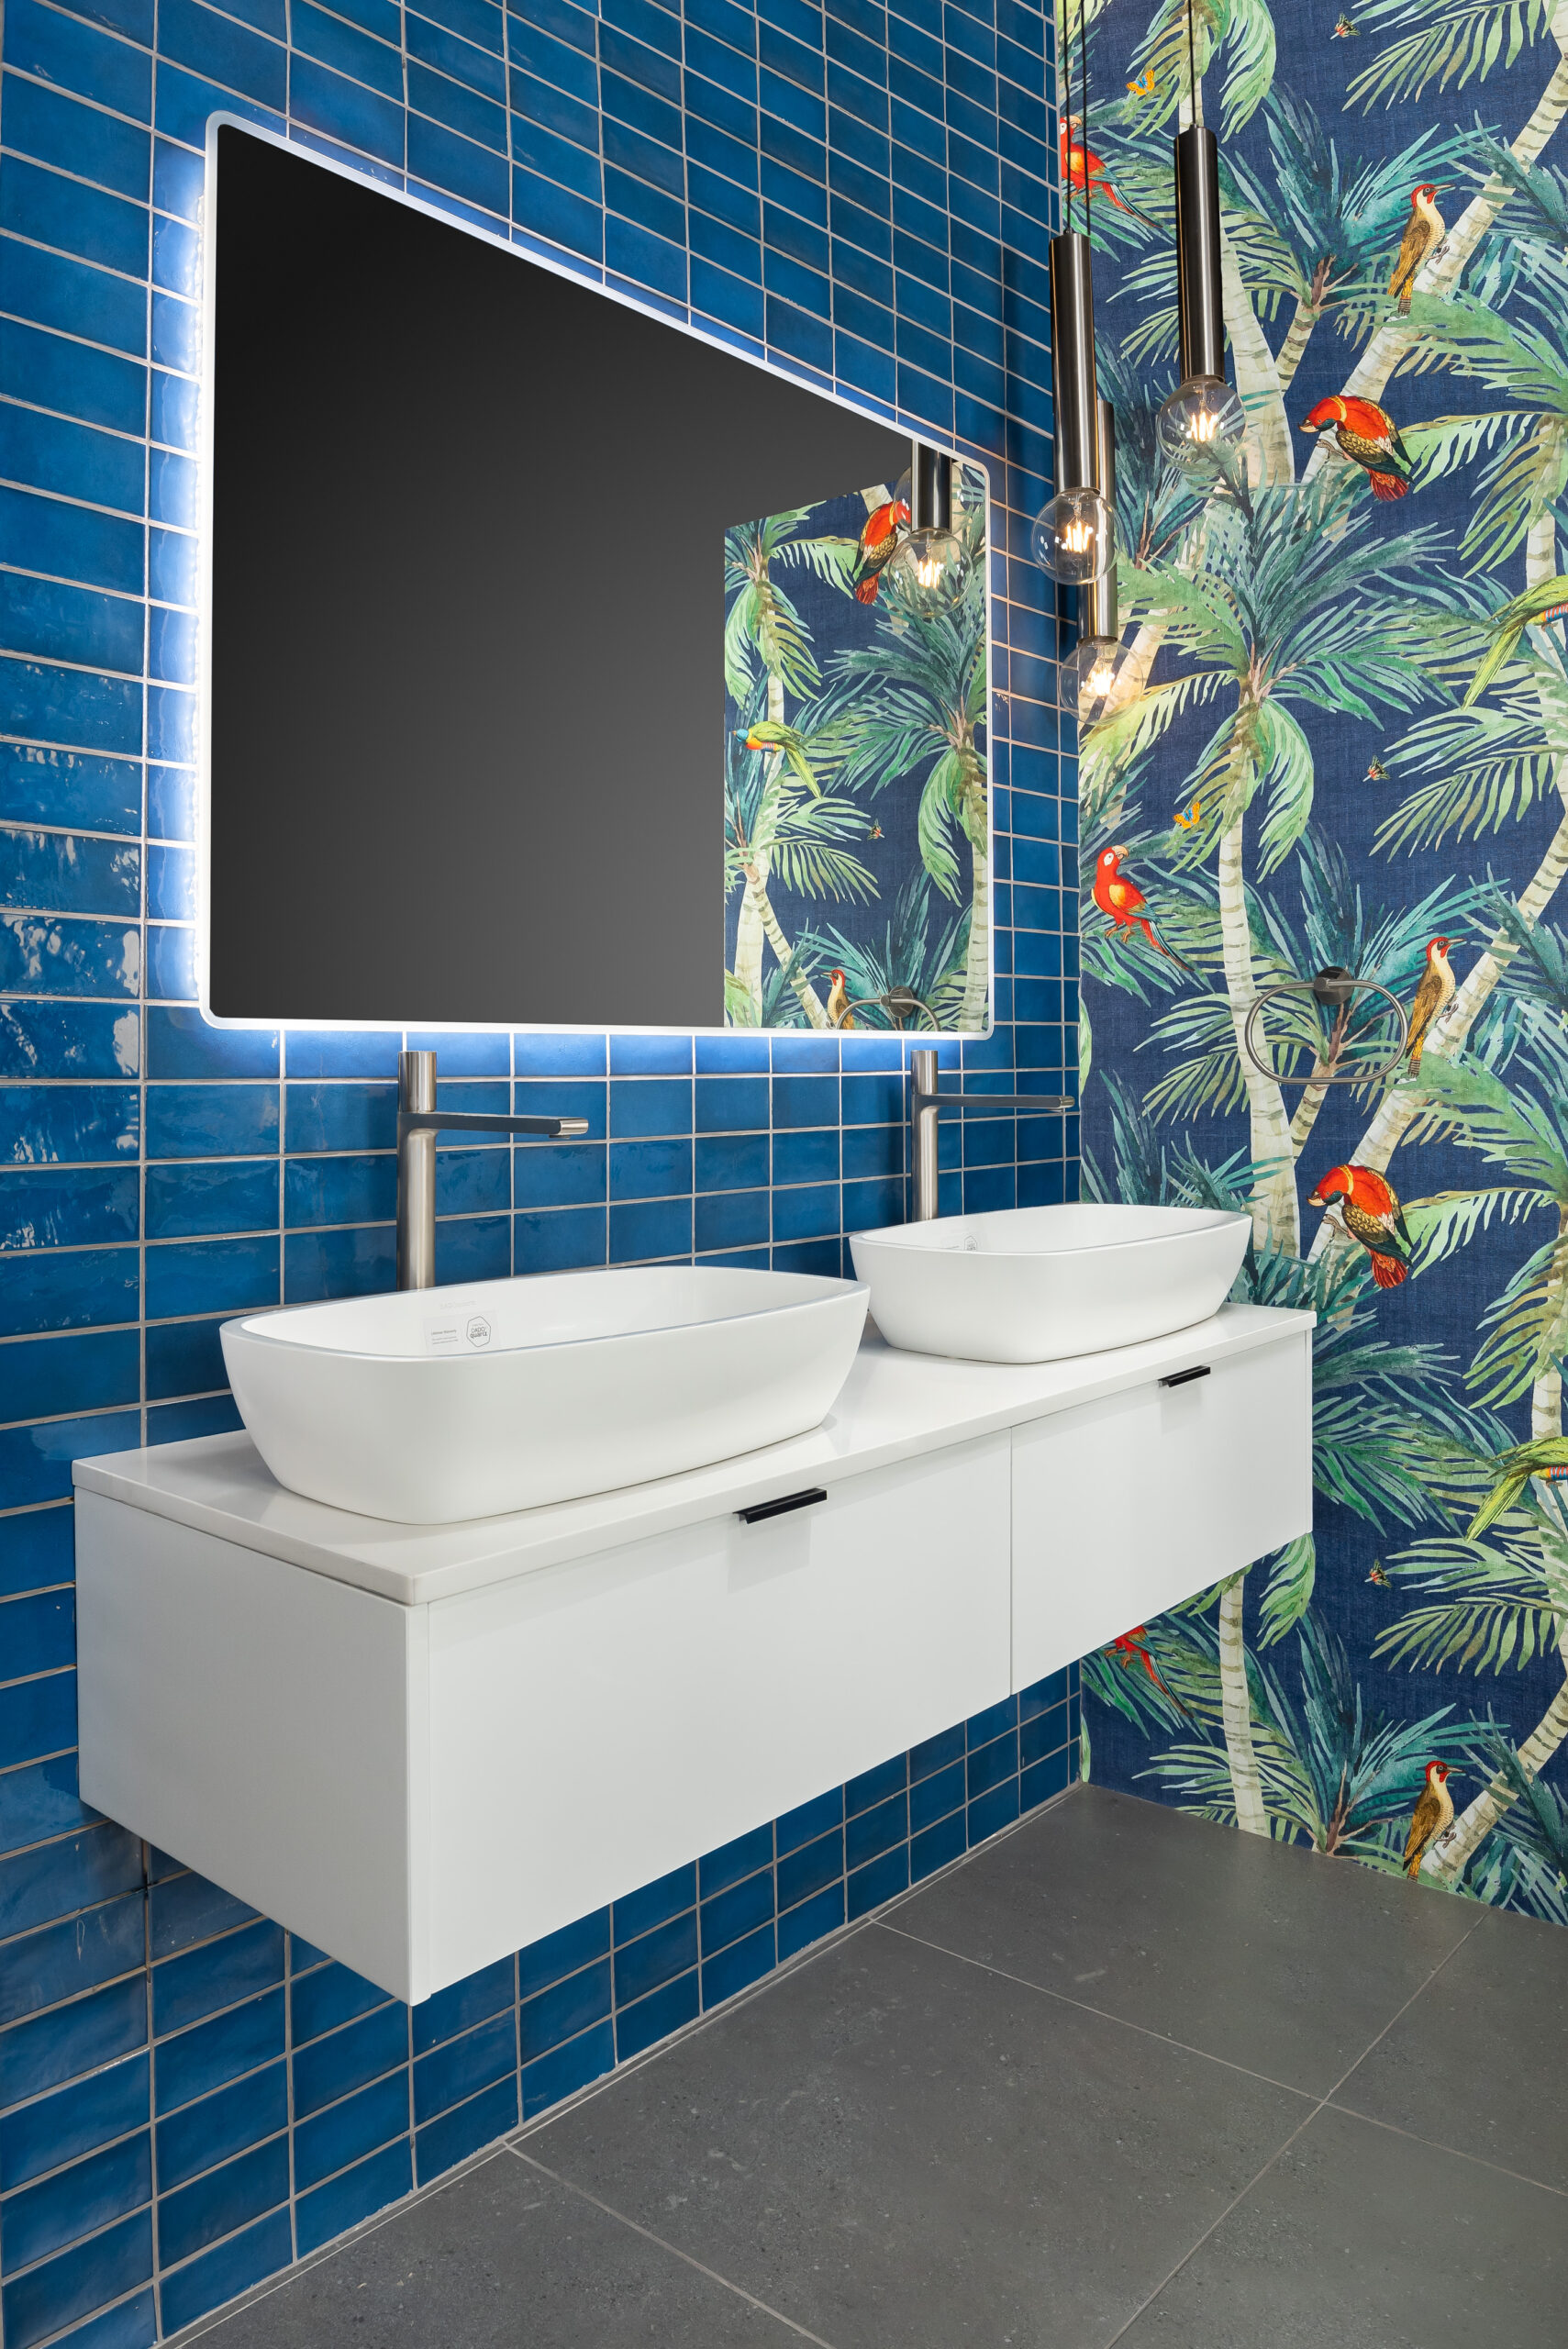
Mixing and matching tiles can add a unique flair to your home, but there are a few guidelines to keep in mind to avoid a visual disconnect. Let’s dive into the general rules for successfully combining different tiles in one space.
Mixing and matching tiles means combining various tile colours and styles within the same space. It’s about creating a cohesive yet dynamic look by using different designs in harmony.
Rule 1: Balance Busy Patterns
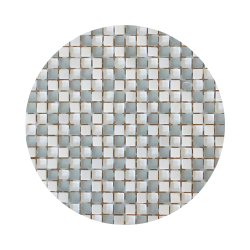
Small statement tiles, like mosaic tiles, can create stunning focal points. However, to avoid overwhelming the space, balance these intricate designs with plain tiles. For example, if you have a vibrant mosaic, surround it with single-colour tiles that pick up one of the colours from the mosaic. This allows your statement tiles to shine without competing for attention.
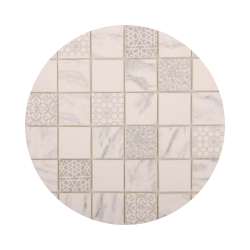
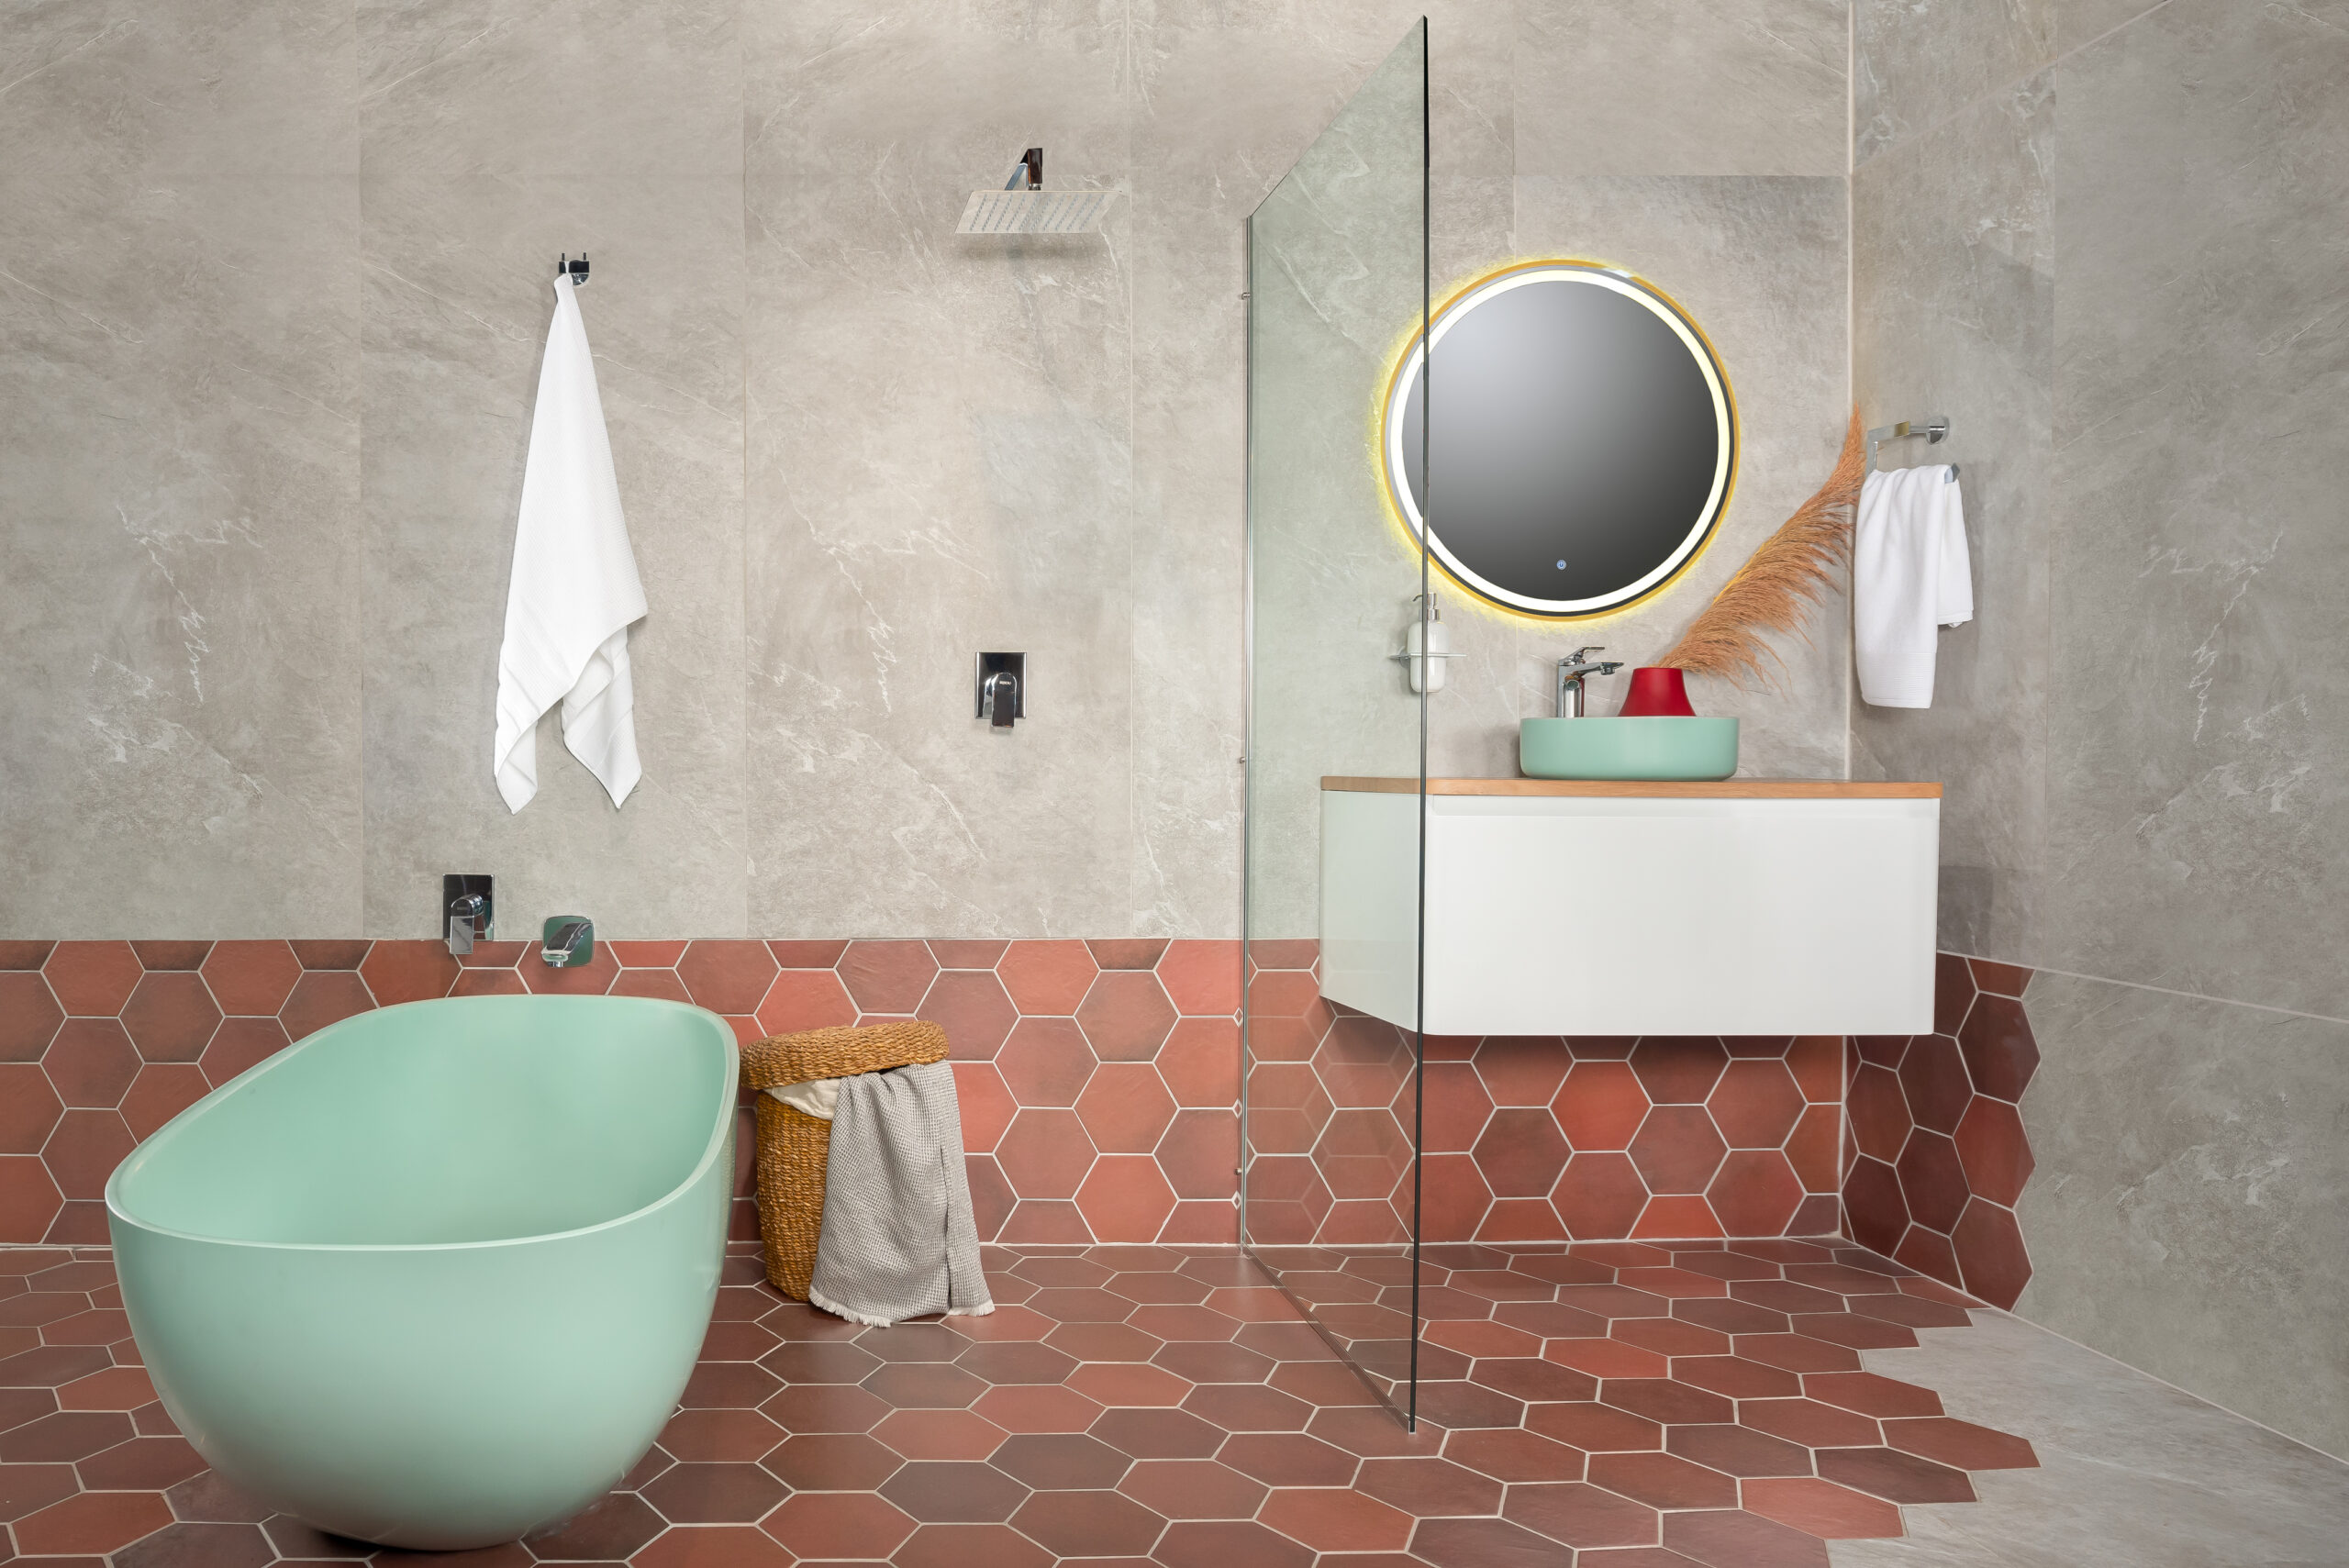
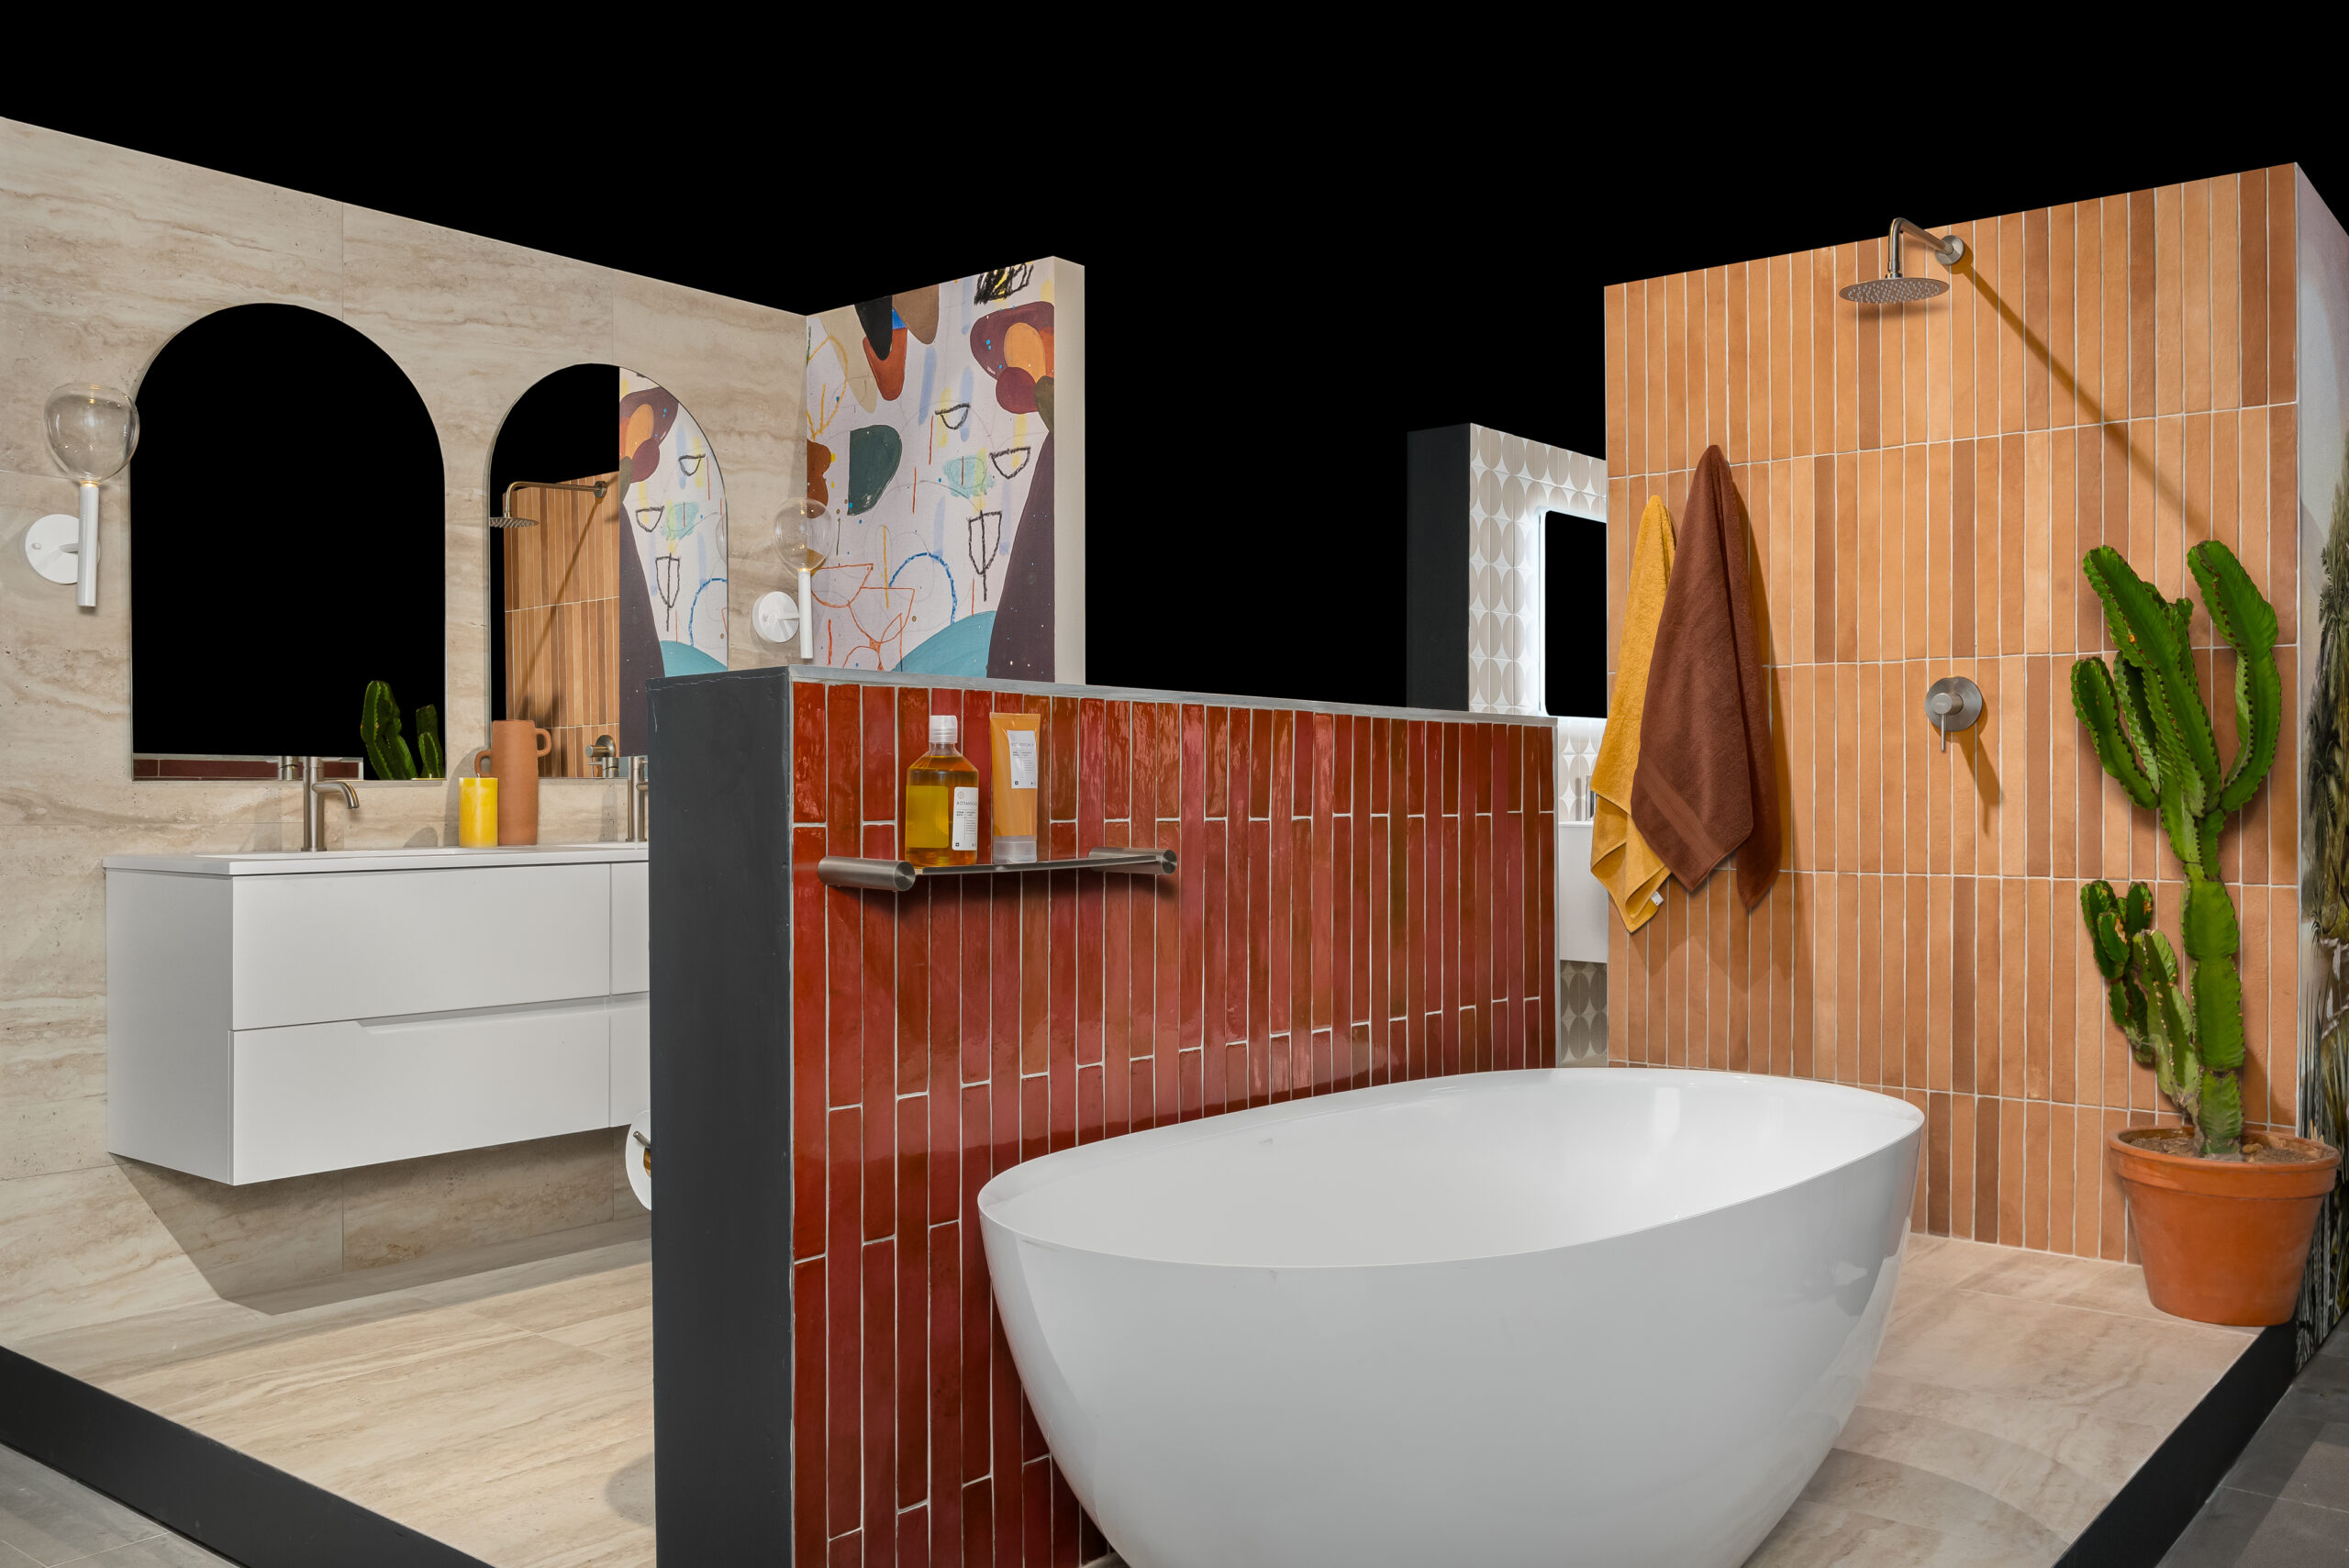
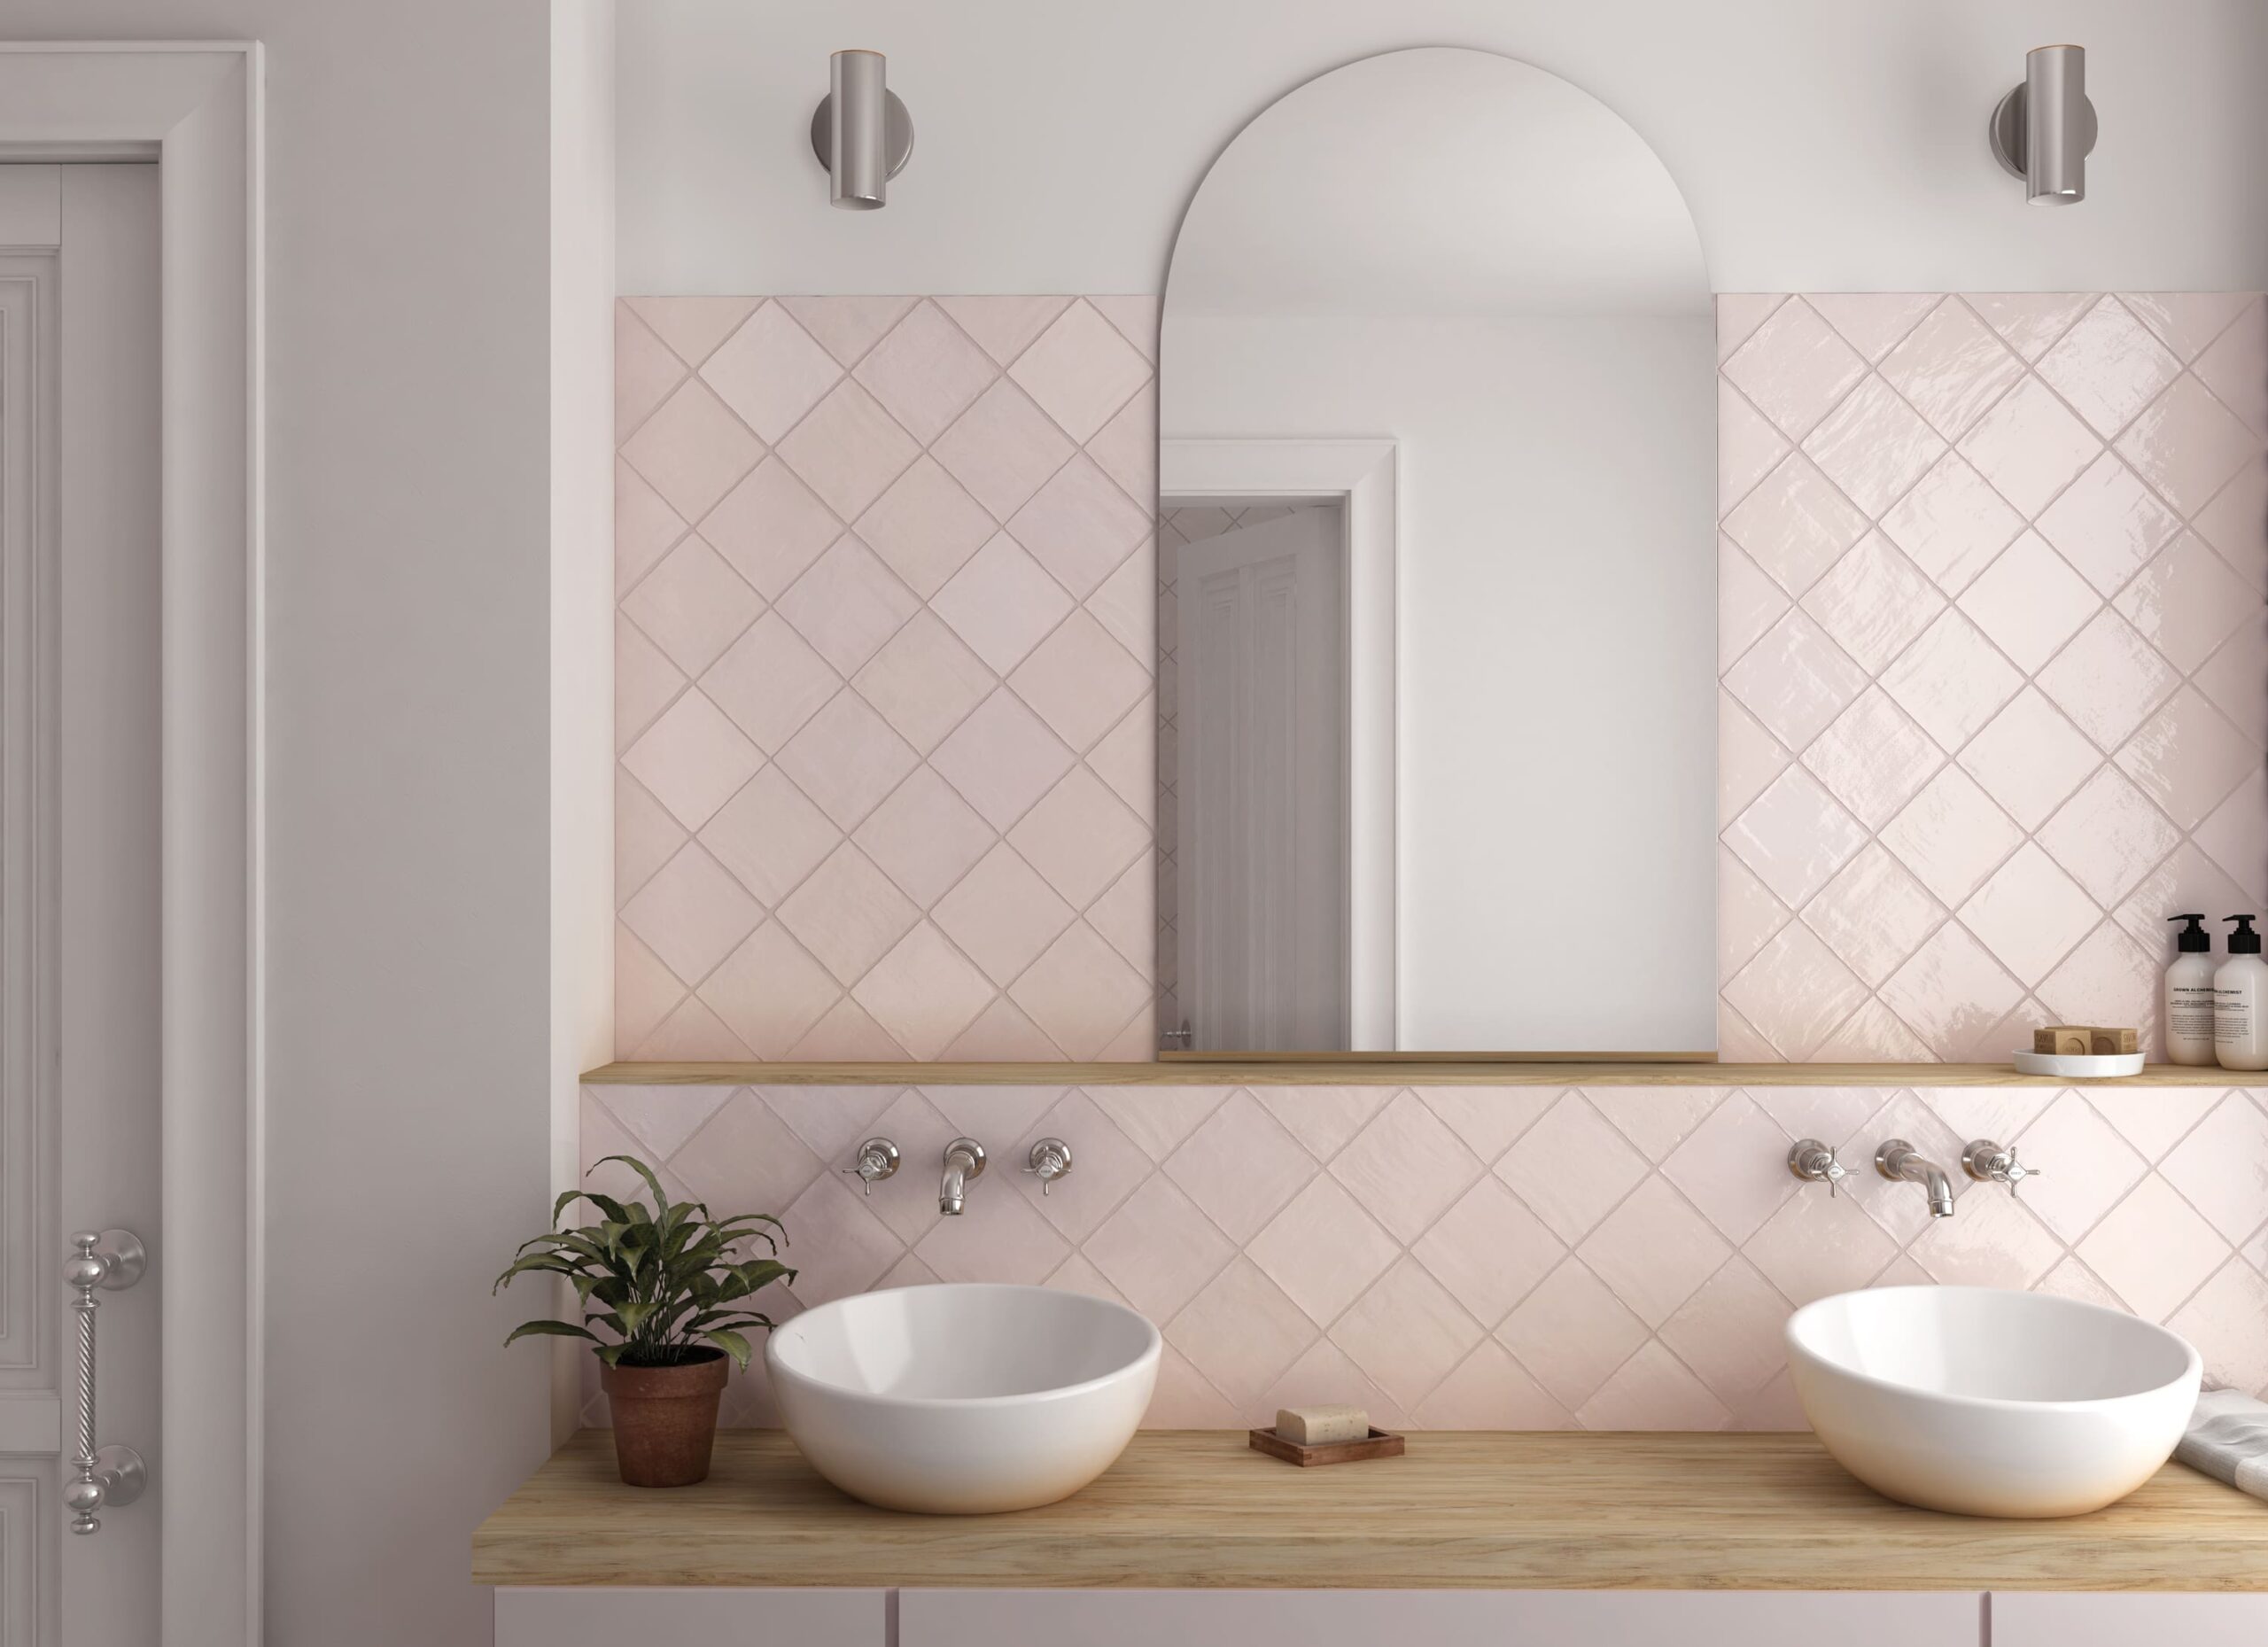
Rule 2: Combine Different Tile Sizes with a Colour Palette
Mixing different tile sizes can create a dynamic and visually appealing pattern. The key is to stick to a similar colour palette. For instance, you can pair large-format tiles with smaller tiles, even hexagonal tiles, as long as they share the same colour family. For example, use white hexagonal tiles on the wall paired with light grey large-format tiles on the floor. This creates a cohesive look with a touch of contrast.
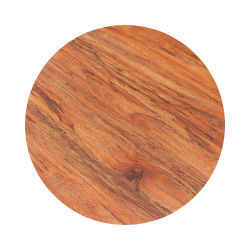
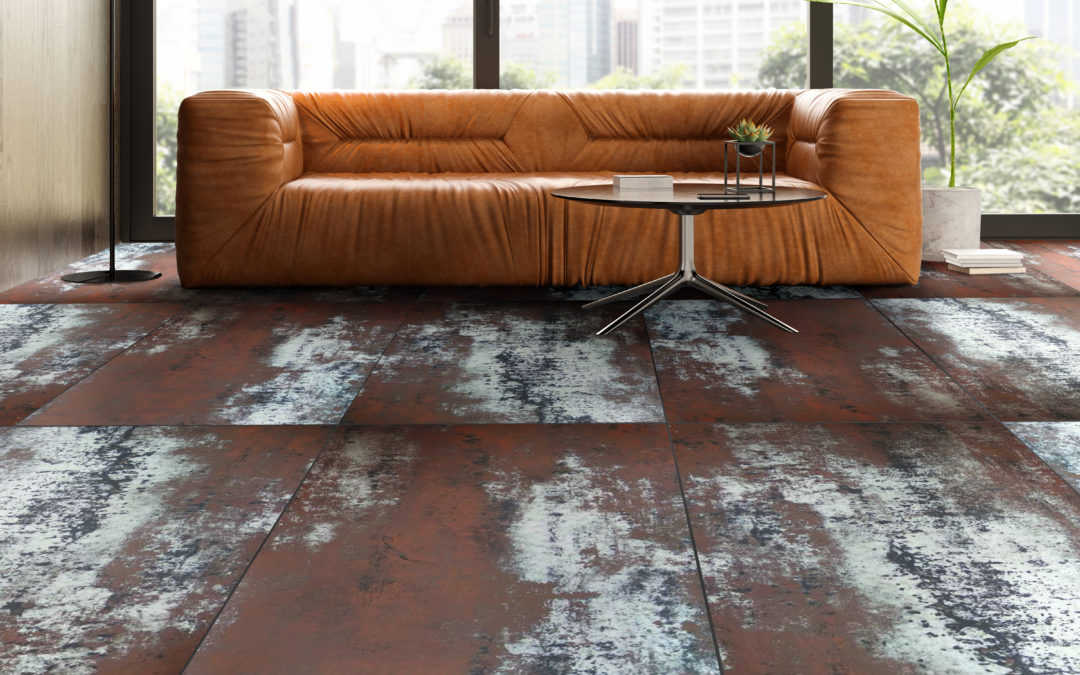
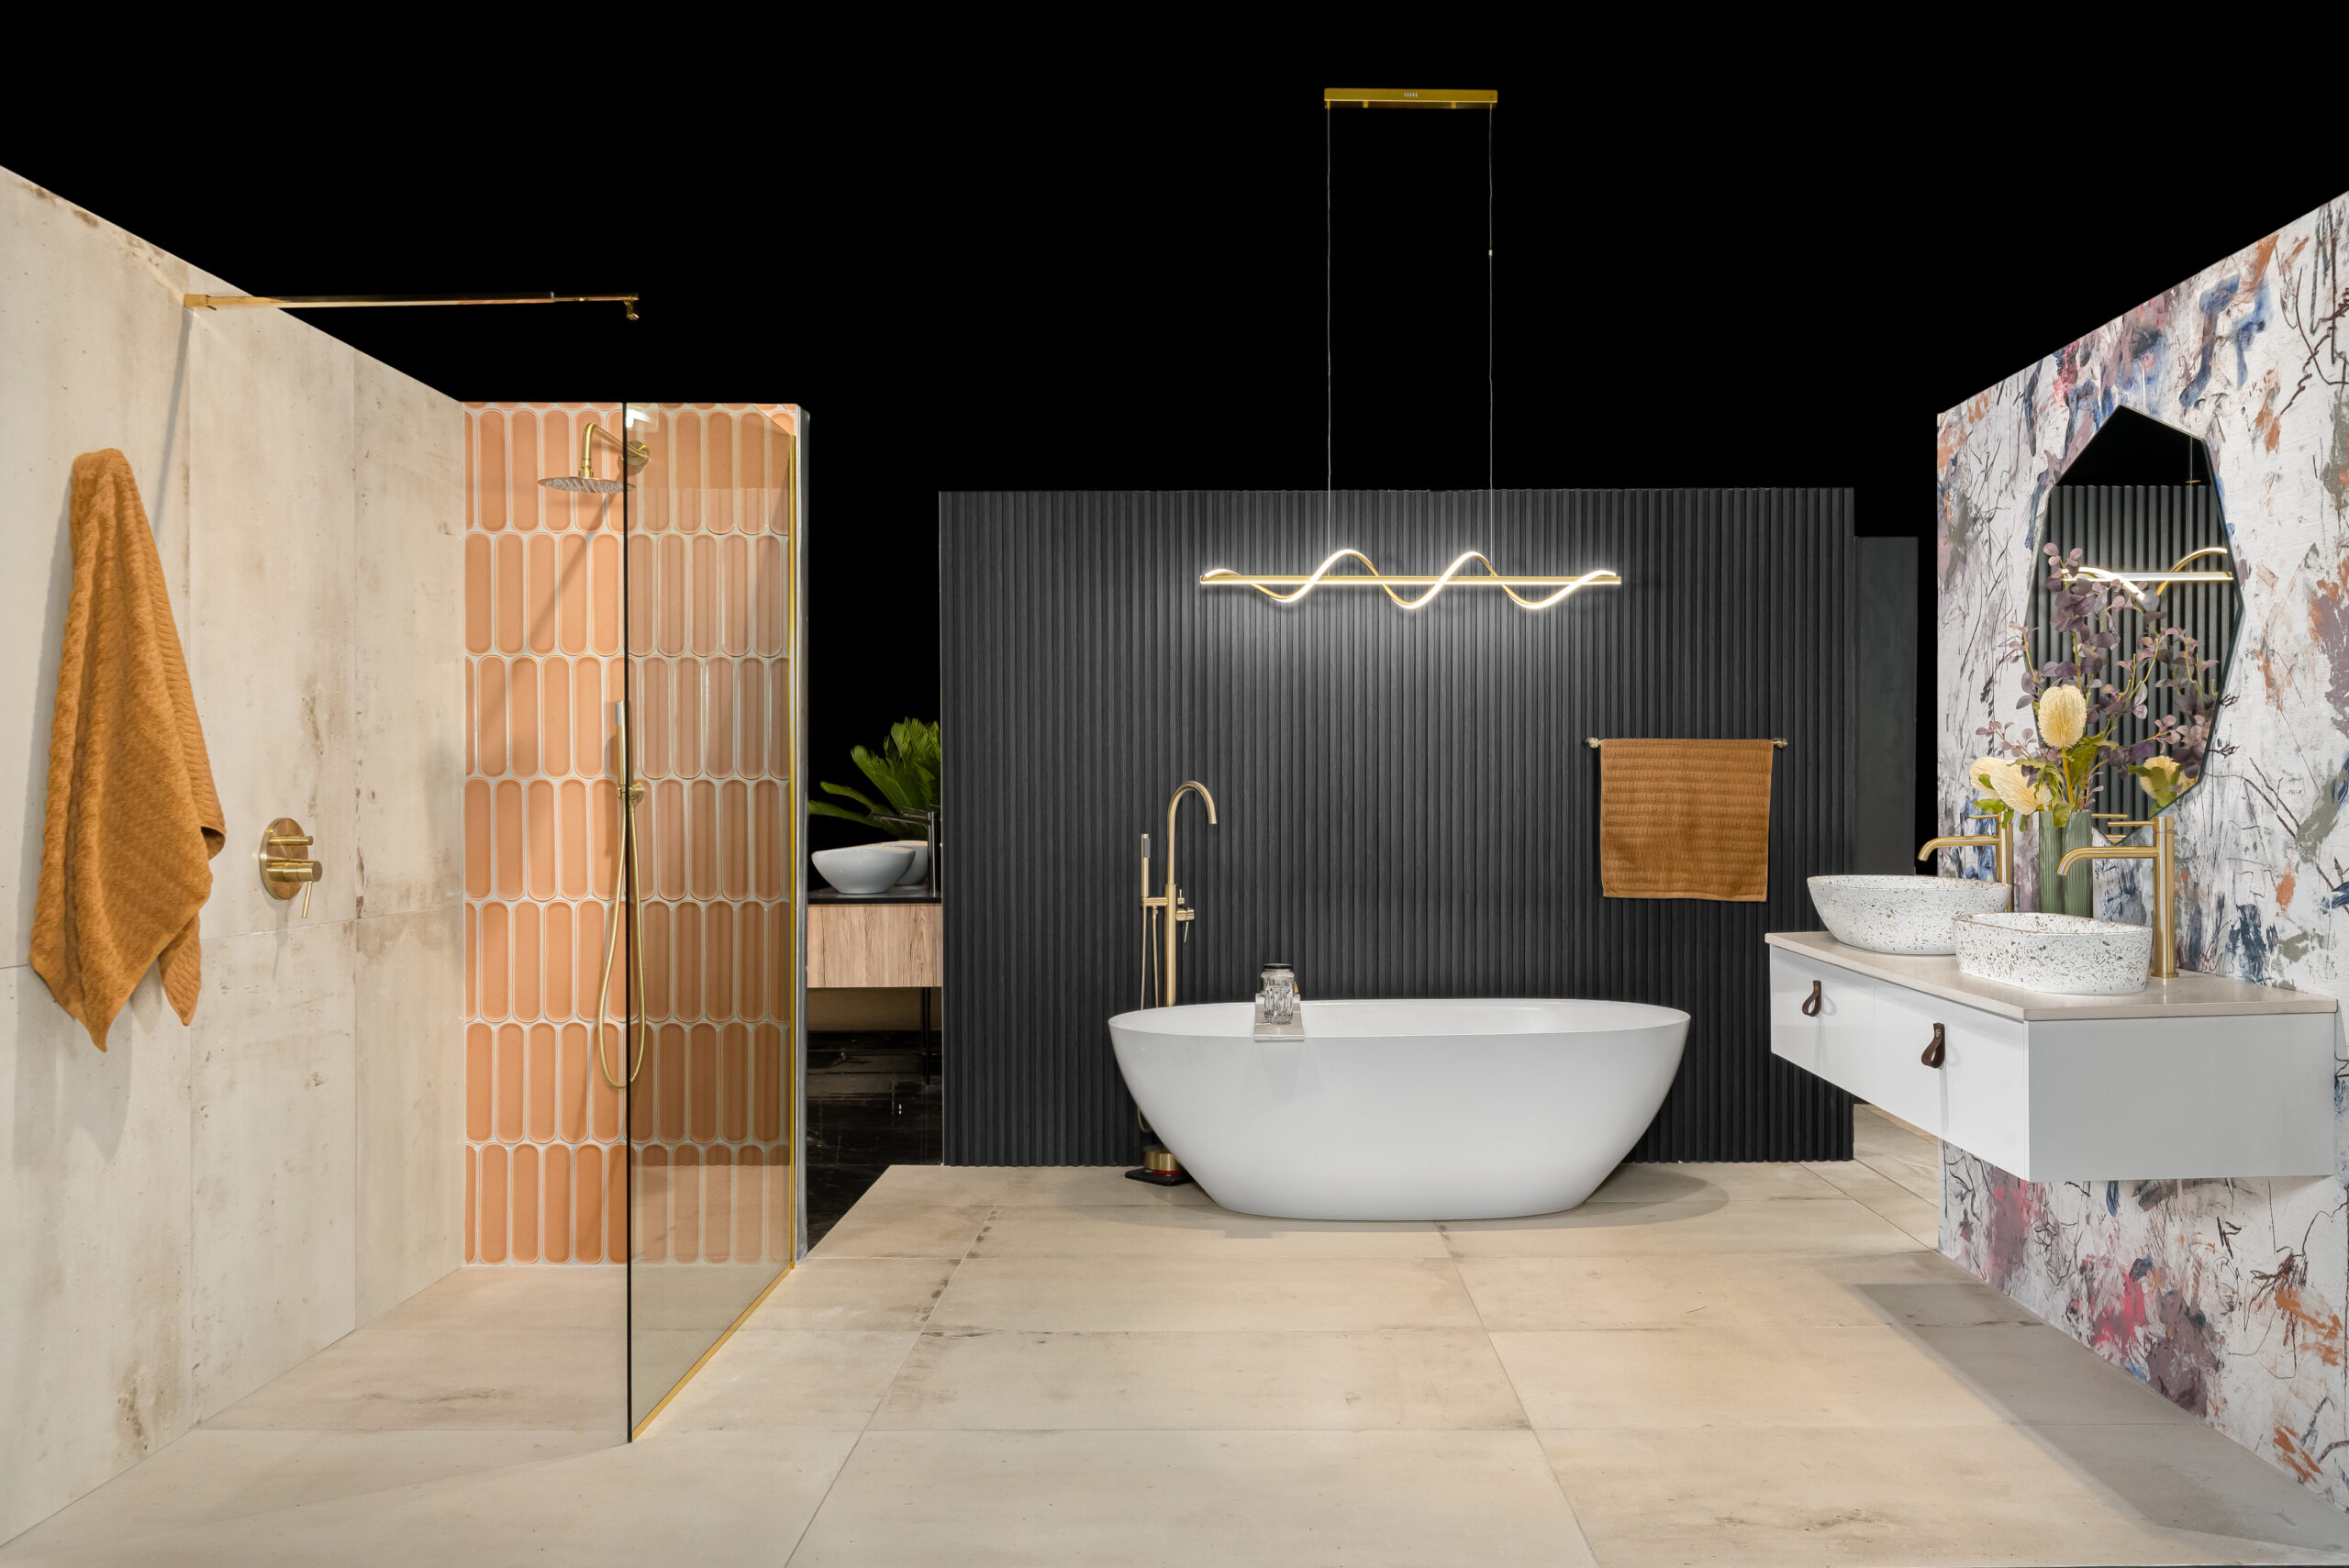
Take this space as an example: large format tiles in a beige hue are paired with terracotta hexagonal tiles. These two differently sized tiles in varying shades of brown complement each other beautifully. You can then add splashes of colour through your features and accessories. Feeling bold? Why not emulate this look with a vibrant blue bath!
Rule 3: Mix Matte and Glossy Tiles
Combining matte and glossy tiles can add depth and dimension to your room. Consider using glossy subway tiles on the walls and matte hexagon tiles on the floor. The contrast in finishes not only adds texture but also a playful touch to the space. Feeling adventurous? For a bold look, you could create a chessboard effect by alternating matte and glossy floor tiles.
Rule 4: Combine Different Tile Styles
If you’re torn between different tile styles, try using two or three styles to create a balanced design. Think about the overall look you want to achieve and choose styles that complement each other. For example, balance busy patterned tiles with plain ones and avoid using patterned tiles throughout the entire room. This ensures the design is visually appealing without being overwhelming.
Don’t be afraid to experiment with different materials like wood, glass, concrete, or marble. Mixing these materials can add texture, depth, and character to your space. The possibilities are endless, so let your creativity run wild!
Need Inspiration?
Have a look at some of our top tile combinations:
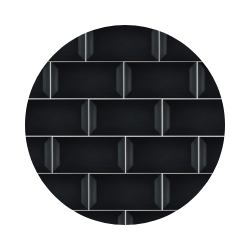
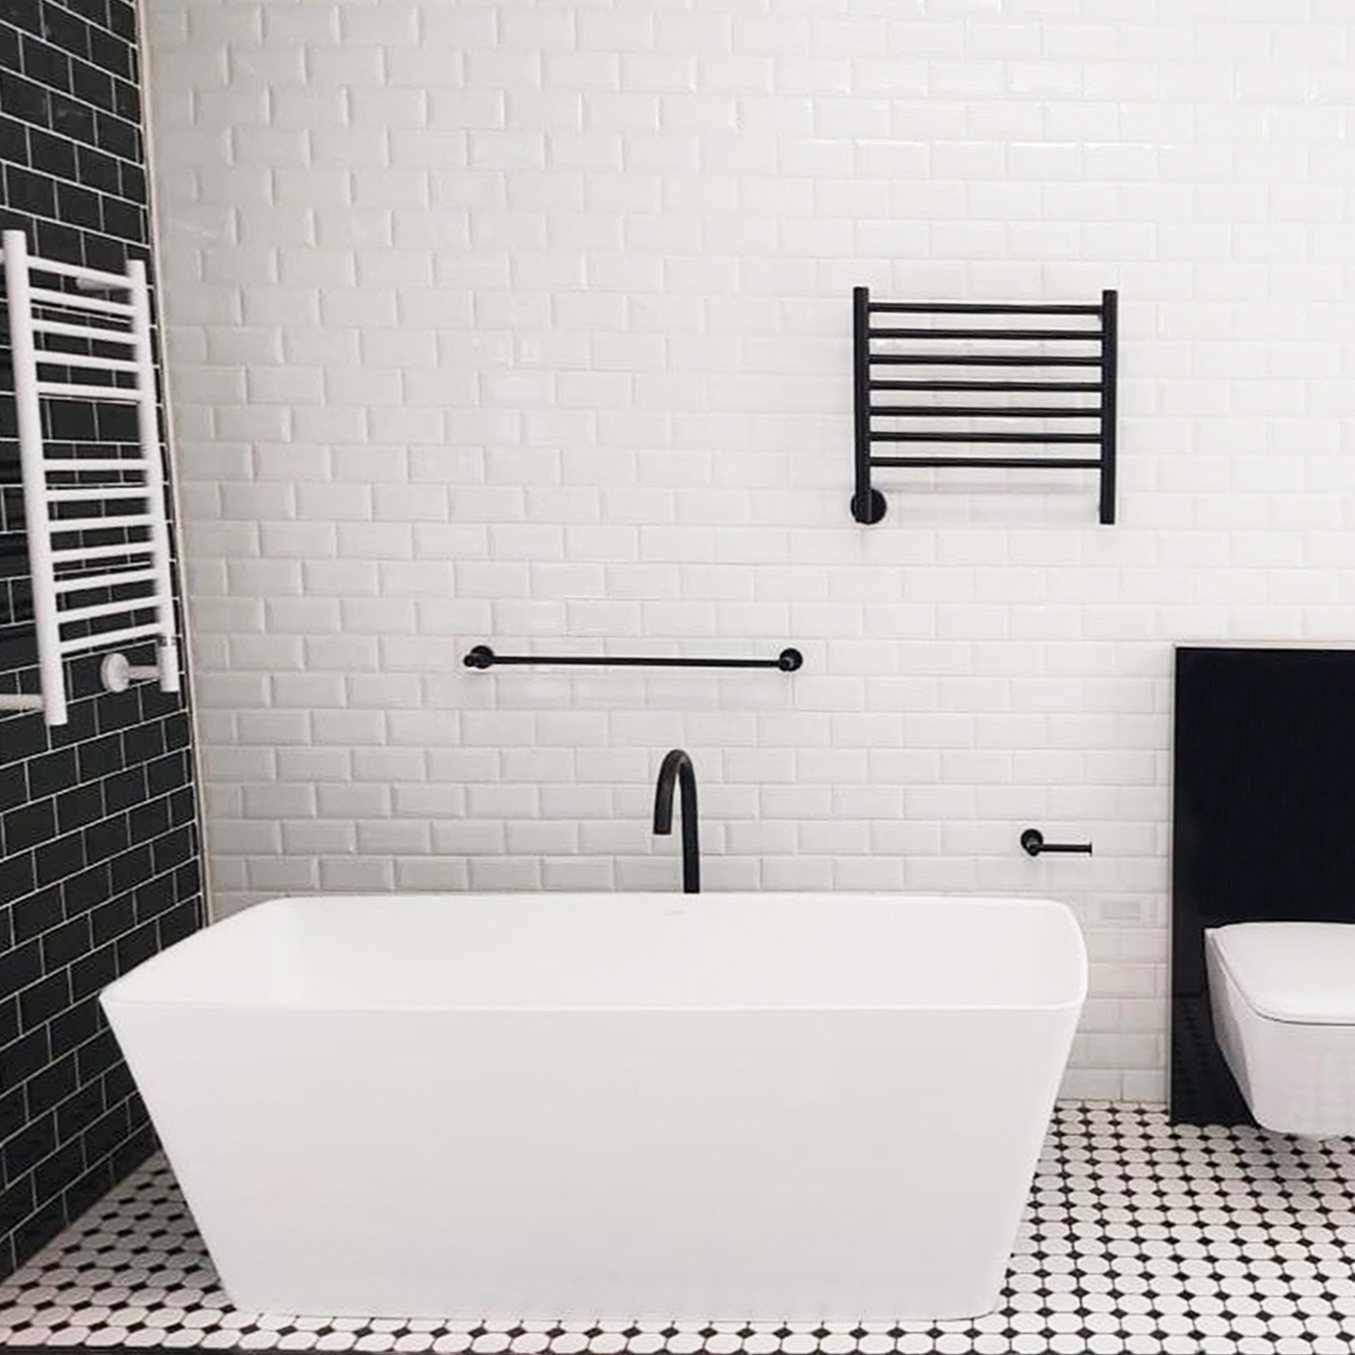
Contrasting Colours (Black and White)
In this space, two tile styles—subway tiles and small hexagonal tiles—are used to create a striking black-and-white contrast. This colour scheme results in a minimalist, balanced room. The bathroom fixtures and accessories also follow the same colour palette, tying the room together seamlessly.
Same Shape, Same Colour Family
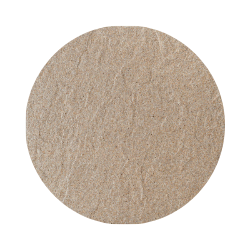
This bathroom showcases subway tiles laid out vertically, adding depth and dimension. The tiles are all within the same colour family, creating a cohesive look. Neutral beige stone tiles are used to bind the space, ensuring a connected and harmonious design.
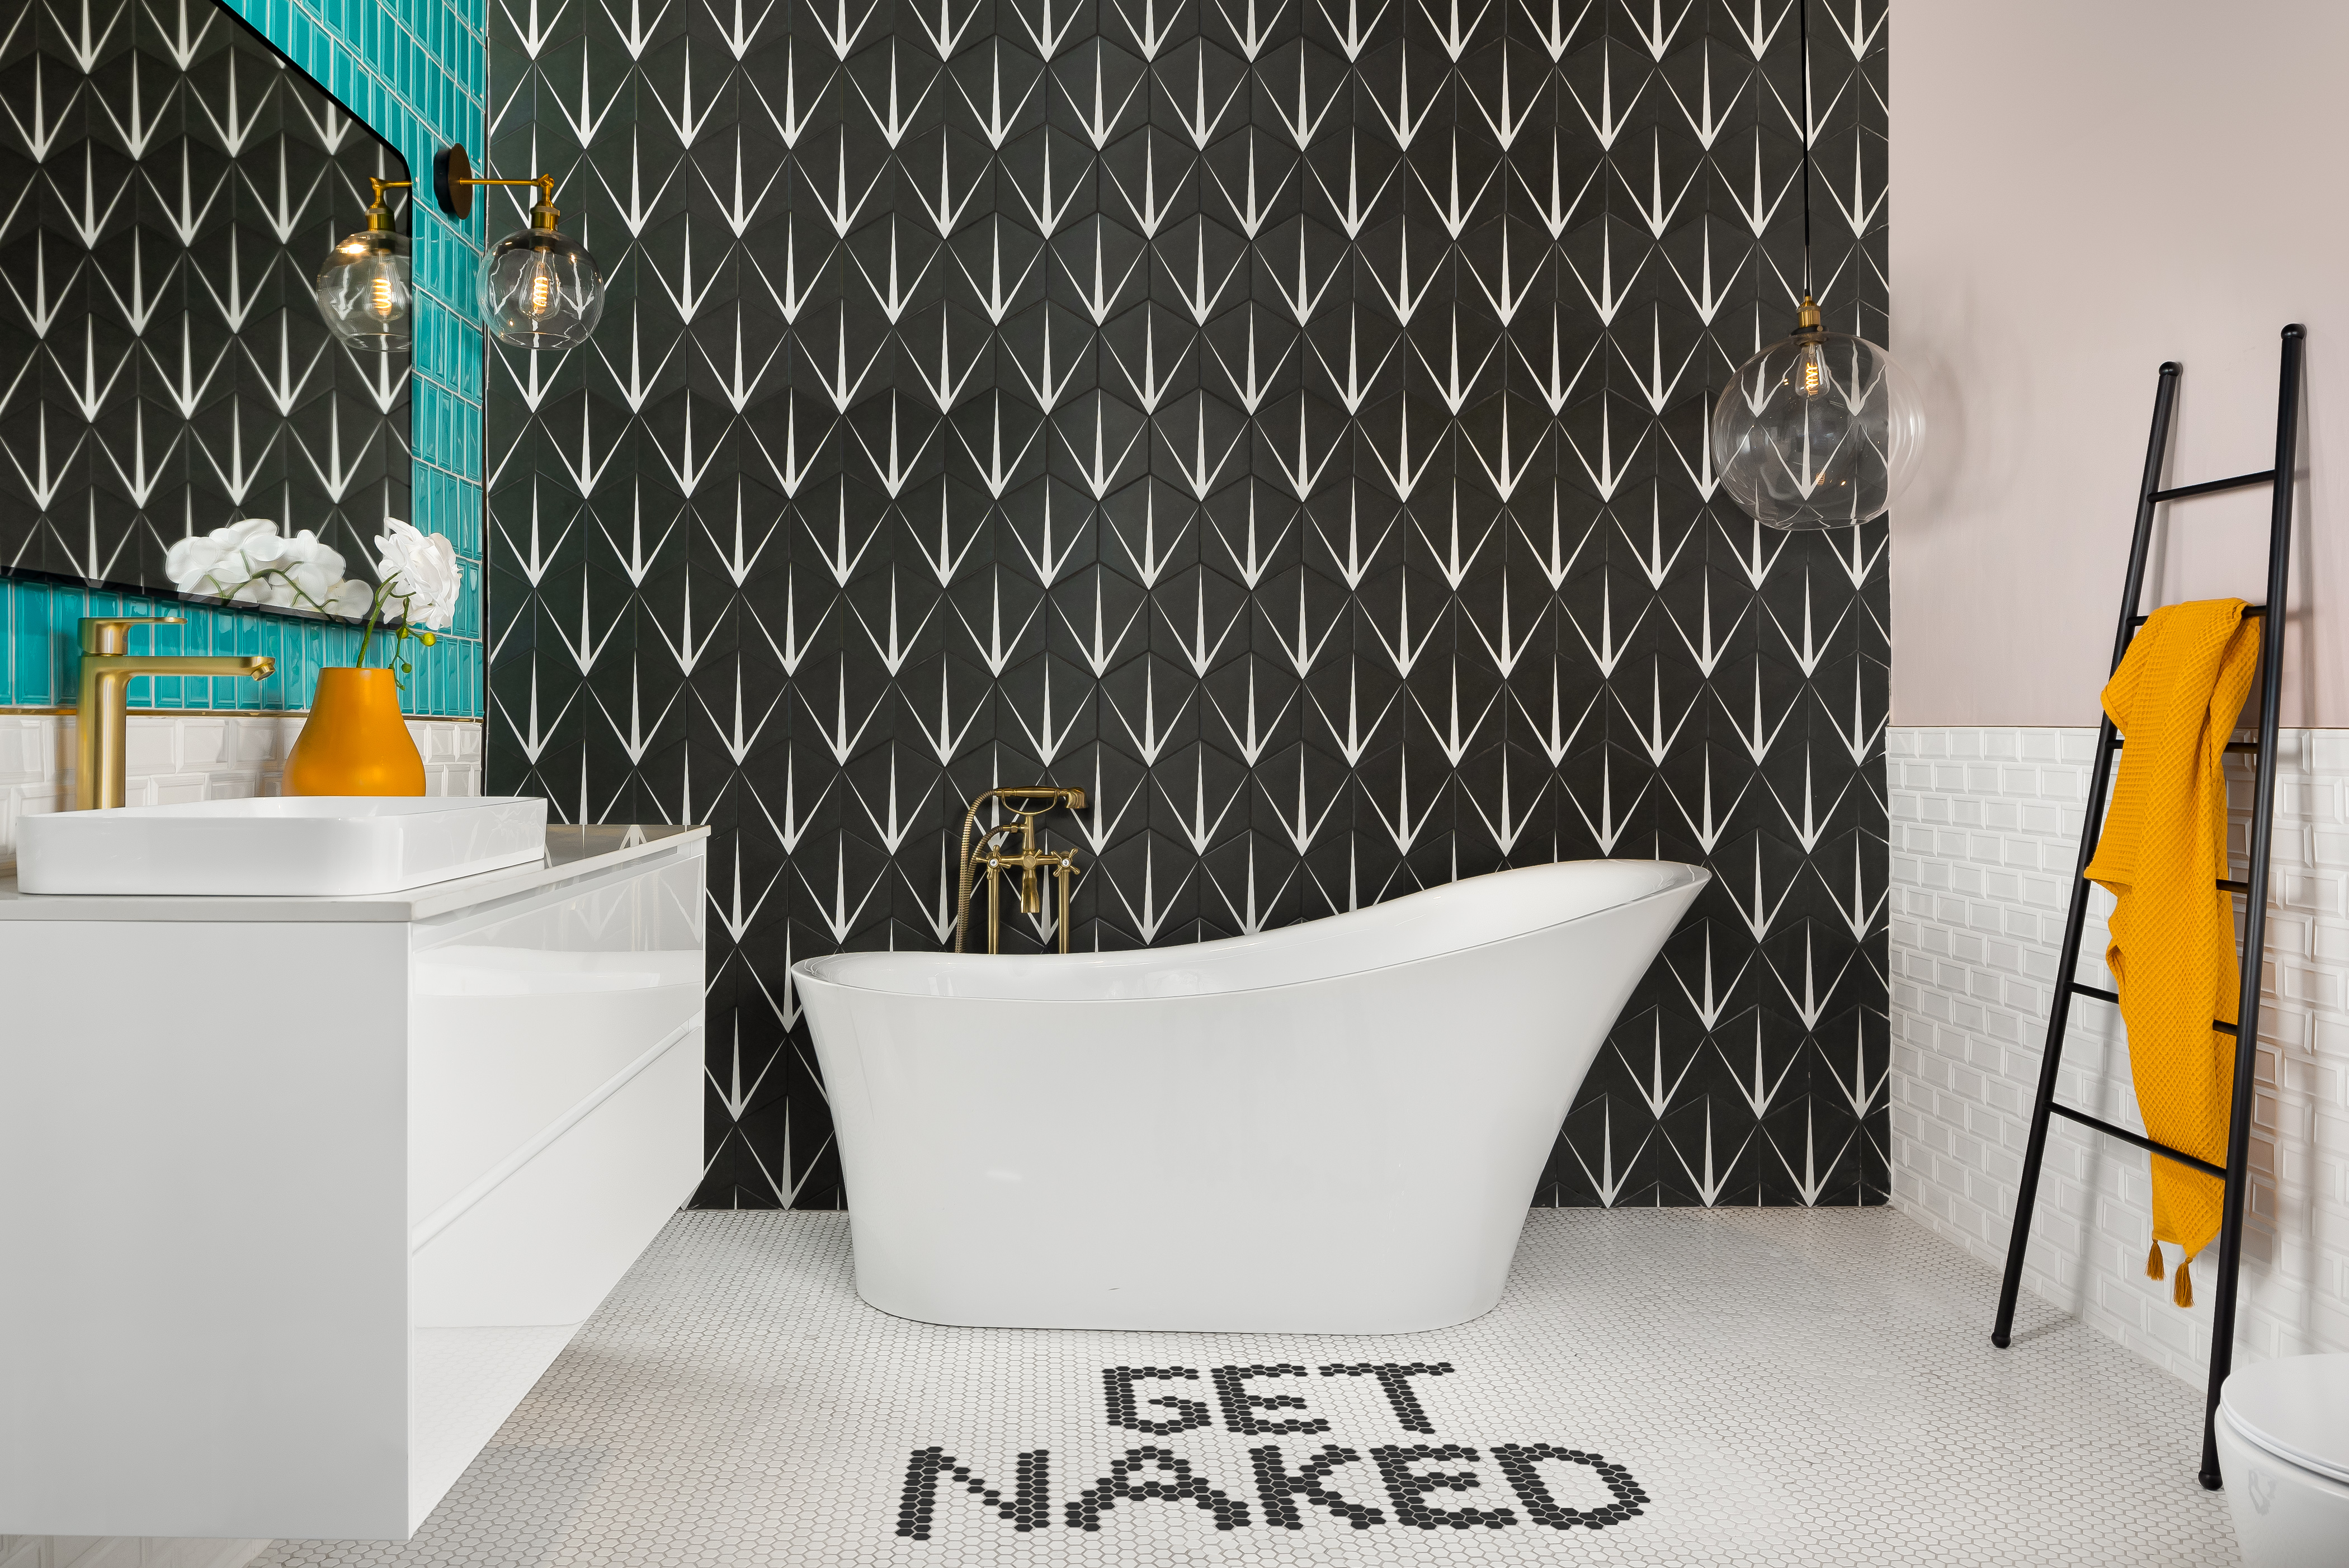
Same Shape, Different Colours
Using the Douglas Jones Punkah collection in Norwegian Red and Green Jade, this design features tiles of the same shape but in different colours to create a playful and vibrant space. Grey marble tiles on the floor break up the colours, allowing the wall tiles to stand out as the focal point.
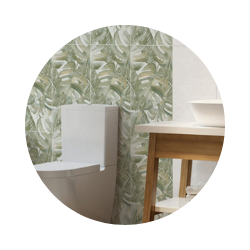
In this bathroom, a variety of decorative tiles are used on the floor, making it the focal point while simple white tiles are used on the walls. This combination creates a contemporary, clean look despite the intricate floor tile designs.
Prefer to watch?
Ryan and Deon discuss mixing and matching tiles in the video below:
Mixing and matching tiles can seem daunting, but with these guidelines, you’ll be able to create a stunning and unique look in any room.
Feeling inspired but unsure where to start? We can help point you in the right direction! Visit your nearest Tiletoria showroom and let us help you choose the best combinations for your space.
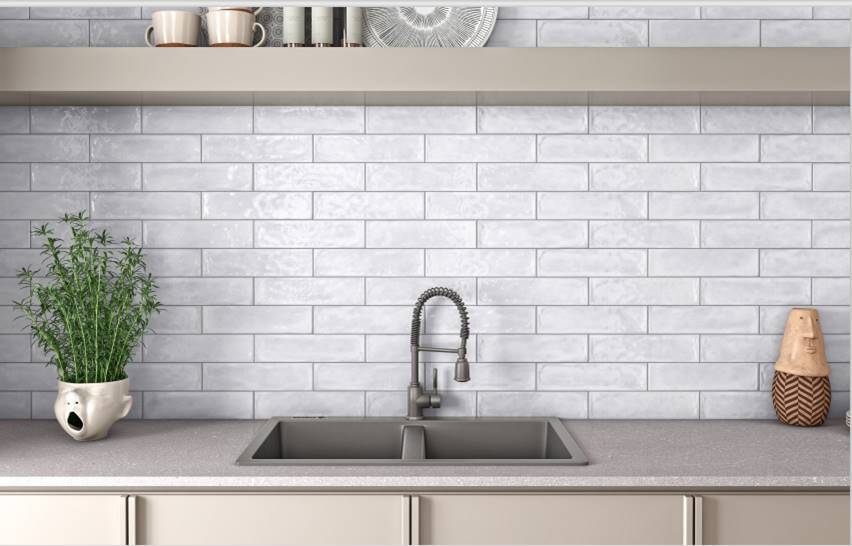
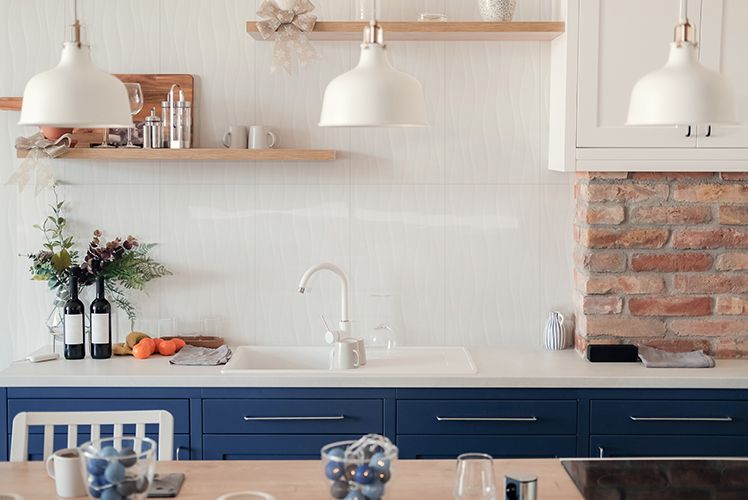
It’s time for a tile upgrade, and let’s be honest, the options can be overwhelming. If you’re after something timeless yet versatile, subway tiles are worth considering. Practical and stylish, subway tiles have evolved in materials, colours, and patterns since their debut over a century ago.
Picture glossy white or black rectangular tiles, often seen in butcheries and restaurants, evoking a vintage New York vibe while exuding cleanliness and hygiene. These tiles get their name from the iconic subway stations, designed to brighten up dark tunnels with their easy-to-clean, light-reflective surfaces. Originally created in a 3×4 rectangle for New York City’s first subway station, subway tiles, also known as Metro tiles, quickly moved from underground to home interiors. Their smooth surface and easy maintenance make them a top choice for kitchens and bathrooms.
The first subway tiles were made of ceramic, but today’s options include ceramic, porcelain, glass, marble, and other stones. Your choice of material will depend on the look and functionality you desire. Once limited to black and white, subway tiles now come in a variety of inspiring colours to spark up any space.
Subway tiles are most popular in kitchens, bathrooms, and utility rooms. They make excellent splashbacks, feature walls, and shower interiors. Thinking about creating the perfect splashback? Check out our detailed guide here.
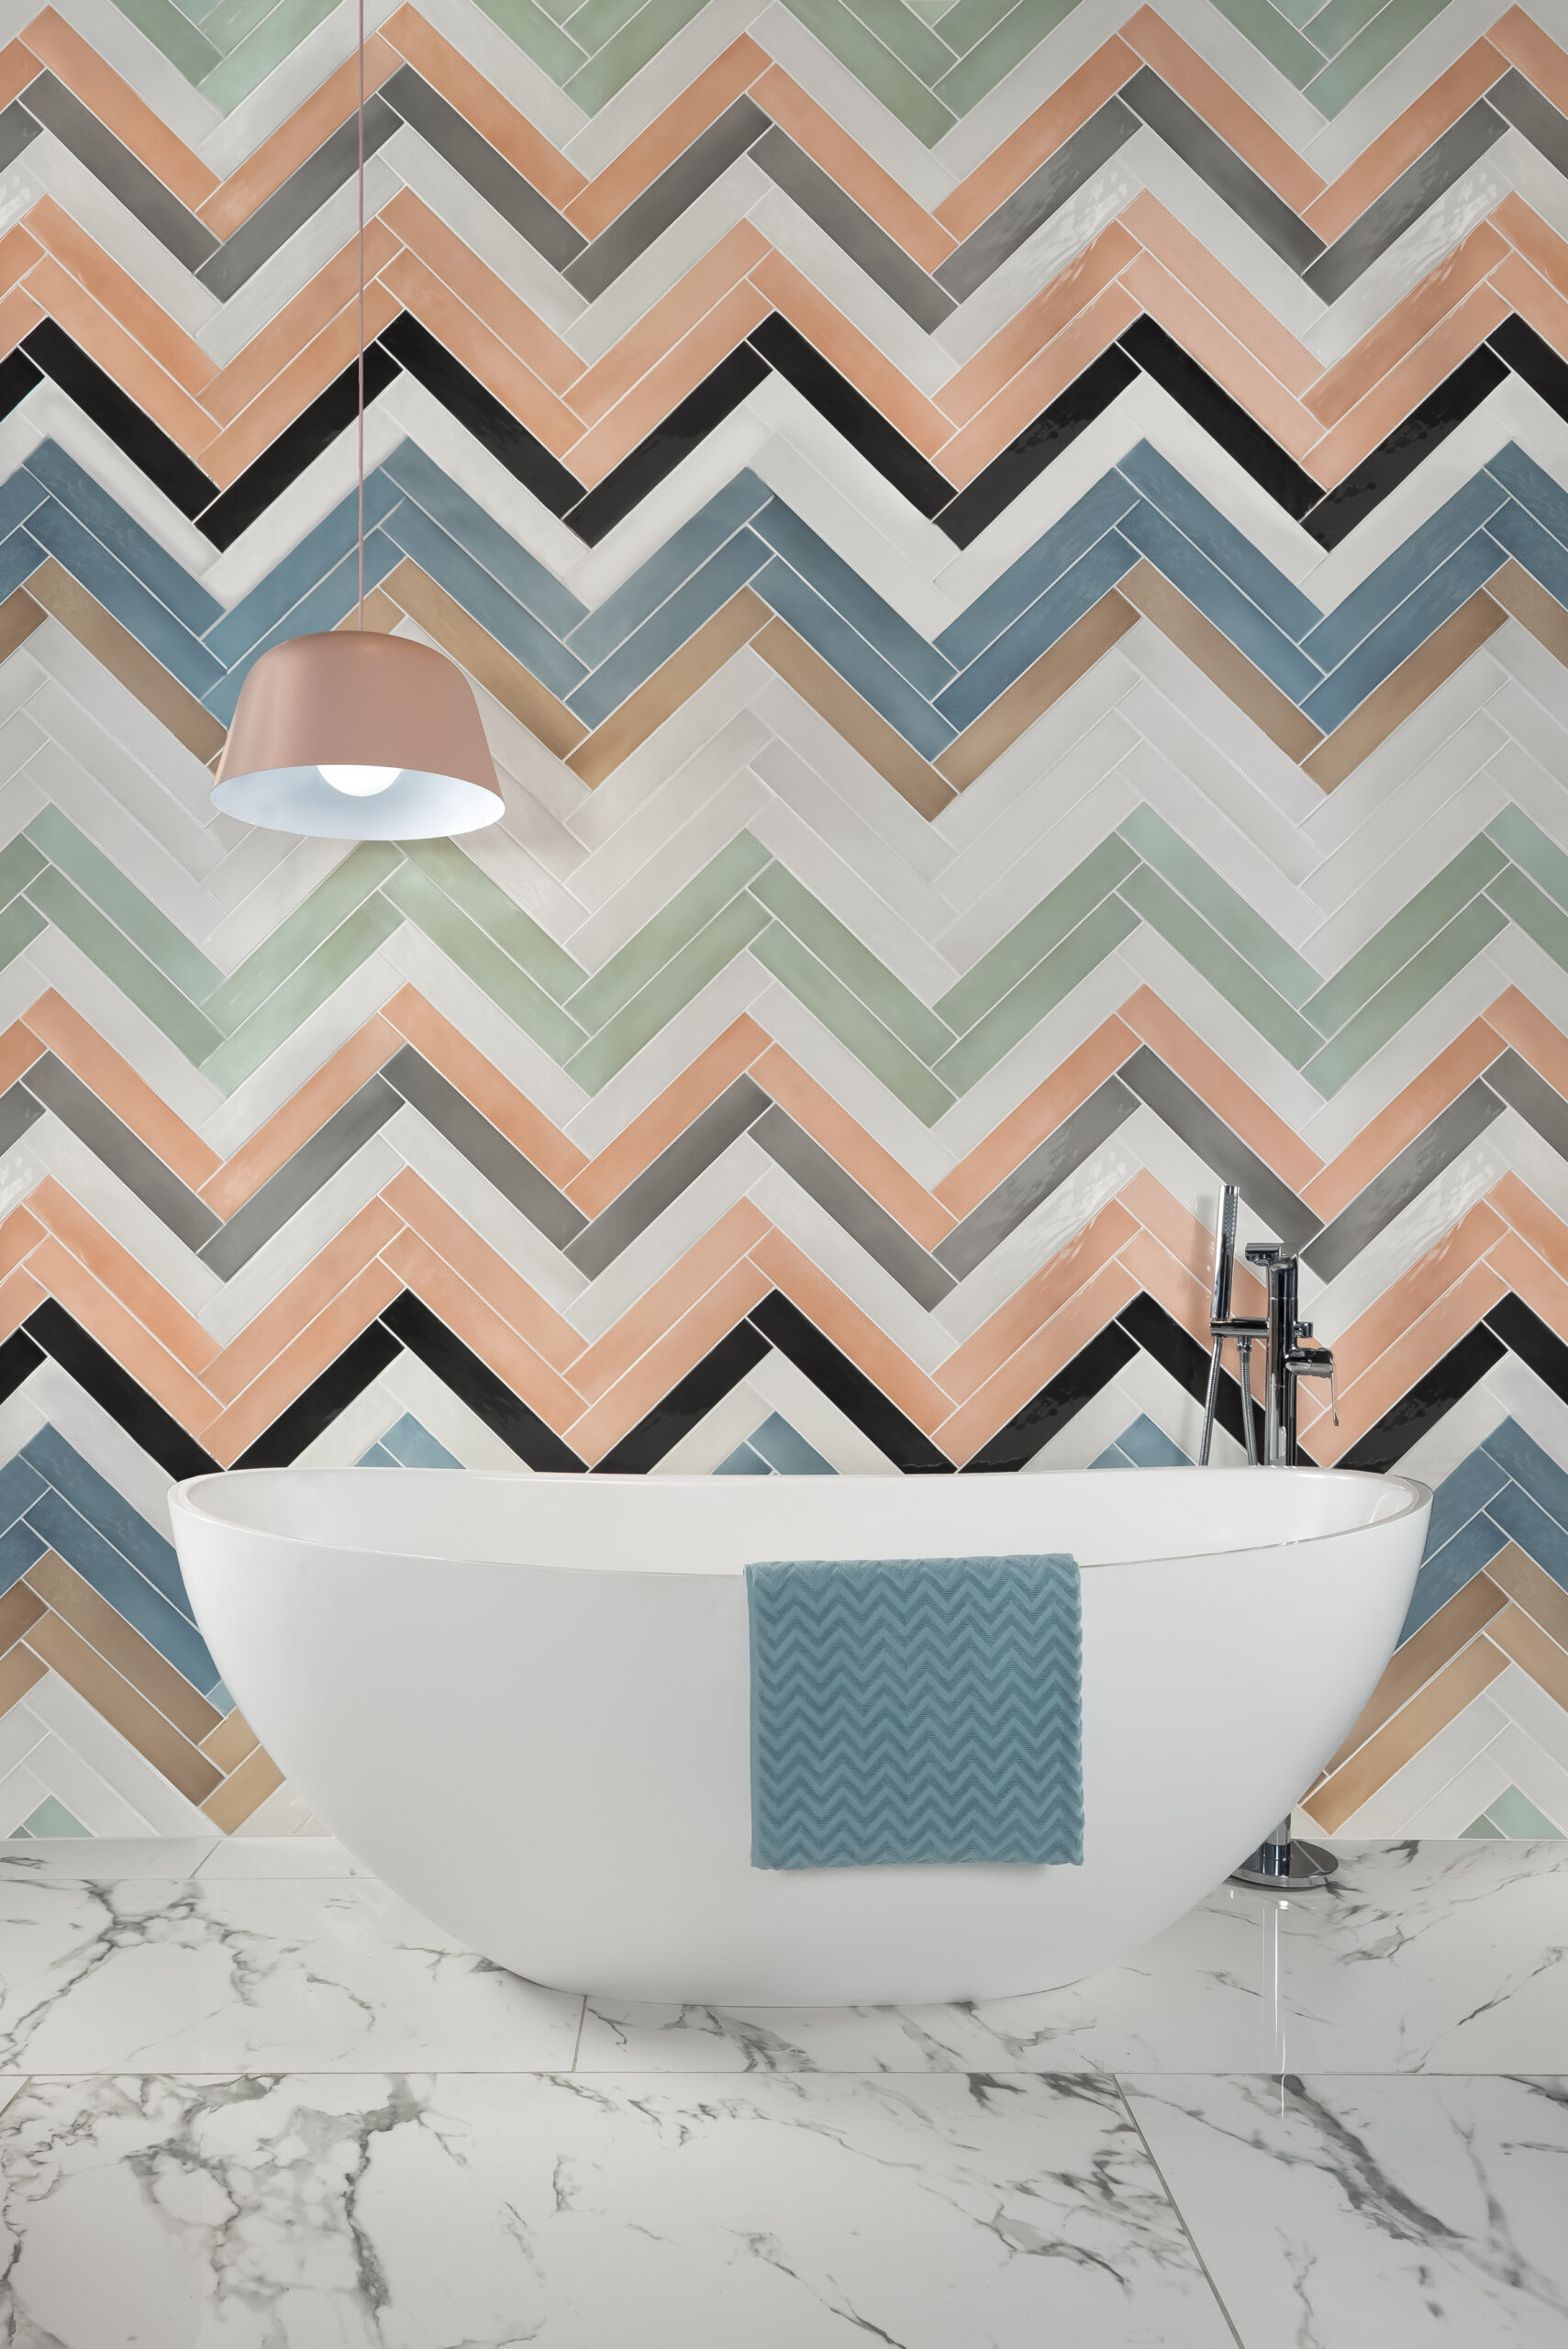
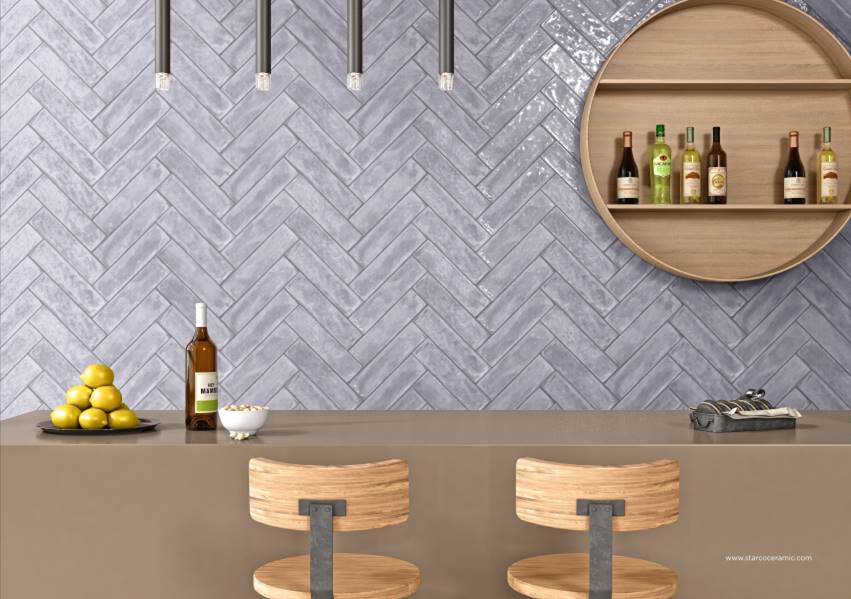
Subway tiles aren’t just easy to clean—they’re also incredibly versatile, being able to be styled in a variety of ways. While the classic brick pattern remains popular, you can break away with herringbone, chevron, or other creative layouts for a modern twist on this American classic. For more layout inspiration, see our blog here.
Grout Colour
Traditional grout colours like white, grey, or black were used to match the tile colour. Nowadays, grout comes in a spectrum of shades. Using contrasting grout, such as black with white subway tiles, creates a striking framed effect. On the other hand, matching grout to the tile colour, like black grout with black tiles, creates a seamless look. Your grout choice depends on the overall aesthetic you want to achieve. Need help choosing grout? Our guide to grout colours is just a click away here.
Ryan and Deon discuss Subway Tiles in the video below:
Subway tiles are here to stay! With an array of colours and layout options available, you’re on your way to designing a feature wall worthy of Broadway. Visit your nearest Tiletoria showroom today or browse our range of subway tiles online.
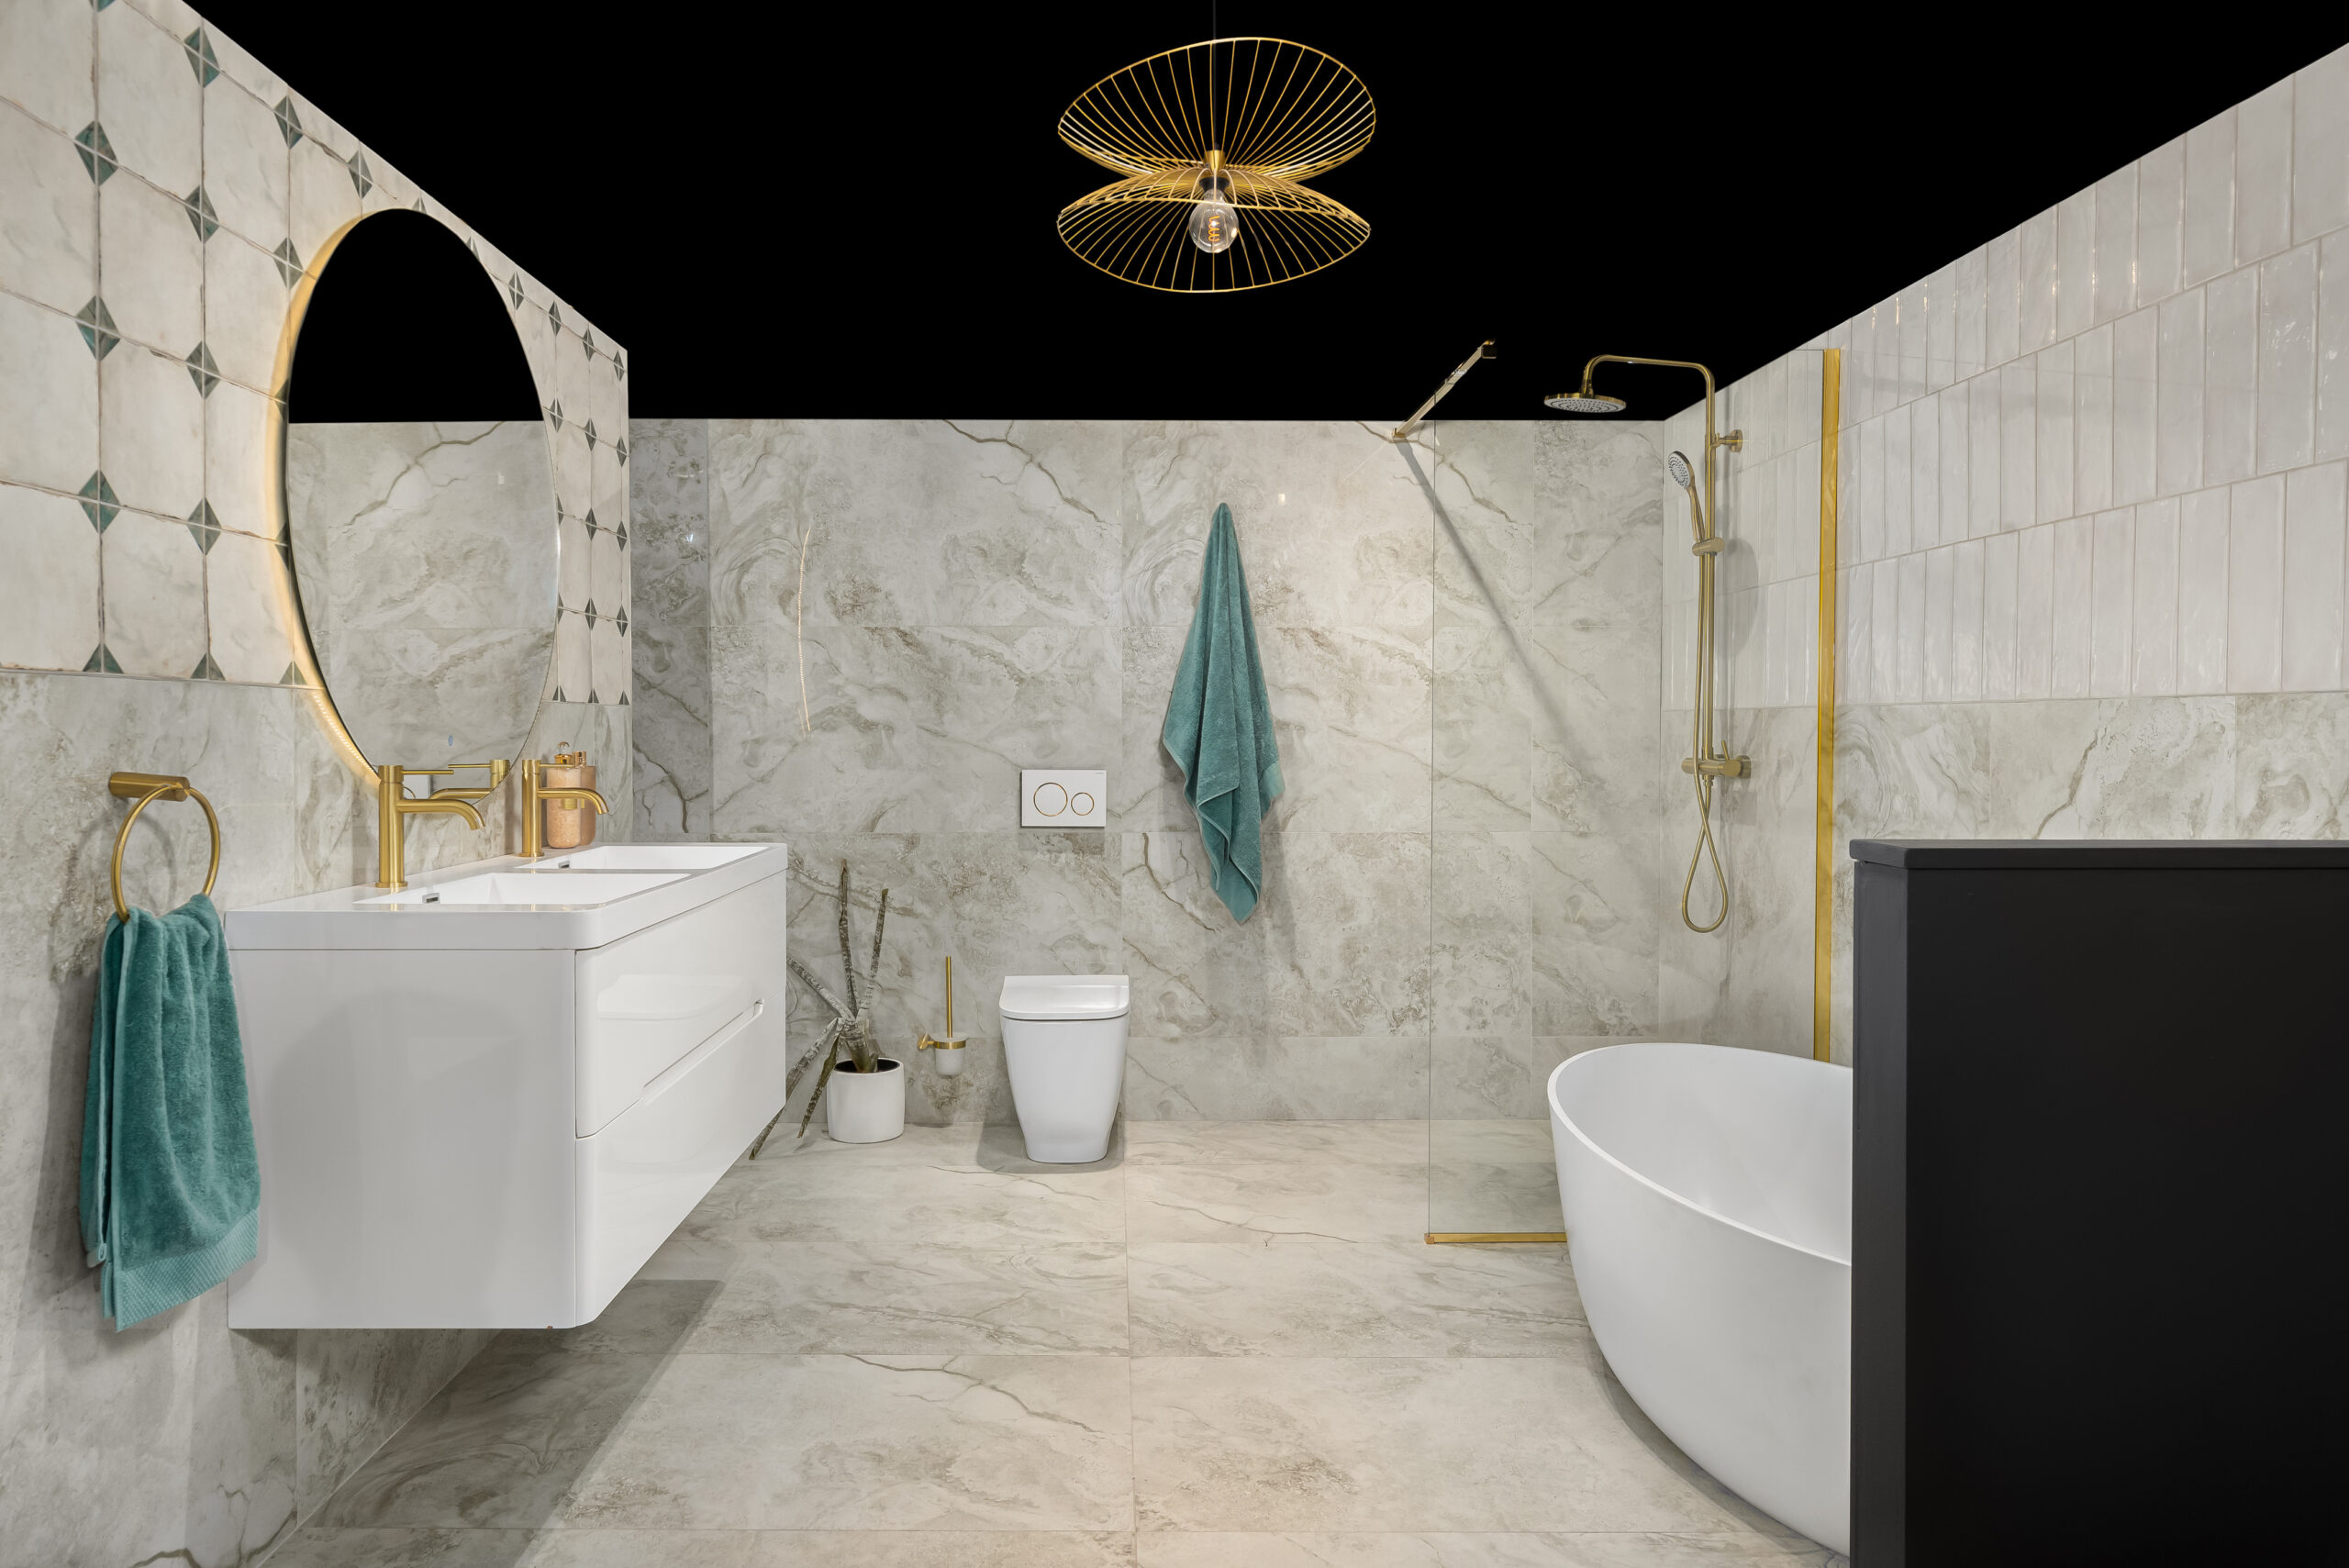
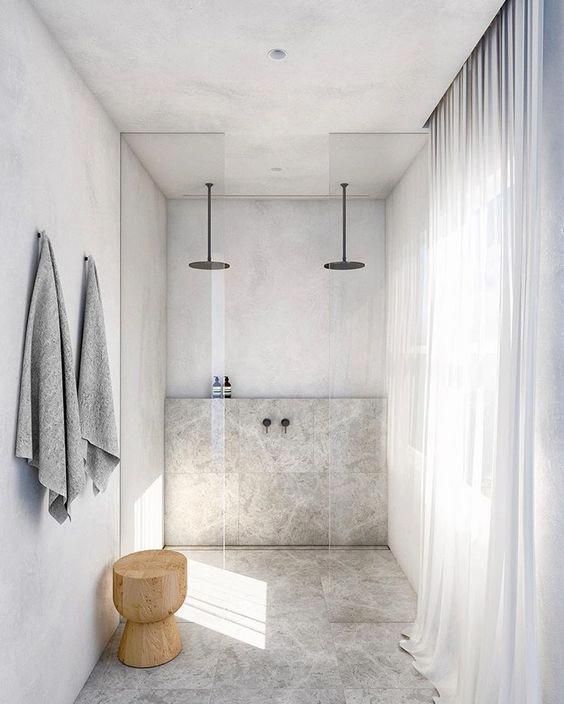
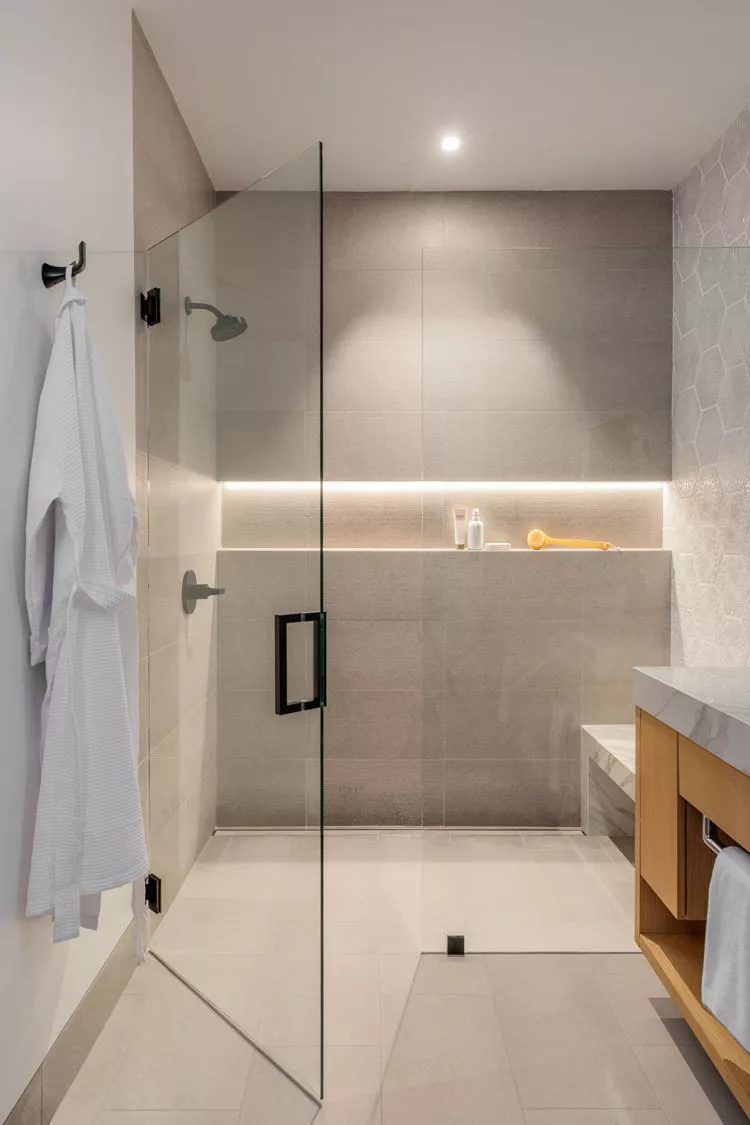
Bathrooms are evolving into personal retreats, resembling home spas. They’re more than just necessities; they create an immersive experience. Let’s explore some trendy shower ideas to inspire your next bathroom upgrade.
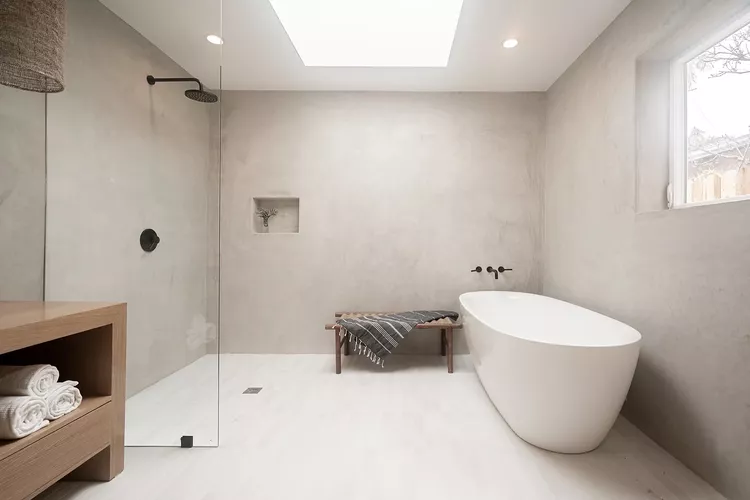
Walk-in showers are all about open space with uncluttered lines, perfect for both large and small bathrooms. The seamless entry? Total game-changer—no more tripping hazards, blending safety and style. Frameless glass panels add that modern, sleek touch with clean lines. Plus, they’re easier to clean with less hardware to collect mold and dirt.
Image Credit: The Home Consultant
Sit-Down Showers
One of the simplest yet most amazing trends is sit-down showers. If you have a larger shower space, creating a spa-like corner is an affordable upgrade that significantly enhances your lifestyle. These showers offer a space to relax and provide a stable surface for the elderly. Try them out, and you’ll see why they’re becoming so popular.
Image Credit: @brittvannamen
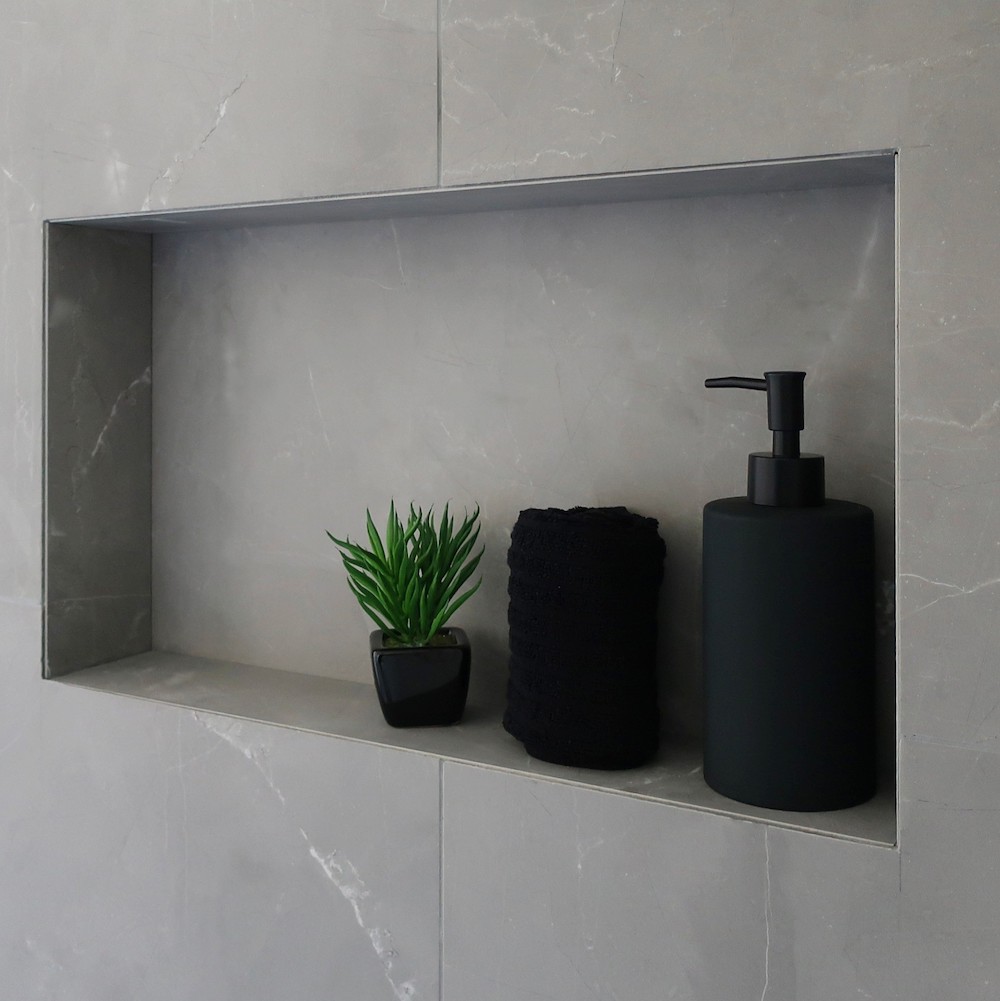
Recessed Nook / Niche
Say goodbye to clutter with recessed nooks. These nifty little spaces keep your toiletries within reach while maintaining a clean, clutter-free look. They’re practical and stylish, a win-win.
Image Credit: The Niche Man
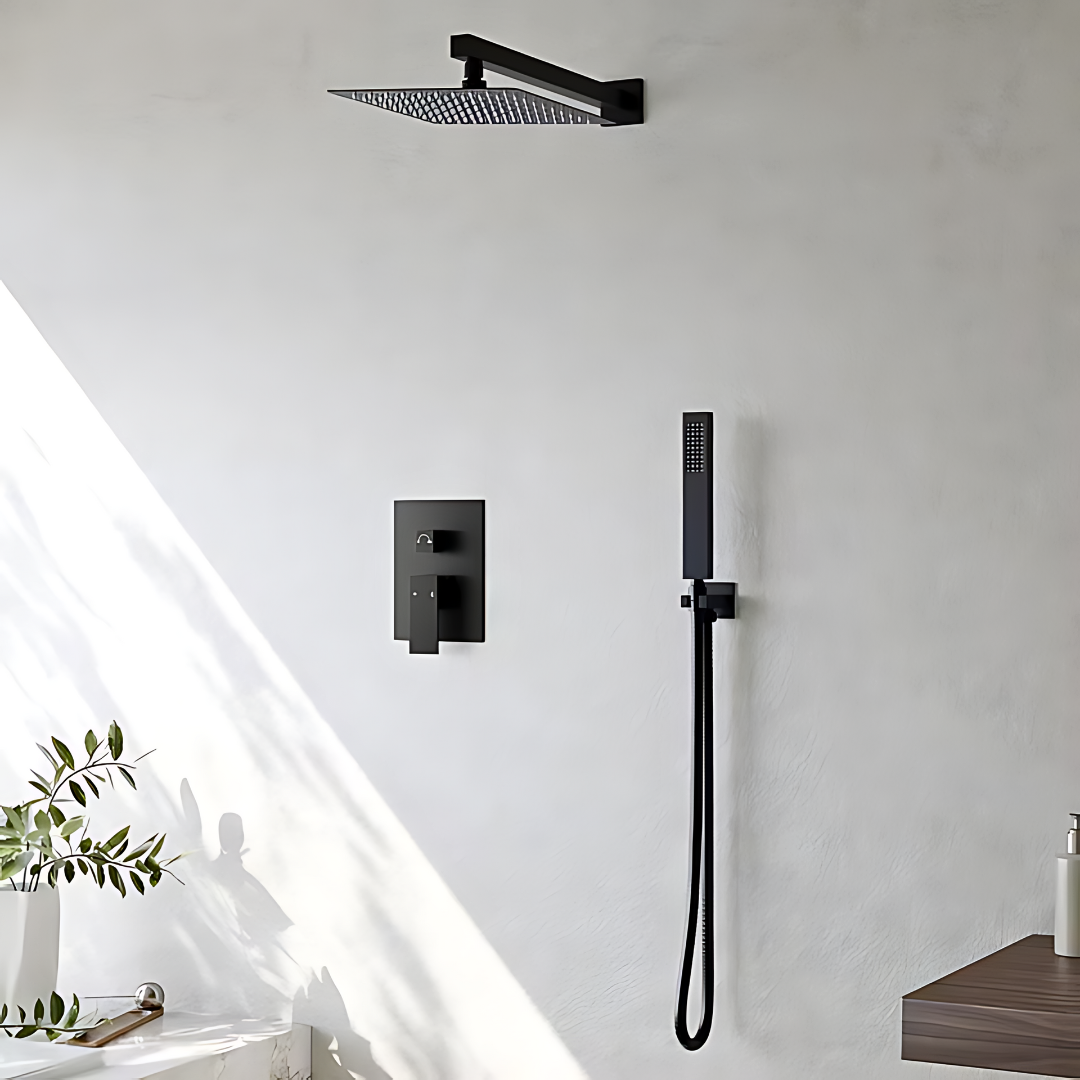
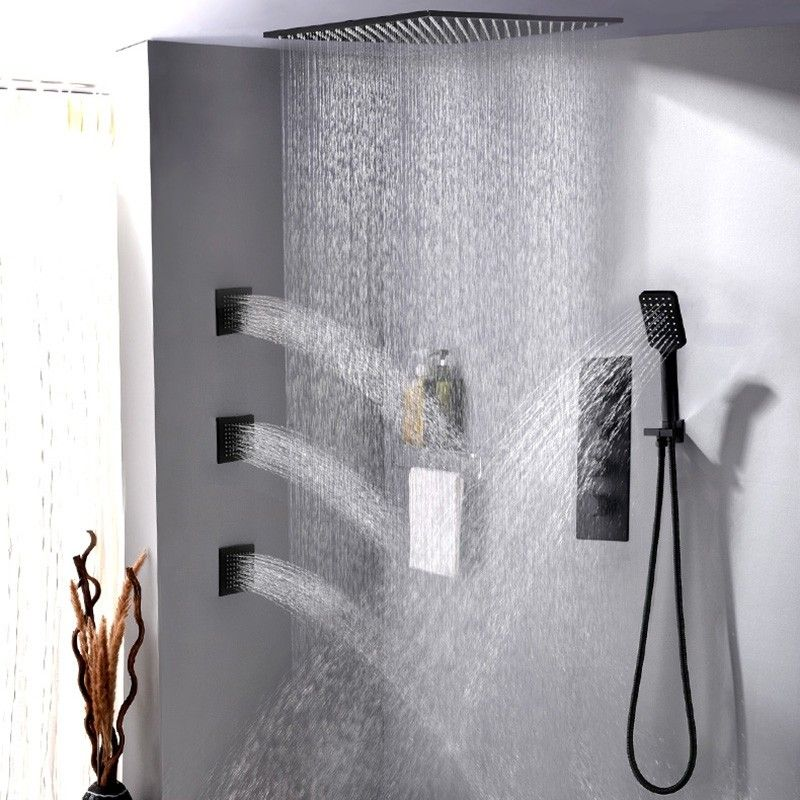
Multiple Shower Heads and Sprays
Enhance your shower experience from simple washing to luxurious pampering by adding multiple shower heads and sprays. A handheld sprayer adds convenience, perfect for rinsing when shaving, cleaning shower walls, or washing pets and kids. Strategically placed sprays at different heights can target muscles and stress points, giving you a rejuvenating massage right at home. Customize the pressure and direction for a personalized hydrotherapy session.
Image Credit: Homary
Twin Shower Heads
Waiting for your significant other to finish showering is a thing of the past. With twin shower heads, two people can shower simultaneously. It’s practical, symmetrical and a real time-saver.
Image Credit: @noasantos
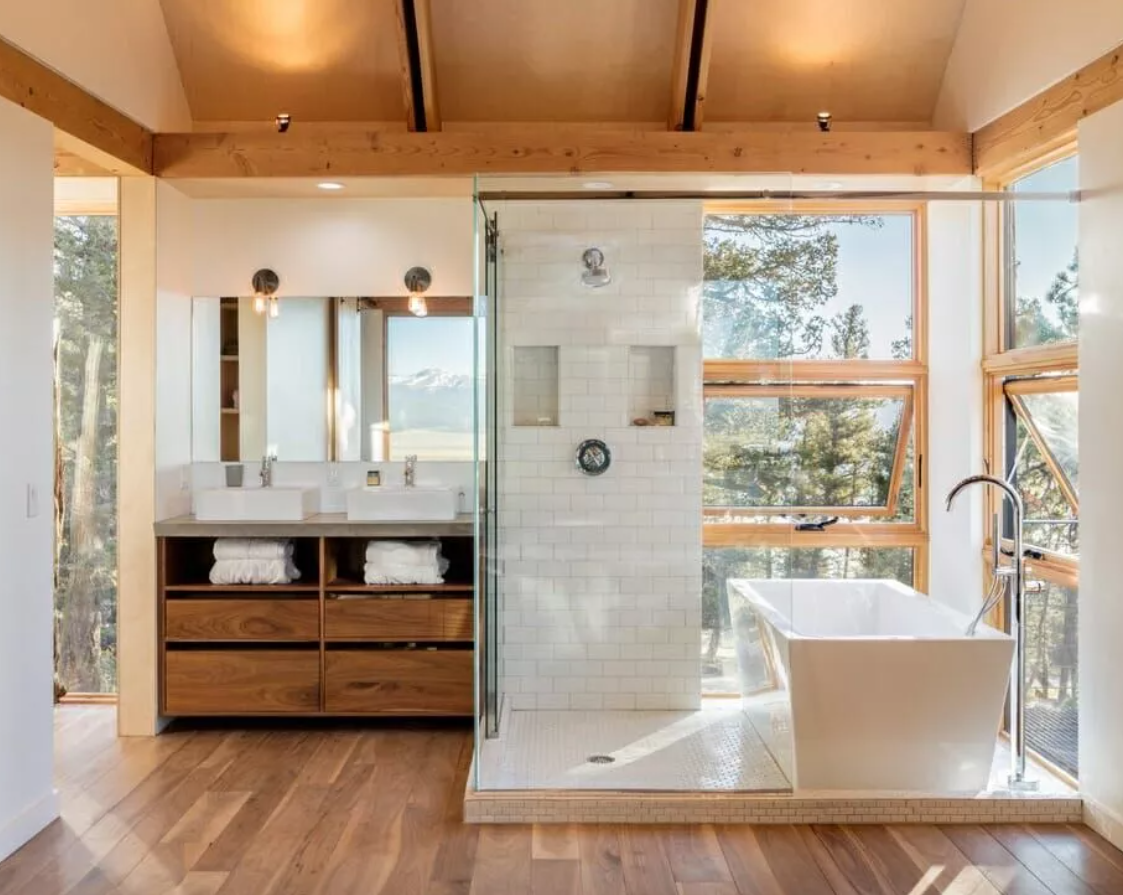
Wet Rooms
Wet rooms are the answer to every bathroom planner’s nightmare – divisions! They’re all about creating an interior shell that can handle wet conditions. No separate cubicles for the shower, bath, and sink—everything fits in one area. They’re easy to clean and maximize floor space.
Image Credit: Creative Mirror & Showers
Two-in-One Shower and Bath
Similar to wet rooms, the two-in-one shower and bath concept is being reinvented. Forget cramped baths with a showerhead and curtain sticking to you. A glass divider holds a full shower and bath. It’s a great solution for maximizing practicality and convenience.
Image Credit: Decorilla
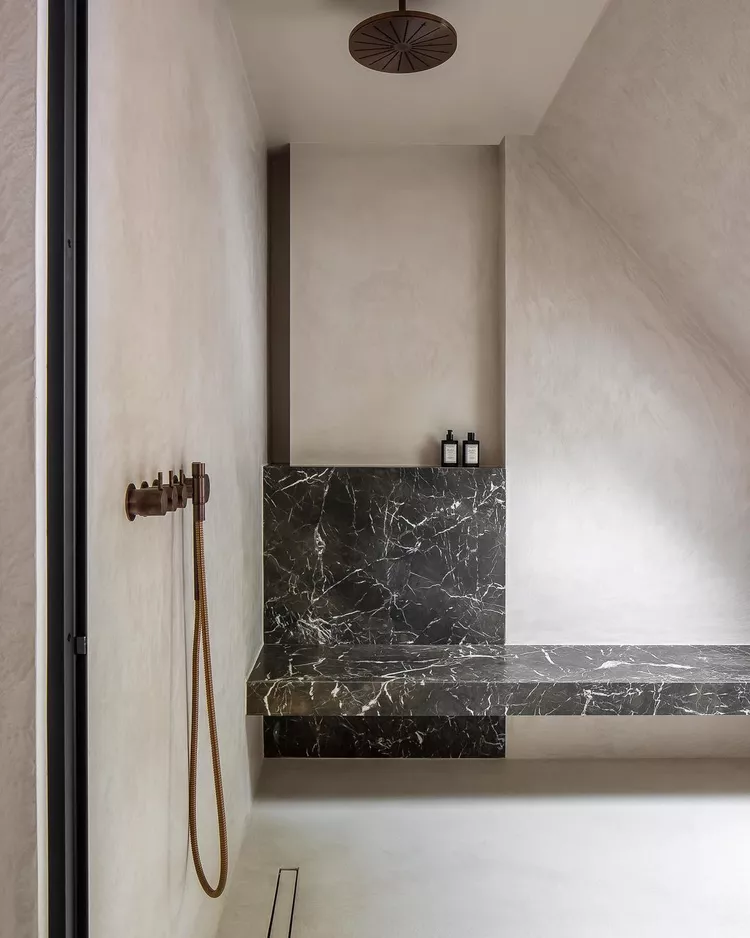
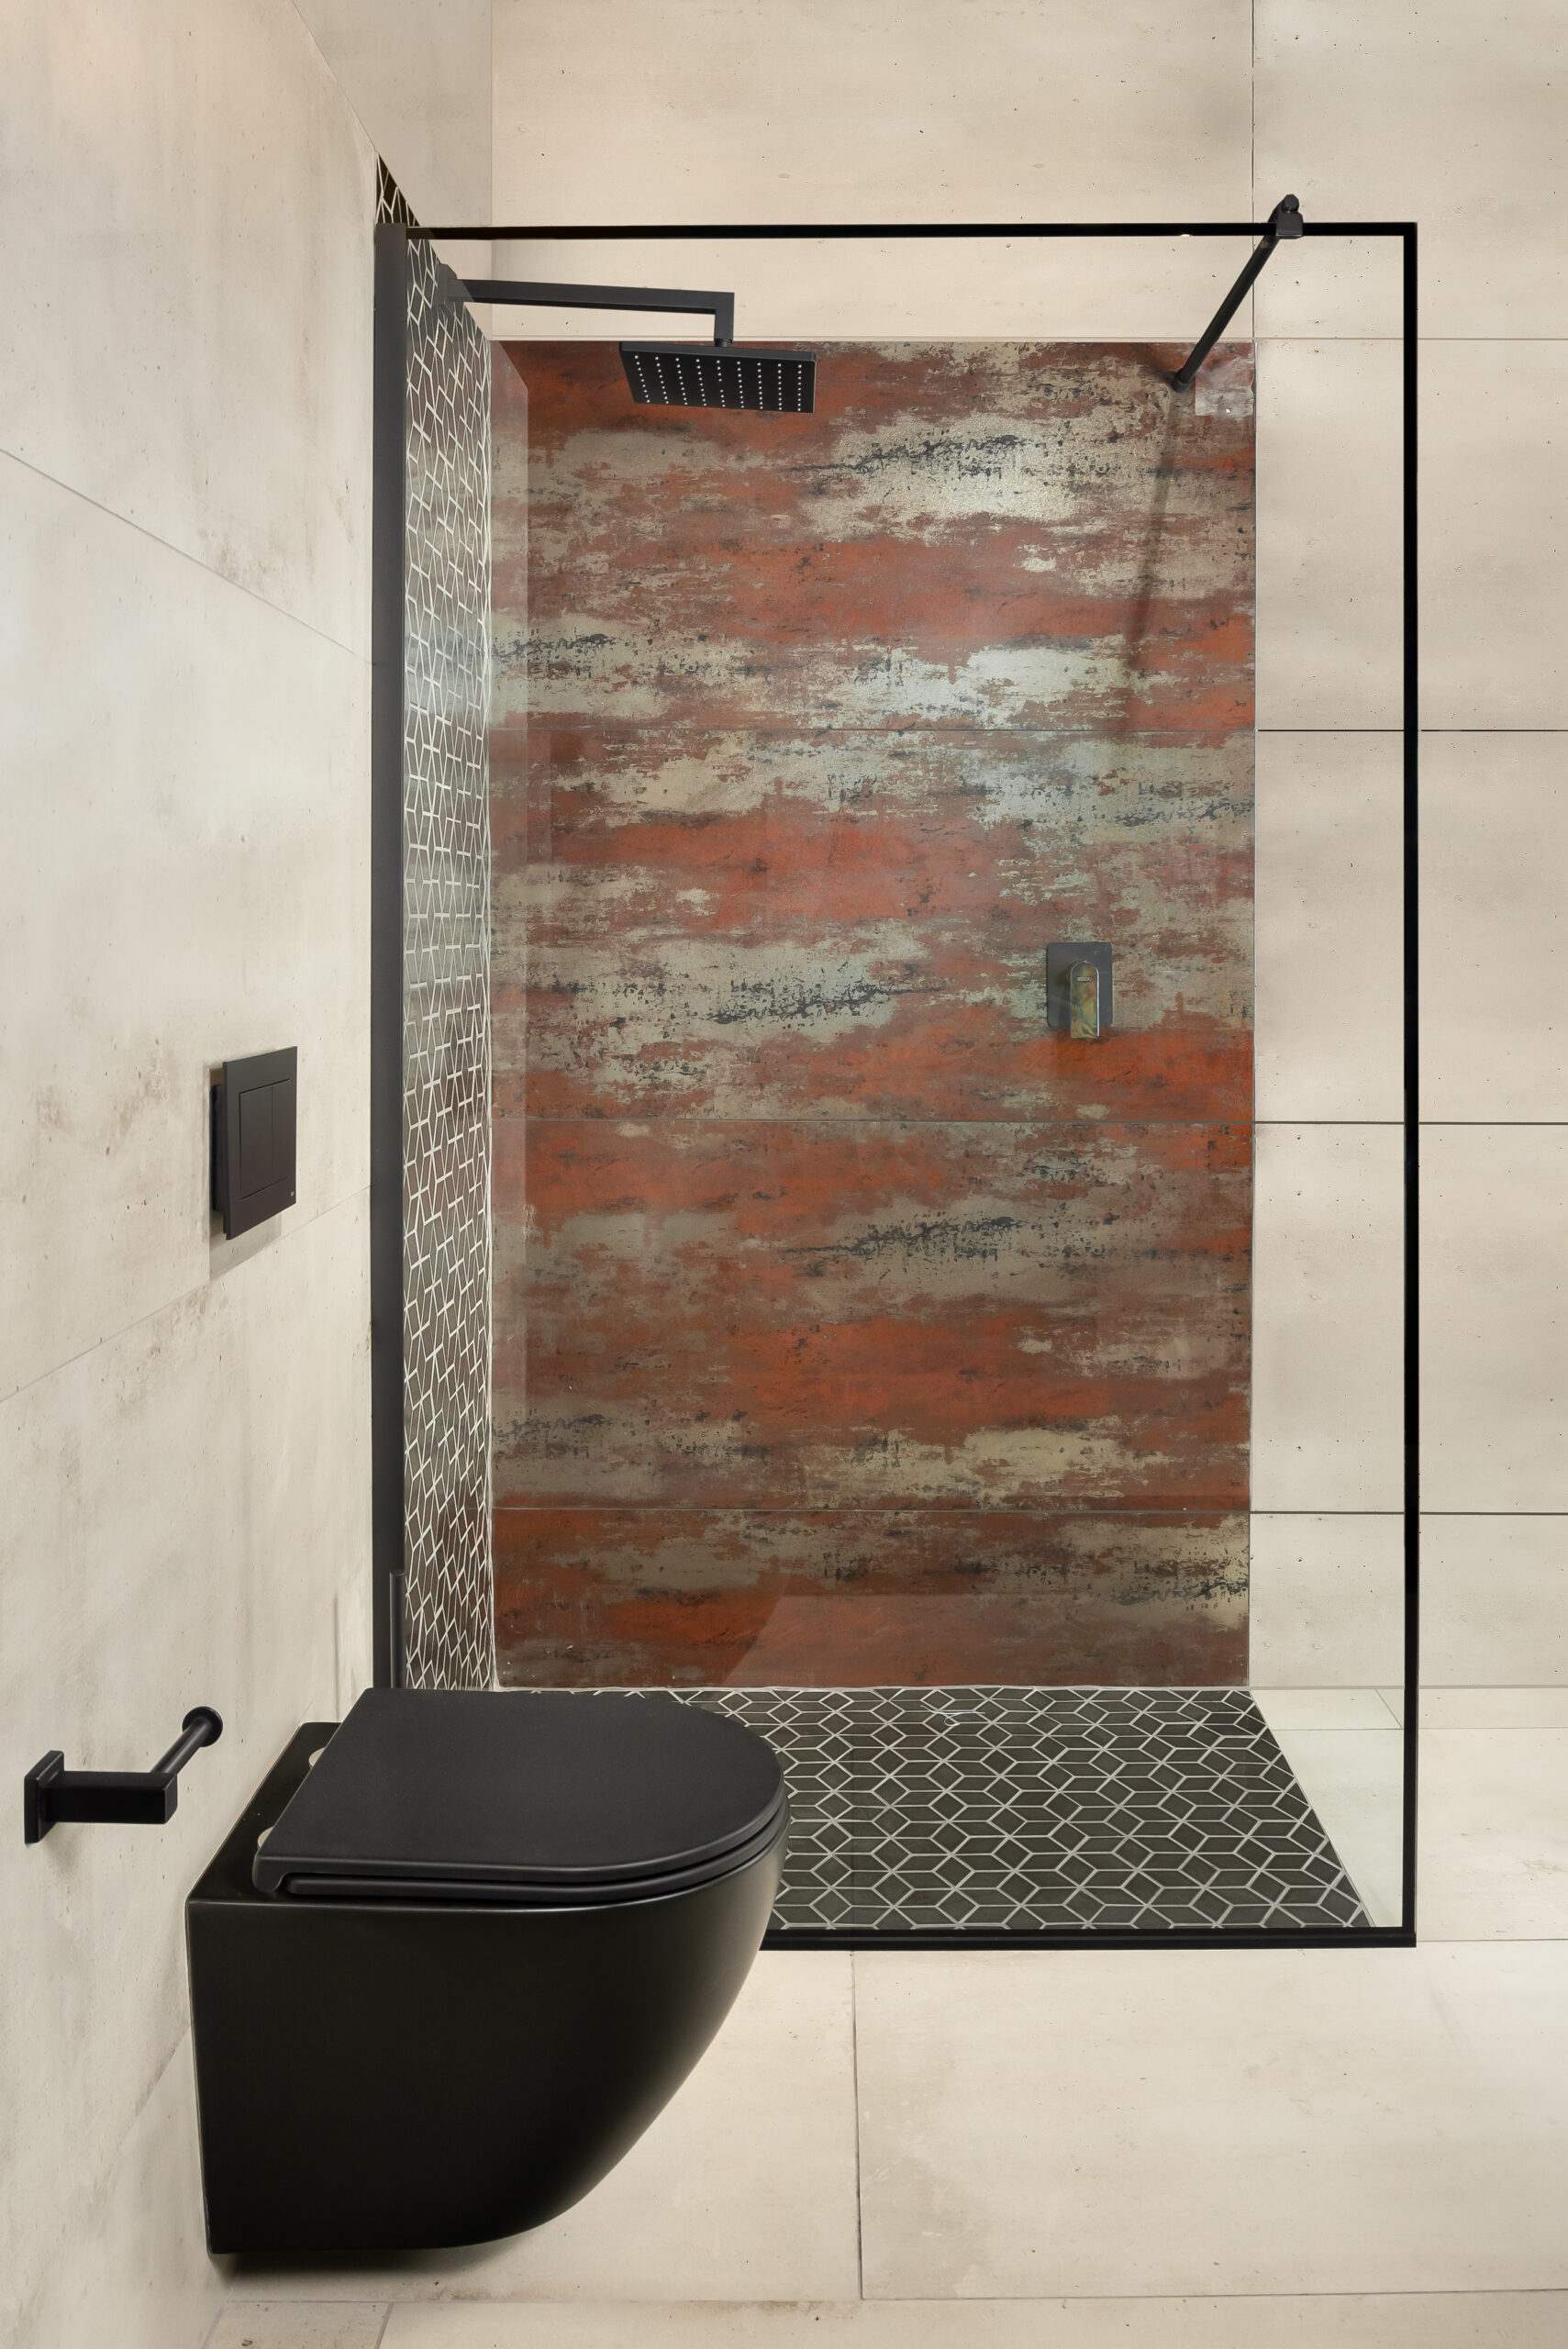
Stylish Shower Tiles
Tiles can make or break your shower’s look. Ceramic and porcelain tiles are classic and durable, perfect for any style. Natural stone like marble and travertine add an organic feel, while glass tiles enhance light, making the room feel bigger. Mosaic tiles create unique designs, and textured tiles add depth and interest to your shower walls.
Digital and Smart Showers
Step into the future with digital and smart showers. They offer personalized temperature control, water flow, and duration settings. Control your shower via smartphone or voice command. These systems are eco-friendly, reducing water bills and wastage. You can even opt for chromotherapy and hydrotherapy showers for a full wellness experience.
Image Credit: Hotel Designs
LED Shower Lighting
Set the mood with LED shower lighting. Adjustable hues and brightness create a tranquil experience while providing clear visibility, reducing the risk of slips and falls. Energy-efficient and stylish, they’re a cost-effective upgrade to your shower space.
Image Credit: Tidal Interiors
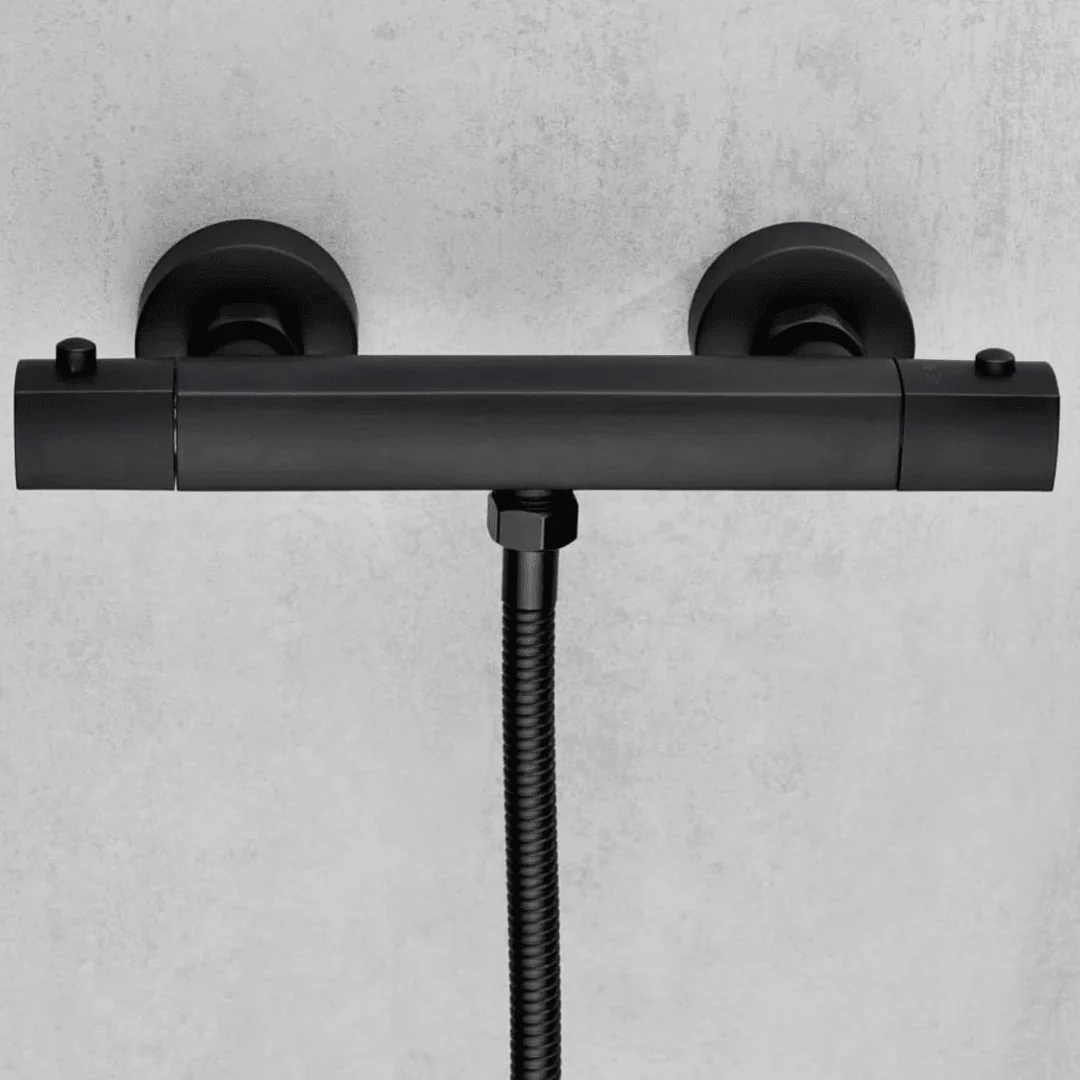
Thermostatic Shower Systems
Nothing ruins a shower like sudden water temperature changes when someone uses the sink or flushes the toilet. Thermostatic shower systems keep your water at a constant temperature, o matter how many household appliances are used simultaneously. The thermostatic valve adjusts the mix of hot and cold water to ensure a stable temperature throughout your shower.
Image Credit: European Household
Looking to upgrade your shower experience? Contact us or stop by one of Tiletoria’s showrooms to speak with an expert about a fresh makeover tailored to your budget!
Prefer to watch?
Check out the video below as Ryan and Deon discuss trendy shower ideas:
Browse our range
Browse our range of showers, panels. screens, mixers and accessories
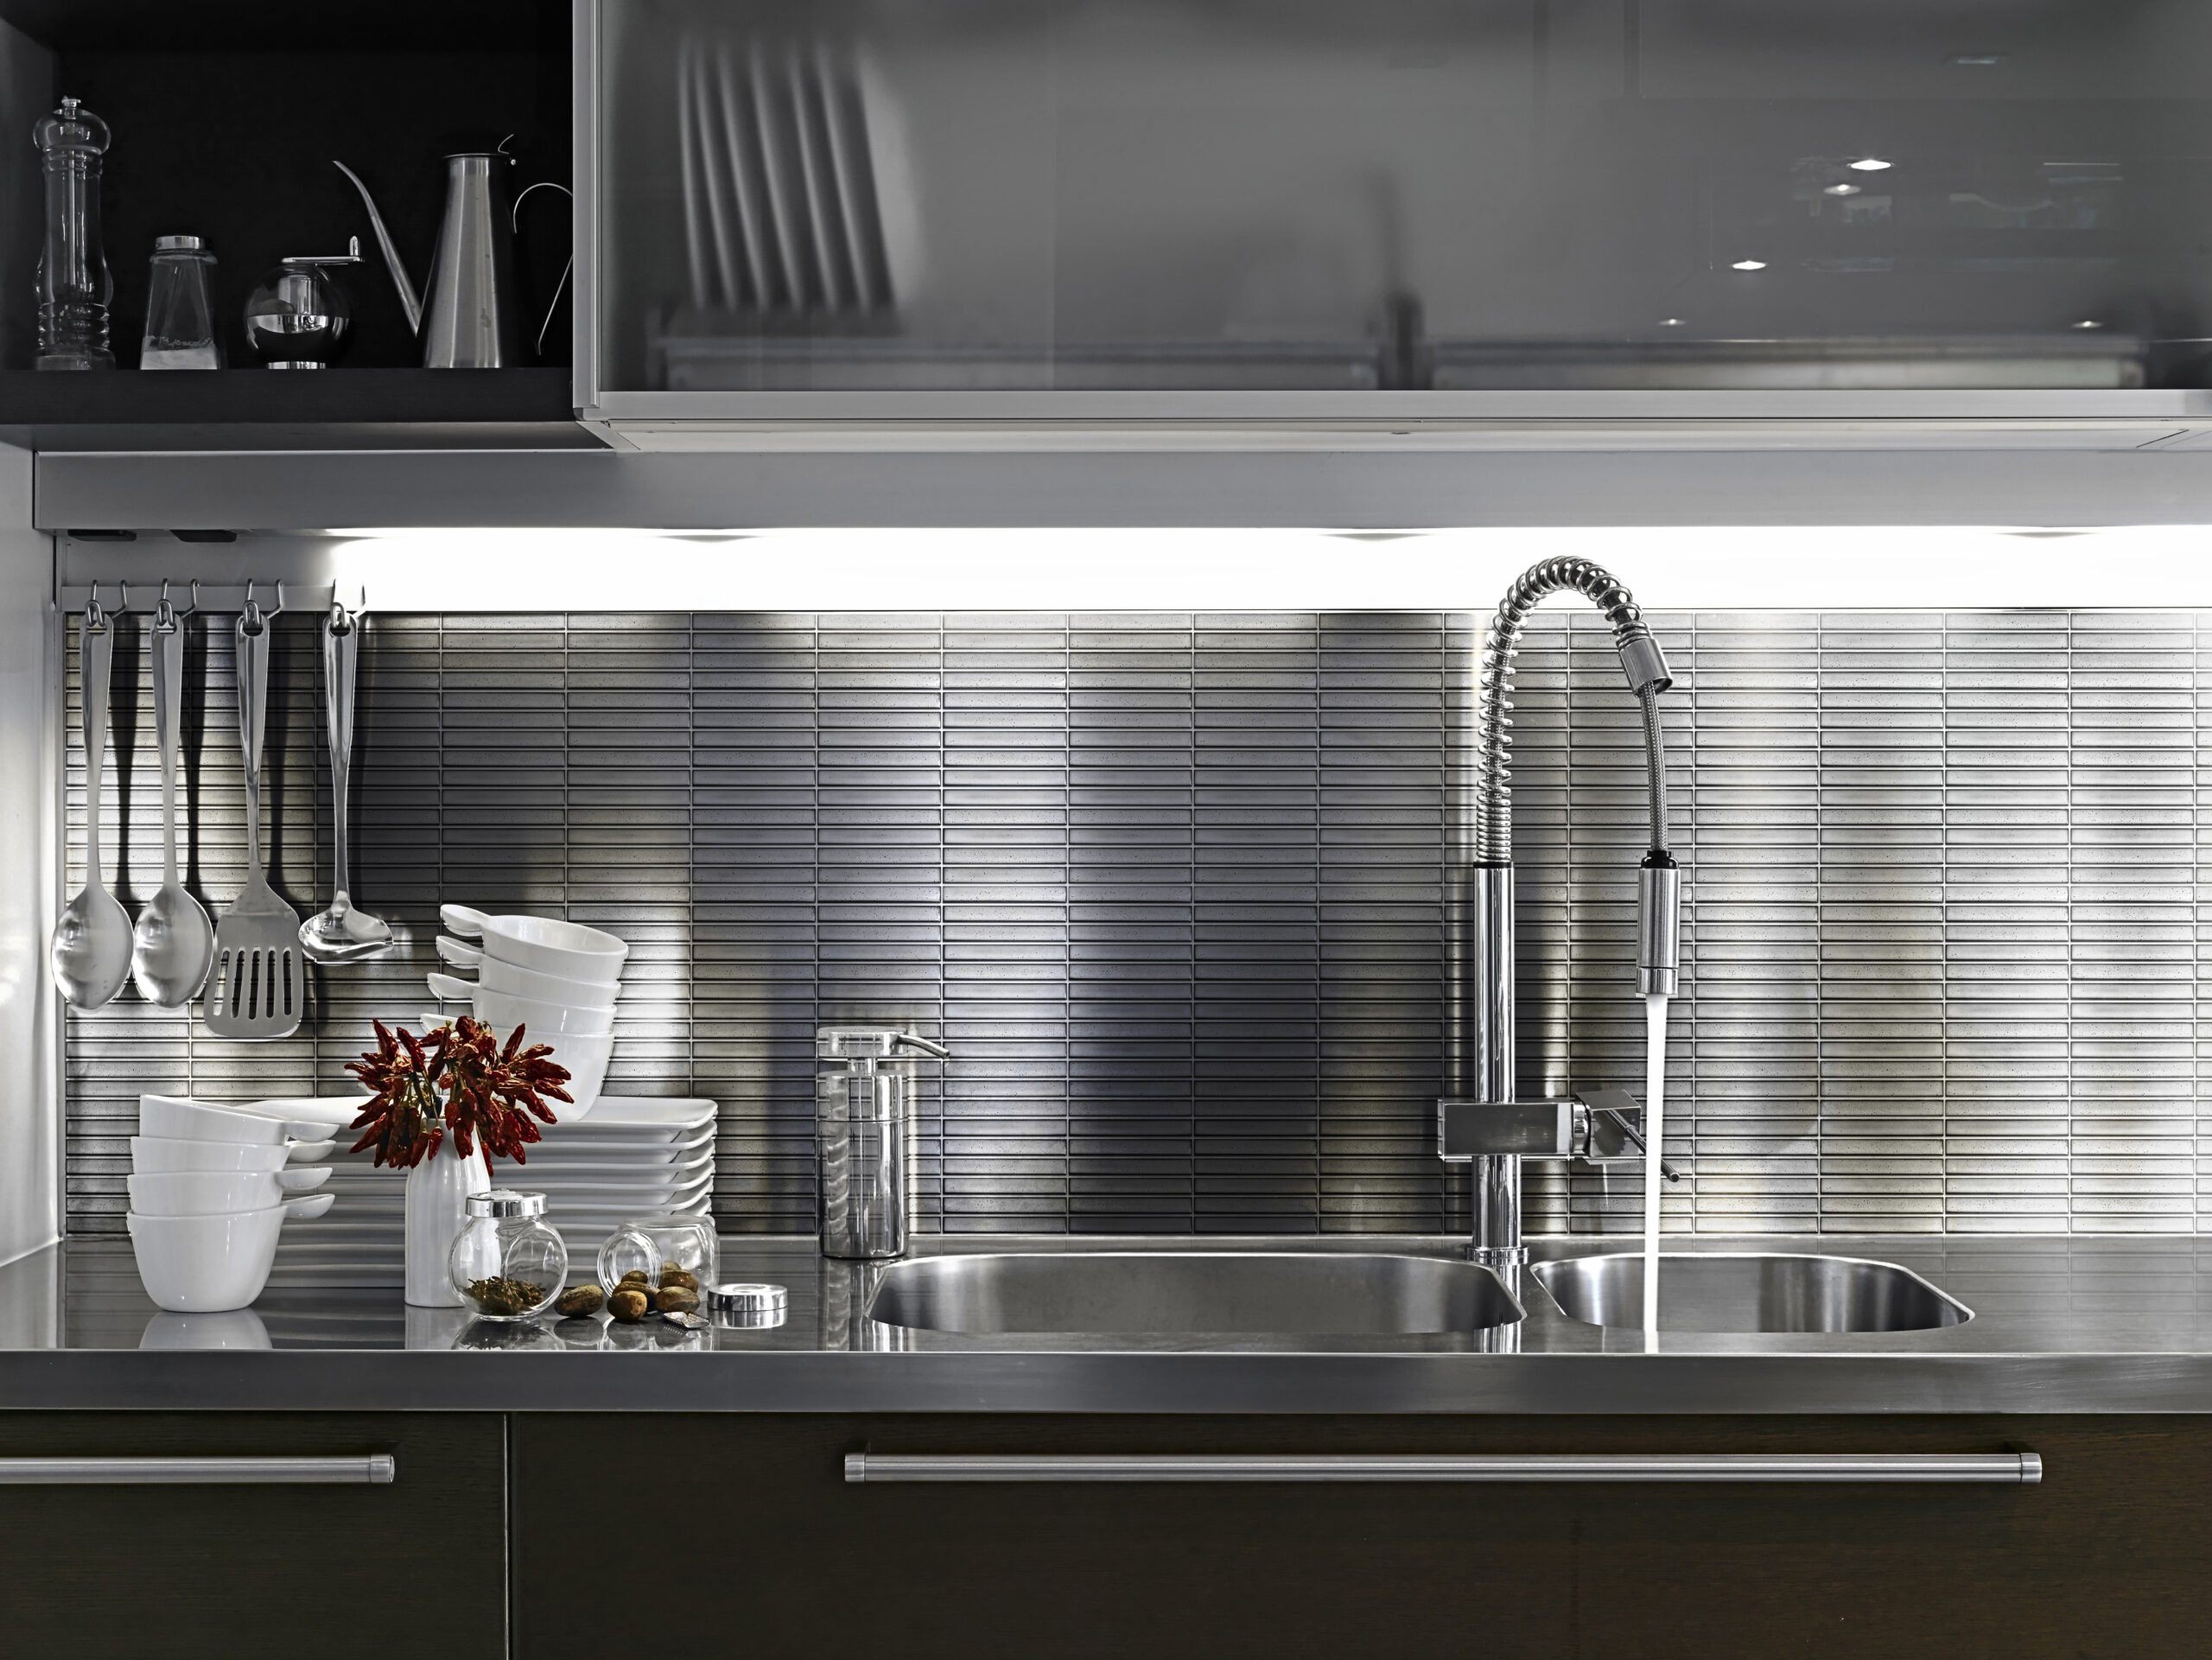
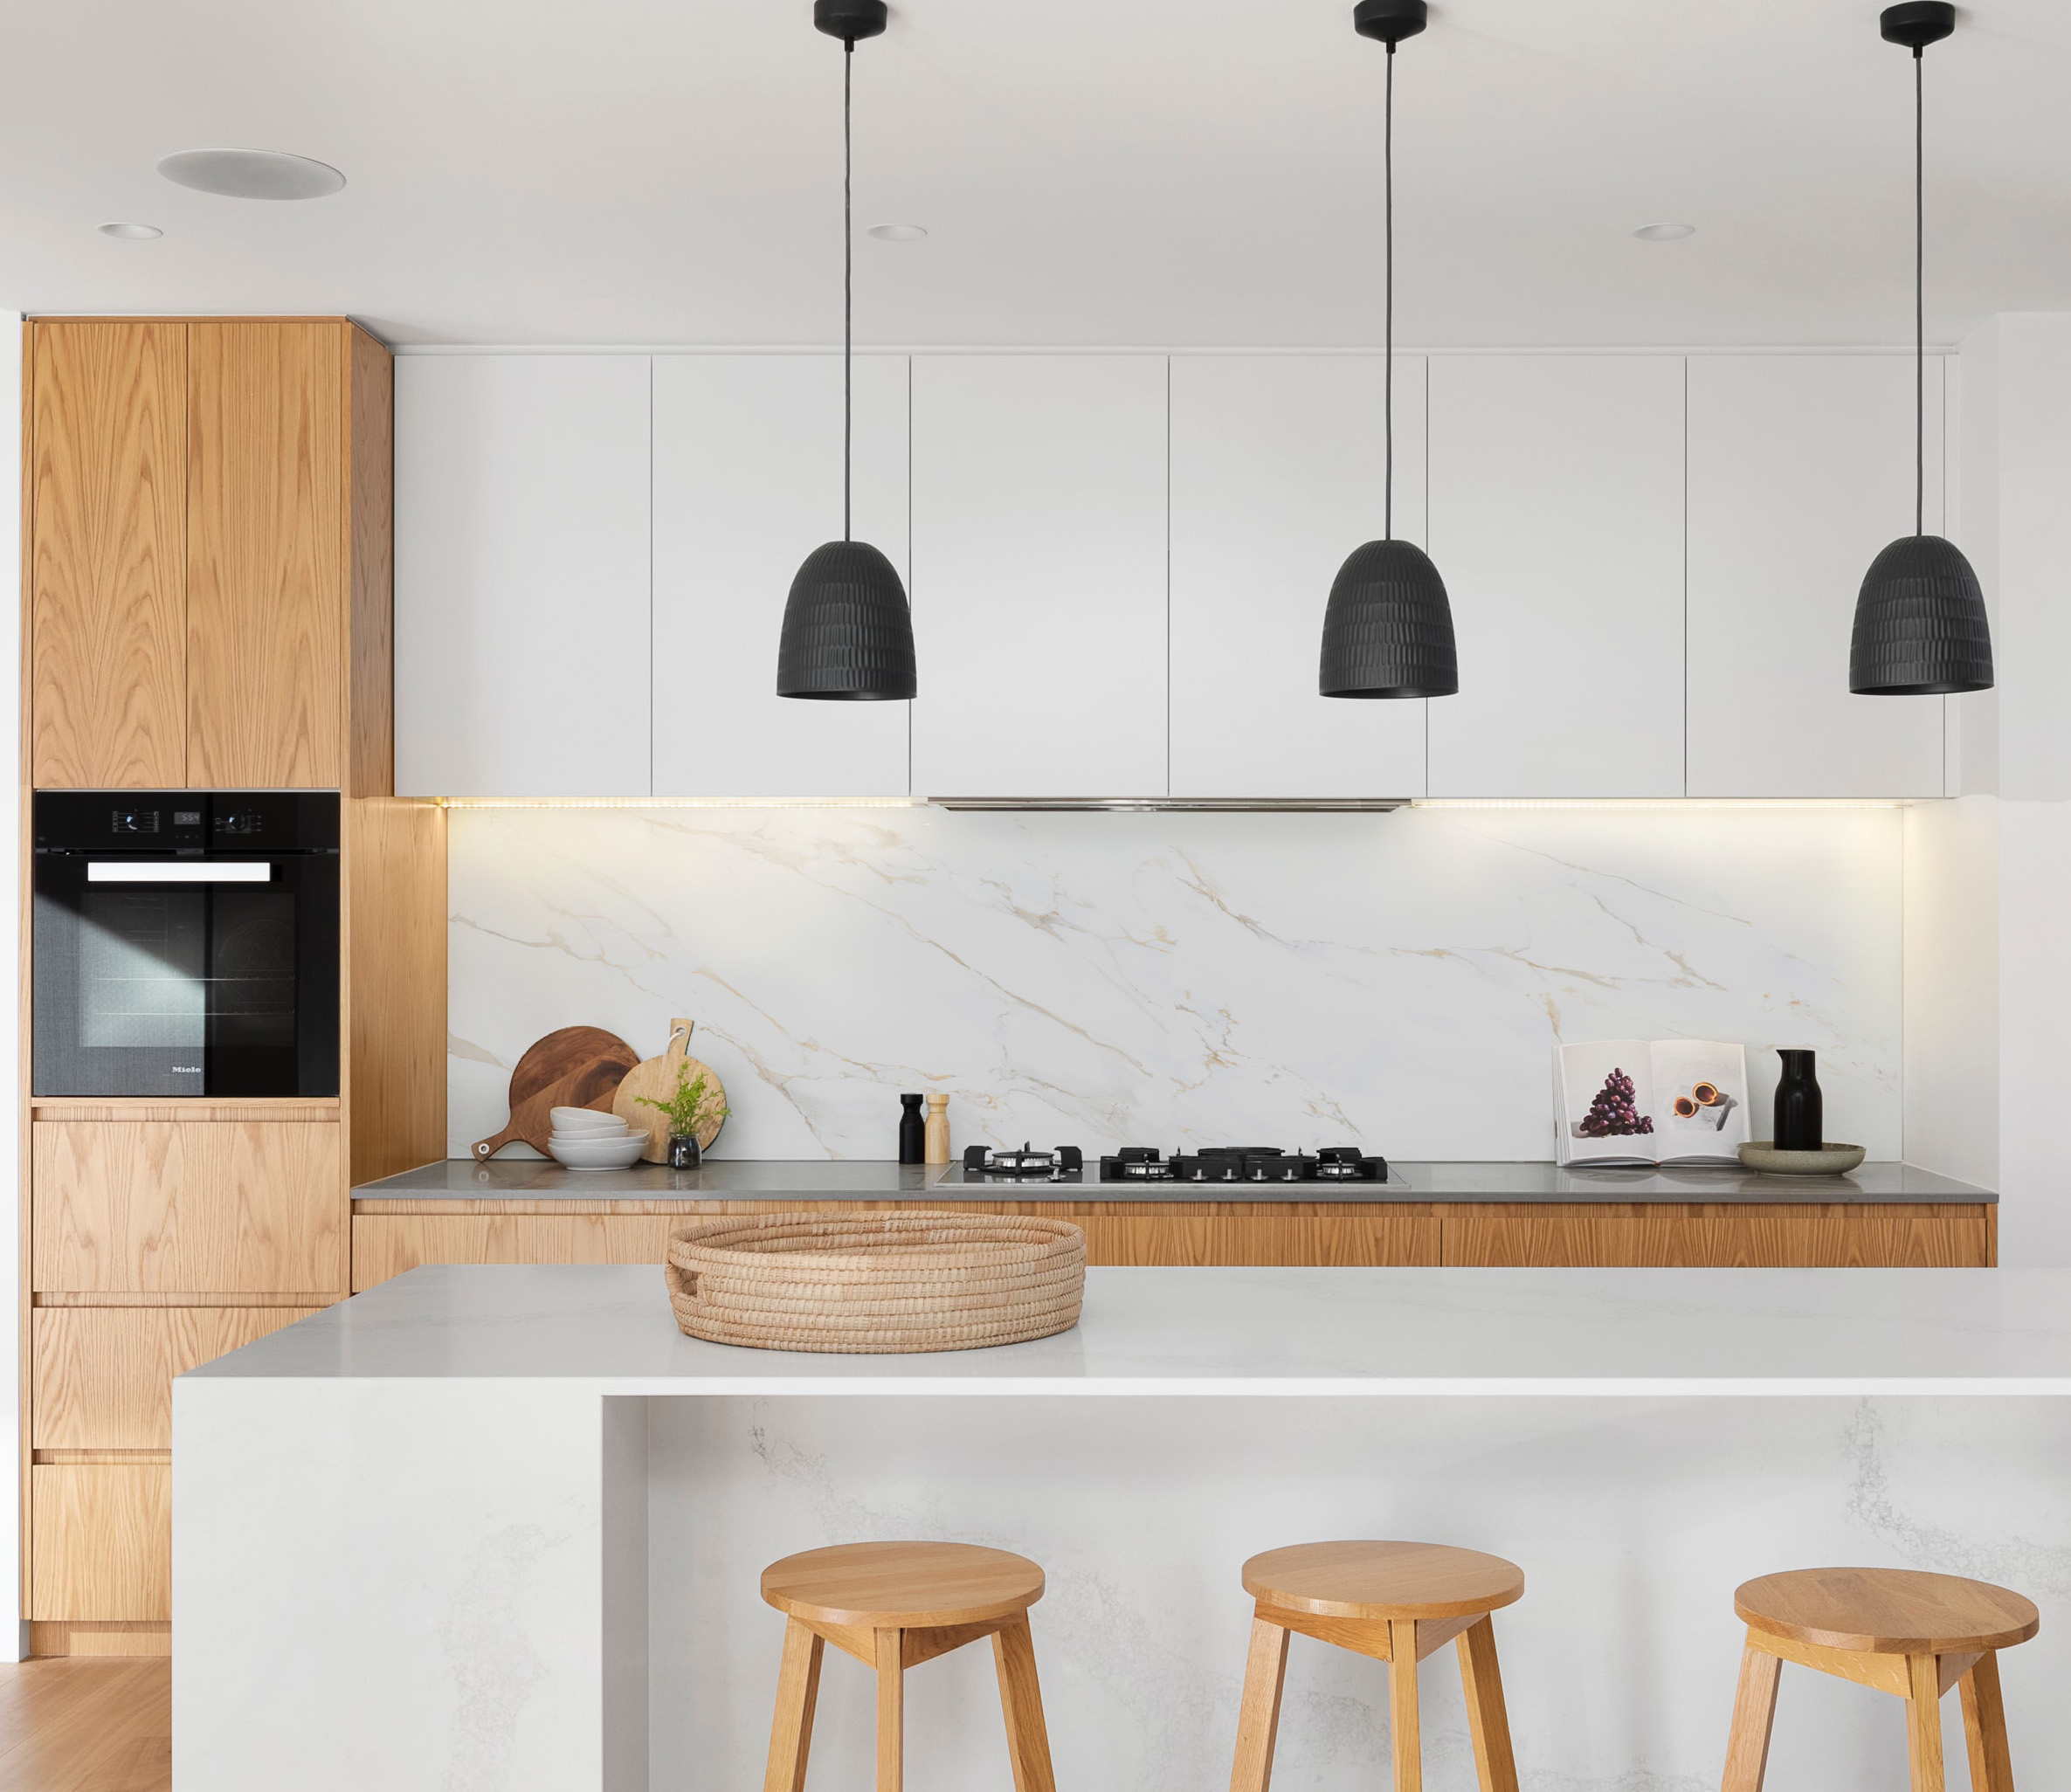
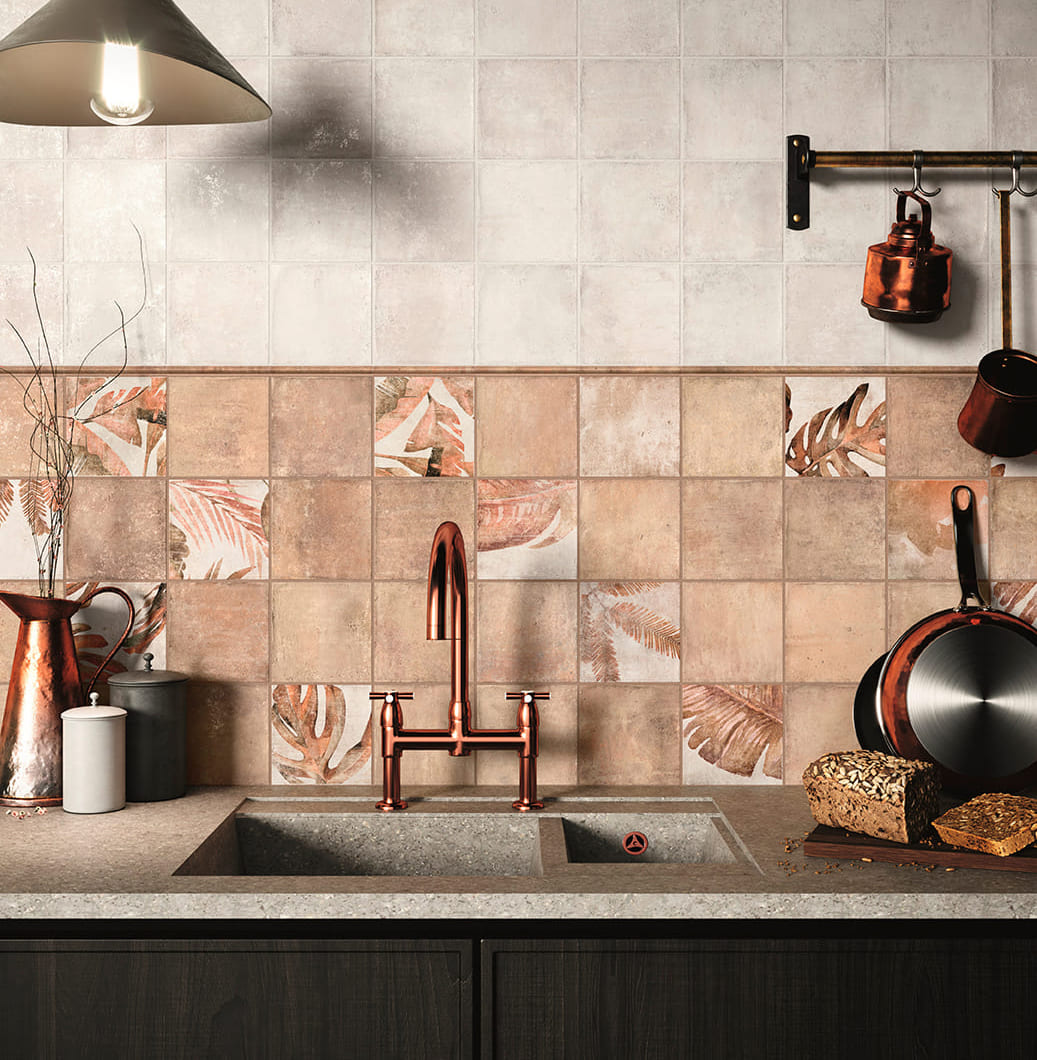
Tile splashbacks are gaining popularity for a reason. They add an eye-catching upgrade to your home and can rejuvenate your walls without breaking the bank. So, let’s splash right into the topic and explore how to choose the perfect tiles for your splashback.
A splashback, or backsplash, is exactly what it sounds like. It’s a protective surface installed in the kitchen or bathroom behind the sink or stove, where water, grease, and food tend to “splash” around. The primary purpose of a splashback is to catch the mess and prevent water or moisture damage to the wall behind the tiles.
Splashback tiles are a simple way to make your kitchen or bathroom feel brand new. They offer benefits like ease of cleaning and durability—it’s much easier to wipe down a tile than to scrub a wall! A splashback can be a few centimeters high or extend all the way to the ceiling.
Imagine standing in your kitchen, tackling that huge pile of dishes. Wouldn’t it be nice to have a beautiful feature to look at while you’re there?
Picking out tiles for your splashback is half the fun. You’re almost ready to create your dream splashback, but it’s important to consider a few key factors. Your kitchen and bathroom endure a lot, so it’s essential to choose tiles that are water-resistant. This helps protect your walls from excess moisture. Non-porous tiles are a must, as they don’t absorb water, air, or other fluids.
The tiles you select should be durable enough to withstand the daily hustle and bustle, allowing you to cook and clean without a worry.
When selecting the colour for your splashback tiles, think about the overall look you want to achieve.
Bold and Bright: If you’re looking to add colour and character to your space, go for bright and bold tiles. You can even opt for a different colored grout to make your tiles stand out.
Subtle and Minimalistic: For a more understated look, white, black, grey or beige tiles can tie the rest of your space together. Matching or contrasting grout can change the final look.
Smaller Tiles: These offer a detailed and uniform look.
Pro Tip
Always purchase more tiles than you think you’ll need. Mishaps happen, and it can be frustrating when you’re not prepared. You might need just half a tile to finish a small corner, so having extra on hand is always a good idea.
Consider Your Options of Tiles
Let’s explore the different types of tiles available for a splashback:
Porcelain Tiles: These are ideal due to their hard-wearing, durable nature. They are usually water-resistant, attractive, inexpensive, and available in various styles and colours.
Subway Tiles: These are popular for their easy-to-clean ceramic surface. They come in various colours, styles, and patterns, and are extremely durable.
Choosing the Tile Pattern
With so many different layouts to choose from, it can be overwhelming to figure out what works best for your space. Check out our previous blog on tile layout patterns for an in-depth review of all the tile pattern options you can choose from here.
Once you’ve considered the important factors for tiling your splashback, it’s time to bring it all together! Visit your nearest tiletoria showroom today to make your splashback dreams a reality.
Prefer to Watch?
Check out the video below where Ryan and Deon discuss the steps to find your perfect splashback tiles:
One of the most exciting things about tiles is the many different ways that they can be installed. The same tile can create a very different result by simply changing the layout pattern. But with all the options, where do you start? Here are some of the most popular tile layout patterns to inspire your next project.
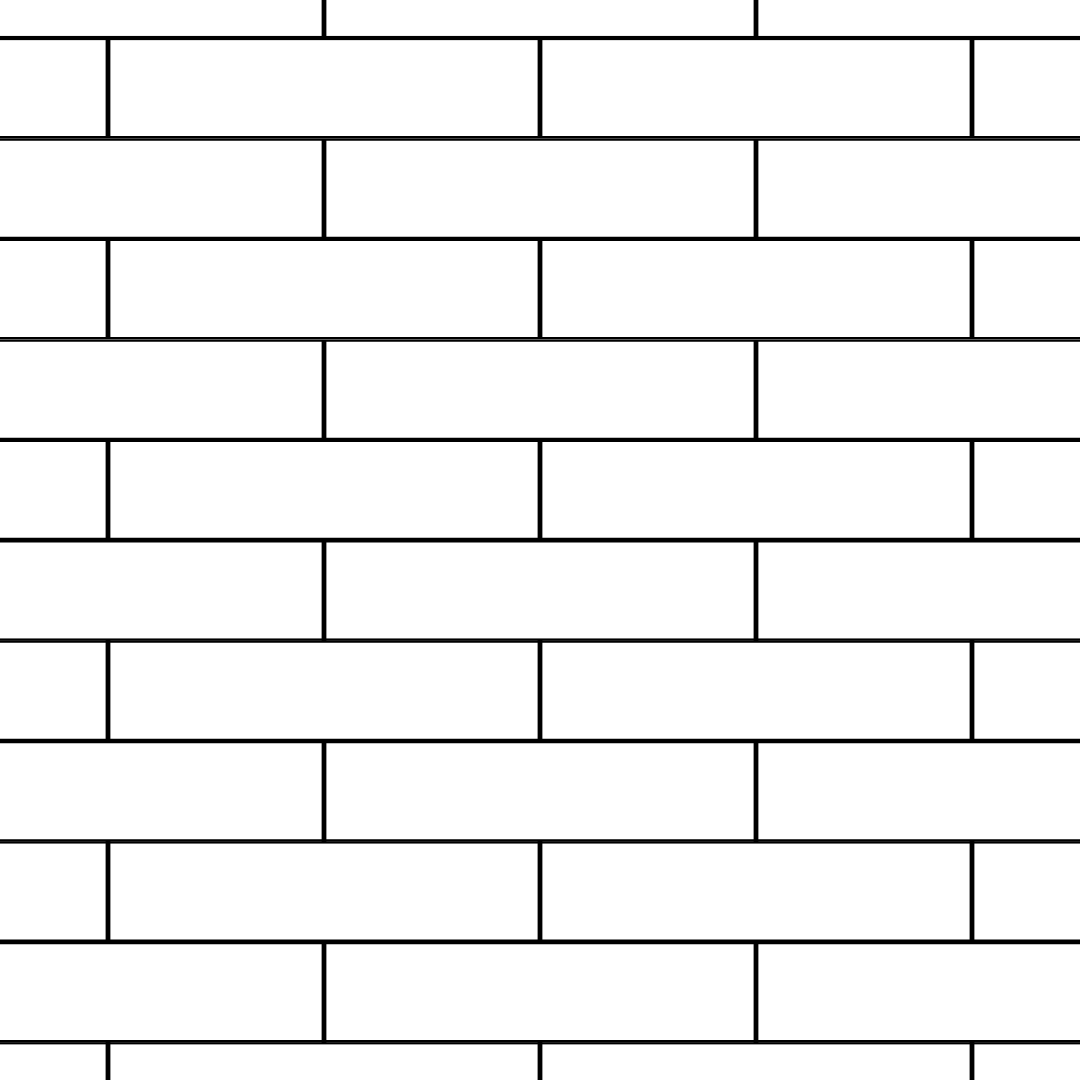
The running bond, or brick pattern, is a classic. Rectangular tiles are laid at a 50% offset horizontally, giving you a clean, timeless look. This pattern is great for hiding imperfections, making it a go-to choice for many.
Image Credit:
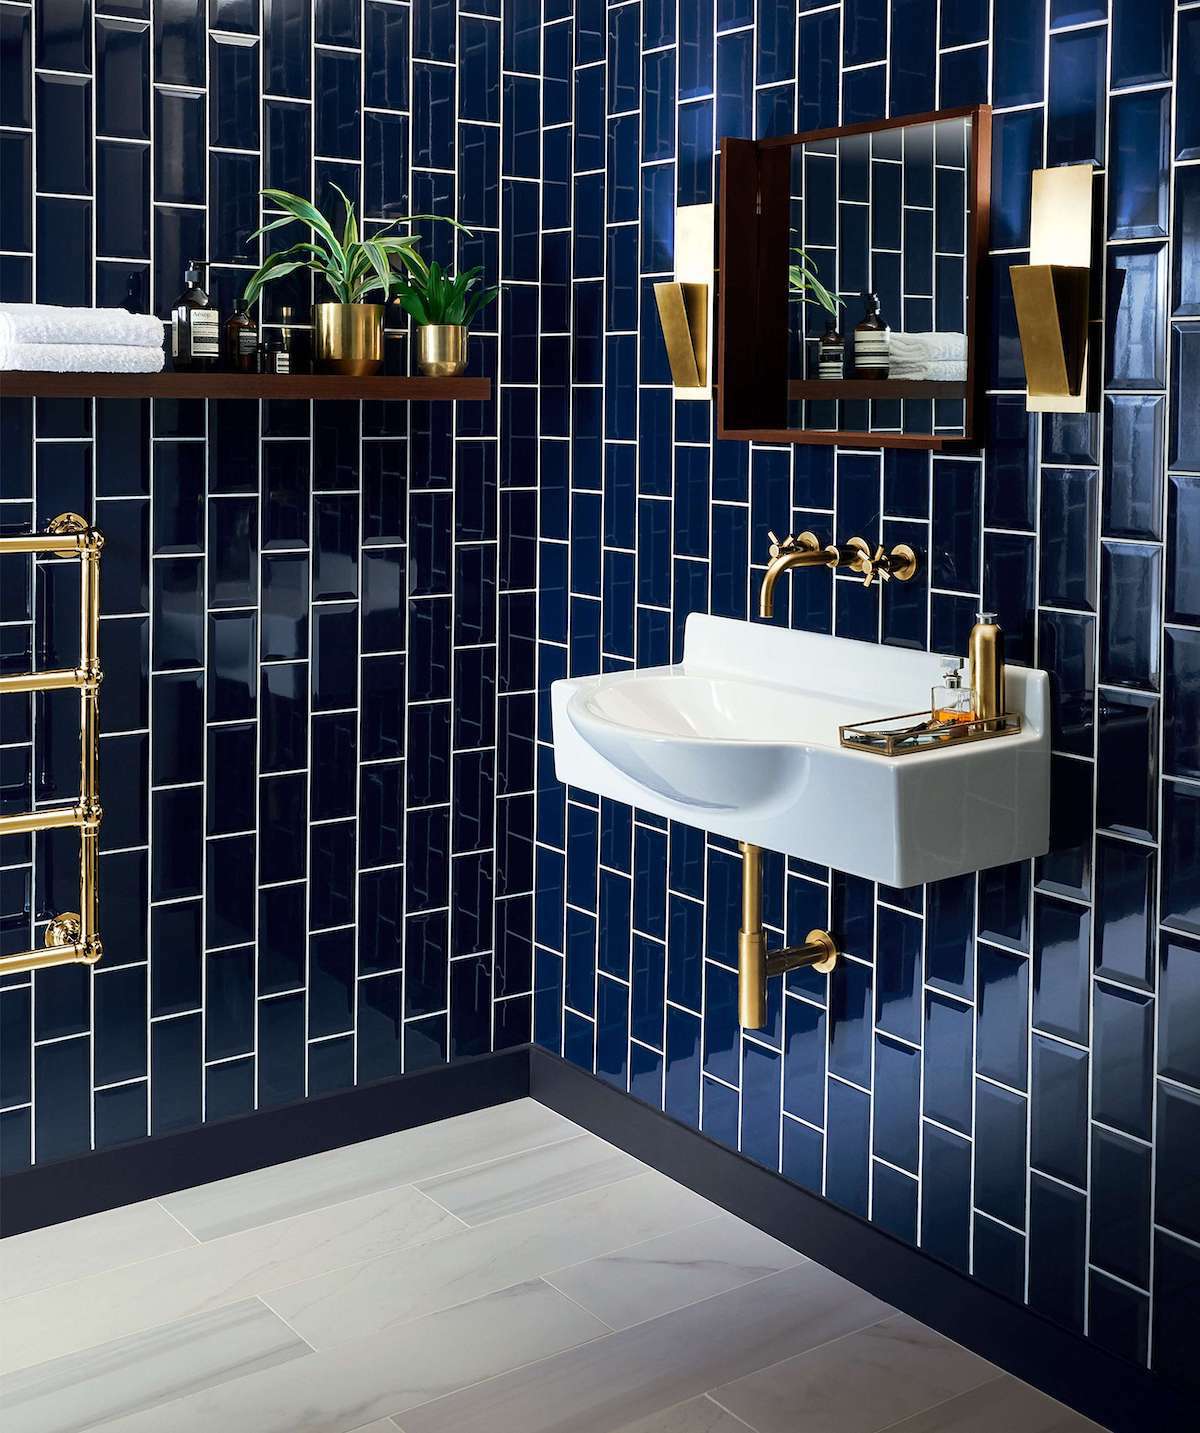
2. Vertical Running Bond
The vertical running bond is similar to the running bond but with a twist. Tiles are offset vertically by 50% instead of horizontally. This pattern draws the eye upward, making your small spaces feel taller and more open.
Image Credit: Topps Tiles UK
3. Vertical Offset
In the vertical offset pattern, each tile is shifted by a third from the one above it. This creates a dynamic look and also helps make your walls appear taller, perfect for compact areas.
Image Credit: Ceramic Connection
4. Stacked Layout
The stacked layout is simple and modern. Tiles are laid directly on top of each other in a basic grid pattern. This straightforward design gives a clean, contemporary look and is easy to install.
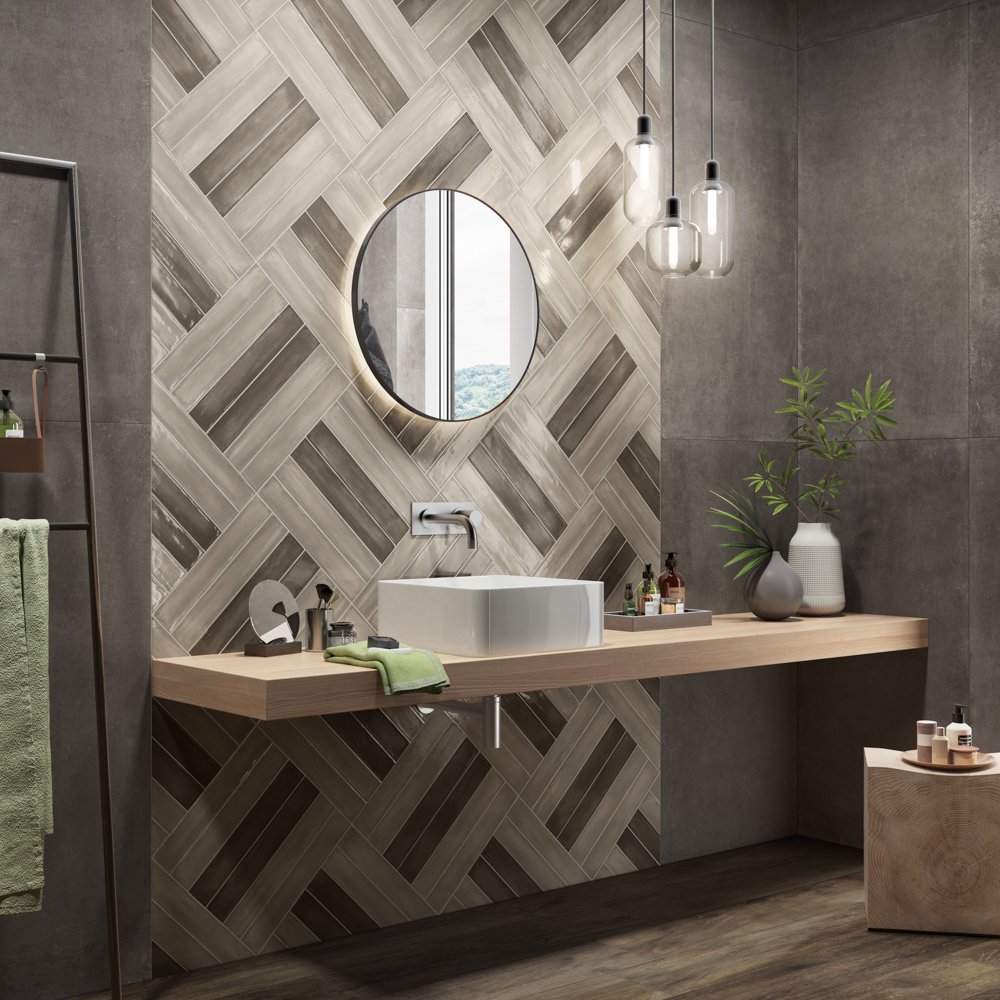
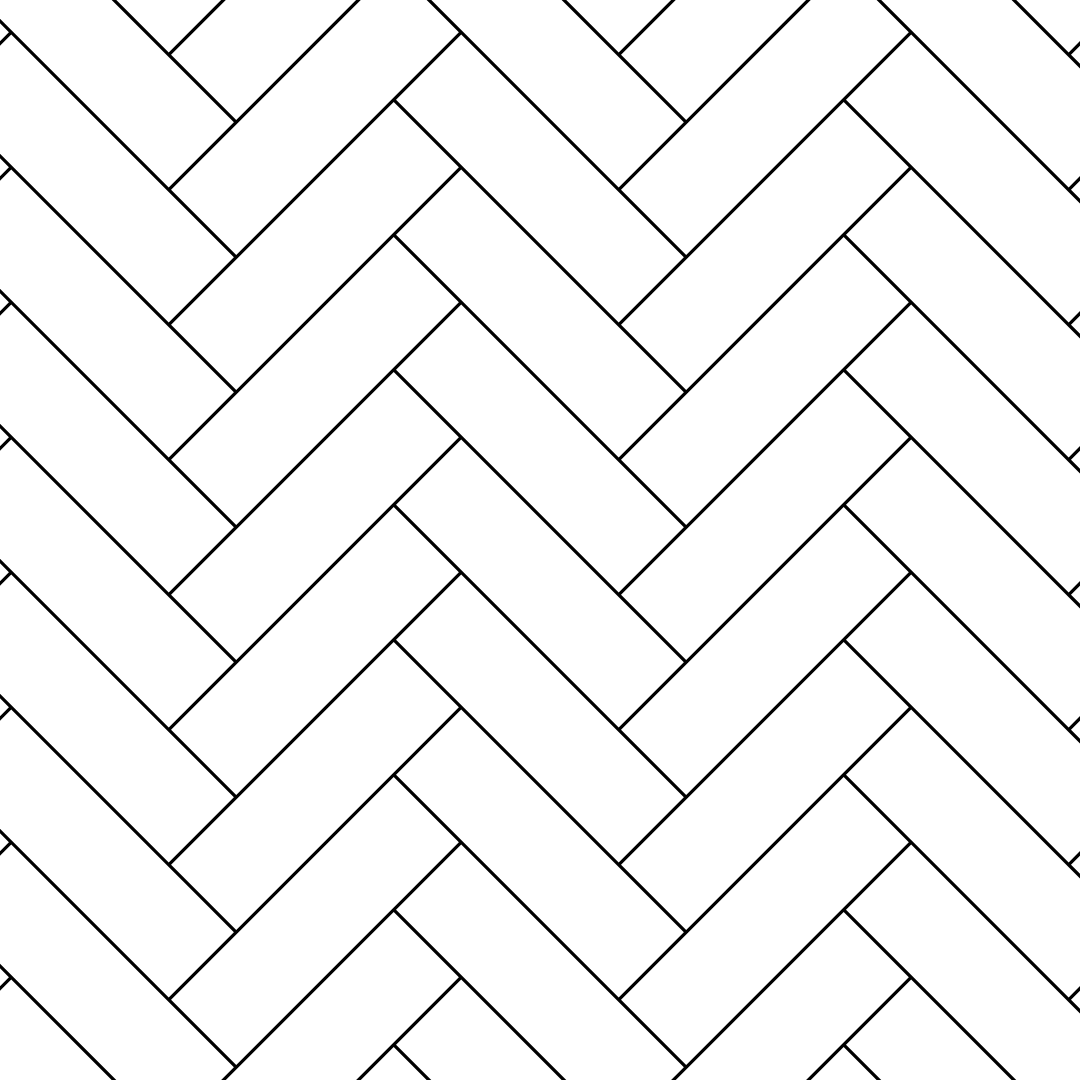
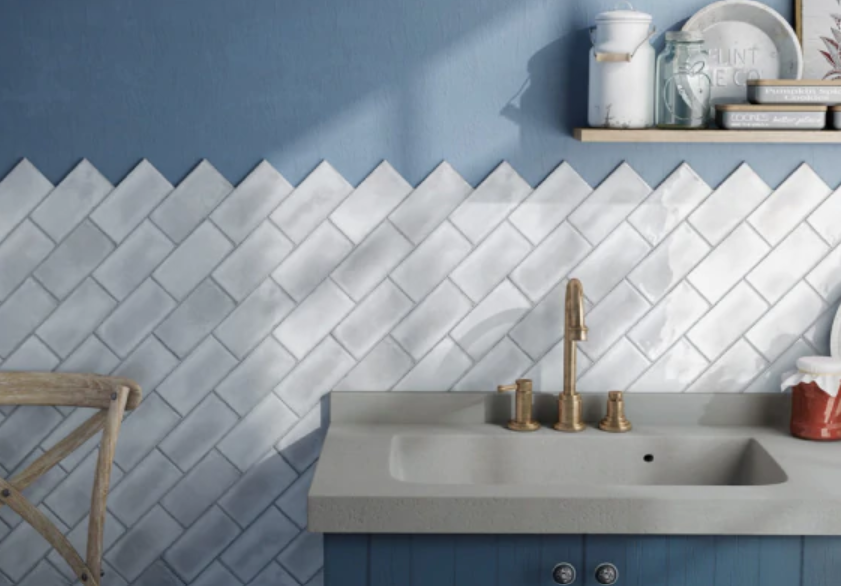
The herringbone pattern uses rectangular tiles set at 45 degrees. This classic design looks amazing on both walls and floors. You can use contrasting grout to create a unique look. Herringbone adds a touch of elegance and movement to your space.
Chevron is like herringbone but with tiles meeting at a 45-degree miter joint. It can be tricky and time consuming to install, but the end result is so worth it. If your tiles aren’t pre-cut for a chevron layout, you’ll need to cut the ends at a 45 degree angle to fit.
Image Credit: Shutterstock
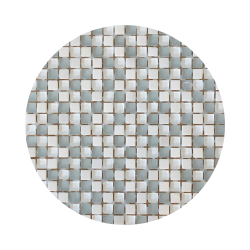
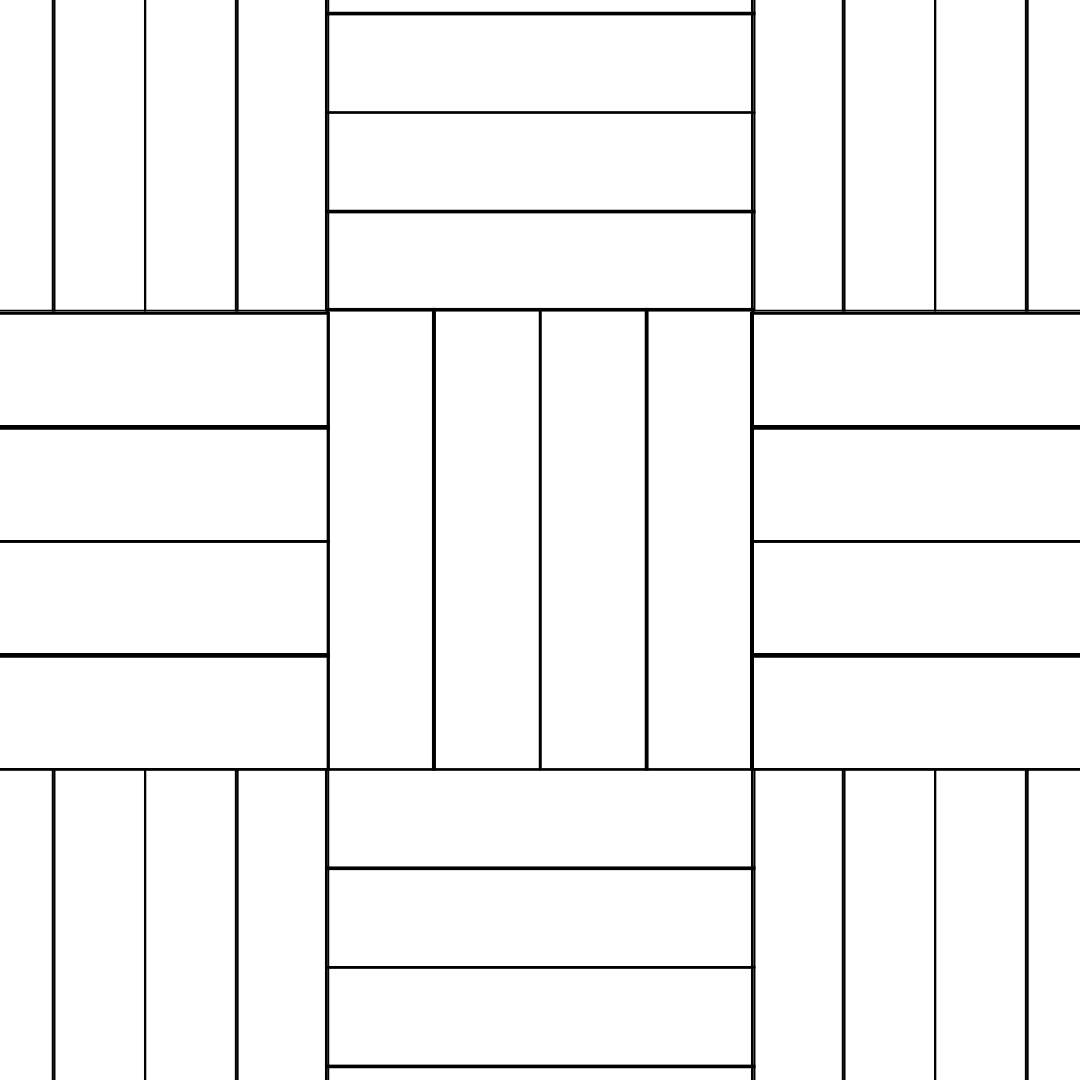
7. Basket Weave
The basket weave pattern alternates horizontal and vertical tiles to create a woven look. Tiles are laid horizontally to form a square and then laid vertically to form another square. The horizontal and vertical tiles then alternate of the following rows. It’s a great way to add texture and visual interest to any space.
A diagonal layout is similar to a running bond, except tiles are turned 45 degrees for a diagonal layout. This pattern is perfect for hiding imperfections and adding a creative touch to your floors or walls.
Image Credit: Equipe Cerámicas
9. Modular Patterns
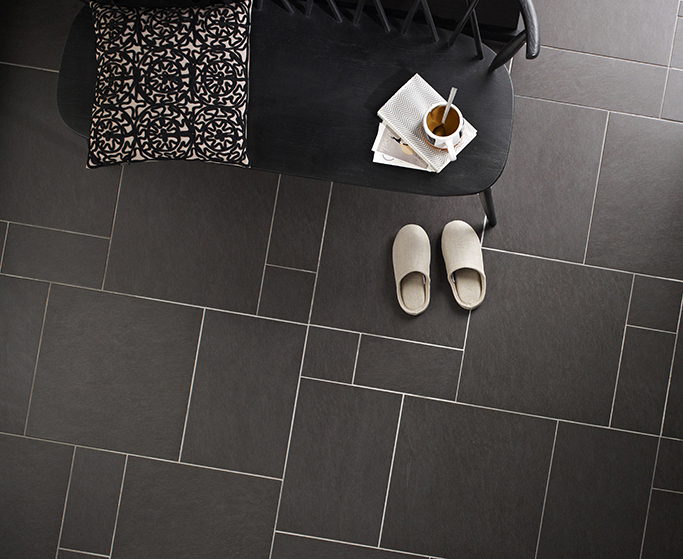
Modular patterns are formed by mixing square and rectangular tiles for a modular pattern. The possibilities are endless, and you can create a custom look based on the tile sizes and shapes you choose.
Image Credit: Tile Mountain
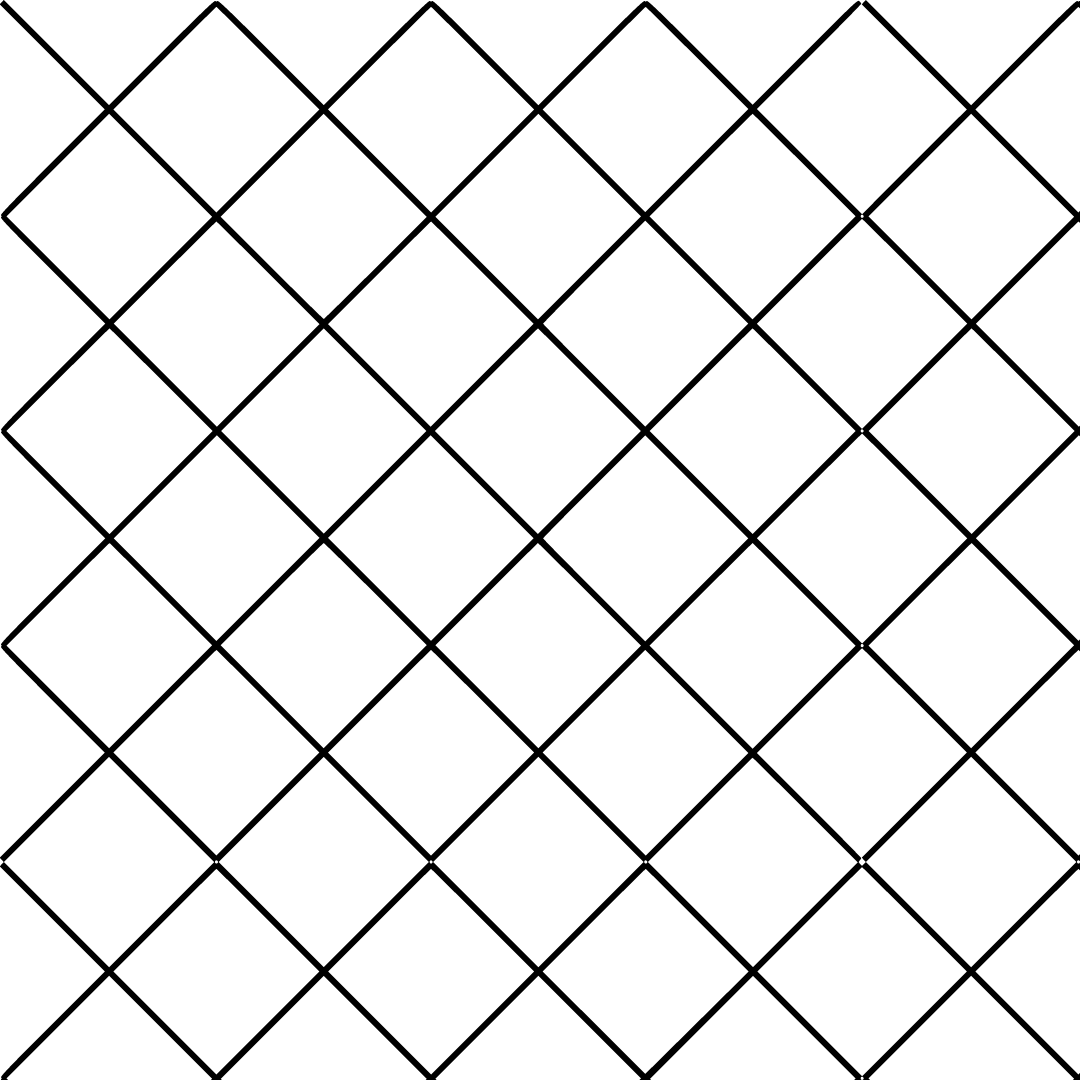
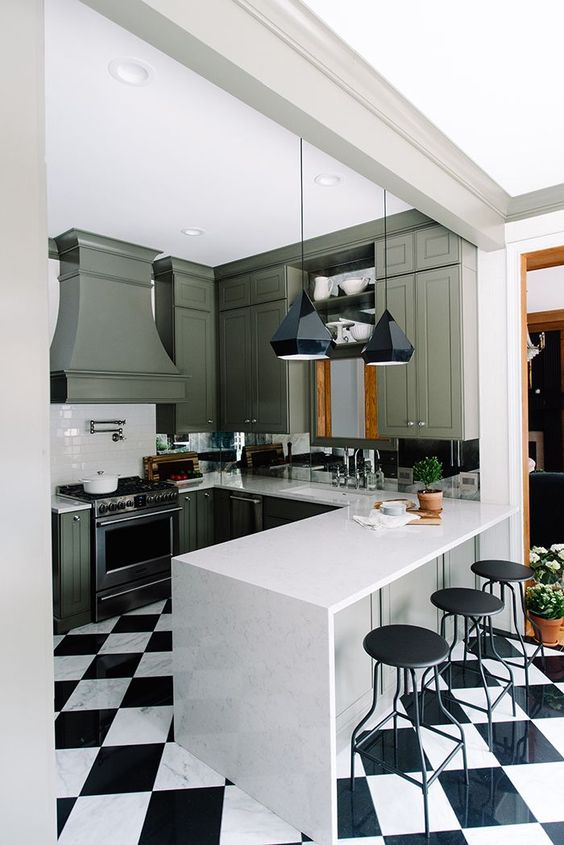
10. Diamond Pattern
Lay square tiles in a diamond pattern for a touch of timeless elegance. This layout is widely used and works well on both walls and floors. A diamond pattern can help disguise uneven surfaces and will hide imperfections if your wall or floor isn’t perfectly square.
Image Credit: The Makerista
Prefer to watch?
Ryan and Deon discuss tile layout patterns
For more inspiration, visit a Tiletoria showroom. Explore these patterns and find the perfect layout for your next project!
Pricing and stock information displayed on this site will be of the branch you select.
It will remain your default branch until you change it. All prices are inclusive of VAT.