commercial blog
What is Shade Variation or Tonality of a Tile?
Did you know that you can expect to find shade variation in porcelain and ceramic tiles?
It’s not a defect. Rather, it’s part of the porcelain and ceramic tile manufacturing process, and as printing on tiles has gotten more sophisticated, you’ll find greater ranges in patterns and shades incorporated into the design. That, in turn, better emulates what you find in natural stone or wood.
In other words, you should definitely expect to find shade variation.
What Exactly is Shade Variation?
Shade variation has to do with the appearance of the porcelain or ceramic tile you are considering. It occurs because the tile production process takes natural clay elements, bakes them at very high heat and, depending on the materials and conditions, may generate slight changes from batch to batch and dye lot to dye lot.
CTDA (Ceramic Tile Distributors Association) Rating System for Shade Variation in Porcelain and Ceramic Tiles.
The shade variation rating of a tile indicates the degree to which its colour, tone and texture may vary among individual tiles. Virtually every ceramic and porcelain tile have some degree of shade variation, even in the same production run.
The CTDA shade variation rating system for porcelain and ceramic tile consists of the following categories:
- V1 = Uniform Appearance – Differences among pieces from the same production run are minimal.
- V2 = Slight Variation – Clearly distinguishable differences in texture and/or pattern with similar colours.
- V3 = Moderate Variation – While the colours present on a single piece of tile will be indicative of the colors to be expected on the other tiles, the number of colors on each piece will vary significantly.
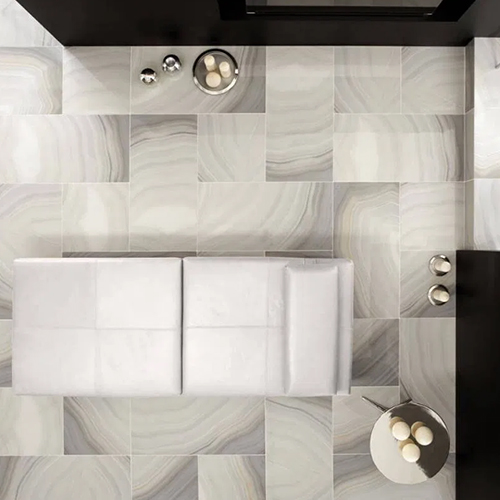
- V4 = Substantial Variation – Random colour differences from tile to tile, so that one tile may have totally different colors from that on other tiles. Thus, the final installation will be unique.
You see each represented visually in the images below:

Expected Manufacturing Variation from Lot to Lot.
As we mentioned above, ceramic and porcelain tiles are earthen products with a degree of expected variation in size, shade and texture from tile to tile within a single box or dye lot.
Furthermore, modern manufacturing techniques are so sophisticated that many tiles have been designed to have up to 40 or more different images (faces) within its production in order to better mimic the differences in colour, shade, variation, and veining inherent to natural products.
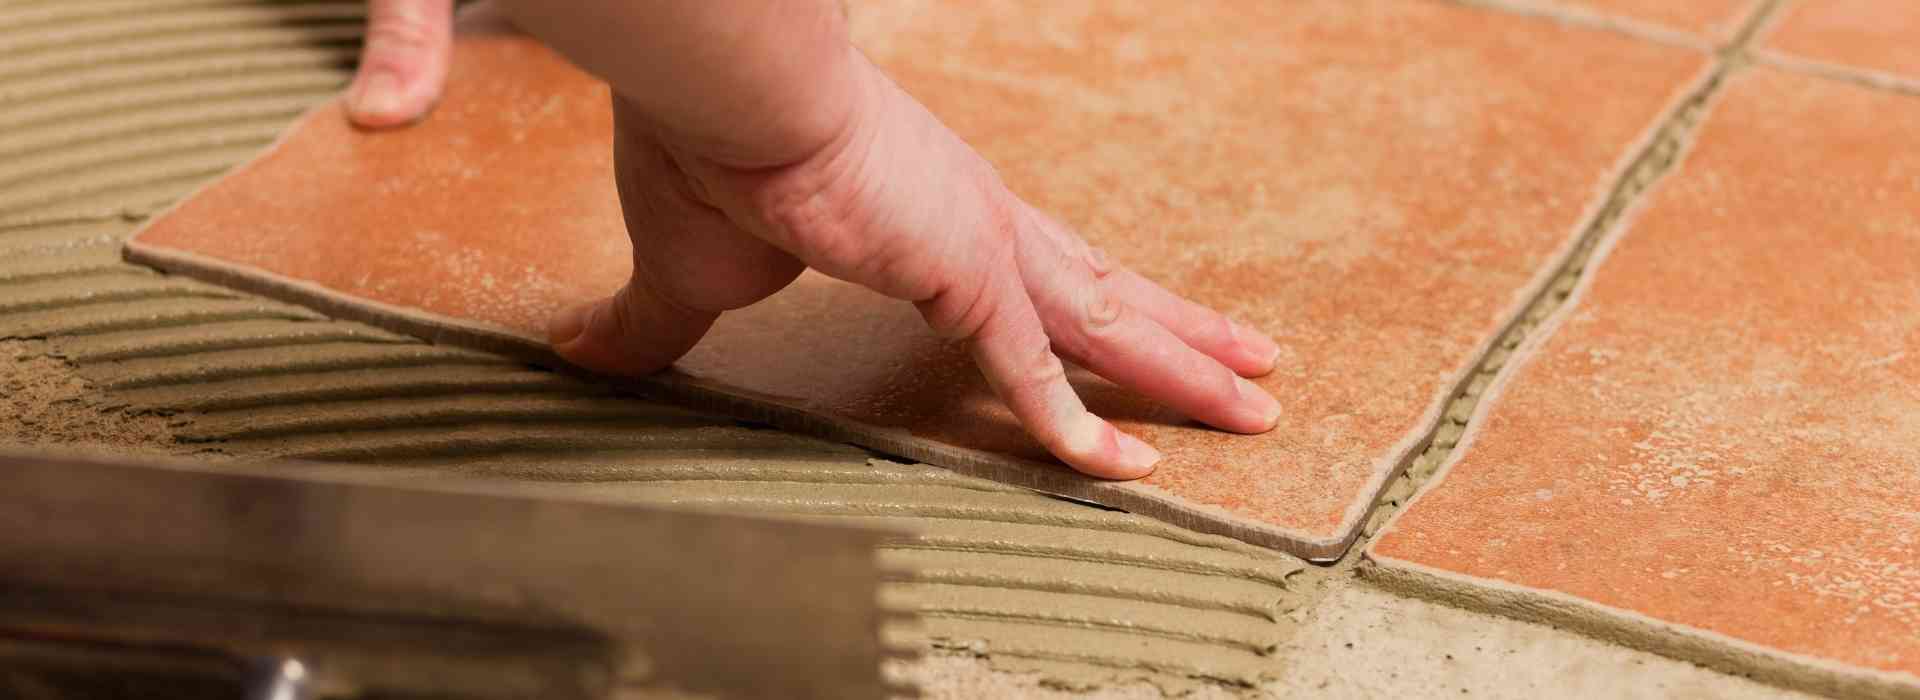
Try a Dry Layout of Your Tile to Determine If You Like the Variation.
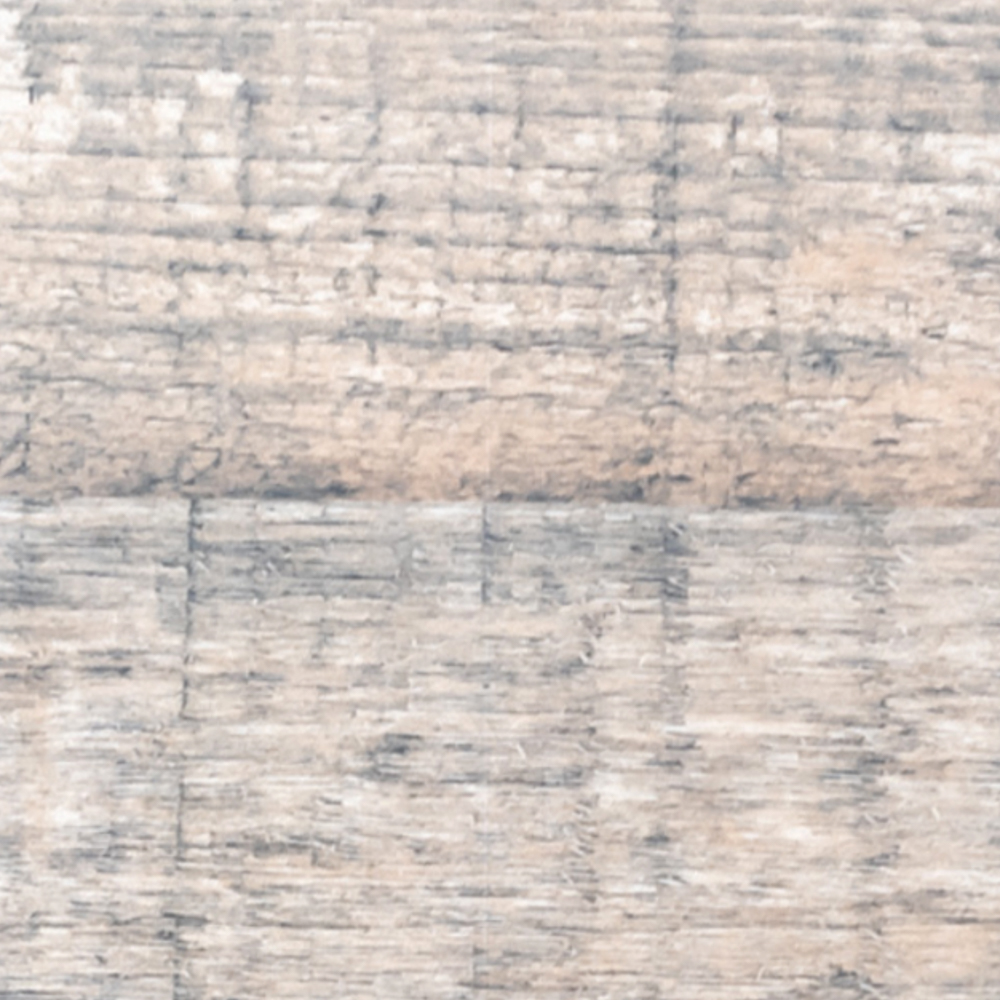
The product below has considerable variation from tile to tile. Before installing such a product, create a dry layout so you and your installer can see how the variation looks close up.
It’s much easier to explore the look in this manner than to install it, be unhappy and then want to rip the installation out and start all over again.
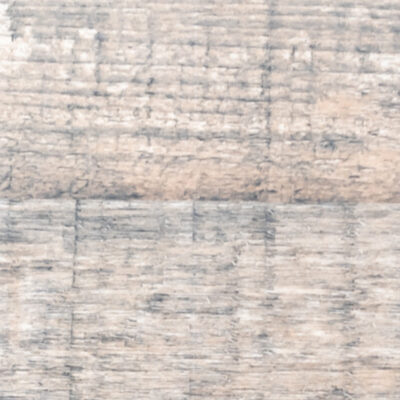
Notice the variation in the plank colors:
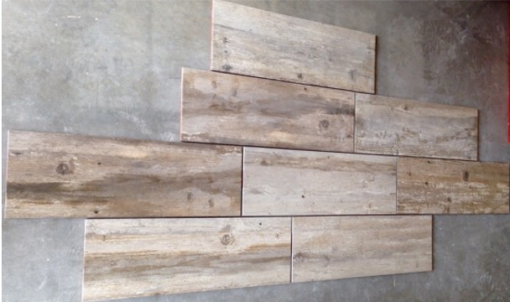
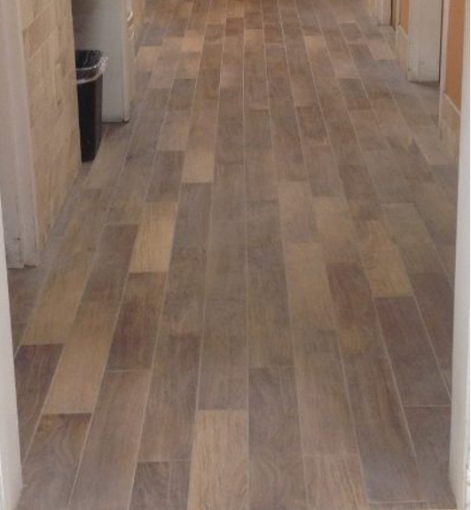
When tiles are purchased, be sure to take several tiles from one box so you can see them side-by-side (dry lay) and determine how the variation in pattern and shade appeals to you.
Why is there Shade Variation or Tonality of a Tile?
Tiles are manufactured using natural materials that are kiln fired and processed. Every time a batch of tiles are made, they tend to vary slightly in shade or size in comparison to the last batch made. The slight variances can be due to any of the following:
- Kiln temperature
- Room temperature
- Atmospheric conditions
- Slight changes in glaze mix
- Material composition (colour, density, origin)
- and many more factors
These causes are referred to as the ‘tonality’ (shade & colour) including the ‘calibration’ (size) of tiles. The natural occurring variation in tiles are inherent characteristics of ceramic and porcelain tiles. This is because tiles are made from natural clays and silicas that react differently to the manufacturing and firing process.
Sometimes the tiles that are selected at any tile showroom can be a different shade to the tiles supplied. This can occur very frequently due to the time difference between showrooms creating displays and delivering a tile to site.
How Can the Tile Appear Different?
Sometimes tiles can appear different in a tile showroom to when it is viewed on site and then in a completed space. Factors affecting this can be:
- Lighting (cool or warm lights)
- Shadows created by furniture & natural light
- Your choice of grout colour
- Paint colour
- Polished or Matt finished tiles. Even Matt tiles can reflect or absorb the colour of surrounding materials
- Size of the room
- and much more.
It is important to remember that a tile’s appearance can change dramatically as soon as a room is completed. It is important to take samples home to preview as close as possible how the tile will appear in the completed space with any other colour swatches such as wall paint, countertop material and other materials used in the space.
If you have any question about Shade Variation and Tonality in Tiles, you are most welcome to contact our Tiletoria Showroom’s to speak to our experts. Our experts offer technical training that is available online or in office with your architectural team. We are also SAIAT accredited to issue CPD credits.

commercial blog
Lippage is a common tiling error that can result in unsightly results. Here’s how to avoid it.
What is Lippage?
Lippage refers to an uneven floor surface caused by tiles that are not laid at a uniform level. It occurs when one tile is higher or lower than its adjacent tile and is more likely when dealing with large format or wood-look plank tiles.
When looking at the image below, notice how some tiles seem higher than others. The tile planks don’t form a flat and even surface.

Lippage is a serious matter because other than being unsightly, it can be a tripping hazard. These differences in height or perception of differences are influenced by many factors such as:
- Actual allowable thickness variation of the tiles when judged in accordance with manufacturing standards.
- The allowable warpage of the tile modules.
- The spacing or separation of the tiles, which would influence a gradual or abrupt change in elevation. This is essentially the thickness of the grout lines.
- The angle of natural or artificial light accentuating otherwise acceptable variance in modules. The customer sees what appears to be serious lippage but it is in fact just shadows cast by low angle light.
- Highly reflective surfaces in the tile accentuating otherwise acceptable variance in the modules. Similar to the above but caused by reflective properties of the tiles.
- Poor installation. This is by far the most common cause of lippage. If the subfloor is uneven, if inadequate adhesive has been used to bed the tiles, if grouting is too thin, or if the tiles have simply not been bedded down correctly. All these can lead to lippage.

Although tiles may look flat at first glance, if you look closely, they probably aren’t. This is not to say they don’t conform to the international standards (warpage), but the very shape of these tiles makes their flatness all the more critical. Basically, with these tiles, the centre is higher, i.e. they are crowned in the middle. This becomes more of a problem when you offset (overlap) them. Variation should not exceed 2mm (depending on size of tile) over the length but this is still enough to cause problems.
Test warpage by putting two tiles face-to-face and you can see how much bowing there is and measure it. Typically, allowable warping is half a percent of the length. So, for a 1,2m plank tile the allowable warpage is 6mm.
The 3 Hazards of Lippage
- Lippage Can Be Grounds for an Installation Job to Be Rejected
One or more of the tile standards has been violated and can be grounds for the job to be rejected.
- Lippage Can Lead to Serious Injury
A serious injury may occur if someone trips on the high tile. In this case, the installer is responsible if someone falls and could be involved in a lawsuit.
- Lippage Looks Bad
And finally, it looks really bad for the installer, to the customer and for the entire tile industry. In the photo below, you see evidence of lippage where the movement of the chair leg across the high tile edge has caused it to chip in several places. As it is, the floor has become an eyesore.

How to Avoid Lippage
-
Subsurface flatness
If the sub floor isn’t really flat, any variation will be accentuated in the tiles. The subfloor should have no greater variation than 6mm in 3m. Also, the larger the tile, the greater the reflection of the unacceptable subsurface tolerance will show up as increased lippage in the finish. The subsurface tolerance is probably the tile contractor’s biggest concern with regards to lippage.
Generally, surface prep is the first step to avoiding lippage. It’s truly critical to ensure that the substrate is flat before installing tiles.
Surface prep, whether it is wall or floor is critical to the completed job being acceptable to the end user. If the substrate is not flat, the finished surface will mirror the irregular substrate which is especially true when tiles are installed over concrete block walls as you see in the photo above.
If your floor isn’t flat this will accentuate the problems with the crown of the tiles.
-
Offset
By doing a 50% offset, where the middle of a tile is exactly in line with the grout joint of the next row, you maximise the amount of unevenness, or lippage, between the tiles. In fact, unless the tile manufacturers say otherwise, the American National Standards Specifications for the Installation of Ceramic Tile sets the limit at 33% (one third) maximum offset. This means that on a 600mm long tile the maximum offset is 200mm.
A wider stagger might cause lippage, because longer tiles are often crowned in the middle.

If you have any question about Lippage, you are most welcome to contact our Tiletoria Showroom’s to speak to our experts. Our experts offer technical training that is available online or in office with your architectural team. We are also SAIAT accredited to issue CPD credits.
commercial blog
Looking to learn more about tiling or brush up on your existing knowledge? Our technical cheat sheet has got you covered.
Different firing temperatures
Naturally, different tile finishes are “fired” at different temperatures in the kiln.
- Ceramic is “fired” in the kiln between 600 and 800 degrees.
- Porcelain is “fired” in the kiln between 1093 and 1300 degrees.
Porcelain tiles reach vitrification at 1093˚c in accordance to EN/I.S.O. standard.
- At lower temperature tiles would be rated as ceramic.
- A tile may be called porcelain if it absorbs less than 0.5% water by volume as per ISO standard.
- In terms of the South African Standard SANS 13006:2003, a “Porcelain Tile” with a water absorption around 1% falls into the “Glazed Porcelain” category “Bib”.
Why Fire the clay?
- The process of firing drives out water and hardens the clay while transforming some of the molecules in the paste into a form of low-order glass. The molten glass fills up the spaces between the clay particles.
- The process is known as vitrification, which is a name for turning something into glass.
Porcelain is denser than ceramic. Less voids means less abortion. If all of the spaces between the clay particles are filled, the resulting ceramic becomes essentially waterproof, thus becoming porcelain.
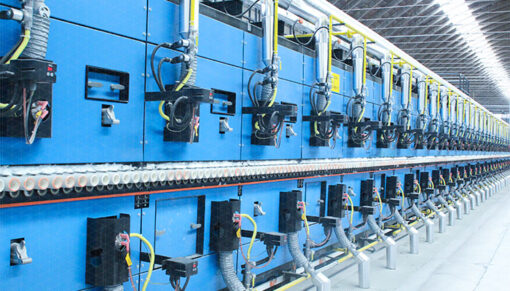
Industrial Kiln
Ceramic or Porcelain will come in 4 main tile body types:
- Glazed
- Colour Body
- Double Loaded
- Full Body
Slip Ratings
Dry Slip Rating
- R9 (slope angle of 6° to 10°)
- R10 (slope angle of 10° to 19°)
- R11 (slope angle of 19° to 27°)
- R12 (slope angle of 27° to 35°)
Wet Slip Rating
The ABC Rating is the rating scale used to measure* wet floor conditions such as swimming poos where bare feet are the norm.
DIN 51097: 1992 Classification is the determination of anti-slip properties; wet loaded barefoot areas; walking method; ramp test German National Standard 1992 – fully recognised and adopted in the UK
ABC Rating Value PTV (Pendulum Test Value) Or
DIN 51097: 1992 Classification SRV (Slip Resistance Value)
A (not to be used in wet area) 21 – 31
B (Can be used semi wet area) 32 – 42
C (Can be used in full wet area) 45+
PEI rating (any glazed tile) Porcelain Enamel Institute
PEI 1 wall only
PEI 2 wall only
PEI 3 Very light traffic residential
PEI 4 Residential/Commercial medium traffic
PEI 5 Commercial High Traffic
MOH (method of Hardness) Full body tile (tile with no glaze)
Deep scratch abrasion test
Tile should be less than 175 mm3
Group Classification
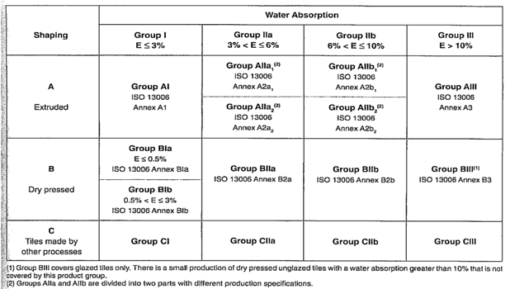
Group Classification Water Absorbtion
Prevention of Moisture Expansion & Cracks
Allow adequate drying times before tiling can commence:
Floors 4-6 weeks (Usually) and subject to the below list.
Screeds/plasters 2-3 weeks before tiling (Usually) and subject to the following:
- Proper bedding of the tiles into the adhesive
- Never tile over a construction joint or a door jam
- Bond instead of water outdoors
- Bond into wall grout in we areas
- Perimeter joints (wall and floor)
- Movement joint intervals
- Know where construction joints are
- Don’t lay over door jam
- Correct size grout joint
- Correct adhesive
- Perimeter joint – 10mm
- Expansion joint – Every 5m
Some more important tips
Tiles on Wood (walls)
- Clean surface
- Key Coat (neat)
- Flex
- Expect Grout Cracks
Tiles on Tile (floor)
- Clean surface
- Acid Wash
- Don’t chip
- Key Coat Slurry
- Adhesive

Tiles on paint
- Clean surface
- Indoor – Chip 80%
- Exterior – remove paint
- Key Coat slurry
- Adhesive
Tiles on Fiberglass
- Sand Surface
- Clean surface
- Superprime
- Key Coat slurry
- Goldflex
Tiles on Bitumen
- Remove 100%
- Key Coat (neat)
- Or 70mm topping
Cleaning and maintenance for Porcelain and Ceramic
Initial:
During grouting make sure all excess grout is removed from the surface with a damp clean cloth or sponge and fresh clean water. Washing grout and residues off the surface with dirty water and/ or cloth or sponge does not clean the surface. Any grout residue will impair the finish after sealing and will result in a very expensive repair. Clean with Tile and Floor Care Grout Off (acid wash) & Easy Clean (neutralizer) to ensure a residue free surface.
Maintenance:
Use Tile and Floor Care Quick Clean as the daily tile cleaner. This product will not leave a residue on the surface. It is important to ensure the water is changed regularly. The anti-slip tiles, by nature, will trap dirt more easily and it may be necessary from time to time to scrub them with Easy Clean. Ensure this is rinsed well with fresh clean water.
If you have any technical questions relating to tiles, you are most welcome to contact our Tiletoria Showroom’s to speak to our experts. Our experts offer technical training that is available online or in office with your architectural team. We are also SAIAT accredited to issue CPD credits.