blog, commercial blog, how to articles, walls
Mosaic tiles have an undeniable charm that can add a touch of artistry and sophistication to any space. Whether you’re planning to transform your kitchen backsplash, bathroom, or any other area in your home, installing mosaic tiles can be a fulfilling DIY project if done correctly. In this comprehensive guide, we’ll walk you through the steps to install mosaic tiles like a professional, ensuring a stunning and lasting result for your home improvement project.
Why Choose Mosaic Tiles?
Before we dive into the installation process, it’s essential to understand why mosaic tiles are a popular choice for homeowners. Mosaic tiles are characterized by their small size and intricate designs. Here are some reasons to consider them:
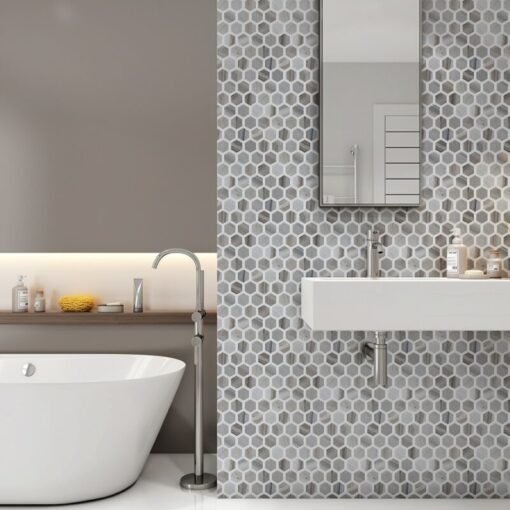
- Visual Appeal: Mosaic tiles come in a wide range of colours, materials, and patterns, allowing you to create unique and eye-catching designs. Their small size often makes them ideal for detailed and intricate patterns.
- Versatility: You can use mosaic tiles in various applications, including backsplashes, showers, floors, and even as decorative accents. They can be applied to almost any surface that can support tiles.
- Durability: Mosaic tiles are typically made from materials like glass, ceramic, porcelain, and natural stone, making them durable and long-lasting. They are resistant to moisture, stains, and wear and tear.
- Easy Maintenance: Mosaic tiles are relatively easy to clean and maintain, thanks to their non-porous surface. A simple wipe-down or mopping will keep them looking new.
- Value Addition: Installing mosaic tiles can increase the value of your home. Potential buyers often find them attractive and appreciate the attention to detail they bring to a space.
Now that you know why mosaic tiles are a great choice let’s get into the step-by-step guide for a professional installation.
Before you begin the installation, gather the following tools and materials to ensure a smooth and efficient process:
Tools:
– Mosaic tiles
– Tile adhesive
– Tile spacers
– Tile cutter or nipper
– Notched trowel
– Grout
– Grout float
– Tile sponge
– Bucket for mixing grout
– Level
– Measuring tape
– Pencil
– Safety glasses and gloves
– Drop cloth or plastic sheeting
– Sandpaper
– Masking tape (if needed)
Step 1: Prepare the Surface
Before you start installing mosaic tiles, it’s crucial to ensure that the surface you’re tiling is clean, smooth, and free from any dust or debris. The quality of your installation depends on a well-prepared surface. If you’re working on a wall, patch any holes or imperfections. If you’re tiling a floor, make sure it’s level.
Tips:
– Repair any existing damage or imperfections on the surface before starting.
– Sand down rough or uneven areas to create a smooth and even substrate for your tiles.
– Cover surrounding areas with a drop cloth or plastic sheeting to protect them from adhesive and grout spills.
Step 2: Plan Your Layout
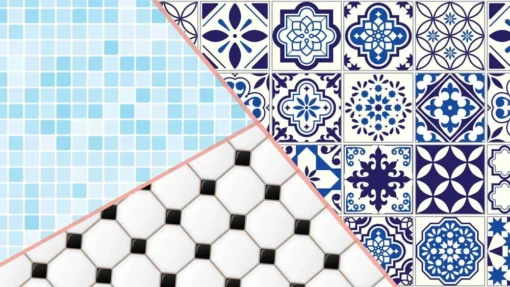
Before you start attaching tiles, it’s a good idea to plan the layout to avoid potential problems later. Here’s how to do it:
- Dry-Fit Your Tiles: Lay out your mosaic tiles on the surface without adhesive to get a sense of how they will look. Experiment with different arrangements and patterns to find the one that suits your aesthetic preferences.
- Measure and Mark: Use a measuring tape and pencil to mark the center point of your surface. This will serve as your starting point for tile installation.
- Create a Grid: Use a level and pencil to create a grid of guidelines that intersect at the center point. This grid will guide your tile placement and ensure a balanced design.
- Adjust and Cut Tiles: Depending on your layout, you may need to trim tiles to fit along the edges and borders of your surface. Use a tile cutter or nipper for this purpose.
Tips:
– Experiment with different arrangements to find the one that suits your aesthetic preferences.
– Make sure that the layout is symmetrical and well-balanced, especially if you’re working with a focal point like a backsplash or a decorative feature.
Step 3: Mix Tile Adhesive
Next, you’ll need to prepare the adhesive that will hold your mosaic tiles in place. Follow the manufacturer’s instructions on the adhesive packaging to create a mixture with the correct consistency.
Tips:
– Mix small batches of adhesive as you work to prevent it from drying out before you can apply the tiles.
– Wear safety glasses and gloves when handling adhesive to protect your eyes and skin.
Step 4: Apply Tile Adhesive
With your adhesive mixture ready, it’s time to apply it to the surface in preparation for your mosaic tiles. Here’s how:
- Work in Small Sections: Begin by spreading a layer of adhesive on a small section of the surface. The idea is to work on an area you can tile in about 15-20 minutes to prevent the adhesive from drying out.
- Use a Notched Trowel: Use a notched trowel to spread the adhesive evenly over the surface. The notches on the trowel create ridges that help the tiles adhere properly. The size of the notches should match the size of your tiles.
- Apply at a 45-Degree Angle: Hold the trowel at a 45-degree angle and apply pressure to ensure that the adhesive is evenly distributed.
Tips:
– Work methodically and avoid applying adhesive to a larger area than you can tile within the specified time to maintain adhesive tackiness.
– Use the notched side of the trowel to create ridges in the adhesive for better tile adhesion.
Step 5: Install Mosaic Tiles
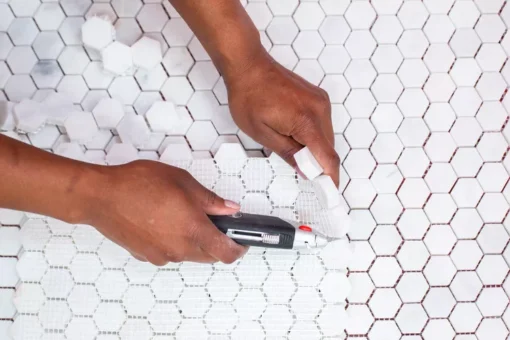
Now comes the exciting part – attaching your mosaic tiles to the adhesive. Follow these steps for a professional-looking installation:
- Press Tiles into Adhesive: Carefully press each mosaic tile into the adhesive, following the grid you created during the layout planning. Ensure that each tile is level and properly aligned with the others.
- Use Tile Spacers: Insert tile spacers between the tiles to maintain even gaps. The size of the spacers will depend on your design and the desired spacing between tiles.
- Trim Tiles When Necessary: You may need to trim tiles to fit along the edges or around obstacles like electrical outlets or plumbing fixtures. Use a tile cutter or nipper for this purpose.
Tips:
– Check your layout and grid lines regularly to ensure that you’re staying on track and that your mosaic design remains balanced.
– Double-check tile alignment and spacing to create a polished look.
Step 6: Allow Adhesive to Dry
After you’ve successfully attached all your mosaic tiles to the adhesive, it’s crucial to allow the adhesive to dry thoroughly. Follow the manufacturer’s instructions for the recommended drying time, which is typically around 24 hours. The drying time may vary based on factors like humidity and temperature.
Tips:
– Avoid any physical contact with the tiles during this drying period to prevent accidental displacement.
Step 7: Prepare Grout
Grout is the material that fills the gaps between your tiles and gives your installation a polished, finished look. Here’s how to prepare it:
- Select the Right Grout: Choose a grout colour that complements your mosaic tiles and the design you’ve created. Grout comes in various colours, so take your time to select the one that enhances your design. Access our guide to Choosing The Right Grout Colour here.
- Mix the Grout: Follow the manufacturer’s instructions to mix your grout. Typically, you’ll need to combine the grout powder with water until you achieve a smooth, thick consistency, similar to peanut butter.
Tips:
– Make sure to choose the right colour of grout that complements your mosaic tiles.
– Prepare a reasonable amount of grout to work with, as it should be used quickly to maintain its workability.
Step 8: Apply Grout
Applying grout is a crucial step that will not only fill the gaps between your mosaic tiles but also ensure their stability. Here’s how to do it:
- Work in Small Sections: Just as with adhesive, it’s best to work in small sections when applying grout. This allows you to manage the process more efficiently.
- Spread Grout: Use a grout float to spread the grout evenly over the tiles. Hold the float at a 45-degree angle to the tiles to pack the grout into the gaps.
- Hold the Float at an Angle: To ensure the grout gets into the gaps and covers the entire tile surface, hold the float at a slight angle and apply pressure as you move it.
Tips:
– Work methodically to ensure that the grout is evenly applied to all areas of your mosaic tiles.
– Don’t rush this step, as it’s essential to get the grout into all the gaps and ensure a secure bond.
Step 9: Remove Excess Grout
Once you’ve applied the grout, it’s time to clean up the excess to reveal your beautifully installed mosaic tiles. Here’s what you need to do:
- Dampen a Tile Sponge: Wet a tile sponge and wring out the excess water. You want the sponge to be damp but not soaking.
- Wipe the Tiles: Gently wipe the tiles with the damp sponge to remove excess grout from the tile surfaces. Rinse the sponge frequently to avoid smearing grout over the tiles.
- Clean Grout Lines: Use the sponge to shape and clean the grout lines, ensuring they are even and smooth.
Tips:
– Work carefully but quickly to prevent the grout from hardening on the tiles.
– Rinse the sponge thoroughly to avoid spreading grout residue on the tiles.
Step 10: Final Cleaning
Once you’ve removed most of the excess grout from the tiles, allow the grout to set for a short period before doing a final cleaning. Here’s how to do it:
- Allow Grout to Set: Let the grout dry for a short time, typically for about 15-30 minutes, or as recommended by the grout manufacturer. The grout should become slightly hazy.
- Buff Tiles: Using a clean, dry cloth or a lint-free rag, gently buff away the remaining grout haze from the tiles. This will reveal the full beauty of your mosaic tiles.
Tips:
– Be patient while buffing the tiles to avoid scratching the surface.
Step 11: Seal the Grout (Optional)
While this step is optional, it’s recommended if you want to protect your grout from staining and make maintenance more manageable. Sealing the grout creates a barrier that prevents moisture and debris from penetrating the porous material. Follow these steps if you choose to seal your grout:
- Select a Grout Sealer: Choose a high-quality grout sealer that suits your needs. Grout sealers come in two main types: penetrating sealers and membrane-forming sealers. Penetrating sealers are absorbed into the grout, providing protection without altering its appearance, while membrane-forming sealers create a protective film over the grout.
- Apply the Sealer: Follow the manufacturer’s instructions for applying the sealer. Typically, you’ll use a brush, roller, or applicator bottle to spread the sealer over the grout lines. Be careful not to get sealer on the tile surfaces.
- Wipe Off Excess Sealer: After allowing the sealer to set for a few minutes (as per the manufacturer’s recommendations), use a clean, dry cloth to wipe off any excess sealer from the tile surfaces.
Tips:
– Make sure the grout is fully dry before applying the sealer.
– Some sealers may require multiple coats, so be sure to follow the product’s specific instructions.
Step 12: Enjoy Your Newly Tiled Surface
With the grout fully cured, which typically takes 24-72 hours, your mosaic tile installation is complete. Step back and admire your professional-looking mosaic tile work that enhances the beauty of your space. You’ve now added a touch of artistry and sophistication to your home.
Tips:
– Clean and maintain your mosaic tiles regularly to keep them looking their best.
– Consider using a tile and grout cleaner to remove dirt and stains without damaging your installation.
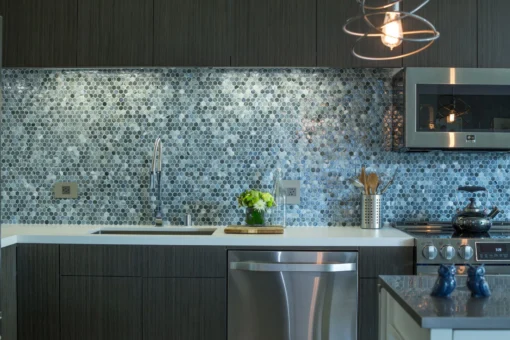
Installing mosaic tiles may seem like a daunting task, but with the right tools, materials, and a methodical approach, you can achieve professional-looking results. The beauty of mosaic tiles lies in their ability to add a unique and elegant touch to any room, and this step-by-step guide can help you achieve just that.
Whether you’re a seasoned DIY enthusiast or a first-time tiler, follow this guide, take your time, and enjoy the process. With patience and attention to detail, your mosaic tile installation will be a stunning addition to your home, elevating the aesthetics of your space and adding value to your property.
Now that you’ve learned how to install mosaic tiles like a pro, it’s time to roll up your sleeves and get started on your own tiling project. Whether you’re revamping your kitchen, upgrading your bathroom, or creating a beautiful mosaic masterpiece, you’re well-prepared for success. Happy tiling!

blog, walls
Mosaic tiles, with their rich history dating back to ancient Roman baths, have always been a beloved element of interior and exterior design. These miniature works of art come in various shapes, sizes, and colours, making them an ideal choice for enhancing different spaces. Among the plethora of mosaic tile options available, geometric mosaic tiles stand out for their unique ability to bring depth, character, and sophistication to any room.
In this blog, we’ll explore the boundless versatility of geometric mosaic tiles and how they can transform various spaces in your home.
Geometric Mosaic Tiles: A Timeless Choice
Geometric patterns have an enduring appeal, offering a timeless and elegant aesthetic that can seamlessly blend with various interior design styles, whether contemporary, classic, or eclectic. Geometric mosaic tiles, characterized by their symmetrical designs and captivating patterns, have the power to captivate the eye and infuse creativity and order into any space.
Let’s have a look at 8 different styles and expressions around your home!
1. The Kitchen: A Culinary Canvas
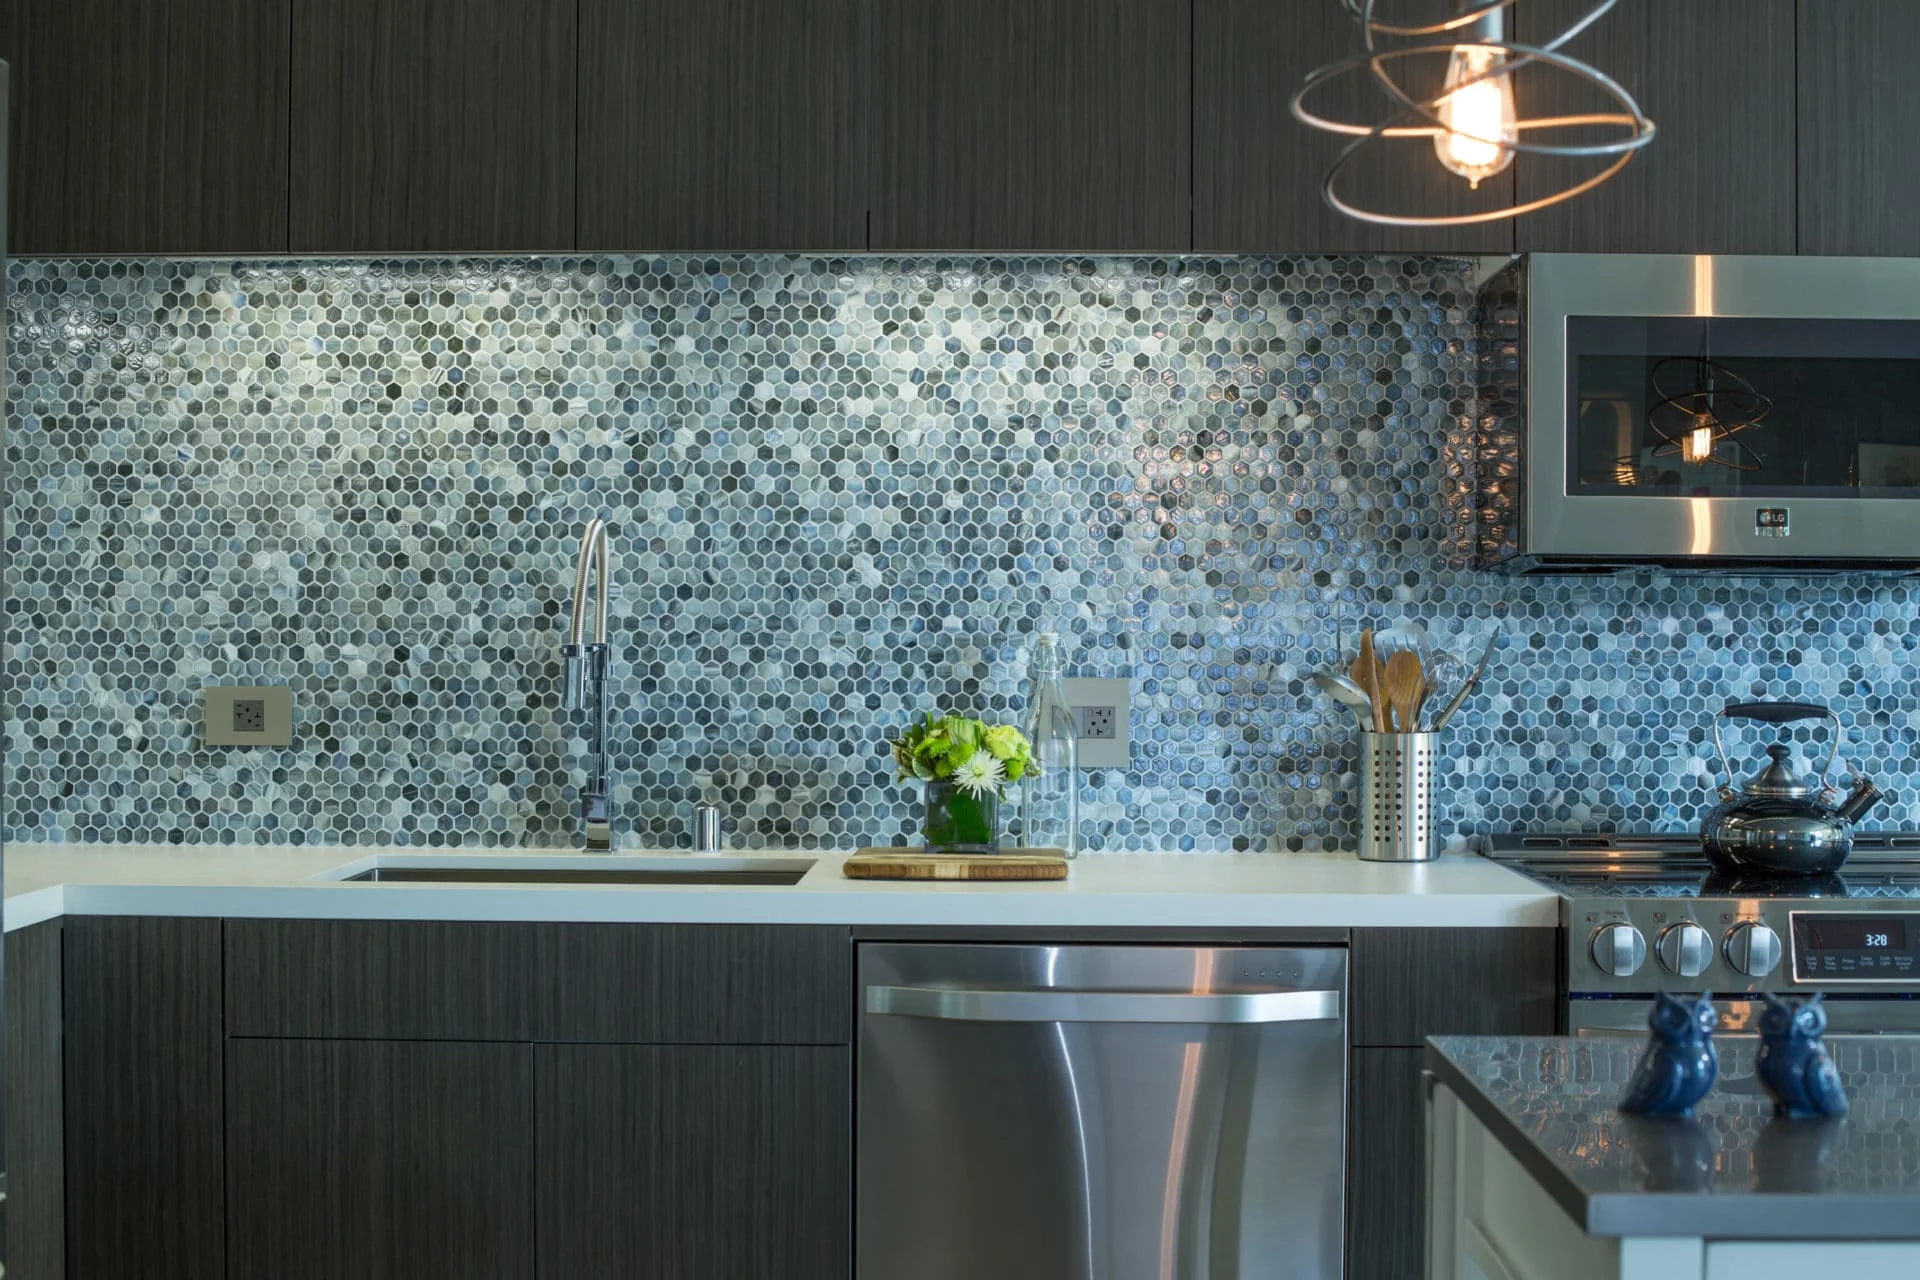
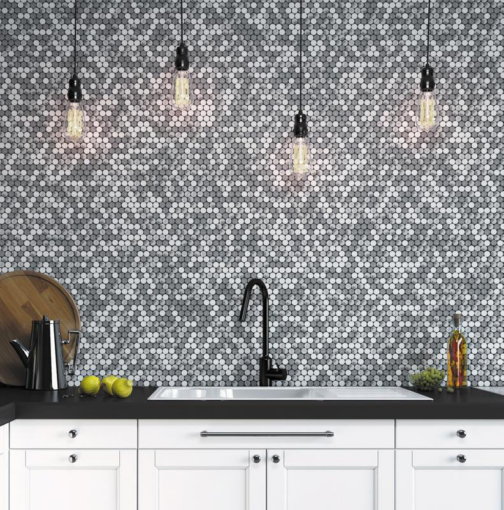
The kitchen is often considered the heart of the home, where functionality and aesthetics must coexist harmoniously. Geometric mosaic tiles can serve as a stunning backsplash, transforming a mundane cooking space into a culinary canvas. Whether you opt for hexagonal, herringbone, or Moroccan-inspired geometric patterns, these tiles breathe life into your kitchen, adding depth to the room and providing the perfect backdrop for your culinary adventures.
2. The Bathroom: Spa-Like Serenity
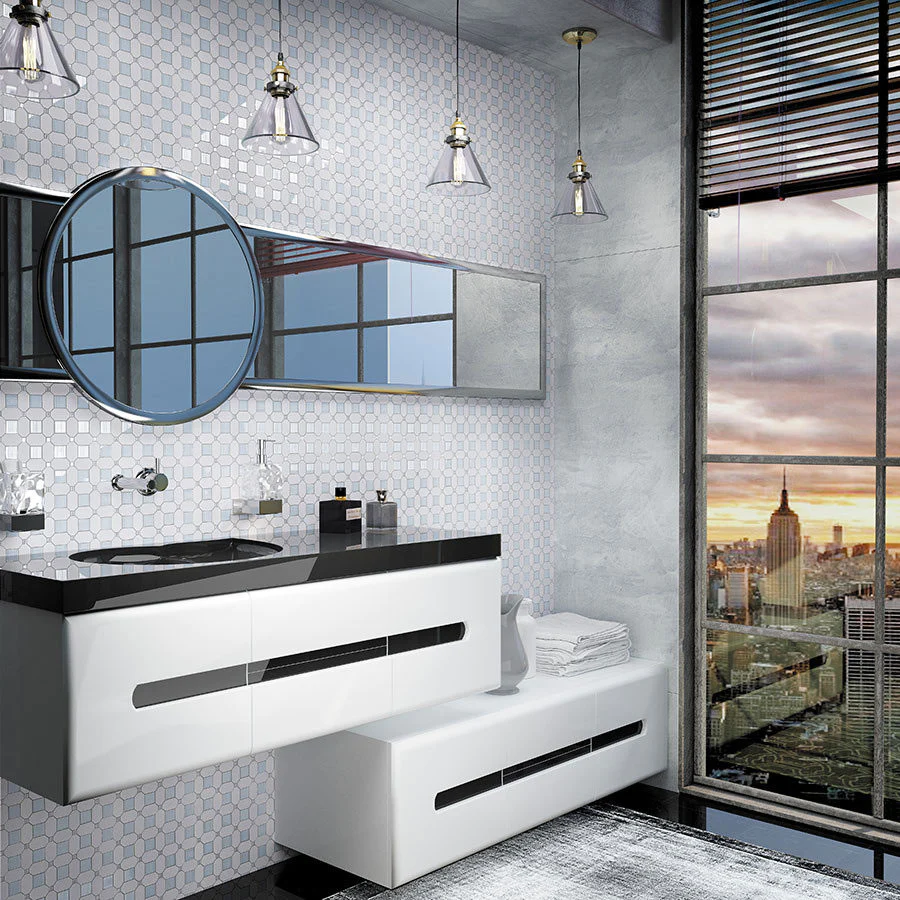
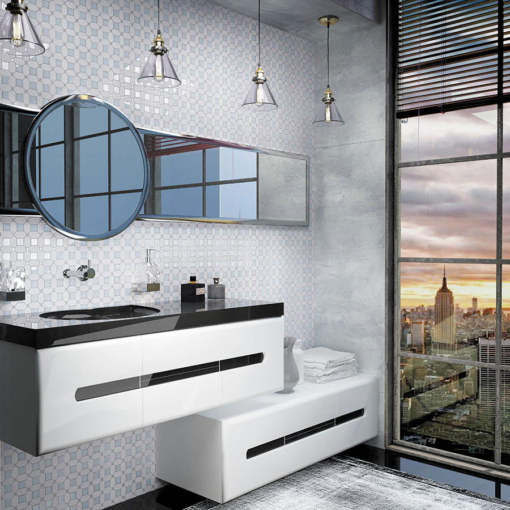
The bathroom is another space where geometric mosaic tiles can shine. These tiles can be used on floors, walls, or as accents to create a spa-like atmosphere that encourages relaxation and rejuvenation. A monochromatic bathroom with white or light-coloured geometric tiles exudes serenity and cleanliness. On the other hand, bold and vibrant geometric patterns can infuse energy into your morning routine, making the bathroom a place for both cleansing your body and refreshing your mind.
3. The Living Room: Artistic Expression
The living room is often a showcase of personal style and creativity. Geometric mosaic tiles can be used on the floor or as a feature wall to create a sense of artistic expression. You can opt for large, dramatic geometric patterns to make a bold statement or choose subtle, understated designs to complement your existing decor. These tiles play a pivotal role in defining the atmosphere of your living room, from a formal and elegant setting to a relaxed and bohemian environment.
4. The Entryway: First Impressions
The entryway is the first thing your guests see when they step into your home. It’s an opportunity to make a memorable first impression, and geometric mosaic tiles can help you achieve just that. An entryway adorned with a striking geometric pattern on the floor sets the tone for the rest of your home. It’s not only visually appealing but also functional, capable of handling heavy foot traffic while maintaining its beauty.
5. The Outdoor Space: Al Fresco Ambiance
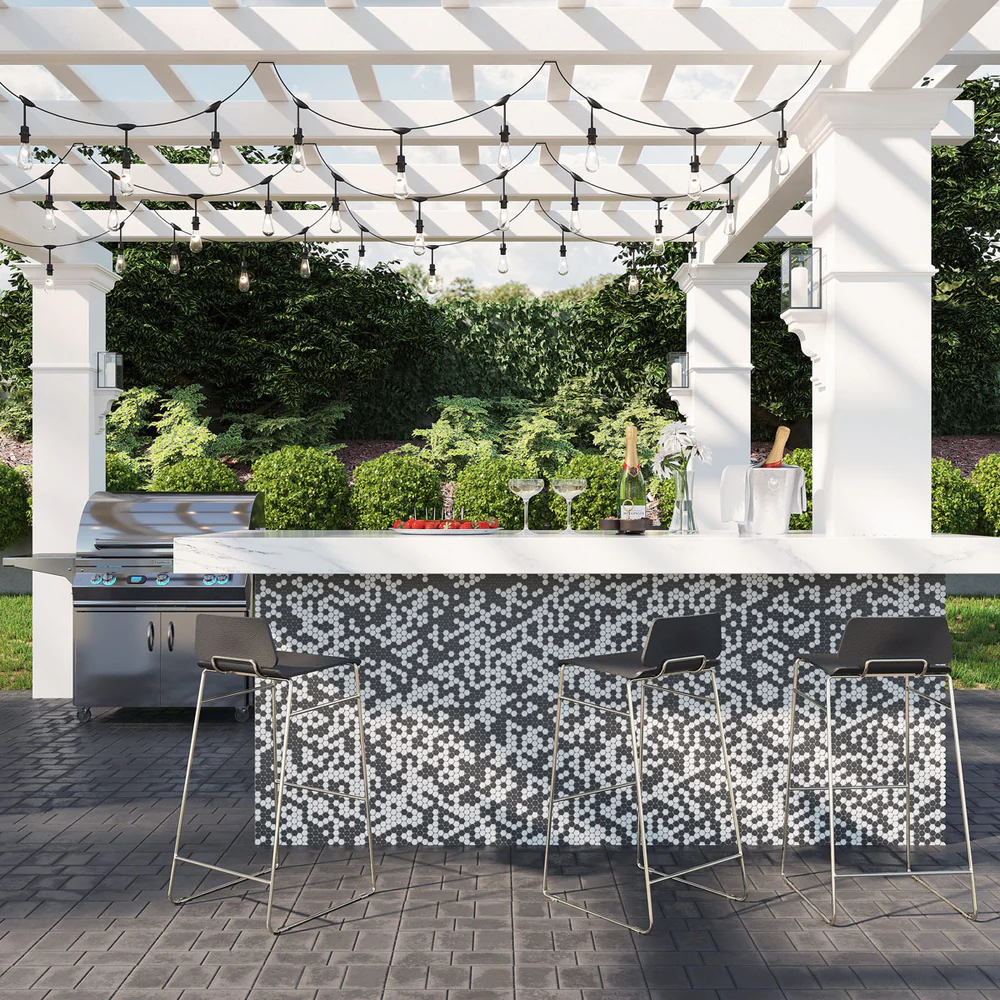
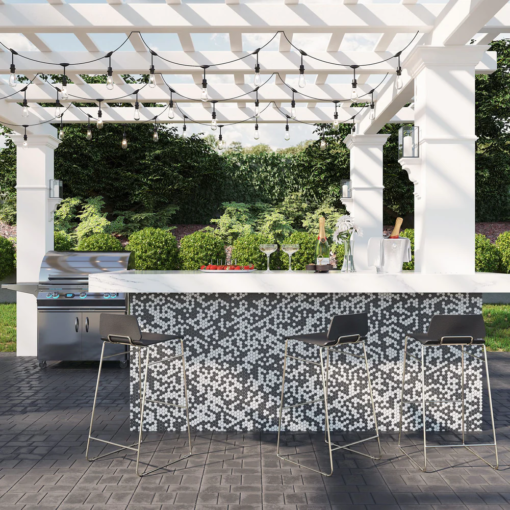
Geometric mosaic tiles are not limited to indoor spaces. They can also enhance your outdoor living areas, such as patios, decks, and poolside settings. These tiles are often made from durable materials like porcelain or natural stone, making them suitable for outdoor use. The right geometric mosaic design can give your outdoor space a touch of Mediterranean charm, creating an al fresco ambiance for your gatherings and relaxation.
6. The Bedroom: Dreamy Retreat
Your bedroom is your personal sanctuary and deserves a touch of luxury and sophistication. Geometric mosaic tiles can be used to create a dreamy retreat. A geometric tile headboard or a feature wall behind the bed can add a level of opulence, making your bedroom feel like a five-star hotel suite. Whether you prefer a soothing palette or bold contrast, these tiles can help you achieve the bedroom of your dreams.
7. The Home Office: Inspiring Creativity
With more people working from home, the home office has become a significant part of our living spaces. Geometric mosaic tiles can help transform your home office into a place that inspires creativity and productivity. They can be used to delineate different zones, such as a work area or a reading nook, making the space both functional and visually appealing.
8. The Fireplace: Cozy Focal Point
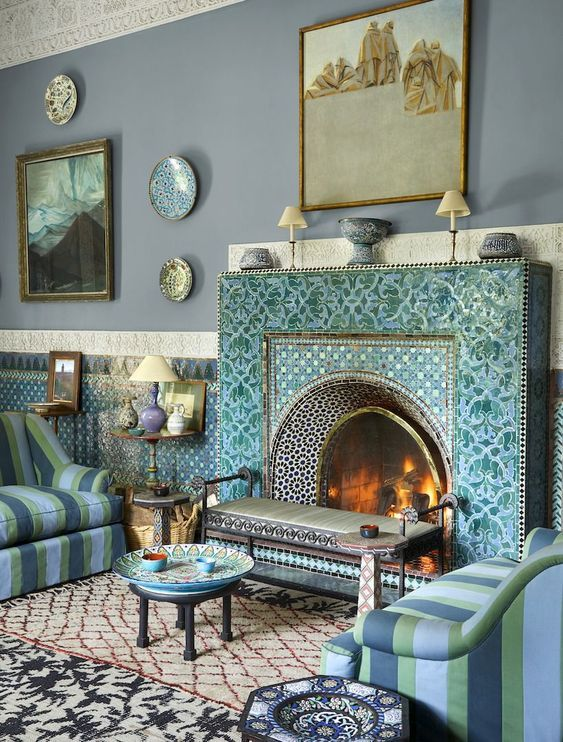
A fireplace is often the focal point of a living room or a cozy nook. Geometric mosaic tiles can add a layer of elegance and warmth to the hearth. You can create a mesmerizing geometric mosaic pattern that draws the eye to the fireplace, turning it into a work of art. Whether you prefer a contemporary look or a more traditional style, these tiles can make your fireplace the heart of your home.
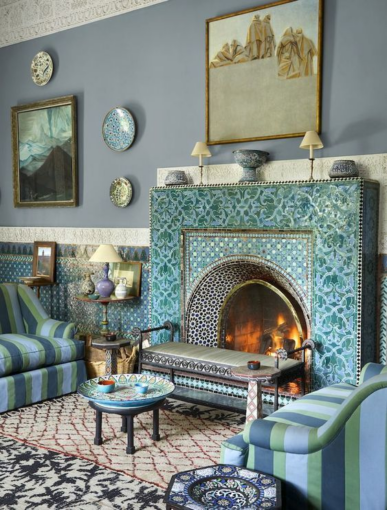
Exploring Tile Patterns: How to Select the Perfect Design for Your Space
Once you’ve meticulously designed your space and handpicked the ideal colour palette, the time comes to add the finishing touches that truly define your interior. While there are numerous ways to infuse character into a room, custom mosaics and tile patterns, in our humble opinion at Artaic, rank among the most versatile and captivating options to make a statement.
In recent years, tile has experienced a resurgence, offering a plethora of captivating choices for those in search of the perfect design. Amid this delightful array of options, it can be a challenge to pinpoint the right tile pattern that complements your project.
To ease your selection process, we’ve categorized the most common designs into eight distinct styles that will simplify your quest for the ideal tile pattern.
1. Abstract Tile Patterns
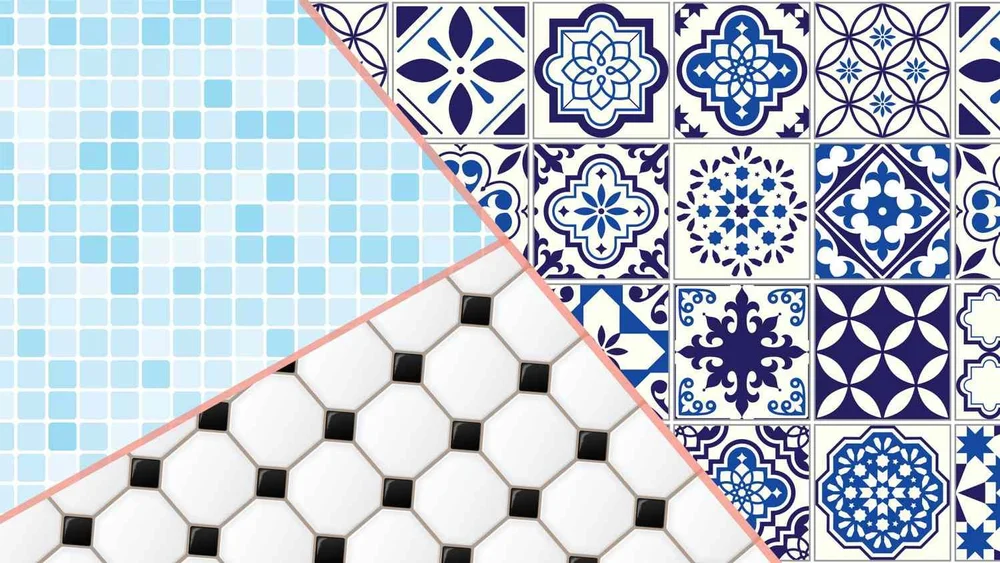
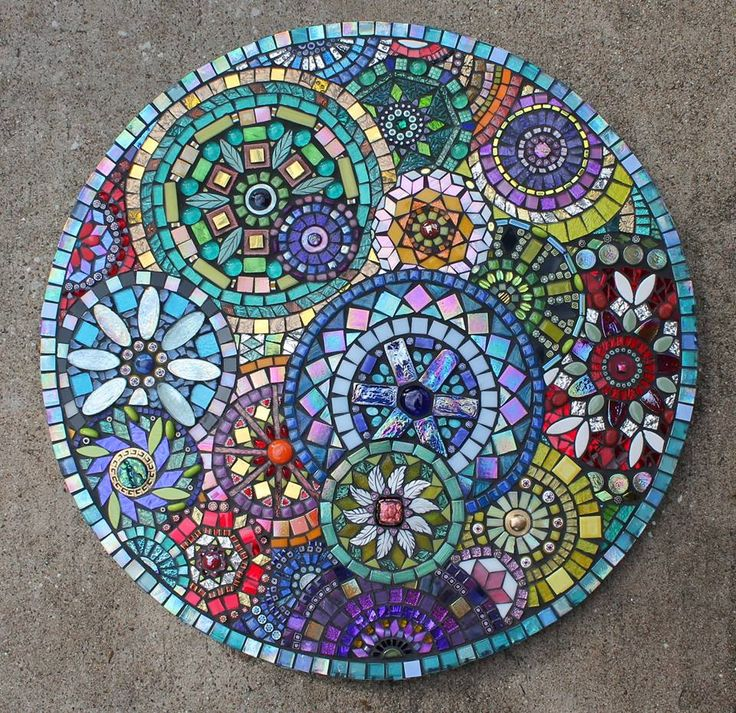
Abstract mosaics stand out as a remarkably versatile way to infuse intrigue into your space. When bathed in bold colour palettes, they exude a vivacious energy, making them a perfect choice for high-traffic areas. Notably, these captivating designs often find their home in public spaces like parks, schools, and lobbies.

On the other hand, when rendered in softer, gentler hues, abstract patterns take on a more tranquil ambiance. Abstract designs featuring light blues and greens seamlessly complement pools and spas, enhancing the soothing reflections and movements of water. Whether you opt for bold or subtle, an abstract mosaic is an accent piece that exudes uniqueness and modern flair.
2. Artistic Tile Patterns
Artistic patterns, though incredibly versatile, exude a more traditional ambiance compared to their abstract counterparts. While they can gracefully blend into a range of settings, artistic patterns are especially well-suited for residential projects and public spaces.
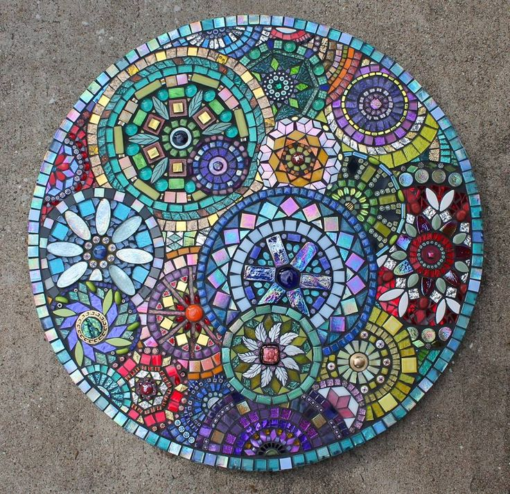
3. Floral Tile Patterns
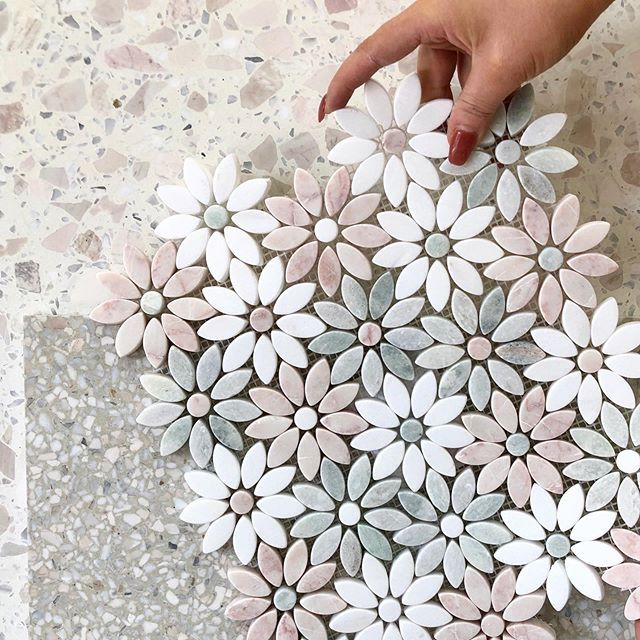
Floral tile patterns serve as a way to bring the outdoors inside. While most floral patterns tend to embrace tradition, some venture towards abstraction, resulting in a more contemporary appearance. The infusion of floral designs into your space brings a refreshing touch of nature and elegance.
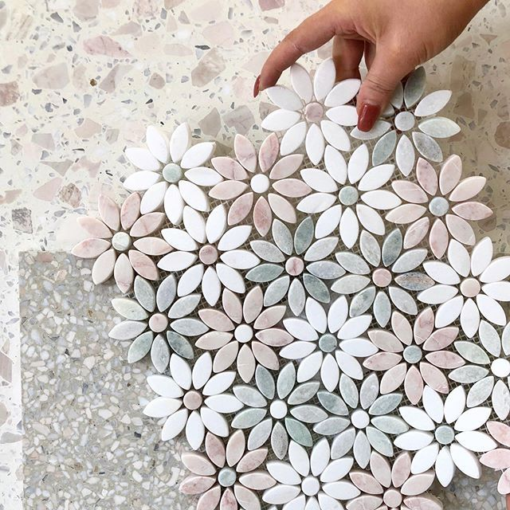
4. Geometric Tile Patterns
For a refreshingly modern appearance, geometric tile patterns are an excellent choice. These designs rely on structured lines to create captivating forms throughout the mosaic. Geometric tile patterns have gained popularity, particularly in kitchen backsplashes, as their bold designs may feel a bit too overpowering for bedrooms and living spaces.
In commercial projects, geometric designs are more liberally used to create bold, modern statement pieces. You’ll often find geometric tile flooring in restaurants, cafes, and bars, as it offers eye-catching aesthetics, easy maintenance, and suitability for high-traffic environments.
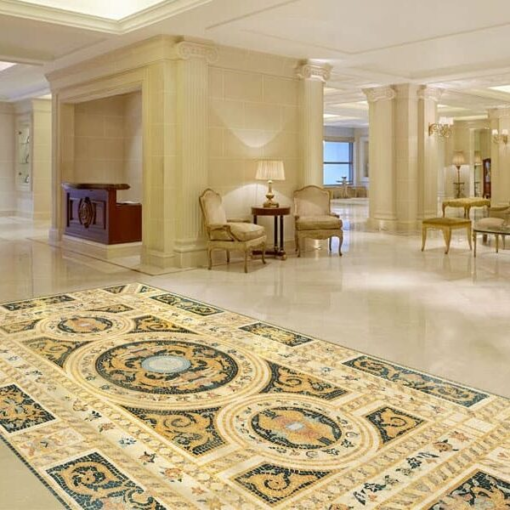
5. Ornamental Tile Patterns
To infuse a touch of tradition and luxury into your space, consider incorporating a detailed ornamental tile design. These decorative patterns can make a statement as flooring in a lobby or entry space, or they can be modernized through unexpected placement or unique colour palettes.
The versatility of geometric mosaic tiles is boundless. These tiles can transform different spaces in your home, adding depth, character, and a touch of sophistication. Whether you’re looking to create a spa-like bathroom, an artistic living room, or a cozy fireplace nook, geometric mosaic tiles offer a world of possibilities. Their timeless appeal and adaptability make them a fantastic choice for homeowners who seek both form and function in their interior design. So, don’t be afraid to experiment with geometric mosaic tiles and unlock the potential of your living spaces.
At Tiletoria, we hope this blog has inspired you to explore the possibilities of geometric mosaic tiles in transforming your living spaces. Whether you’re embarking on a kitchen renovation or redesigning your outdoor patio, geometric mosaic tiles can be your key to unlocking the hidden potential of your home.
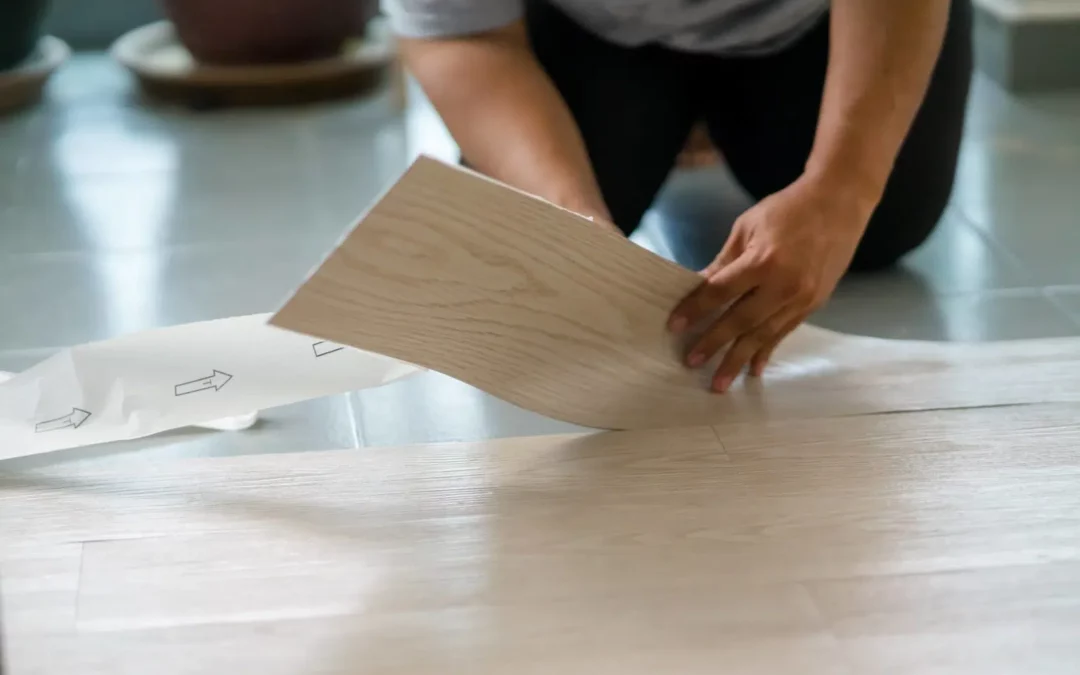
blog, floors, woodlook
In the realm of home improvement, making informed choices is paramount, and at Tiletoria, we take this commitment a step further. Renowned for our unwavering dedication to quality, Tiletoria stocks only the best quality products, ensuring that every selection you make for your home is one that you can trust and rely on.
When it comes to flooring, the choices can be overwhelming, but fear not – we’re here to simplify the process for you. Selecting the right flooring for your home is a significant decision that impacts both aesthetics and functionality. With a wide range of options available, two popular choices that often come into consideration are vinyl and laminate flooring.
Both vinyl and laminate flooring offer unique benefits, and each boasts its own set of characteristics that cater to different preferences and needs. In this blog, we’ll delve into the key differences between these two options, shedding light on their respective attributes.
Vinyl Flooring: Versatile and Resilient
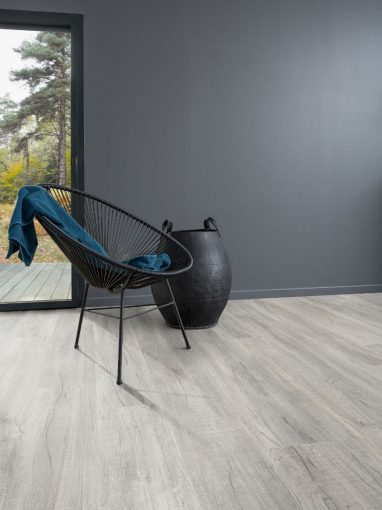
gerflor creation 30 swiss oak pearl
Vinyl flooring has gained immense popularity in recent years due to its versatility and durability. It is available in various forms, including vinyl sheets, vinyl tiles, and luxury vinyl planks (LVP). Here’s why vinyl flooring might be the right choice for your home:
1. Water Resistance:
One of the standout features of vinyl flooring is its water resistance. This makes it an excellent choice for areas prone to moisture, such as kitchens, bathrooms, and basements. Unlike other flooring options, vinyl won’t warp or swell when exposed to water, making it highly suitable for busy households.
2. Durability:
Vinyl flooring is designed to withstand heavy foot traffic, making it a great option for homes with children and pets. Its top layer is typically coated with a protective finish that resists scratches, stains, and scuffs, ensuring your flooring remains pristine even in high-traffic areas.
3. Comfort and Noise Reduction:
Vinyl flooring offers a softer underfoot feel compared to harder surfaces like tile or laminate. This cushioning effect can be especially appreciated in spaces where you spend a lot of time standing. Additionally, vinyl’s resilience helps dampen sound, reducing noise transfer between floors.
7. Ease of Maintenance:
Cleaning vinyl floors is a breeze. Regular sweeping or vacuuming, along with occasional damp mopping, is usually sufficient to keep them looking clean and fresh. The water-resistant properties also mean you don’t have to worry about moisture causing damage during routine cleaning.
8. Design Options:
Vinyl flooring comes in a wide array of designs, including realistic wood and stone patterns. If you’re aiming for a specific aesthetic without the maintenance requirements of natural materials, vinyl can offer a great alternative.
Laminate Flooring:
kronotex trend oak grey
Laminate flooring has long been a popular choice for homeowners seeking an affordable and elegant flooring solution. Constructed from compressed wood and topped with a photographic image layer, laminate flooring boasts its own set of advantages:
1. Aesthetic Appeal:
Laminate flooring often replicates the look of natural materials, such as hardwood or stone, at a fraction of the cost. The high-resolution photographic layer captures intricate details, giving you the appearance of genuine materials without the associated upkeep.
2. Easy Installation:
Laminate flooring is known for its click-and-lock installation system, which makes it a suitable choice for DIY enthusiasts. This interlocking mechanism eliminates the need for adhesives and simplifies the installation process.
3. Affordability:
If you’re looking to achieve a high-end look on a budget, laminate flooring offers an excellent compromise. It allows you to enjoy the aesthetic benefits of premium materials without the hefty price tag.
4. Durability:
While laminate is not as resistant to water as vinyl, modern laminate flooring options often come with improved water-resistant features. Nevertheless, caution should still be exercised in areas with excessive moisture.
5. Low Maintenance:
Laminate floors are relatively easy to maintain. Regular sweeping and occasional damp mopping are typically sufficient to keep them looking their best. However, caution should be exercised to prevent excessive water exposure.
Choosing the Right Flooring for Your Home
Making a decision between vinyl and laminate flooring requires considering your home’s specific requirements, your lifestyle, and your aesthetic preferences. To help you make the right choice, here are a few factors to take into account:
1. Location:
If you’re planning to install flooring in areas that are exposed to moisture or high foot traffic, vinyl might be the better choice due to its water resistance and durability.
2. Budget:
Both vinyl and laminate flooring offer cost-effective alternatives to natural materials, but laminate may be more budget-friendly if you’re aiming for a luxurious look without the premium price.
3. Aesthetics:
Consider the overall design and aesthetic you want to achieve in your space. Vinyl offers a wide variety of designs, including wood and stone patterns, while laminate can mimic the appearance of high-end materials.
4. Installation:
If you’re confident in your DIY skills and prefer a straightforward installation process, laminate’s click-and-lock mechanism could be the way to go. Vinyl flooring installation might require more expertise, particularly when dealing with larger areas.
5. Maintenance:
If ease of maintenance is a top priority, both options are relatively simple to clean, but vinyl’s water resistance can provide an added advantage in spaces prone to spills and moisture.
When it comes to choosing between vinyl and laminate flooring, there’s no one-size-fits-all answer. Both options have their strengths and are suitable for various settings. Consider your specific needs and preferences to make an informed decision that enhances the beauty and functionality of your home. Whether you opt for vinyl or laminate, Tiletoria has a wide range of options to help you find the perfect flooring solution for your space.
Disclaimer:
Tiletoria offers advice in this article for construction and renovation purposes. However, it’s crucial to recognize that this advice does not replace the expertise of certified building contractors. Each project is unique, and
potential complexities vary. Readers should consult professionals before undertaking any projects. Our network of approved contractors ensures tailored guidance for safety and quality. While our article provides insights,
collaboration with contractors remains vital. Contact us for assistance or connections with reputable professionals. Your project’s success and longevity are our priority.

bathroom, blog
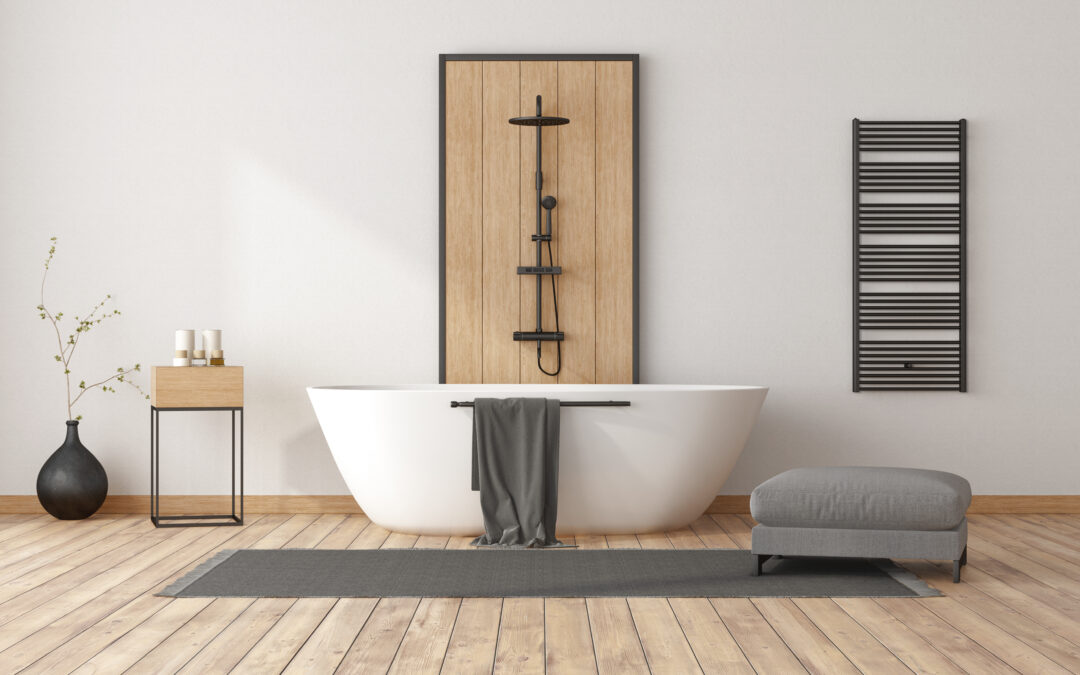
Renovating your bathroom is an exciting project that involves many decisions. Among the most critical choices you’ll make is selecting the right sanitary ware. Sanitary ware encompasses essential bathroom fixtures such as toilets, basins, vanities, bathtubs, showers, taps and accessories. These elements are not only functional but also contribute significantly to the aesthetics and overall comfort of your bathroom. In this comprehensive guide, we’ll explore different aspects of choosing the perfect sanitary ware for your bathroom, step by step.

Table of Contents
1. Understanding Your Bathroom Space
2. Toilet Selection: Comfort and Efficiency
3. Sink and Vanity Units: Functionality Meets Style
4. Bathtubs: Relaxation and Luxury
5. Showers: Convenience and Versatility
6. Choosing Faucets and Accessories
7. Sustainability and Water Efficiency
8. Budgeting and Cost Considerations
9. Maintenance and Durability
10. Showroom Visits and Expert Assistance
1. Understanding Your Bathroom Space

Before you begin your journey to find the perfect sanitary ware, take a moment to assess your bathroom space. Consider the following factors:
- Size: The available space in your bathroom will determine the size and style of sanitary ware that will fit comfortably.
- Layout: The layout of your bathroom, including the placement of plumbing lines, can impact your choices for fixtures and their placement.
- Style: Think about the overall style or theme you want to achieve in your bathroom. This will influence your selection of sanitary ware that complements the design.
2. Toilet Selection: Comfort and Efficiency

Step 1: Toilet Type
Choose between standard close-coupled toilets, wall-hung toilets, or concealed cistern toilets. Wall-hung toilets can create a more spacious look, while concealed cisterns provide a sleek appearance.
Step 2: Comfort Features
Consider features like soft-close lids, dual flush options for water conservation, and ergonomically designed seats for added comfort.
3. Sink and Vanity Units: Functionality Meets Style
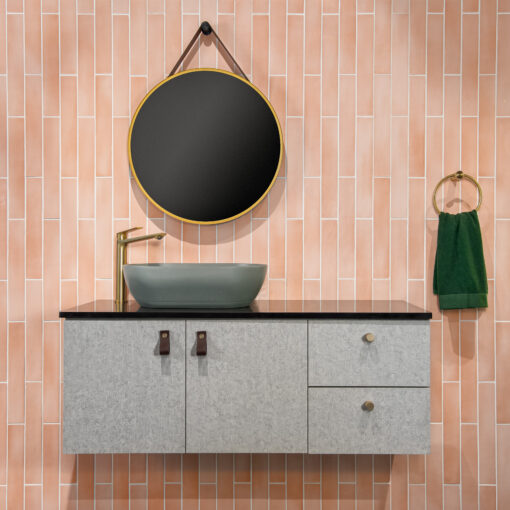
Step 1: Sink Style
Select from various sink styles, including pedestal sinks, vessel sinks, undermount sinks, and countertop sinks. Each style offers a unique look and functionality.
Step 2: Vanity Units
Determine if you need a vanity unit for storage. Choose one that complements the sink and the overall bathroom design.
4. Bathtubs: Relaxation and Luxury
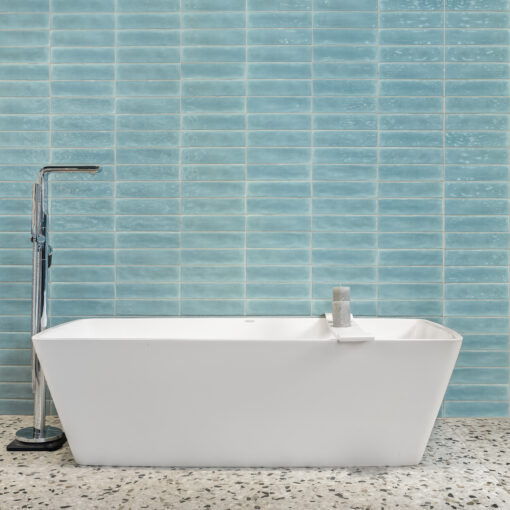
Step 1: Bathtub Type
Decide between freestanding, alcove, or corner bathtubs. Freestanding tubs add a luxurious touch, while alcove tubs are space-efficient.
Step 2: Material
Select a bathtub material, such as acrylic, cast iron, or stone, based on your preferences for
durability and heat retention.
5. Showers: Convenience and Versatility
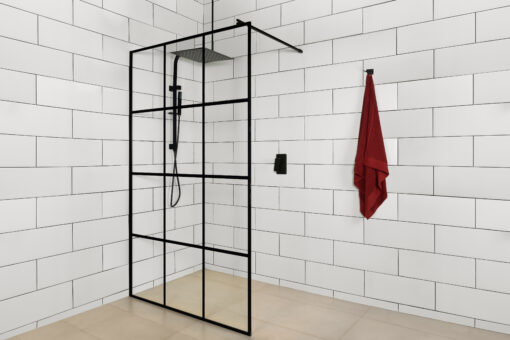
Step 1: Shower Type
Choose between walk-in showers, enclosed showers, or shower-bathtub combinations. Consider the available space and your bathing habits.
Step 2: Showerheads and Controls
Select showerheads, controls, and accessories that offer the water flow and features you desire, such as rain showerheads and thermostatic controls.
6. Choosing Faucets and Accessories
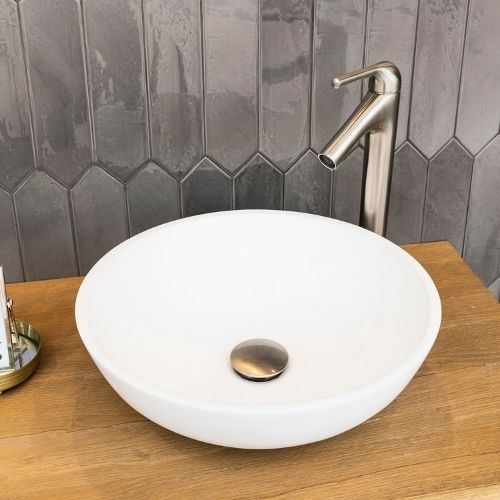
Coordinate your bathroom’s aesthetic by selecting matching faucets and accessories. Consider finishes like chrome, brushed nickel, or matte black to complement your chosen style.
7. Sustainability and Water Efficiency

Opt for sanitary ware that incorporates water-saving features. Look for fixtures with the WaterSense label or low-flow options to reduce water consumption while maintaining functionality.
8. Budgeting and Cost Considerations
Set a realistic budget for your bathroom renovation, including the cost of sanitary ware, installation, and any additional features or accessories. Balance quality with affordability to get the best value.
9. Maintenance and Durability
Choose sanitary ware that is easy to clean and maintain. Materials like porcelain, glazed ceramic, and acrylic are known for their durability and resistance to stains.
10. Showroom Visits and Expert Assistance
Visiting a showroom, like Tiletoria, is a great way to explore a wide range of sanitary ware options in person. Here’s how to make the most of your showroom visit:
- Expert Advice: Utilize the expertise of showroom staff to get recommendations and insights based on your needs and preferences.
- Visualize: Imagine how different fixtures will look in your bathroom by exploring showroom displays.
- Compare: Compare various brands, styles, and prices to make an informed decision.
- Quality Assurance: Showrooms often carry reputable brands known for their quality, ensuring you invest in long-lasting sanitary ware.
In conclusion, choosing the perfect sanitary ware for your bathroom involves careful consideration of factors like space, style, functionality, and budget. By following the steps outlined in this comprehensive guide and taking advantage of showroom visits and expert assistance, you can create a bathroom that not only meets your practical needs but also reflects your unique style and enhances the overall appeal of your home. Make your bathroom renovation a success by selecting sanitary ware that combines comfort, efficiency, and aesthetics seamlessly.
Disclaimer:
Tiletoria offers advice in this article for construction and renovation purposes. However, it’s crucial to recognize that this advice does not replace the expertise of certified building contractors. Each project is unique, and potential complexities vary. Readers should consult professionals before undertaking any projects. Our network of approved contractors ensures tailored guidance for safety and quality. While our article provides insights, collaboration with contractors remains vital. Contact us for assistance or connections with reputable professionals. Your project’s success and longevity are our priority.
bathroom, blog
Bathroom renovations are among the most popular home improvement projects, and for a good reason. Not only do they enhance the aesthetics of your home, but they also add value to your property. When it comes to giving your bathroom a fresh look, one of the most crucial decisions you’ll make is selecting the right tiles. Tiles are not only a functional choice but also a design element that can transform the entire space. In this article, we’ll explore the key factors to consider when choosing the right tiles for your bathroom renovation.

1. Durability: Start with the Basics

Bathrooms are high-traffic areas with frequent exposure to moisture and humidity. Therefore, the durability of your chosen tiles is paramount. Porcelain and ceramic tiles are the most popular choices for bathrooms due to their resistance to moisture, stains, and wear. Porcelain tiles, in particular, are known for their exceptional durability and low maintenance, making them an excellent choice for bathroom floors and walls. Natural stone tiles like marble and granite can also be used, but they may require more maintenance over time.
2. Water Resistance: Ensure Longevity

Bathrooms are synonymous with water, so it’s crucial to choose tiles that can withstand constant exposure to moisture. Look for tiles with a low water absorption rate, which is often indicated as the “PEI rating” or “water absorption rate.” Tiles with a low absorption rate are less likely to warp, crack, or develop mold and mildew. Additionally, consider sealing your tiles, especially if you choose natural stone, to further enhance their water resistance.
3. Size Matters: Selecting the Right Tile Dimensions

The size of your bathroom tiles can significantly impact the overall look and feel of the space. Larger tiles, such as 12×24 inches or 24×24 inches, can create a more modern and spacious appearance, as they have fewer grout lines. On the other hand, smaller tiles, like mosaic or subway tiles, can add texture and character to your bathroom. Ultimately, the choice of tile size should align with your design vision and the size of your bathroom.
4. Colour and Pattern: Set the Mood

The colour and pattern of your bathroom tiles play a crucial role in defining the ambiance of the space. Light-coloured tiles can make a small bathroom feel more open and airy, while dark tiles can create a cozy and intimate atmosphere. Consider your personal preferences and the overall style of your home when choosing tile colours.
Patterns can also make a significant impact. Traditional subway tiles in a brick pattern are timeless and versatile, while geometric and mosaic patterns can add a touch of uniqueness and flair. Just be cautious not to overwhelm the space with busy patterns, especially in smaller bathrooms.
5. Texture: Balance Style and Safety

While smooth and glossy tiles are visually appealing, they can become slippery when wet, posing a safety hazard. To maintain both style and safety, consider textured tiles for bathroom floors or wet areas like the shower. Textured tiles provide better traction and reduce the risk of slipping, making them an excellent choice for families with children or elderly individuals.
6. Maintenance: Keep It Manageable

No one wants to spend excessive time cleaning and maintaining bathroom tiles. Therefore, choose tiles that are easy to clean and require minimal maintenance. Porcelain and ceramic tiles are known for their low-maintenance qualities, as they are resistant to stains and easy to wipe clean. Natural stone tiles may require periodic sealing to prevent staining and maintain their appearance.
7. Budget: Balance Quality and Cost

Your budget is a significant factor in tile selection. While it’s tempting to opt for the most expensive and luxurious tiles available, it’s essential to strike a balance between quality and cost. Determine how much you’re willing to spend on tiles and explore various options within your budget. Remember that high-quality tiles can last for many years, making them a wise long-term investment.
8. Style and Theme: Reflect Your Personality

Your bathroom should be an extension of your personal style and preferences. Consider the overall theme you want to achieve in your bathroom renovation. Whether you prefer a contemporary, classic, rustic, or eclectic look, there are tiles available to suit every style. Mix and match different tile styles, colours, and patterns to create a unique and personalized design.
9. Lighting: Enhance the Tile’s Appeal

Proper lighting can enhance the visual appeal of your chosen tiles. Consider the bathroom’s natural and artificial lighting when selecting tiles. Light-colored tiles can help brighten up a dimly lit bathroom, while dark tiles can create a cozy atmosphere when paired with soft lighting. Experiment with different lighting options to see how they complement your chosen tiles.
10. Test Samples: Visualize the End Result

Before making your final decision, it’s advisable to obtain tile samples and test them in your bathroom space. This allows you to visualize how the tiles will look in your specific environment, including how they interact with lighting and other design elements. It’s also an opportunity to assess the texture and feel of the tiles in person.
Selecting the right tiles for your bathroom renovation is a crucial step in achieving the desired
look and functionality of your space. Consider factors such as durability, water resistance, size,
color, texture, maintenance, budget, style, lighting, and the use of tile samples to make an
informed decision. With careful consideration and attention to detail, you can transform your
bathroom into a beautiful and functional oasis that reflects your personal style and enhances the
value of your home.
When you’re ready to explore the world of bathroom tiles, remember that Tiletoria offers a full
range of options right in their showrooms. Our experienced staff is on hand to provide excellent
assistance, helping you find the perfect tiles to bring your vision to life. Additionally, Tiletoria’s
showrooms features pre-built bathroom showpieces on the floor, designed to spark ideas and
inspire your creative journey. With our extensive selection and expert guidance, your bathroom
renovation project is sure to be a success. Start your renovation journey today and turn your
bathroom into a sanctuary of style and comfort with Tiletoria’s exceptional tile solutions
Disclaimer:
Tiletoria offers advice in this article for construction and renovation purposes. However, it’s crucial to recognize that this advice does not replace the expertise of certified building contractors. Each project is unique, and potential complexities vary. Readers should consult professionals before undertaking any projects. Our network of approved contractors ensures tailored guidance for safety and quality. While our article provides insights, collaboration with contractors remains vital. Contact us for assistance or connections with reputable professionals. Your project’s success and longevity are our priority.

blog, kitchen, trends
Imagine stepping into your kitchen and being greeted by a world of colour, texture, and character. Your kitchen tiles are more than just practical surfaces; they are your canvas for creativity, a chance to infuse your space with personality. Whether adorning your walls or gracing your floors, Tiltoria Tiles are the ultimate expression of style and sophistication, offering a diverse range that caters to every taste.
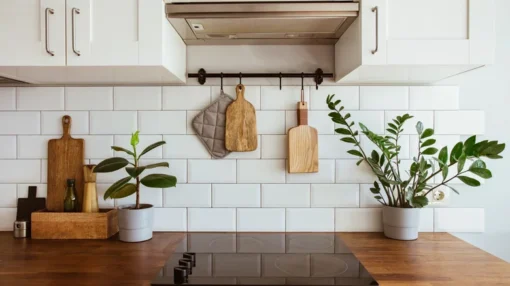
A Symphony of Styles: 10 Captivating Kitchen Tile Ideas
1. Penny Tiles: Whimsical Elegance

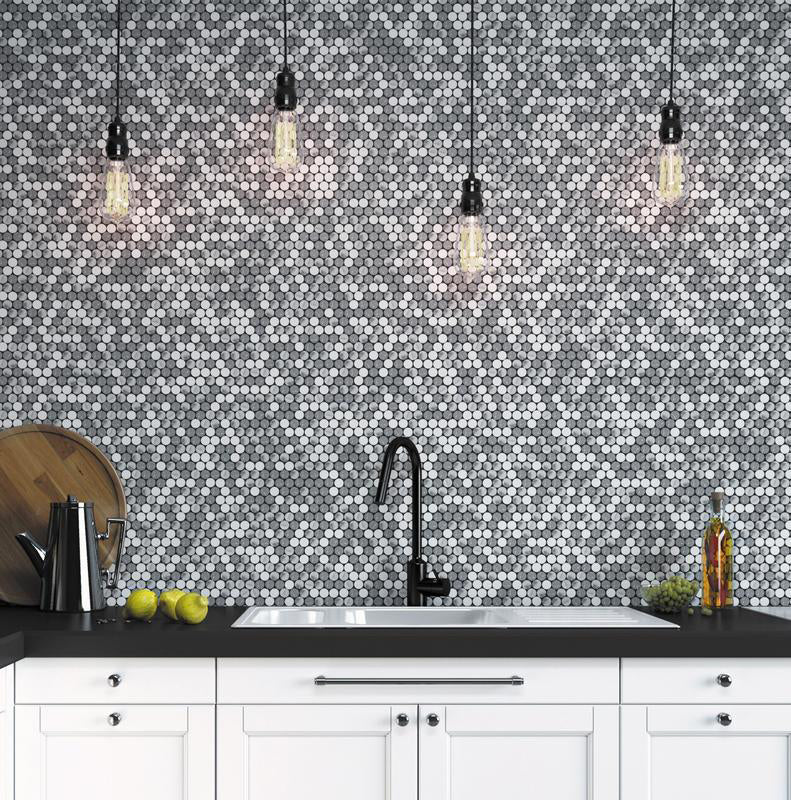
Looking to add a touch of whimsy and elegance to your modern kitchen design? Look no further than penny tiles! These tiny, round tiles are making a big comeback in the world of interior design. With their delicate size and intricate patterns, penny tiles can transform any kitchen space into a charming oasis. Whether you opt for classic white or bold metallic hues, these versatile tiles offer countless design possibilities.
2. Rustic Charm: Brick Unveiled

Invite the rustic elegance of brick into your kitchen. Transform it into a sanctuary that echoes the warmth of the outdoors. With its inviting texture and resilience, brick bridges the gap between tradition and contemporary minimalism. It’s like a hug from nature that endures the hustle of your culinary adventures.
3. Mosaic Marvel: Glass Mosaic Backsplash
Elevate your kitchen’s style with a stunning glass mosaic backsplash. These shimmering tiles create a mesmerizing focal point that reflects light and adds a touch of luxury to your space. With a wide range of colours and patterns, you can customize your backsplash to match your kitchen’s aesthetic perfectly.
4. Imperfectly Perfect: Zellige Tiles

Zellige tiles tell a story of craftsmanship and imperfection. With their handcrafted allure, they redefine charm in your neutral haven. Their uneven finish, irregular shapes, and glaze variations draw the eye, forming a kaleidoscope of tones that tell tales of uniqueness.
5. The Gloss Renaissance: A Shimmering Shift
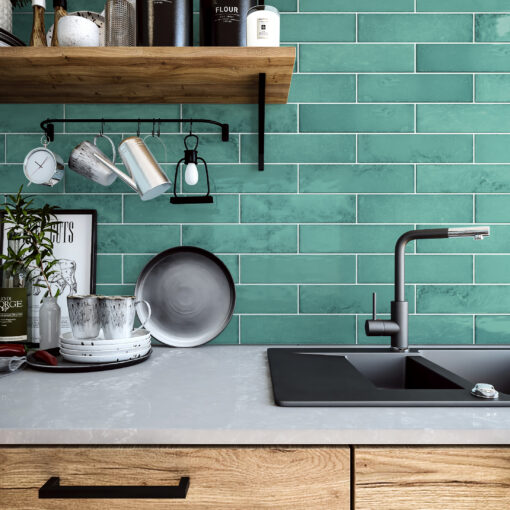
Shift from matte to gloss with a dash of audacious elegance. Dive into the world of glazed tiles that shimmer like stars in your kitchen. From rich hues to tantalizing neutrals, high gloss tiles redefine sophistication while providing a practical solution that’s easy to clean and admire.
6. Subway Splendor: From Bland to Bold
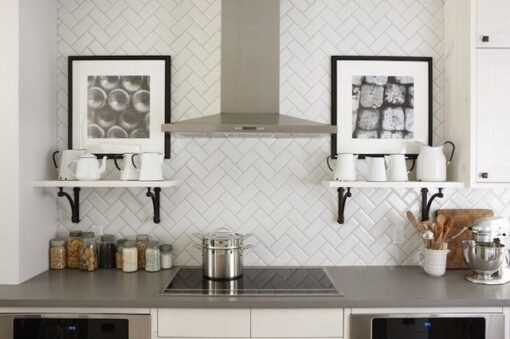
Subways tiles reignite with newfound charisma. Say goodbye to the mundane and hello to transformative design. Stretching from floor to ceiling, these tiles frame your kitchen with intriguing lines and captivating colours. The drama is in the details, and subways tiles are the stars of the show.
7. Terracotta Temptations: European Chic
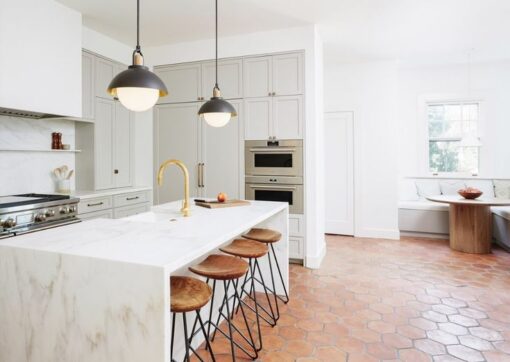
Embrace European allure with terracotta floor tiles. They infuse your space with farmhouse charm, a testament to timeless beauty. Their hues dance between warmth and subtlety, making them the perfect backdrop for your kitchen’s stories.
8. Marble Slab Dreams: Elegance Redefined
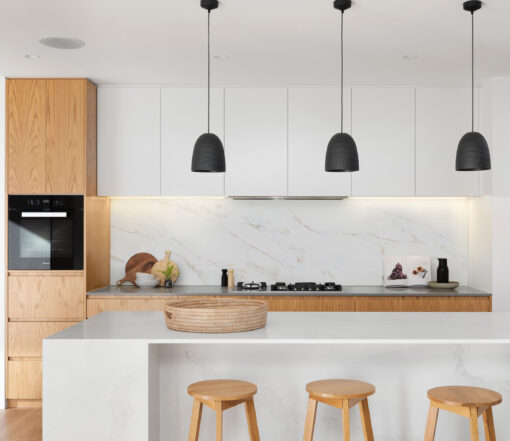
Elevate elegance with marble slab tiles that paint a picture of opulence. Minimal grout lines and uninterrupted patterns create a seamless masterpiece. From countertop to backsplash, the marriage of marble and luxury is an everlasting affair.
9. A Whimsical Illusion: Striped Wonders
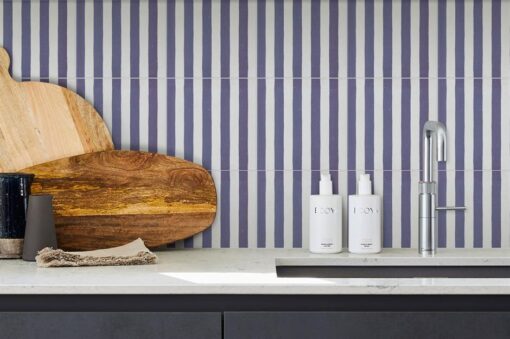
Play with perception through the magic of stripes. Transform your space into a canvas of illusion, making it feel larger and more open. From floors to backsplashes, stripes become an art form that captivates the eye.
10. Stove Showstopper: Encaustic Elegance
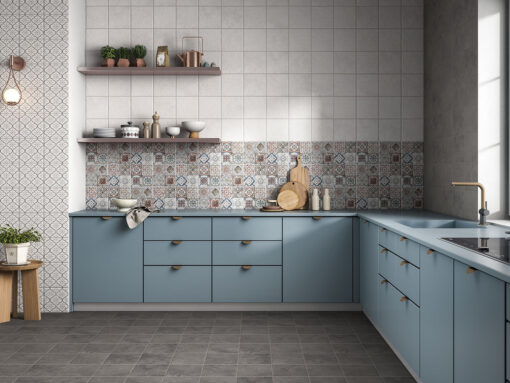
Let your stove area shine with encaustic tiles that exude European allure. These practical yet captivating tiles blend seamlessly with the kitchen’s narrative, turning functional spaces into focal points of beauty.
Choosing Your Canvas: The Perfect Tiles for Your Kitchen

When considering kitchen tiles, it’s essential to match the right tile with the right purpose. For kitchen floors, porcelain tiles reign supreme, providing durability and easy maintenance. Larger formats open up spaces, inviting a sense of openness. For walls, let your style dictate—whether it’s classic subways, textured 3D designs, or the rustic charm of zellige.
Trending Tides: Texture Takes Center Stage
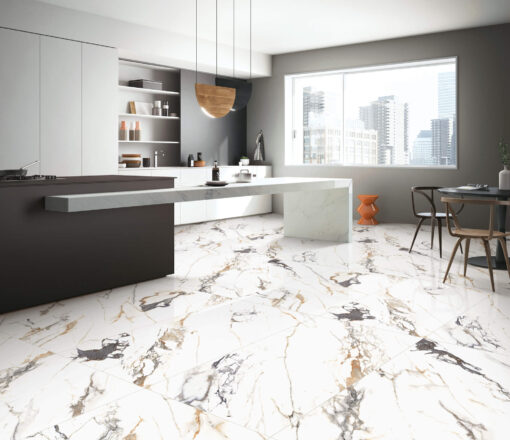
In the ever-evolving world of kitchen tile trends, texture steals the limelight. Fluted designs, zellige tiles, and the timeless charm of terracotta have captured our hearts. These textures embrace the rustic kitchen trend, transforming spaces into cozy havens filled with tactile delights.
Of course, let’s not forget the enduring popularity of subway tiles. They’ve stood the test of time, providing a versatile canvas for creativity. The key lies in experimenting with finishes and grout colors, turning the ordinary into the extraordinary.
Tiltoria Tiles: Elevating Your Kitchen Beyond Imagination
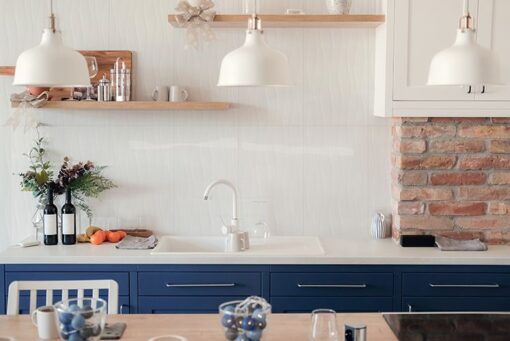
Whether you’re looking for a classic style or something more contemporary, Tiltoria Tiles have the perfect tiling option to fit any modern kitchen design. With the growing trend of texture taking center stage, why not make your space unique with encaustic tiles or zellige? From penny tiles to brick slips and marble slab dreams, let your creativity flow with endless possibilities! Start exploring our range today and find that perfect tile for your kitchen project.
Let us know what kind of kitchen tile design made you fall in love with your cooking corner in the comments below!
Disclaimer:
In conclusion, Tiletoria offers advice in this article for construction and renovation purposes. However, it’s crucial to recognize that this advice does not replace the expertise of certified building contractors. Each project is unique, and potential complexities vary. Readers should consult professionals before undertaking any projects. Our network of approved contractors ensures tailored guidance for safety and quality. While our article provides insights, collaboration with contractors remains vital. Contact us for assistance or connections with reputable professionals. Your project’s success and longevity are our priority.