blog, floors, how to articles, walls
Master the art of tile maintenance and cleaning with our comprehensive guide to ensure your tiles stay sparkling and fresh.
Tiles can transform your space with their elegance and functionality. Whether you have glazed or unglazed tiles, proper maintenance is essential to preserve their beauty and longevity. In this guide, we’ll walk you through the steps of cleaning and maintaining your tiles, whether they’re in your bathroom, kitchen, or any other area of your home. With the right approach, your tiles will continue to shine for years to come.

Regular Cleaning Routine for Glazed Tiles
Glazed tiles are a popular choice for various applications, including walls, baths, and showers.
To keep them looking their best, follow these steps:
1. Choose the Right Cleaner: Opt for an all-purpose, low VOC, household or commercial cleaner that is compatible with grout joint cleaning. Avoid harsh chemicals, as they can damage the tile’s glazed surface and the grout.
2. Application and Agitation: Use a cotton mop, cloth, sponge, or non-metallic brush to apply the cleaner to the tile surface. Gently agitate the cleaner to remove soap scum, hard water deposits, and mildew.
3. Rinse and Dry: After cleaning, rinse the area with clean water to remove any residue. Thoroughly dry the tiles to prevent water spots.
Unglazed Tiles Require Special Care
Unglazed tiles, on the other hand, need a slightly different cleaning approach:
1. Neutral pH Cleaners: Choose concentrated tile cleaners with a neutral pH for routine cleaning. These cleaners effectively remove grease, oils, and normal spills from unglazed tiles.
2. Application and Compatibility: Apply the chosen cleaner according to the manufacturer’s instructions. Ensure the cleaner is compatible with your specific type of grout.
Removing Sealers and Waxes
Glazed ceramic tiles do not require sealing, but grout should be sealed. If you need to remove a topical sealer or floor wax, follow these steps:
1. Use a Sealer and Adhesive Remover: Apply an undiluted tile sealer and adhesive remover to a small area. Allow it to soften the coating or residue.
2. Agitate and Wipe: If needed, agitate the area with a white nylon scrub pad. Wipe up the residue using a cotton towel or sponge. Rinse thoroughly with clean water.
Taking Care of Grout
Grout plays a vital role in tile installations. To maintain it properly:
1. Sealing Grout: Grout should be sealed regularly to preserve its color and protect it from stains. Choose a penetrating/impregnating sealer for cementitious grouts. Epoxy grouts do not require sealing.
2. Grout Maintenance: Clean grout periodically using a concentrated household or commercial cleaner. For heavy-duty cleaning, use a professional strength tile and grout cleaner with non-polluting chemicals and low VOC levels.
3. Grout Colour Restoration: When grout is stained beyond maintenance, you can use a grout stain to restore its color. Clean the grout thoroughly before applying the stain.
Proper Grout Installation and Care
During and after installation, follow these steps to ensure the best outcome:
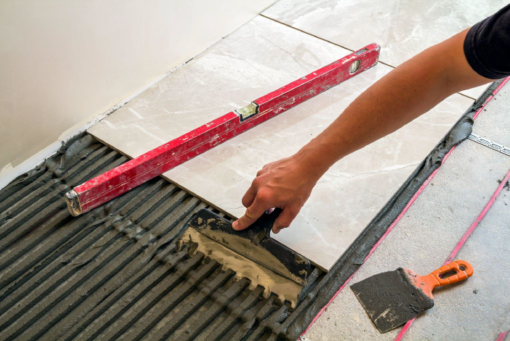
1. Immediate Protection: Cover newly installed and grouted tile with brown paper to shield it from debris. Dampen the grout daily during the first week to aid in curing and colour lock.
2. Grout Haze Removal: After at least 24 hours, remove grout haze with water or a grout haze remover. Avoid using harsh chemicals on natural stone products.
Safety Precautions & Maintenance
Always prioritize safety when handling tile installation and maintenance products. Test products in a small area before widespread use. Follow the manufacturer’s instructions and heed any warnings. Additionally, consider the specific needs of natural stone products, which may require different maintenance methods.
In conclusion, maintaining your tiles doesn’t have to be a daunting task. With the right products and techniques, you can keep your tiles looking pristine and attractive. Regular cleaning, proper sealing, and careful maintenance will ensure that your tiles continue to enhance your living spaces for years to come. Remember, a little effort now can lead to long-lasting beauty and functionality for your home.
Disclaimer: Tiletoria offers advice in this article for construction and renovation purposes. However, it’s crucial to recognize that this advice does not replace the expertise of certified building contractors. Each project is unique, and potential complexities vary. Readers should consult professionals before undertaking any projects. Our network of approved contractors ensures tailored guidance for safety and quality. While our article provides insights, collaboration with contractors remains vital. Contact us for assistance or connections with reputable professionals. Your project’s success and longevity are our priority.

blog, floors, woodlook
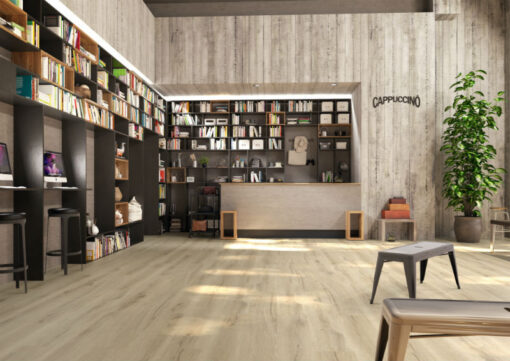
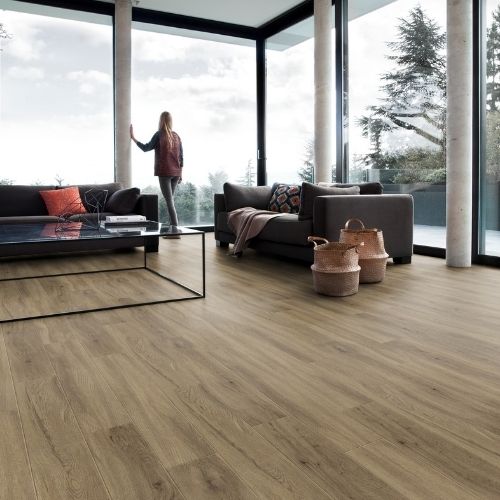
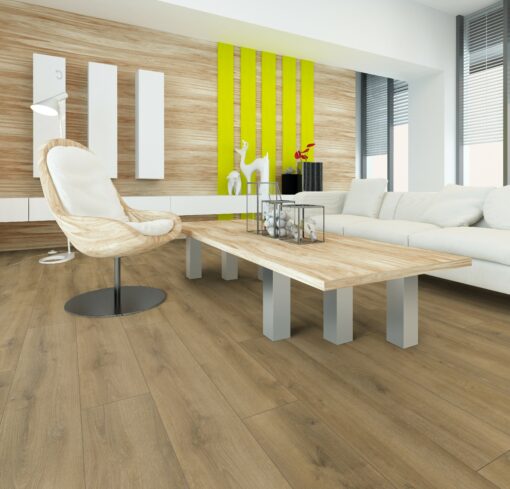
Wood look tile flooring has taken the world of interior design by storm, offering a practical and stylish alternative to traditional hardwood floors. With its ability to replicate the warmth and beauty of natural wood while providing the durability and ease of maintenance of ceramic or porcelain tiles, it’s no wonder wood look tile flooring has become a popular choice for modern homes.
In this comprehensive guide, we’ll explore the key factors to consider when searching for the best wood look tile flooring, ensuring you make a well-informed decision that suits your taste, lifestyle, and budget.
Authenticity and Realism:
When choosing wood look tile flooring, focus on finding options that showcase the highest level of authenticity and realism. Look for tiles that feature intricate grain patterns, natural variations in colour, and texture, closely resembling real wood. Some manufacturers use advanced printing technologies to achieve incredibly realistic wood-like finishes, providing a convincing and natural appearance.
Tile Material and Durability:
Wood look tiles are available in various materials, such as ceramic, porcelain, laminate, and luxury vinyl.
Porcelain tiles are generally more durable and water-resistant than ceramic tiles, making them suitable for high-traffic areas and moisture-prone spaces like kitchens and bathrooms.
Laminate flooring offers excellent durability, scratch resistance, and a cost-effective alternative to hardwood floors.
Luxury vinyl tiles provide exceptional durability, waterproof properties, and comfort underfoot, making them ideal for busy households or commercial spaces.
Choose the material that best suits your needs and the level of traffic in the intended installation area.
Size and Shape of Tiles:
Consider the size and shape of the wood look tiles as they can significantly impact the overall appearance of the floor. Larger tiles tend to create a more seamless and expansive look, while smaller tiles can add character and interest to the design. Plank-shaped tiles, which mimic the look of hardwood planks, are a popular choice for achieving an authentic wood floor appearance.
Grout Lines and Installation:
The spacing between tiles and the colour of grout lines can affect the overall look of your wood look tile flooring. Opt for tiles that come with rectified edges for minimal grout lines and a more seamless appearance. Choose a grout colour that complements the tiles to achieve a cohesive and natural effect. Professional installation is crucial for wood look tile flooring to ensure precise alignment and proper adhesive application.
Texture and Finish:
The texture of the wood look tiles plays a vital role in replicating the feel of real wood. Some tiles feature a distressed or hand-scraped texture, adding depth and character to the floor. Additionally, consider the finish of the tiles, whether it’s matte, glossy, or semi-glossy, as it can influence the overall style and maintenance requirements of the flooring.
Budget Considerations:
While wood look tile flooring is generally more affordable than hardwood floors, prices can vary based on the quality, brand, and material. Set a budget and explore options that fit within your price range while maintaining the desired quality and appearance.
Finding the best wood look tile flooring involves careful consideration of authenticity, tile material, size, installation, texture, finish, and budget. With its ability to emulate the beauty of natural wood while offering durability and practicality, wood look tile flooring is an excellent choice for any space.
Whether you opt for porcelain, ceramic, or luxury vinyl tiles, rest assured that you can achieve a stunning and realistic wood-inspired floor that will elevate the aesthetics and functionality of your home.
For a wide selection of high-quality wood look tile flooring options, visit Tiletoria’s showroom in Cape Town and Johannesburg. Our knowledgeable staff will assist you in finding the perfect tiles to create the wood floor of your dreams.
blog, commercial blog, how to articles
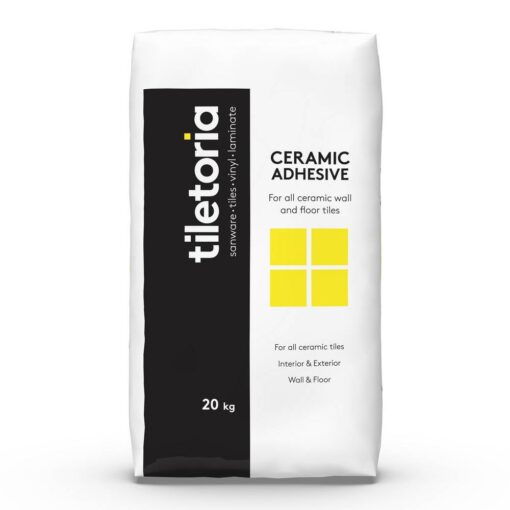
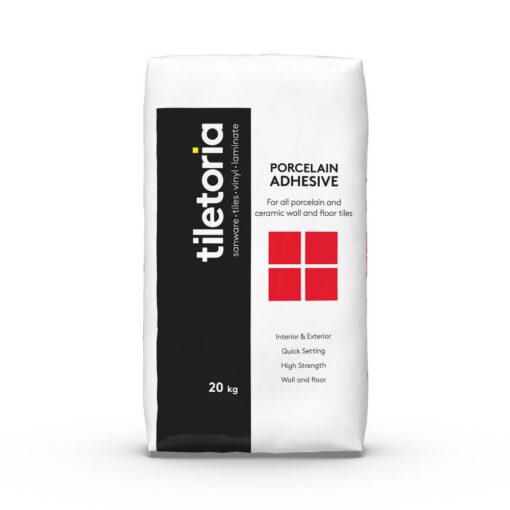
When it comes to tiling projects, using the right adhesive is crucial for achieving a durable and long-lasting finish. Properly applied adhesive ensures that tiles adhere securely to the surface, preventing cracks, loose tiles, and water damage.
In this comprehensive guide, we will walk you through the essential steps and best practices for using adhesives in your tiling projects, enabling you to achieve professional results and create beautiful tiled surfaces that stand the test of time.
1. Select the Right Adhesive:
Choosing the correct adhesive is the first step towards a successful tiling project. Consider factors such as the type of tiles you are using, the substrate (surface) you are tiling on, and the environment in which the tiles will be installed.
Different adhesives are formulated for specific applications, such as ceramic, porcelain, or natural stone tiles. Select an adhesive that is suitable for your specific tile type and the surface you are working on to ensure proper adhesion and longevity.
2. Prepare the Surface:
Proper surface preparation is vital for optimal adhesion. Ensure that the surface is clean, dry, and free from dust, grease, or any other contaminants. Remove any loose or uneven areas and repair them before applying the adhesive.
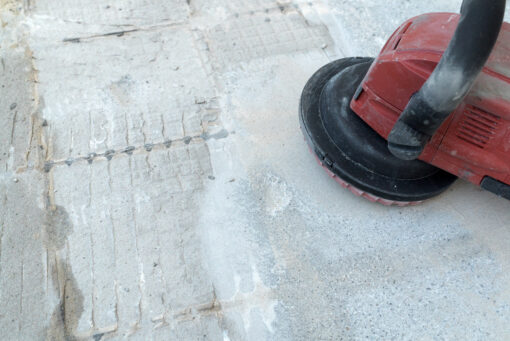
If the surface is particularly smooth or non-porous, consider roughening it with sandpaper or using a suitable primer to enhance the bond between the adhesive and the surface.
3. Mix the Adhesive:
Follow the manufacturer’s instructions to mix the adhesive correctly. Use clean water and gradually add the adhesive powder while stirring to achieve a smooth and lump-free consistency.
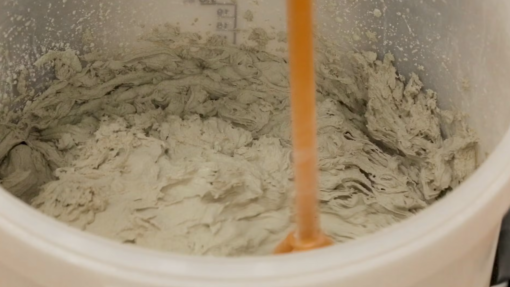
Avoid preparing more adhesive than you can use within the recommended pot life to prevent waste and ensure the adhesive remains workable.
4. Apply the Adhesive:
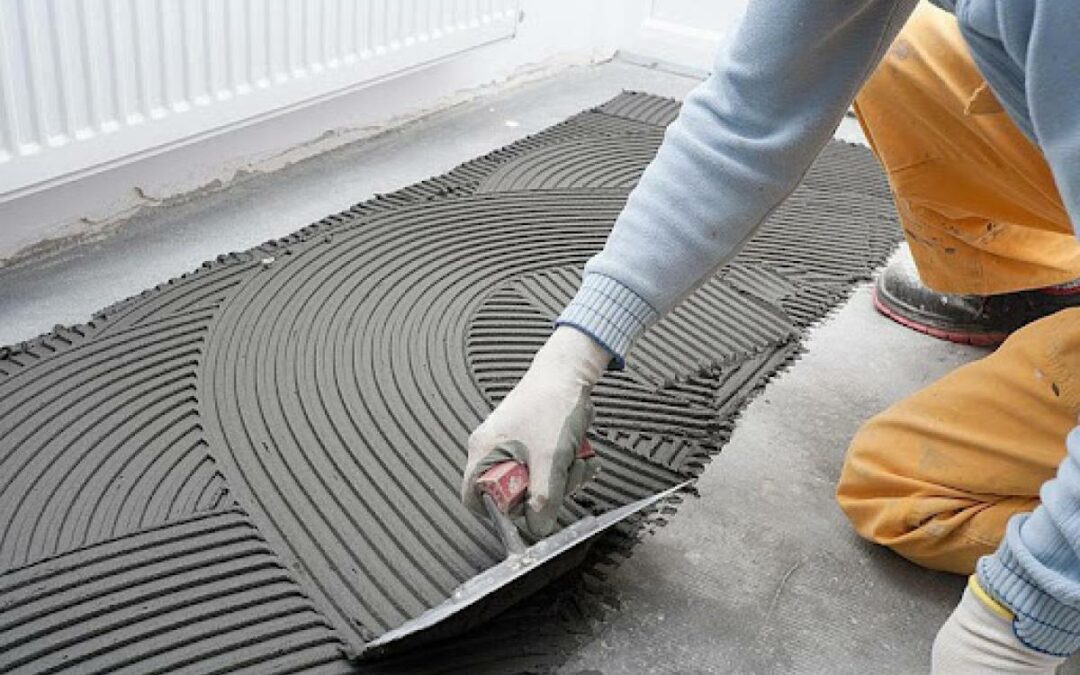
Using a notched trowel, spread the adhesive evenly onto the surface. The size of the notches on the trowel should be determined by the tile size and thickness, as well as the substrate condition.
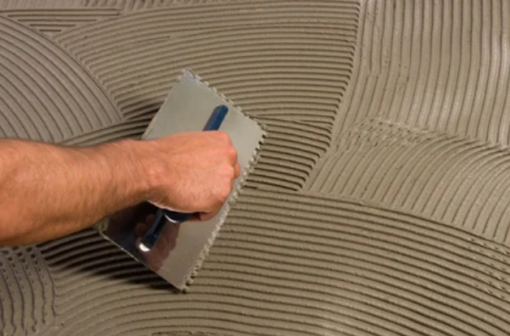
Apply the adhesive in small sections, working in manageable areas to prevent it from drying out before placing the tiles. Keep the trowel at a consistent angle to ensure a uniform adhesive bed.
5. Tile Placement:
Carefully press each tile into the adhesive, applying even pressure to ensure good contact and proper adhesion. Use tile spacers to maintain consistent spacing between tiles and achieve straight grout lines.
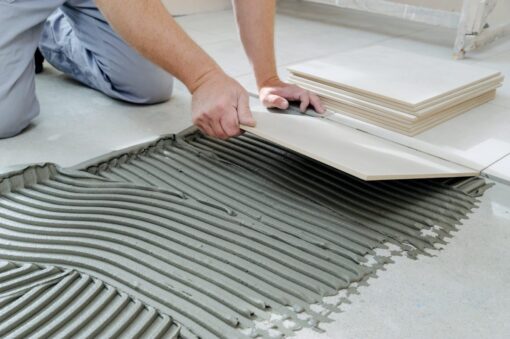
Check periodically with a level or straightedge to ensure that the tiles are aligned correctly and flush with each other. Wipe off any excess adhesive that squeezes out from the joints before it dries.
6. Allow for Proper Drying and Curing Time:
Follow the manufacturer’s instructions regarding drying and curing time. Allow the adhesive to set for the recommended period before applying grout or subjecting the tiled surface to any moisture or foot traffic.
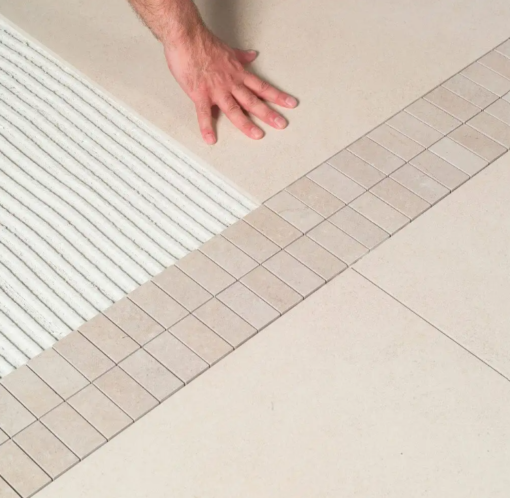
Proper drying and curing time will ensure that the adhesive reaches its maximum strength and bond.
Using adhesives for tiling requires attention to detail and adherence to proper techniques. By following this guide, you can achieve professional results in your tiling projects.
At Tiletoria, we offer a wide range of high-quality adhesives suitable for various tile types and applications. With the right adhesive and proper techniques, you can confidently tackle any tiling project and enjoy beautiful, long-lasting results.
Visit our showroom in Cape Town or Johannesburg to explore our selection and consult with our knowledgeable staff.

blog, commercial blog, floors, woodlook
When it comes to selecting flooring for your home or office, vinyl flooring has emerged as a popular choice due to its durability, versatility, and aesthetic appeal. With a wide range of options available, choosing the right vinyl flooring can seem overwhelming.
In this comprehensive guide, we will walk you through the key factors to consider when selecting vinyl flooring, ensuring that you make an informed decision that meets your style preferences and functional needs.
Determine Your Flooring Requirements:
Before diving into the vast array of vinyl flooring options, it’s essential to identify your specific requirements. Consider factors such as the room’s foot traffic, moisture levels, and desired level of comfort.
High-traffic areas, such as hallways or commercial spaces, may require a thicker wear layer for enhanced durability, while moisture-prone areas like bathrooms would benefit from waterproof vinyl flooring options.
Explore Different Types of Vinyl Flooring:
Vinyl flooring comes in various types, each offering distinct benefits. Sheet vinyl is a cost-effective option that provides seamless coverage and easy maintenance. Vinyl planks and tiles offer a more realistic appearance, mimicking the look of natural hardwood or stone at a fraction of the cost.
Luxury Vinyl Tiles (LVT) and Luxury Vinyl Planks (LVP) are known for their durability, water resistance, and ability to handle heavy foot traffic. Understanding the types of vinyl flooring available will help you choose the one that aligns with your style and practical requirements.
Consider Design and Style:
Vinyl flooring is available in a vast range of designs, patterns, and colours, allowing you to unleash your creativity and achieve your desired aesthetic.
Whether you prefer the warmth of wood, the elegance of stone, or the sleekness of modern designs, there is a vinyl flooring option to suit every taste.
Take into account the existing decor and colour palette of your space, and select a vinyl flooring style that complements and enhances the overall ambiance.
Assess Installation Methods:
Vinyl flooring can be installed in different ways, including glue-down, click-lock, and loose-lay methods. Glue-down vinyl requires adhesive to secure the flooring to the subfloor, ensuring a permanent and stable installation.

Click-lock vinyl utilizes a locking mechanism that allows the planks or tiles to seamlessly interlock, providing a floating floor installation that is easy to install and remove. Loose-lay vinyl features a heavy backing that helps keep the flooring in place without the need for adhesive or locking mechanisms. Consider your installation preferences and skill level when choosing the appropriate installation method for your vinyl flooring.
Evaluate Maintenance and Durability:
One of the significant advantages of vinyl flooring is its low-maintenance nature. However, different vinyl options may have varying durability and maintenance requirements. Look for vinyl flooring with a wear layer that suits your needs—thicker wear layers offer better protection against scratches and wear over time.
Additionally, consider factors such as stain resistance, ease of cleaning, and resistance to fading from sunlight. Opt for vinyl flooring that aligns with your lifestyle and requires minimal upkeep to keep it looking its best.
Choosing the perfect vinyl flooring for your space is an exciting process when armed with the right knowledge. By considering these factors, you can confidently select vinyl flooring that strikes the perfect balance between style and functionality.
Visit your neartest Tiletoria showroom in Cape Town Johannesburg today to explore our extensive range of vinyl flooring options.
Our knowledgeable staff will guide you through the selection process, ensuring you find the ideal vinyl flooring that transforms your space into a stunning and durable haven.
blog, commercial blog, floors, woodlook
When it comes to transforming your home or office space, choosing the right flooring is crucial. If you’re looking for a flooring solution that offers both beauty and functionality, look no further than laminate flooring. Laminate floors have become increasingly popular due to their durability, affordability, and wide range of design options.
At Tiletoria, we pride ourselves on providing the finest laminate flooring choices to suit every style and preference.
KRONOTEX Laminate Flooring:
One of our premier laminate flooring options is the KRONOTEX range, crafted in Germany. KRONOTEX is renowned for its exceptional quality and attention to detail. With a variety of decors, this range caters to diverse tastes and preferences.
Whether you desire the timeless elegance of wood grain or the captivating allure of stone textures, KRONOTEX offers laminate flooring that perfectly emulates the natural beauty of these materials.
Each plank provides an authentic look and feel, ensuring a stunning result that will impress any visitor.
Natures Floor Laminate Range:
For those seeking a more natural ambiance, our Natures Floor laminate range is an excellent choice. This collection combines the elegance of hardwood with the durability and practicality of laminate.
Natures Floor captures the essence of wood, bringing warmth and character to any space. From rich, deep tones to lighter shades, these laminates beautifully replicate the diverse colours and textures found in nature.
Embrace the cozy atmosphere of a wooden floor while enjoying the convenience and resilience of laminate.
Style Laminate Floor Range:
If you’re looking to elevate your space with a touch of timeless elegance, our Style Laminate Floor range is the perfect choice.
This collection offers a wide selection of classic designs and finishes that exude sophistication and refinement.
From rich walnut red to smooth grey, Style Laminate Floors provide the perfect balance of style and functionality.
With their sleek and versatile appearance, these laminates seamlessly integrate into any interior design, creating a cohesive and inviting atmosphere.
We understand that choosing the right flooring is essential in creating the perfect ambiance for your space. Whether you’re renovating your home or embarking on a commercial project, our laminate floors offer durability, versatility, and unmatched aesthetics.
Visit our Tiletoria showroom in Cape Town or Johannesburg today to explore our laminate flooring range and experience firsthand the quality and beauty that laminate flooring can bring to your space.
Trust us to provide you with the finest products and exceptional customer service, ensuring your flooring journey is a success.
blog, floors, walls
When it comes to home design, simplicity and minimalism have become increasingly popular. Embracing clean lines, open spaces, and a clutter-free environment can create a sense of calm and harmony. However, minimalism doesn’t have to mean boring or plain. By incorporating large impactful lines and graphic shapes into your tiling, you can infuse your space with a bold and striking design feature.
Let’s explore how minimalistic tiling with graphic shapes can transform your home.
1. Embracing Minimalistic Tiling:
Minimalistic tiling is all about using clean lines, neutral colours, and simple patterns to create a visually pleasing aesthetic. It focuses on the idea that less is more, and every element serves a purpose. When considering minimalistic tiling, keep the following principles in mind:
– Neutral Colour Palette: Opt for neutral colours such as white, grey, beige, or black. These colours provide a clean canvas for your graphic shapes to stand out while maintaining an overall minimalist feel.
– Simplicity in Design: Choose tile patterns that are straightforward and uncomplicated. Subtle textures or monochromatic tiles can enhance the minimalistic appeal.
2. Incorporating Graphic Shapes:
Now comes the exciting part – introducing graphic shapes into your tiling to create a captivating visual impact. By using bold lines and shapes, you can add a dynamic and artistic touch to your space. Here are some ideas to consider:
– Geometric Patterns: Incorporate geometric shapes like squares, rectangles, triangles, or hexagons to create visually striking patterns. Experiment with different orientations and combinations to find a design that suits your style.
– Large-Scale Lines: Opt for tiles with prominent, elongated lines that draw the eye across the space. These lines can be used to create linear or diagonal patterns, adding depth and interest to your tiling.
– Oversized Shapes: Think big! Consider using larger tiles or oversized shapes to make a bold statement. Large-scale circles, diamonds, or irregular shapes can create a focal point in your space.
3. Creating a Cohesive Design:
To ensure a successful outcome, it’s essential to create a cohesive design that balances minimalism with impactful graphic shapes. Consider the following tips:
– Strategic Placement: Select one or two areas to showcase your graphic shapes, such as a feature wall, backsplash, or floor design. This allows the shapes to stand out without overwhelming the entire space.
– Contrast and Balance: Pair the graphic shapes with the surrounding tiles for a harmonious look. Choose complementary colours or textures that provide a contrast while maintaining a cohesive overall design.
– Consistency in Style: Maintain a consistent style throughout your space. Use the same types of shapes or lines in different areas to create a sense of continuity. Consistency helps tie the design together and prevents it from feeling disjointed.
Minimalistic tiling with graphic shapes offers an exciting opportunity to transform your home into a visually captivating space. By adhering to the principles of minimalism while incorporating impactful lines and shapes, you can create a harmonious balance between simplicity and boldness. Whether you’re a DIY homeowner looking to enhance your living space or an interior designer seeking to impress clients, this trend provides a versatile and timeless design option.
So, embrace minimalistic tiling with graphic shapes and watch as your space undergoes a remarkable transformation that leaves a lasting impression.
Remember, with minimalism and graphic shapes, sometimes less truly can be more!