blog, commercial blog, how to articles
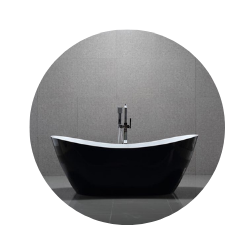
Embarking on a tile installation project can be both exciting and daunting. Whether you’re revamping your kitchen, bathroom, or any other space, the success of your project hinges on the tools and accessories you use. Choosing the right equipment can make the difference between a flawless installation and a frustrating ordeal. In this comprehensive guide, we’ll explore the crucial tools and accessories that are indispensable for a successful tile installation.

- Measuring and Layout Tools:
Accurate measurements and precise layout are the foundation of any successful tile installation. Invest in quality measuring tools, such as a tape measure, straight edge, and a framing square. A laser level is an excellent addition to ensure a level and straight installation.
- Tile Cutter:
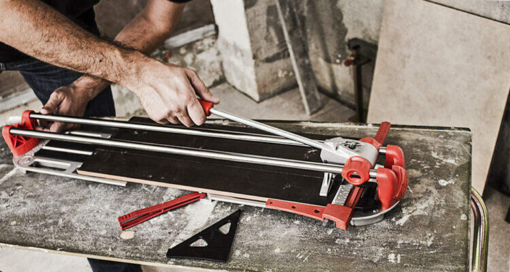
A tile cutter is a must-have tool for any tile installation project. There are various types of tile cutters available, including manual snap cutters, electric wet saws, and handheld tile cutters. Choose the one that best suits your needs and the type of tiles you’re working with.
- Tile Nippers:
Tile nippers are essential for making small, detailed cuts or shaping tiles to fit around obstacles. They are especially handy when dealing with ceramic or porcelain tiles that may require slight adjustments for a perfect fit.
- Tile Spacers:
Achieving consistent and even spacing between tiles is crucial for a professional-looking finish. Tile spacers come in various sizes and are used to maintain uniform gaps, ensuring that the tiles are properly aligned during installation.
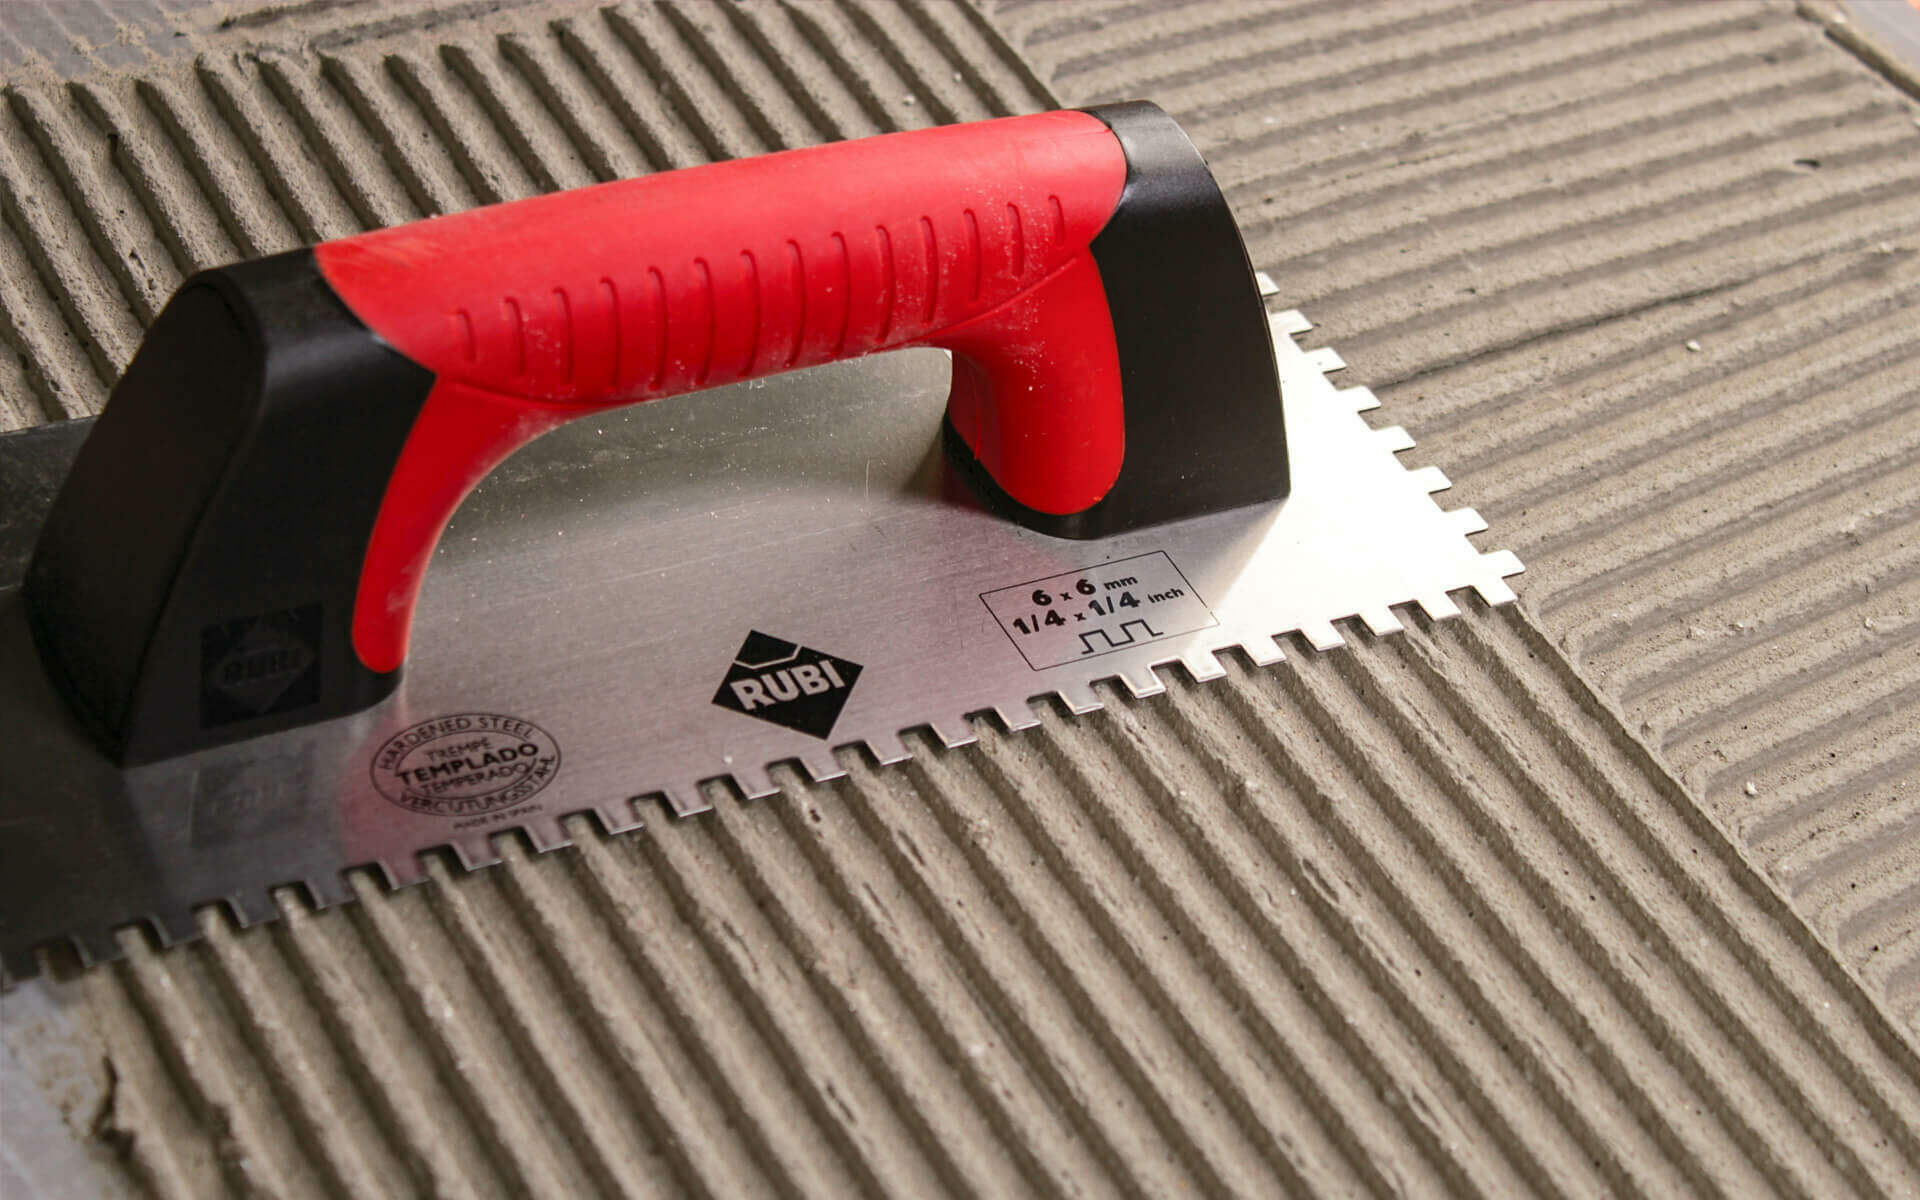
- Trowels and Notched Trowels:

Trowels are used to spread adhesive or mortar evenly on the substrate before laying the tiles. Notched trowels have ridges that help create uniform grooves in the adhesive, promoting better adhesion and reducing the risk of air pockets.
- Grout Float:
Once the tiles are in place, a grout float is used to apply and press grout into the spaces between tiles. Choose a rubber float for standard applications or a harder plastic float for epoxy grouts.
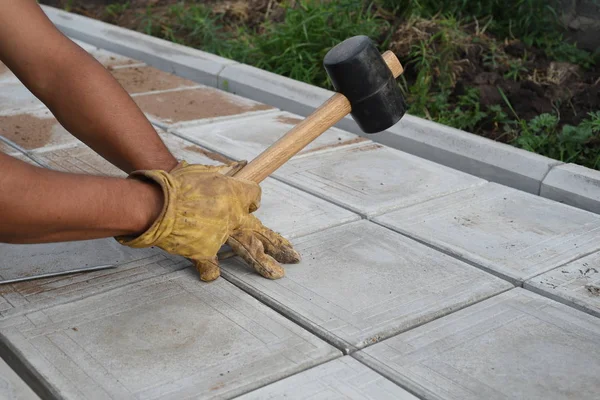
- Rubber Mallet:

A rubber mallet is essential for gently tapping tiles into place without damaging them. It’s particularly useful when adjusting tiles that may be slightly uneven or need to be leveled with neighboring tiles.
- Wet Saw:

For cutting through hard materials like natural stone or porcelain tiles, a wet saw is indispensable. The continuous flow of water helps keep the blade cool and minimizes dust, ensuring clean and precise cuts.
- Knee Pads:
Tile installation often involves spending a significant amount of time on your knees. Invest in quality knee pads to provide comfort and protection, reducing strain on your joints during the installation process.
- Safety Gear:
Protect yourself with the appropriate safety gear, including safety glasses and gloves. Tile cutting and installation can generate dust and debris, and protecting your eyes and hands is essential for a safe working environment.
- Mixing Drill and Paddle:
For large tile installations, using a mixing drill with the appropriate paddle attachment is essential for efficiently mixing mortar or adhesive. This ensures a consistent and lump-free mixture, promoting a secure bond between the tiles and the substrate.
- Sponges and Buckets:
Keep a bucket of clean water and a sponge handy for wiping off excess grout and adhesive during and after the installation. A clean sponge helps achieve a professional finish by preventing grout haze and residue on the tiles.
- Sealer and Applicator:
Depending on the type of tile you’re using, applying a sealer may be necessary to protect against stains and moisture. Invest in a high-quality sealer and the appropriate applicator to ensure thorough and even coverage.
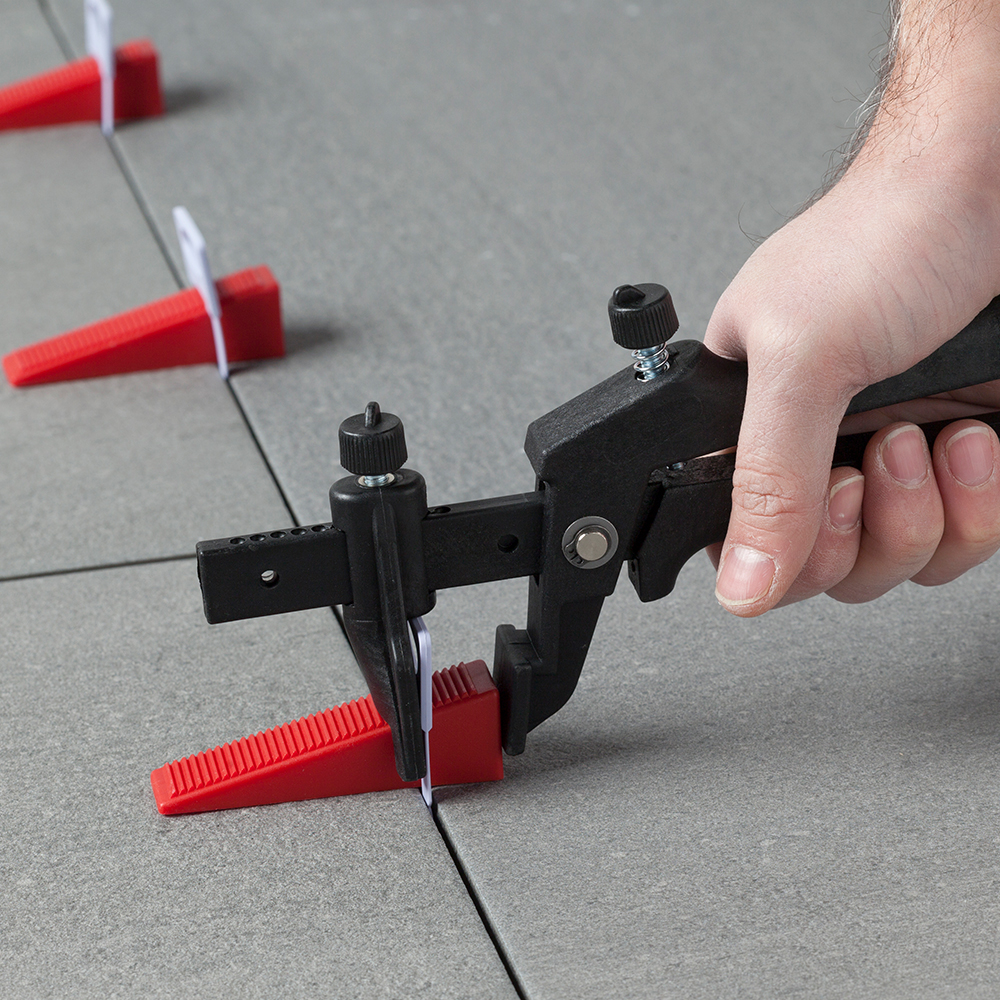
- Tile Leveling System:

To achieve a perfectly flat and level surface, consider using a tile leveling system. These systems use clips and wedges to ensure that tiles are flush with each other, preventing lippage and creating a seamless finish.
- Caulk and Caulk Gun:
Finish the edges of your tile installation with a high-quality caulk that matches the grout colour. A caulk gun makes the application process clean and precise, providing a professional look while also sealing gaps and preventing water intrusion.
A successful tile installation requires more than just the tiles themselves. The right tools and accessories play a crucial role in achieving a professional and long-lasting result. By investing in high-quality equipment and taking the time to plan and measure accurately, you’ll set the stage for a smooth and successful tile installation project. Whether you’re a seasoned DIY enthusiast or a professional contractor, having the essential tools at your disposal will make the entire process more efficient and enjoyable.
blog, floors, walls
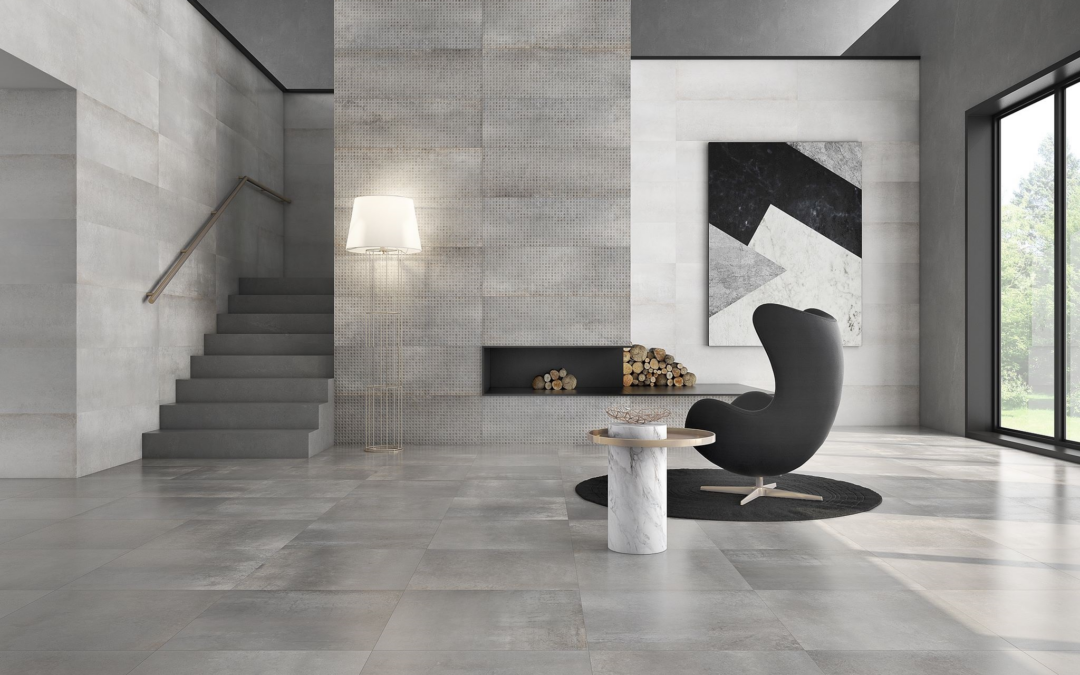
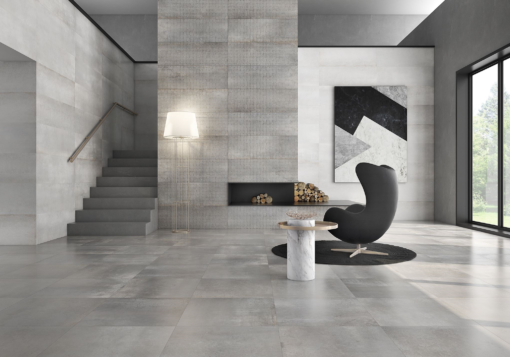
In the ever-evolving world of interior design, homeowners are constantly on the lookout for innovative ways to enhance the aesthetic appeal of their living spaces. One trend that has gained considerable popularity in recent years is the use of large format tiles. These tiles, known for their expansive dimensions and seamless appearance, have become a go-to choice for those seeking a modern and sophisticated look in their homes. As with any design choice, there are both advantages and drawbacks to consider. In this blog post, we’ll delve into the pros and cons of using large format tiles, helping you make an informed decision about whether they’re the right fit for your home.
Pros of Using Large Format Tiles:
- Sleek Aesthetics:
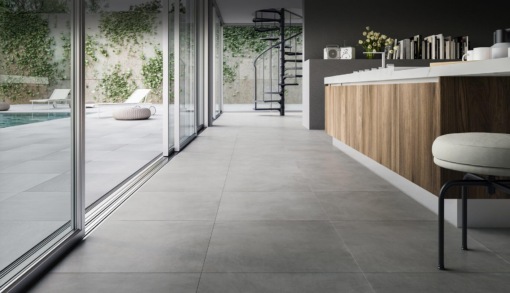
One of the primary reasons homeowners opt for large format tiles is the seamless and sophisticated appearance they offer. These tiles can create a visually stunning, uninterrupted surface that can make smaller spaces appear more expansive and open.
- Fewer Grout Lines:
Large format tiles cover more surface area with fewer grout lines. This not only contributes to a cleaner and more streamlined look but also reduces the amount of maintenance required to keep the tiles looking their best.
- Contemporary Design:
Large format tiles are synonymous with contemporary design. If you’re looking to achieve a modern and minimalist aesthetic, these tiles can be an excellent choice. They provide a canvas for other design elements to shine, allowing you to create a space that feels current and stylish.
- Illusion of Space:
The expansive nature of large format tiles can create an optical illusion, making a room feel larger than it actually is. This is particularly beneficial in smaller spaces where maximizing the perception of space is crucial.
- Easy Maintenance:
With fewer grout lines to clean and maintain, large format tiles are generally easier to care for than smaller tiles. Regular cleaning is simplified, and the overall upkeep is less time-consuming.
Cons of Using Large Format Tiles:
- Installation Challenges:
Installing large format tiles requires precision and expertise. The sheer size and weight of these tiles can make the installation process more complex, and hiring a professional is often recommended to ensure a flawless finish.
- Uneven Surfaces:
In some cases, the existing floor or wall surfaces may not be perfectly level. Large format tiles can exaggerate these imperfections, leading to an uneven appearance. Proper preparation of the surface is essential to avoid this issue.
- Cost:
While large format tiles can create a high-end look, they often come with a higher price tag compared to smaller tiles. Homeowners need to weigh the visual impact against their budget and decide whether the investment is justified for their particular project.
- Limited Design Options:
Large format tiles may not be suitable for intricate designs or spaces with a lot of corners and angles. The limited variety in patterns and designs can be a drawback for those seeking a more diverse range of options.
- Potential for Breakage:
Handling and transporting large format tiles can be challenging, and there is an increased risk of breakage during these processes. Careful planning and professional installation can mitigate this risk, but it’s an aspect to consider.
Tiletoria: Your Expert Guide to Large Format Tiles
If you’re considering incorporating large format tiles into your home, it’s crucial to partner with a reliable supplier who not only offers a diverse range of options but also provides expert advice and guidance. At Tiletoria, we take pride in being a leading supplier of tiles and sanware, committed to helping our customers make informed decisions about their home improvement projects.
Our team of experts understands the nuances of large format tiles and can guide you through the selection process, considering factors such as your budget, design preferences, and the specific requirements of your space. We believe in transparency and will discuss both the advantages and challenges associated with large format tiles, ensuring that you have a clear understanding before making a decision.
In addition to offering a wide range of high-quality tiles, we provide valuable resources such as installation guides and maintenance tips to make your experience with large format tiles as seamless as possible. Our commitment to customer satisfaction extends beyond the sale, as we strive to build lasting relationships with homeowners who trust Tiletoria for their tile and sanware needs.
In conclusion, the decision to use large format tiles in your home comes down to a careful consideration of the pros and cons. If you’re drawn to the sleek aesthetics, minimalistic design, and the illusion of space that these tiles can provide, the investment may well be worth it. However, it’s essential to be aware of the potential challenges and enlist the support of experts like Tiletoria to ensure a successful and visually stunning outcome for your home.
blog, floors, trends, walls
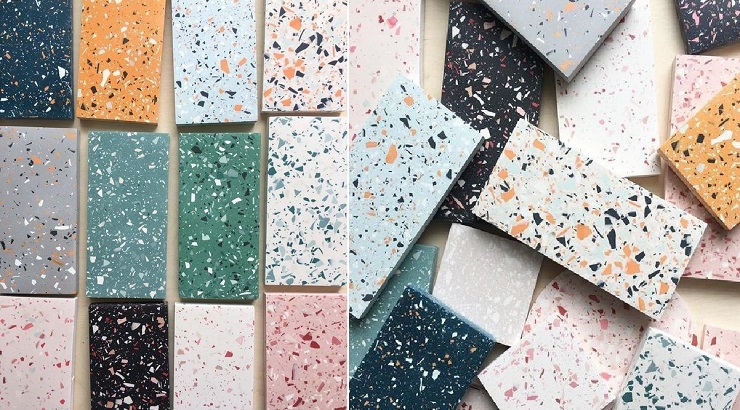
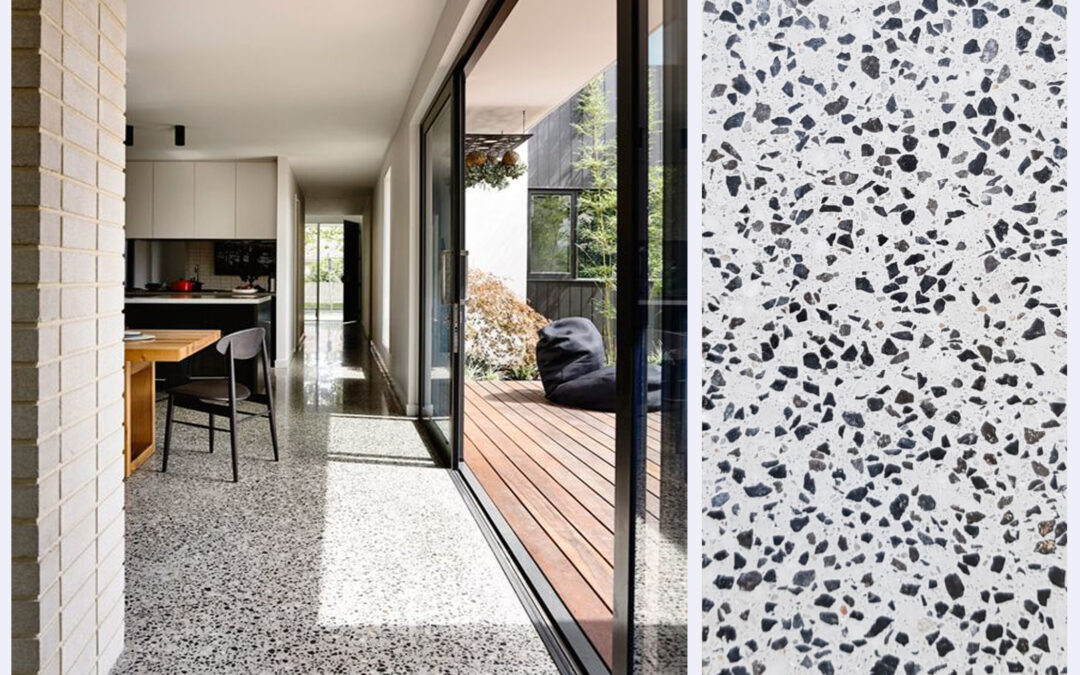
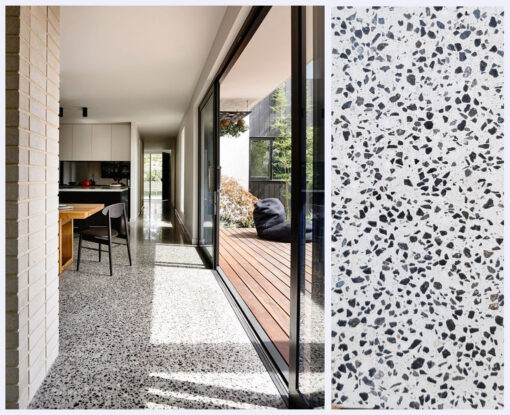
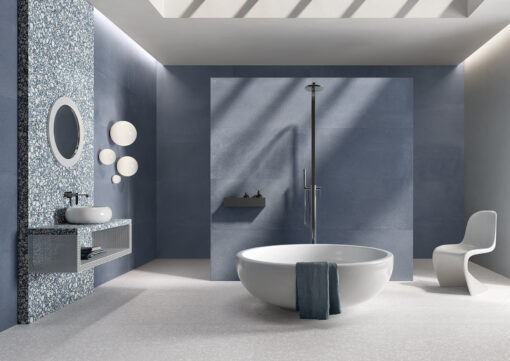
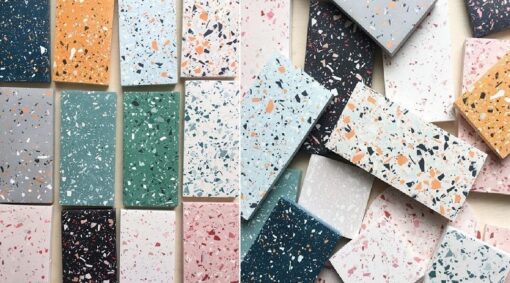
Terrazzo, a classic flooring material that originated in ancient times, has experienced a renaissance in contemporary interior design. The amalgamation of marble, granite, quartz, or glass chips with cement or epoxy resin creates a unique and versatile surface known for its durability and aesthetic appeal. As we navigate the ever-evolving landscape of design trends, terrazzo tiles have emerged as a timeless choice, seamlessly blending the old and the new. In this blog, we explore the resurgence of terrazzo in contemporary interior design and delve into the various trends that make it a captivating choice for modern spaces.
The Terrazzo Comeback
Terrazzo, born in ancient Rome, made its mark as a cost-effective flooring solution. Over the centuries, it evolved, gracing palaces and cathedrals, becoming synonymous with luxury. However, by the mid-20th century, it fell out of favor, giving way to more minimalistic and utilitarian design choices. Fast forward to the 21st century, and terrazzo has made a triumphant return to the forefront of interior design.
Contemporary Applications
One of the key reasons behind the resurgence of terrazzo is its adaptability to various spaces. From residential homes to commercial spaces, terrazzo tiles have found their way into modern interiors, offering a distinctive character that resonates with both designers and homeowners. The versatility of terrazzo extends beyond flooring to countertops, backsplashes, and even furniture, making it a multifaceted choice for those looking to infuse their spaces with character.
Colourful Variations
Traditionally, terrazzo was characterized by a neutral colour palette dominated by shades of white, gray, and beige. However, contemporary design has ushered in a new era of terrazzo, marked by a burst of vibrant and bold colours. Designers and homeowners are now opting for terrazzo tiles that feature a spectrum of hues, adding an element of playfulness and individuality to spaces. From soft pastels to deep jewel tones, the colourful variations of terrazzo allow for creative expression, transforming spaces into lively and dynamic environments.
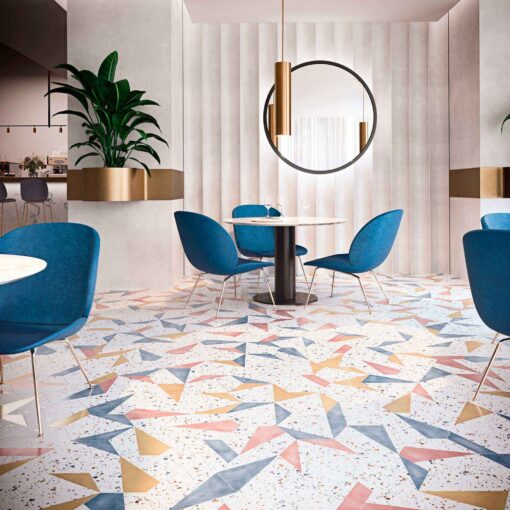
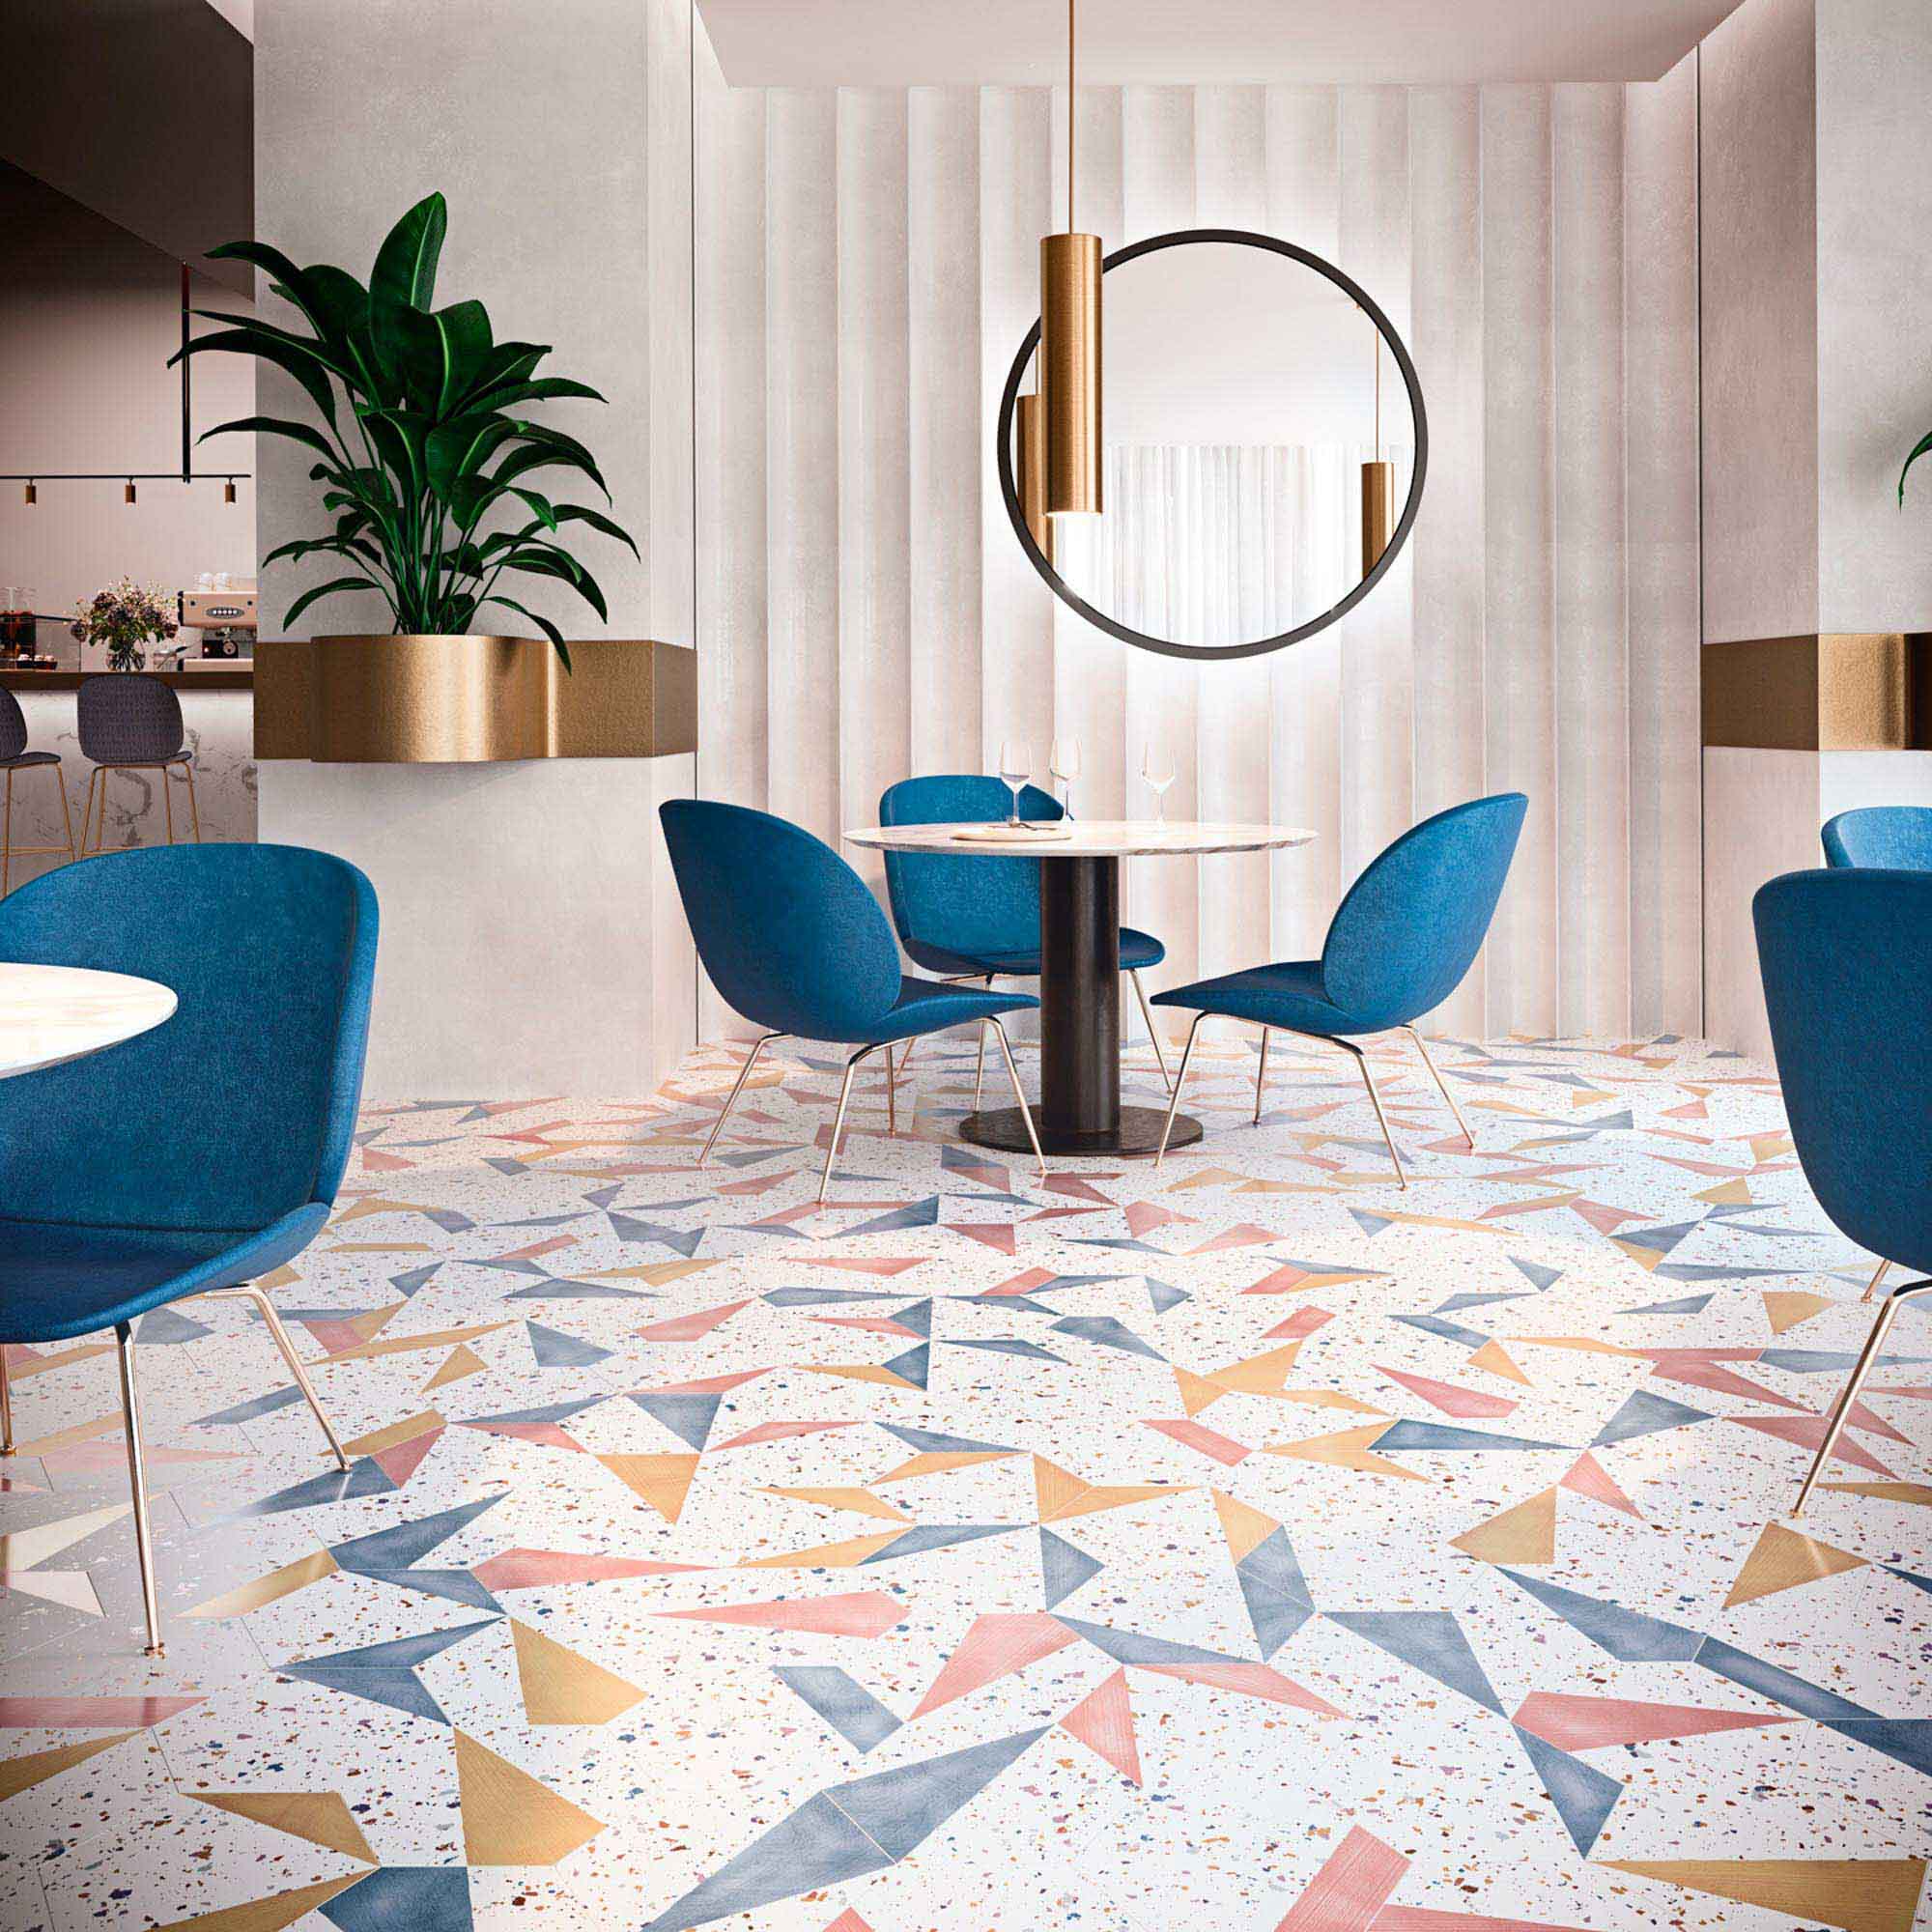
Large-format Terrazzo Tiles
In the realm of contemporary interior design, the size of tiles plays a crucial role. Large-format tiles, a trend gaining momentum, contribute to a sense of continuity and openness in a space. Terrazzo, once confined to smaller tiles, has embraced this trend with larger slabs that showcase the intricate patterns and textures more prominently. The result is a visually striking surface that commands attention and elevates the overall design aesthetic.
Customization and Pattern Play
One of the most appealing aspects of terrazzo is the ability to customize the mix of aggregates, allowing for a truly unique design. Contemporary interiors often favor personalized elements that reflect the tastes and preferences of the occupants. Terrazzo caters to this demand by offering a canvas for creative expression. Whether it’s incorporating specific colours, types of aggregates, or creating intricate patterns, the customization options with terrazzo are vast, allowing designers and homeowners to craft spaces that are truly one-of-a-kind.
Seamless Integration with Other Materials
Terrazzo’s adaptability extends beyond its standalone application. Designers are increasingly exploring ways to seamlessly integrate terrazzo with other materials, creating a harmonious blend of textures and finishes. For instance, combining terrazzo flooring with wooden elements or metal accents can result in a balanced and visually appealing composition. This integration not only enhances the aesthetic appeal but also opens up new possibilities for creating diverse design narratives.
Eco-Friendly Terrazzo
As sustainability becomes a focal point in contemporary design, eco-friendly materials are gaining prominence. Terrazzo, with its composition of recycled materials and low environmental impact, aligns perfectly with this shift towards more sustainable practices. Manufacturers are now producing terrazzo tiles with recycled glass, porcelain, and other environmentally friendly components, making it an eco-conscious choice for those looking to create stylish yet responsible interiors.
In the dynamic world of interior design, Terrazzo’s resurgence as a timeless and versatile choice is undeniable. From its historical roots in ancient Rome to its present status as a design icon, Terrazzo has experienced a remarkable renaissance. The infusion of vibrant colours, the embrace of large-format tiles, customizable options, and its seamless integration with other materials highlight its enduring popularity. As trends evolve, Terrazzo’s ability to seamlessly blend tradition with modernity has made it a staple in both residential and commercial spaces.
As we explore the cyclical nature of design trends, we invite you to consider the enduring appeal of Terrazzo. Whether you are envisioning a vibrant and bold colour palette, the sophistication of large-format tiles, or a personalized touch through customization, Terrazzo offers a canvas for creative expression. Its adaptability and eco-friendly options align perfectly with the growing demand for sustainable design practices.
At Tiletoria, a leading supplier of tiles and sanitary ware, we understand the significance of staying ahead of design trends. Our curated collection of Terrazzo tiles reflects not only the classic elegance of this material but also its contemporary adaptations. Whether you’re a homeowner looking to infuse your space with character or a designer seeking versatile options, our Terrazzo tiles provide a perfect balance of tradition and modernity. Let Tiletoria be your partner in creating spaces that stand the test of time, where Terrazzo takes center stage as a symbol of enduring style and sophistication.

blog, commercial blog, how to articles, walls
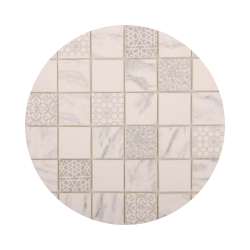
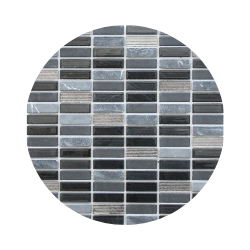
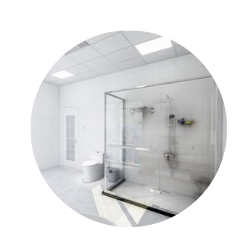
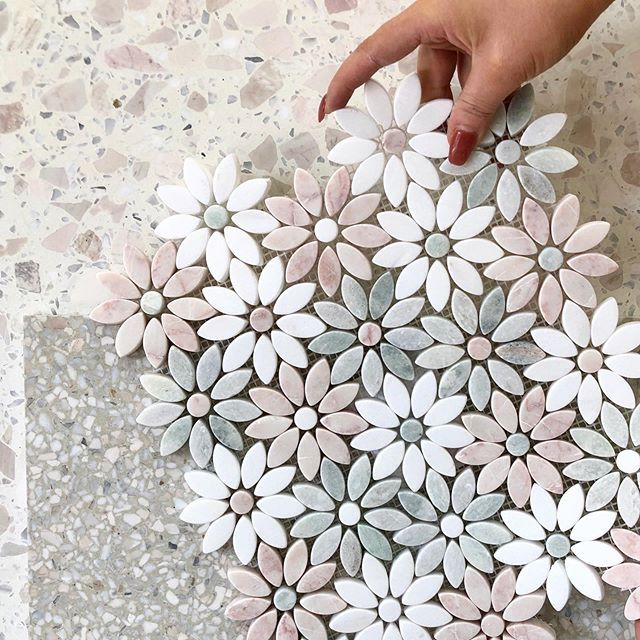
Mosaic tiles have an undeniable charm that can add a touch of artistry and sophistication to any space. Whether you’re planning to transform your kitchen backsplash, bathroom, or any other area in your home, installing mosaic tiles can be a fulfilling DIY project if done correctly. In this comprehensive guide, we’ll walk you through the steps to install mosaic tiles like a professional, ensuring a stunning and lasting result for your home improvement project.
Why Choose Mosaic Tiles?
Before we dive into the installation process, it’s essential to understand why mosaic tiles are a popular choice for homeowners. Mosaic tiles are characterized by their small size and intricate designs. Here are some reasons to consider them:
- Visual Appeal: Mosaic tiles come in a wide range of colours, materials, and patterns, allowing you to create unique and eye-catching designs. Their small size often makes them ideal for detailed and intricate patterns.
- Versatility: You can use mosaic tiles in various applications, including backsplashes, showers, floors, and even as decorative accents. They can be applied to almost any surface that can support tiles.
- Durability: Mosaic tiles are typically made from materials like glass, ceramic, porcelain, and natural stone, making them durable and long-lasting. They are resistant to moisture, stains, and wear and tear.
- Easy Maintenance: Mosaic tiles are relatively easy to clean and maintain, thanks to their non-porous surface. A simple wipe-down or mopping will keep them looking new.
- Value Addition: Installing mosaic tiles can increase the value of your home. Potential buyers often find them attractive and appreciate the attention to detail they bring to a space.
Now that you know why mosaic tiles are a great choice let’s get into the step-by-step guide for a professional installation.
Tools and Materials You’ll Need
Before you begin the installation, gather the following tools and materials to ensure a smooth and efficient process:
Tools:
– Mosaic tiles
– Tile adhesive
– Tile spacers
– Tile cutter or nipper
– Notched trowel
– Grout
– Grout float
– Tile sponge
– Bucket for mixing grout
– Level
– Measuring tape
– Pencil
– Safety glasses and gloves
– Drop cloth or plastic sheeting
– Sandpaper
– Masking tape (if needed)
Step 1: Prepare the Surface
Before you start installing mosaic tiles, it’s crucial to ensure that the surface you’re tiling is clean, smooth, and free from any dust or debris. The quality of your installation depends on a well-prepared surface. If you’re working on a wall, patch any holes or imperfections. If you’re tiling a floor, make sure it’s level.
Tips:
– Repair any existing damage or imperfections on the surface before starting.
– Sand down rough or uneven areas to create a smooth and even substrate for your tiles.
– Cover surrounding areas with a drop cloth or plastic sheeting to protect them from adhesive and grout spills.
Step 2: Plan Your Layout
Before you start attaching tiles, it’s a good idea to plan the layout to avoid potential problems later. Here’s how to do it:
- Dry-Fit Your Tiles: Lay out your mosaic tiles on the surface without adhesive to get a sense of how they will look. Experiment with different arrangements and patterns to find the one that suits your aesthetic preferences.
- Measure and Mark: Use a measuring tape and pencil to mark the center point of your surface. This will serve as your starting point for tile installation.
- Create a Grid: Use a level and pencil to create a grid of guidelines that intersect at the center point. This grid will guide your tile placement and ensure a balanced design.
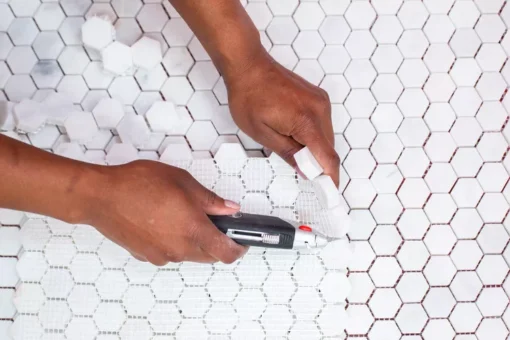
- Adjust and Cut Tiles: Depending on your layout, you may need to trim tiles to fit along the edges and borders of your surface. Use a tile cutter or nipper for this purpose.
Tips:
– Experiment with different arrangements to find the one that suits your aesthetic preferences.
– Make sure that the layout is symmetrical and well-balanced, especially if you’re working with a focal point like a backsplash or a decorative feature.
Step 3: Mix Tile Adhesive
Next, you’ll need to prepare the adhesive that will hold your mosaic tiles in place. Follow the manufacturer’s instructions on the adhesive packaging to create a mixture with the correct consistency.
Tips:
– Mix small batches of adhesive as you work to prevent it from drying out before you can apply the tiles.
– Wear safety glasses and gloves when handling adhesive to protect your eyes and skin.
Step 4: Apply Tile Adhesive
With your adhesive mixture ready, it’s time to apply it to the surface in preparation for your mosaic tiles. Here’s how:
- Work in Small Sections: Begin by spreading a layer of adhesive on a small section of the surface. The idea is to work on an area you can tile in about 15-20 minutes to prevent the adhesive from drying out.
- Use a Notched Trowel: Use a notched trowel to spread the adhesive evenly over the surface. The notches on the trowel create ridges that help the tiles adhere properly. The size of the notches should match the size of your tiles.
- Apply at a 45-Degree Angle: Hold the trowel at a 45-degree angle and apply pressure to ensure that the adhesive is evenly distributed.
Tips:
– Work methodically and avoid applying adhesive to a larger area than you can tile within the specified time to maintain adhesive tackiness.
– Use the notched side of the trowel to create ridges in the adhesive for better tile adhesion.
Step 5: Install Mosaic Tiles
Now comes the exciting part – attaching your mosaic tiles to the adhesive. Follow these steps for a professional-looking installation:
- Press Tiles into Adhesive: Carefully press each mosaic tile into the adhesive, following the grid you created during the layout planning. Ensure that each tile is level and properly aligned with the others.
- Use Tile Spacers: Insert tile spacers between the tiles to maintain even gaps. The size of the spacers will depend on your design and the desired spacing between tiles.
- Trim Tiles When Necessary: You may need to trim tiles to fit along the edges or around obstacles like electrical outlets or plumbing fixtures. Use a tile cutter or nipper for this purpose.
Tips:
– Check your layout and grid lines regularly to ensure that you’re staying on track and that your mosaic design remains balanced.
– Double-check tile alignment and spacing to create a polished look.
Step 6: Allow Adhesive to Dry
After you’ve successfully attached all your mosaic tiles to the adhesive, it’s crucial to allow the adhesive to dry thoroughly. Follow the manufacturer’s instructions for the recommended drying time, which is typically around 24 hours. The drying time may vary based on factors like humidity and temperature.
Tips:
– Avoid any physical contact with the tiles during this drying period to prevent accidental displacement.
Step 7: Prepare Grout
Grout is the material that fills the gaps between your tiles and gives your installation a polished, finished look. Here’s how to prepare it:
- Select the Right Grout: Choose a grout colour that complements your mosaic tiles and the design you’ve created. Grout comes in various colours, so take your time to select the one that enhances your design. Access our guide to Choosing The Right Grout Colour here.
- Mix the Grout: Follow the manufacturer’s instructions to mix your grout. Typically, you’ll need to combine the grout powder with water until you achieve a smooth, thick consistency, similar to peanut butter.
Tips:
– Make sure to choose the right colour of grout that complements your mosaic tiles.
– Prepare a reasonable amount of grout to work with, as it should be used quickly to maintain its workability.
Step 8: Apply Grout
Applying grout is a crucial step that will not only fill the gaps between your mosaic tiles but also ensure their stability. Here’s how to do it:
- Work in Small Sections: Just as with adhesive, it’s best to work in small sections when applying grout. This allows you to manage the process more efficiently.
- Spread Grout: Use a grout float to spread the grout evenly over the tiles. Hold the float at a 45-degree angle to the tiles to pack the grout into the gaps.
- Hold the Float at an Angle: To ensure the grout gets into the gaps and covers the entire tile surface, hold the float at a slight angle and apply pressure as you move it.
Tips:
– Work methodically to ensure that the grout is evenly applied to all areas of your mosaic tiles.
– Don’t rush this step, as it’s essential to get the grout into all the gaps and ensure a secure bond.
Step 9: Remove Excess Grout
Once you’ve applied the grout, it’s time to clean up the excess to reveal your beautifully installed mosaic tiles. Here’s what you need to do:
- Dampen a Tile Sponge: Wet a tile sponge and wring out the excess water. You want the sponge to be damp but not soaking.
- Wipe the Tiles: Gently wipe the tiles with the damp sponge to remove excess grout from the tile surfaces. Rinse the sponge frequently to avoid smearing grout over the tiles.
- Clean Grout Lines: Use the sponge to shape and clean the grout lines, ensuring they are even and smooth.
Tips:
– Work carefully but quickly to prevent the grout from hardening on the tiles.
– Rinse the sponge thoroughly to avoid spreading grout residue on the tiles.
Step 10: Final Cleaning
Once you’ve removed most of the excess grout from the tiles, allow the grout to set for a short period before doing a final cleaning. Here’s how to do it:
- Allow Grout to Set: Let the grout dry for a short time, typically for about 15-30 minutes, or as recommended by the grout manufacturer. The grout should become slightly hazy.
- Buff Tiles: Using a clean, dry cloth or a lint-free rag, gently buff away the remaining grout haze from the tiles. This will reveal the full beauty of your mosaic tiles.
Tips:
– Be patient while buffing the tiles to avoid scratching the surface.
Step 11: Seal the Grout (Optional)
While this step is optional, it’s recommended if you want to protect your grout from staining and make maintenance more manageable. Sealing the grout creates a barrier that prevents moisture and debris from penetrating the porous material. Follow these steps if you choose to seal your grout:
- Select a Grout Sealer: Choose a high-quality grout sealer that suits your needs. Grout sealers come in two main types: penetrating sealers and membrane-forming sealers. Penetrating sealers are absorbed into the grout, providing protection without altering its appearance, while membrane-forming sealers create a protective film over the grout.
- Apply the Sealer: Follow the manufacturer’s instructions for applying the sealer. Typically, you’ll use a brush, roller, or applicator bottle to spread the sealer over the grout lines. Be careful not to get sealer on the tile surfaces.
- Wipe Off Excess Sealer: After allowing the sealer to set for a few minutes (as per the manufacturer’s recommendations), use a clean, dry cloth to wipe off any excess sealer from the tile surfaces.
Tips:
– Make sure the grout is fully dry before applying the sealer.
– Some sealers may require multiple coats, so be sure to follow the product’s specific instructions.
Step 12: Enjoy Your Newly Tiled Surface
With the grout fully cured, which typically takes 24-72 hours, your mosaic tile installation is complete. Step back and admire your professional-looking mosaic tile work that enhances the beauty of your space. You’ve now added a touch of artistry and sophistication to your home.
Tips:
– Clean and maintain your mosaic tiles regularly to keep them looking their best.
– Consider using a tile and grout cleaner to remove dirt and stains without damaging your installation.

Installing mosaic tiles may seem like a daunting task, but with the right tools, materials, and a methodical approach, you can achieve professional-looking results. The beauty of mosaic tiles lies in their ability to add a unique and elegant touch to any room, and this step-by-step guide can help you achieve just that.
Whether you’re a seasoned DIY enthusiast or a first-time tiler, follow this guide, take your time, and enjoy the process. With patience and attention to detail, your mosaic tile installation will be a stunning addition to your home, elevating the aesthetics of your space and adding value to your property.
Now that you’ve learned how to install mosaic tiles like a pro, it’s time to roll up your sleeves and get started on your own tiling project. Whether you’re revamping your kitchen, upgrading your bathroom, or creating a beautiful mosaic masterpiece, you’re well-prepared for success. Happy tiling!

blog, walls
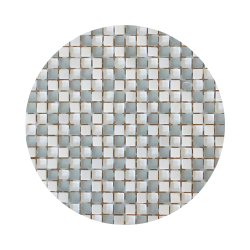
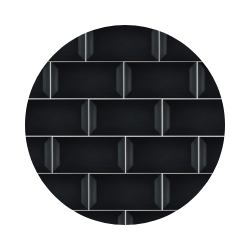
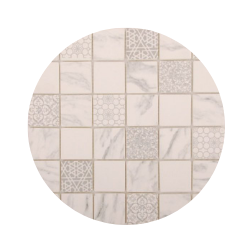
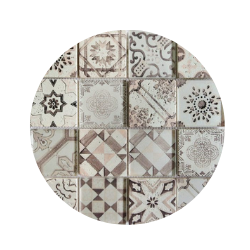
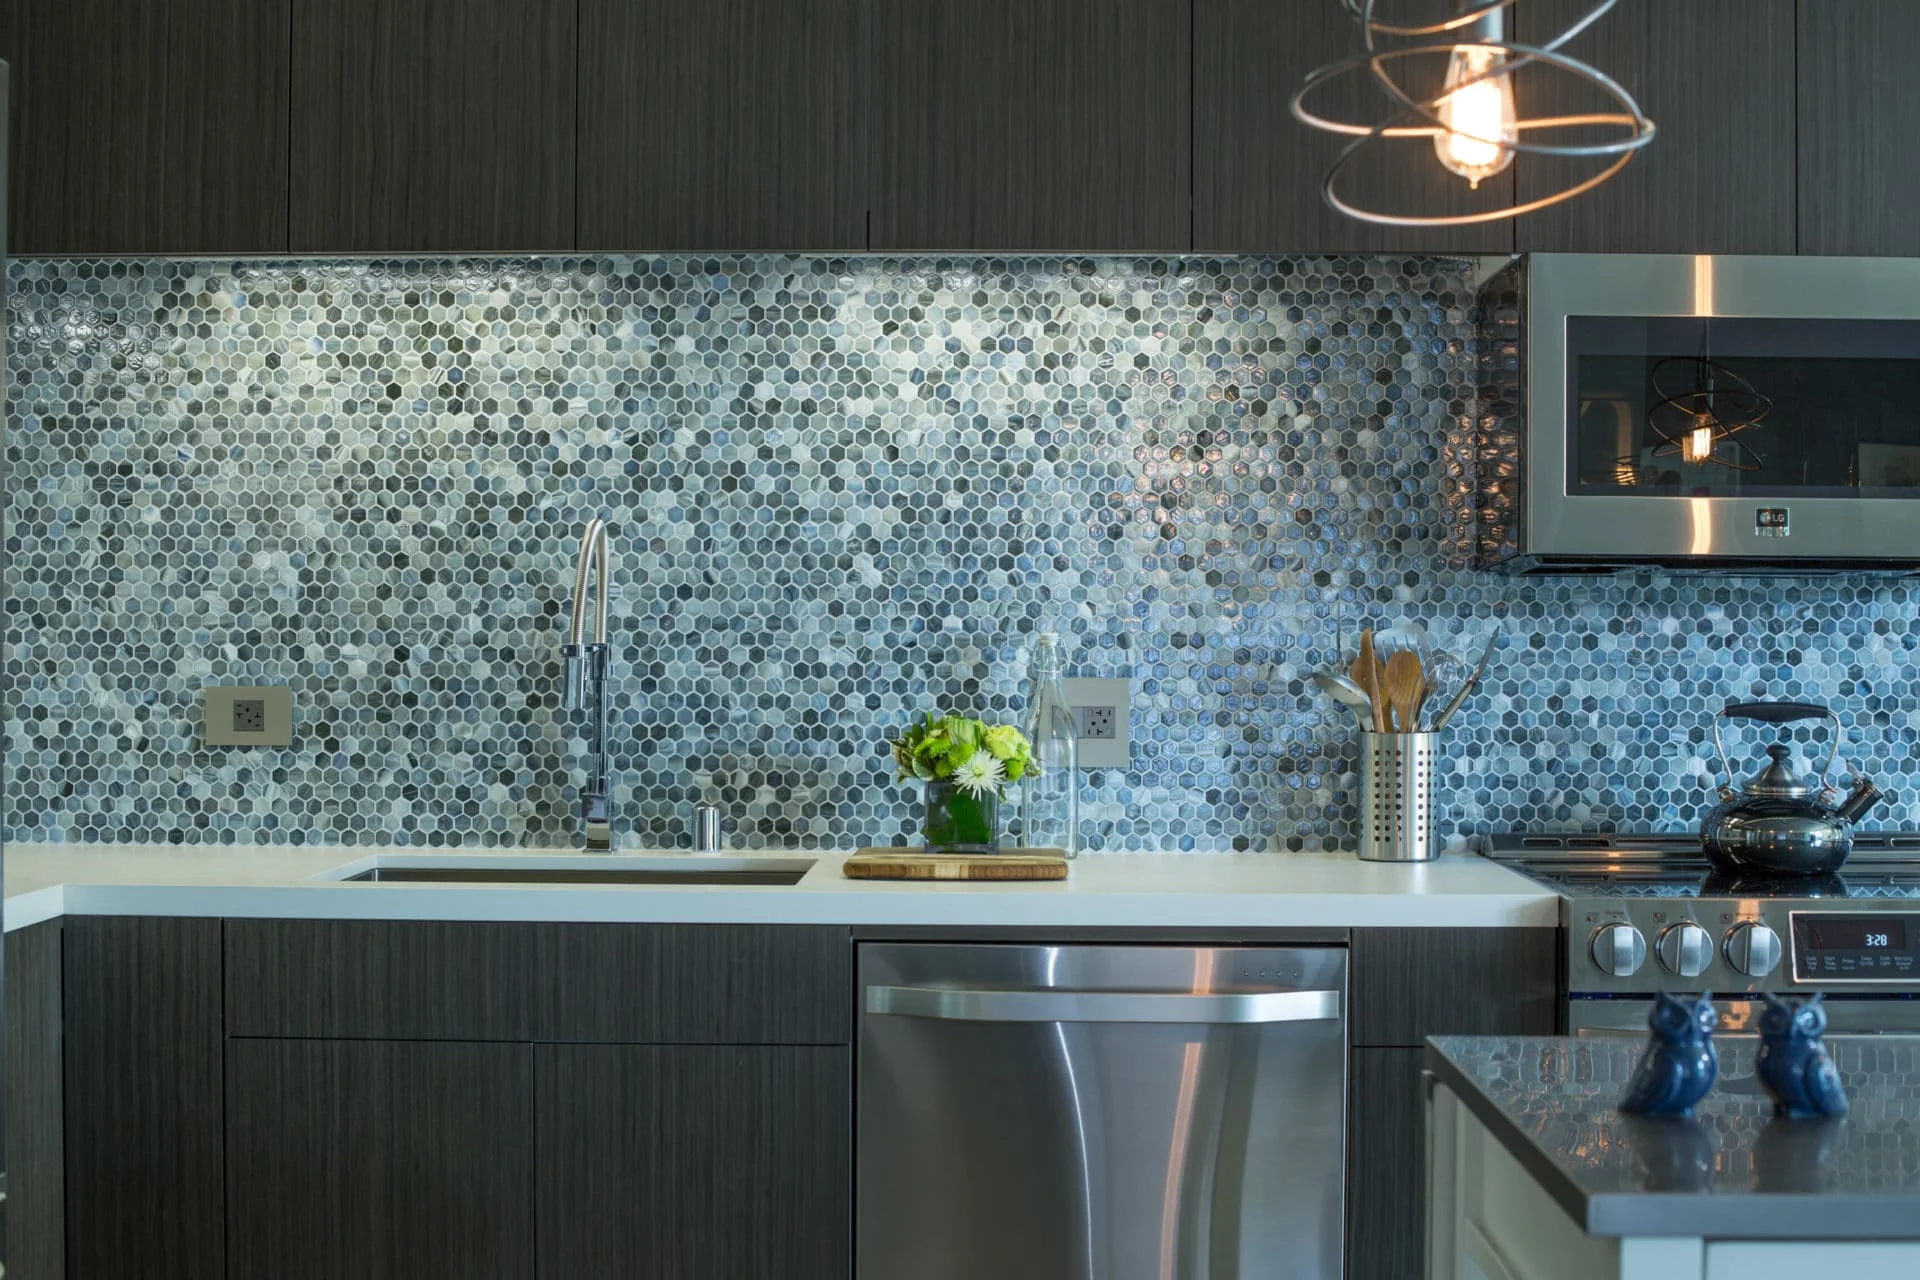
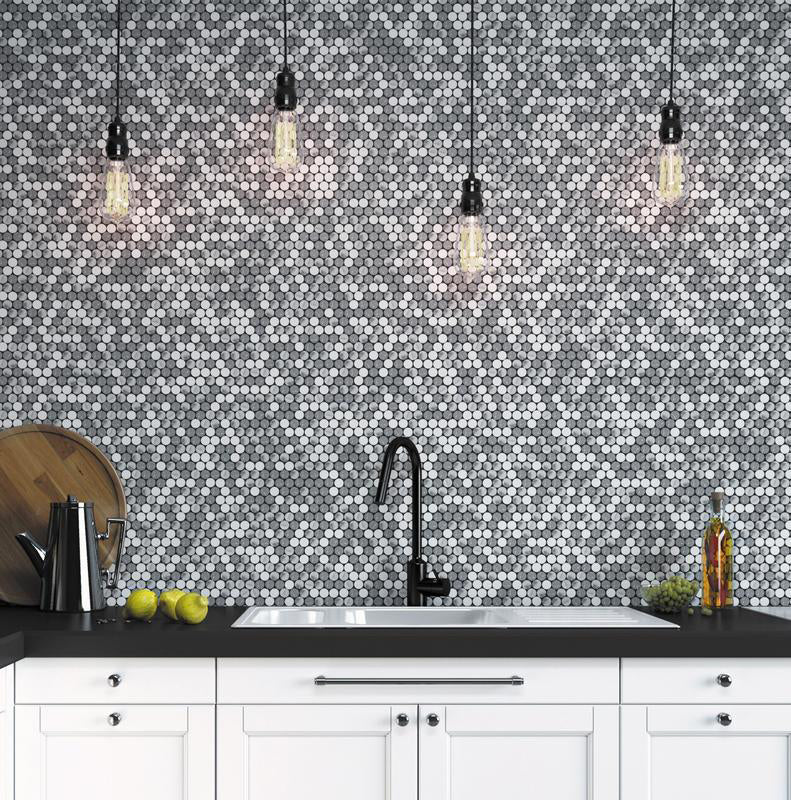
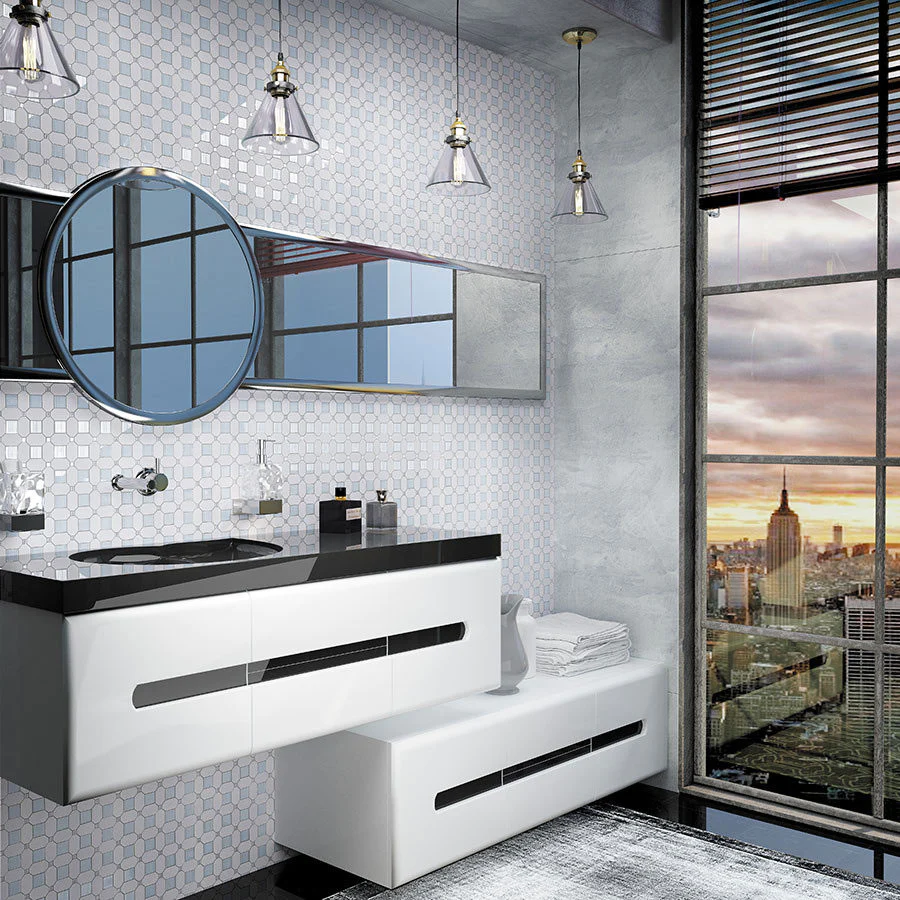
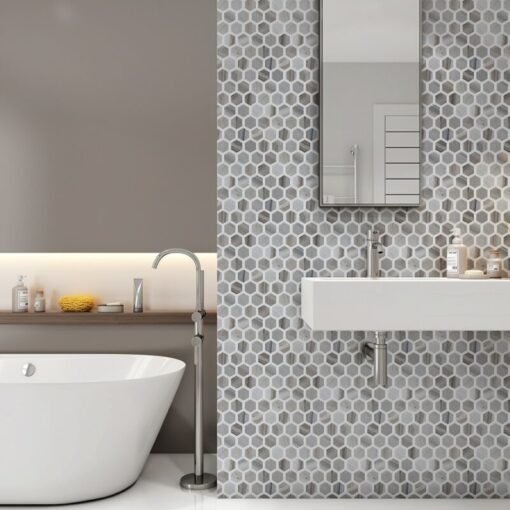
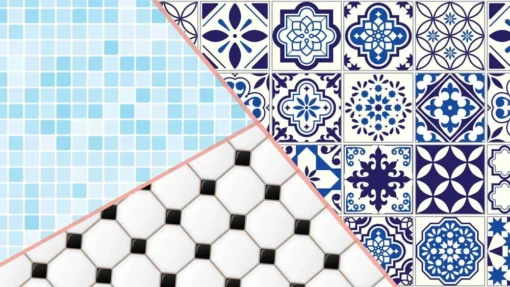
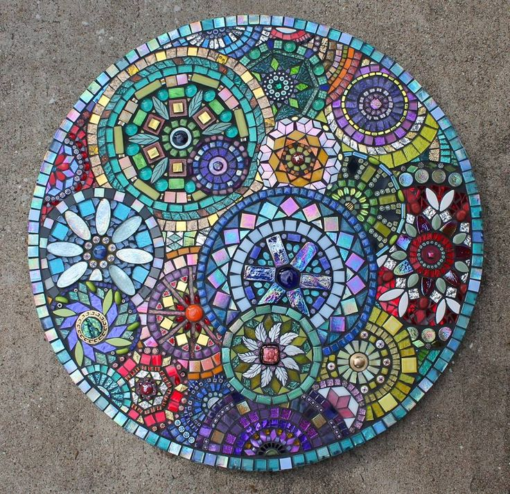
Mosaic tiles, with their rich history dating back to ancient Roman baths, have always been a beloved element of interior and exterior design. These miniature works of art come in various shapes, sizes, and colours, making them an ideal choice for enhancing different spaces. Among the plethora of mosaic tile options available, geometric mosaic tiles stand out for their unique ability to bring depth, character, and sophistication to any room.
In this blog, we’ll explore the boundless versatility of geometric mosaic tiles and how they can transform various spaces in your home.
Geometric Mosaic Tiles: A Timeless Choice
Geometric patterns have an enduring appeal, offering a timeless and elegant aesthetic that can seamlessly blend with various interior design styles, whether contemporary, classic, or eclectic. Geometric mosaic tiles, characterized by their symmetrical designs and captivating patterns, have the power to captivate the eye and infuse creativity and order into any space.
Let’s have a look at 8 different styles and expressions around your home!
1. The Kitchen: A Culinary Canvas
The kitchen is often considered the heart of the home, where functionality and aesthetics must coexist harmoniously. Geometric mosaic tiles can serve as a stunning backsplash, transforming a mundane cooking space into a culinary canvas. Whether you opt for hexagonal, herringbone, or Moroccan-inspired geometric patterns, these tiles breathe life into your kitchen, adding depth to the room and providing the perfect backdrop for your culinary adventures.

2. The Bathroom: Spa-Like Serenity
The bathroom is another space where geometric mosaic tiles can shine. These tiles can be used on floors, walls, or as accents to create a spa-like atmosphere that encourages relaxation and rejuvenation. A monochromatic bathroom with white or light-coloured geometric tiles exudes serenity and cleanliness. On the other hand, bold and vibrant geometric patterns can infuse energy into your morning routine, making the bathroom a place for both cleansing your body and refreshing your mind.

3. The Living Room: Artistic Expression
The living room is often a showcase of personal style and creativity. Geometric mosaic tiles can be used on the floor or as a feature wall to create a sense of artistic expression. You can opt for large, dramatic geometric patterns to make a bold statement or choose subtle, understated designs to complement your existing decor. These tiles play a pivotal role in defining the atmosphere of your living room, from a formal and elegant setting to a relaxed and bohemian environment.
4. The Entryway: First Impressions
The entryway is the first thing your guests see when they step into your home. It’s an opportunity to make a memorable first impression, and geometric mosaic tiles can help you achieve just that. An entryway adorned with a striking geometric pattern on the floor sets the tone for the rest of your home. It’s not only visually appealing but also functional, capable of handling heavy foot traffic while maintaining its beauty.
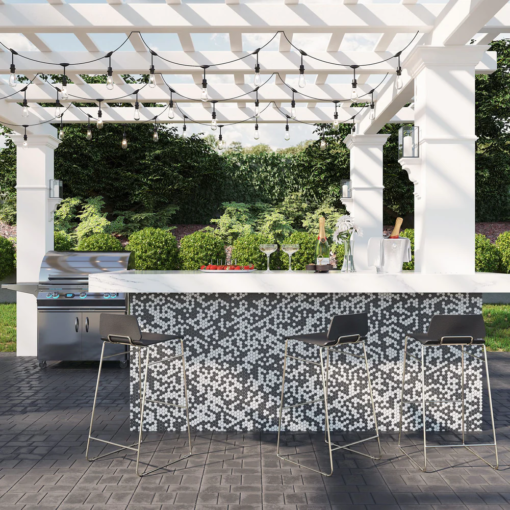
5. The Outdoor Space: Al Fresco Ambiance
Geometric mosaic tiles are not limited to indoor spaces. They can also enhance your outdoor living areas, such as patios, decks, and poolside settings. These tiles are often made from durable materials like porcelain or natural stone, making them suitable for outdoor use. The right geometric mosaic design can give your outdoor space a touch of Mediterranean charm, creating an al fresco ambiance for your gatherings and relaxation.
6. The Bedroom: Dreamy Retreat
Your bedroom is your personal sanctuary and deserves a touch of luxury and sophistication. Geometric mosaic tiles can be used to create a dreamy retreat. A geometric tile headboard or a feature wall behind the bed can add a level of opulence, making your bedroom feel like a five-star hotel suite. Whether you prefer a soothing palette or bold contrast, these tiles can help you achieve the bedroom of your dreams.
7. The Home Office: Inspiring Creativity
With more people working from home, the home office has become a significant part of our living spaces. Geometric mosaic tiles can help transform your home office into a place that inspires creativity and productivity. They can be used to delineate different zones, such as a work area or a reading nook, making the space both functional and visually appealing.
8. The Fireplace: Cozy Focal Point
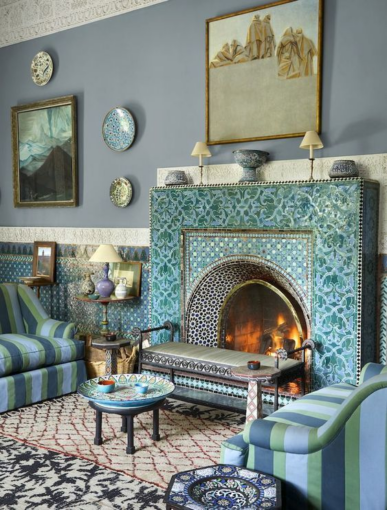
A fireplace is often the focal point of a living room or a cozy nook. Geometric mosaic tiles can add a layer of elegance and warmth to the hearth. You can create a mesmerizing geometric mosaic pattern that draws the eye to the fireplace, turning it into a work of art. Whether you prefer a contemporary look or a more traditional style, these tiles can make your fireplace the heart of your home.
Exploring Tile Patterns: How to Select the Perfect Design for Your Space
Once you’ve meticulously designed your space and handpicked the ideal colour palette, the time comes to add the finishing touches that truly define your interior. While there are numerous ways to infuse character into a room, custom mosaics and tile patterns, in our humble opinion at Artaic, rank among the most versatile and captivating options to make a statement.
In recent years, tile has experienced a resurgence, offering a plethora of captivating choices for those in search of the perfect design. Amid this delightful array of options, it can be a challenge to pinpoint the right tile pattern that complements your project.
To ease your selection process, we’ve categorized the most common designs into eight distinct styles that will simplify your quest for the ideal tile pattern.
1. Abstract Tile Patterns
Abstract mosaics stand out as a remarkably versatile way to infuse intrigue into your space. When bathed in bold colour palettes, they exude a vivacious energy, making them a perfect choice for high-traffic areas. Notably, these captivating designs often find their home in public spaces like parks, schools, and lobbies.

On the other hand, when rendered in softer, gentler hues, abstract patterns take on a more tranquil ambiance. Abstract designs featuring light blues and greens seamlessly complement pools and spas, enhancing the soothing reflections and movements of water. Whether you opt for bold or subtle, an abstract mosaic is an accent piece that exudes uniqueness and modern flair.
2. Artistic Tile Patterns
Artistic patterns, though incredibly versatile, exude a more traditional ambiance compared to their abstract counterparts. While they can gracefully blend into a range of settings, artistic patterns are especially well-suited for residential projects and public spaces.
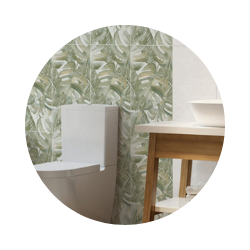
3. Floral Tile Patterns
Floral tile patterns serve as a way to bring the outdoors inside. While most floral patterns tend to embrace tradition, some venture towards abstraction, resulting in a more contemporary appearance. The infusion of floral designs into your space brings a refreshing touch of nature and elegance.

4. Geometric Tile Patterns
For a refreshingly modern appearance, geometric tile patterns are an excellent choice. These designs rely on structured lines to create captivating forms throughout the mosaic. Geometric tile patterns have gained popularity, particularly in kitchen backsplashes, as their bold designs may feel a bit too overpowering for bedrooms and living spaces.
In commercial projects, geometric designs are more liberally used to create bold, modern statement pieces. You’ll often find geometric tile flooring in restaurants, cafes, and bars, as it offers eye-catching aesthetics, easy maintenance, and suitability for high-traffic environments.
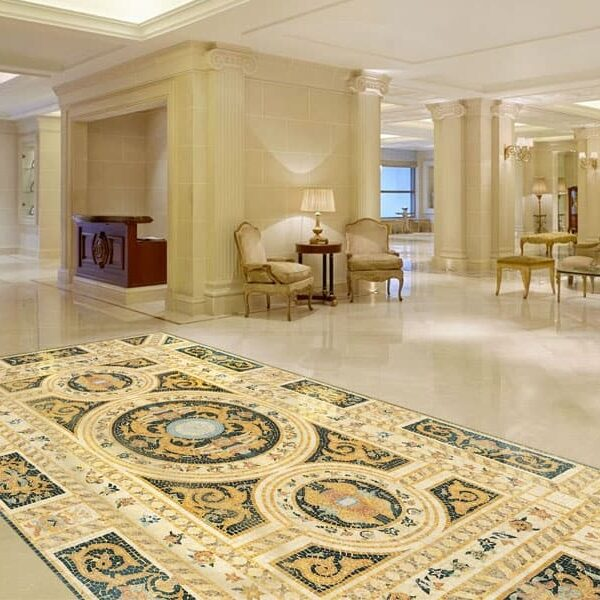
5. Ornamental Tile Patterns
To infuse a touch of tradition and luxury into your space, consider incorporating a detailed ornamental tile design. These decorative patterns can make a statement as flooring in a lobby or entry space, or they can be modernized through unexpected placement or unique colour palettes.

The versatility of geometric mosaic tiles is boundless. These tiles can transform different spaces in your home, adding depth, character, and a touch of sophistication. Whether you’re looking to create a spa-like bathroom, an artistic living room, or a cozy fireplace nook, geometric mosaic tiles offer a world of possibilities. Their timeless appeal and adaptability make them a fantastic choice for homeowners who seek both form and function in their interior design. So, don’t be afraid to experiment with geometric mosaic tiles and unlock the potential of your living spaces.
At Tiletoria, we hope this blog has inspired you to explore the possibilities of geometric mosaic tiles in transforming your living spaces. Whether you’re embarking on a kitchen renovation or redesigning your outdoor patio, geometric mosaic tiles can be your key to unlocking the hidden potential of your home.
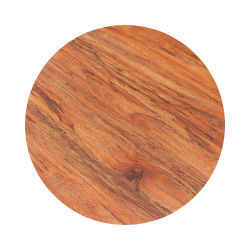
blog, floors, woodlook
In the realm of home improvement, making informed choices is paramount, and at Tiletoria, we take this commitment a step further. Renowned for our unwavering dedication to quality, Tiletoria stocks only the best quality products, ensuring that every selection you make for your home is one that you can trust and rely on.
When it comes to flooring, the choices can be overwhelming, but fear not – we’re here to simplify the process for you. Selecting the right flooring for your home is a significant decision that impacts both aesthetics and functionality. With a wide range of options available, two popular choices that often come into consideration are vinyl and laminate flooring.
Both vinyl and laminate flooring offer unique benefits, and each boasts its own set of characteristics that cater to different preferences and needs. In this blog, we’ll delve into the key differences between these two options, shedding light on their respective attributes.
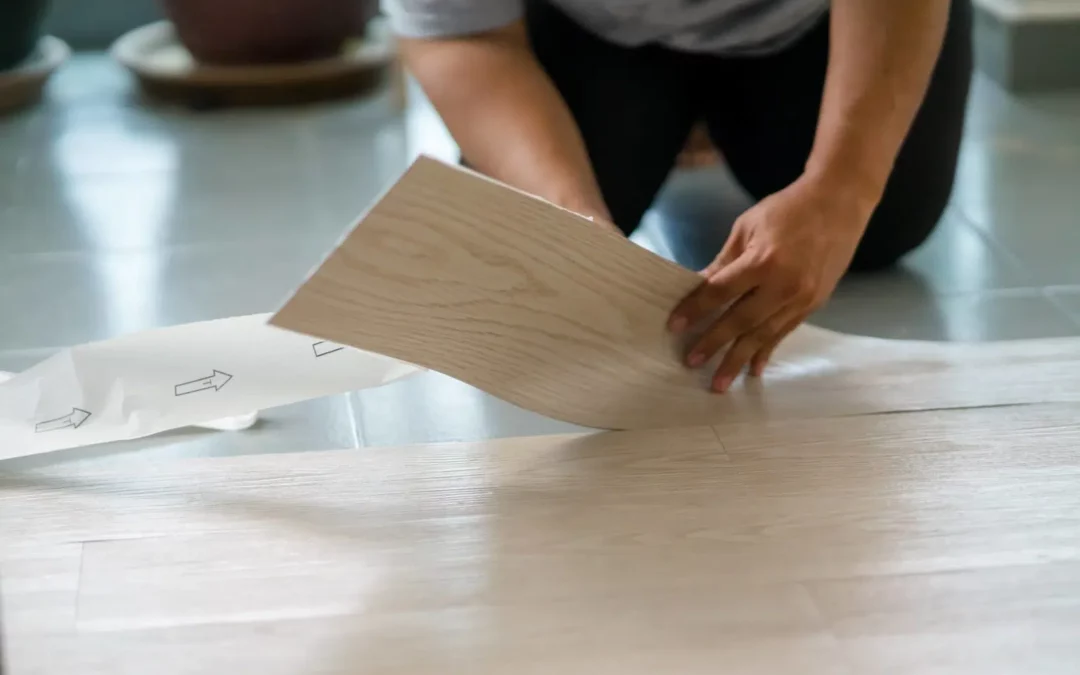
Vinyl Flooring: Versatile and Resilient
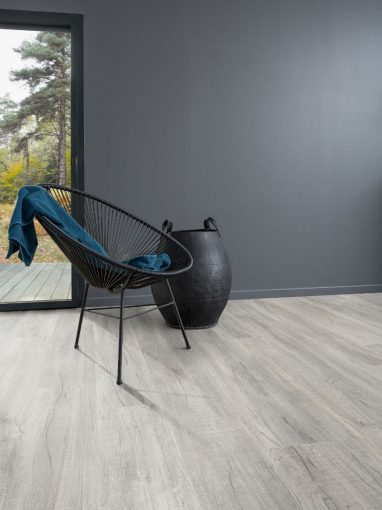
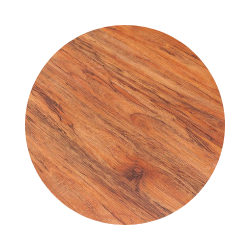
gerflor creation 30 swiss oak pearl
Vinyl flooring has gained immense popularity in recent years due to its versatility and durability. It is available in various forms, including vinyl sheets, vinyl tiles, and luxury vinyl planks (LVP). Here’s why vinyl flooring might be the right choice for your home:
1. Water Resistance:
One of the standout features of vinyl flooring is its water resistance. This makes it an excellent choice for areas prone to moisture, such as kitchens, bathrooms, and basements. Unlike other flooring options, vinyl won’t warp or swell when exposed to water, making it highly suitable for busy households.
2. Durability:
Vinyl flooring is designed to withstand heavy foot traffic, making it a great option for homes with children and pets. Its top layer is typically coated with a protective finish that resists scratches, stains, and scuffs, ensuring your flooring remains pristine even in high-traffic areas.
3. Comfort and Noise Reduction:
Vinyl flooring offers a softer underfoot feel compared to harder surfaces like tile or laminate. This cushioning effect can be especially appreciated in spaces where you spend a lot of time standing. Additionally, vinyl’s resilience helps dampen sound, reducing noise transfer between floors.
7. Ease of Maintenance:
Cleaning vinyl floors is a breeze. Regular sweeping or vacuuming, along with occasional damp mopping, is usually sufficient to keep them looking clean and fresh. The water-resistant properties also mean you don’t have to worry about moisture causing damage during routine cleaning.
8. Design Options:
Vinyl flooring comes in a wide array of designs, including realistic wood and stone patterns. If you’re aiming for a specific aesthetic without the maintenance requirements of natural materials, vinyl can offer a great alternative.
Laminate Flooring:

kronotex trend oak grey
Laminate flooring has long been a popular choice for homeowners seeking an affordable and elegant flooring solution. Constructed from compressed wood and topped with a photographic image layer, laminate flooring boasts its own set of advantages:
1. Aesthetic Appeal:
Laminate flooring often replicates the look of natural materials, such as hardwood or stone, at a fraction of the cost. The high-resolution photographic layer captures intricate details, giving you the appearance of genuine materials without the associated upkeep.
2. Easy Installation:
Laminate flooring is known for its click-and-lock installation system, which makes it a suitable choice for DIY enthusiasts. This interlocking mechanism eliminates the need for adhesives and simplifies the installation process.
3. Affordability:
If you’re looking to achieve a high-end look on a budget, laminate flooring offers an excellent compromise. It allows you to enjoy the aesthetic benefits of premium materials without the hefty price tag.
4. Durability:
While laminate is not as resistant to water as vinyl, modern laminate flooring options often come with improved water-resistant features. Nevertheless, caution should still be exercised in areas with excessive moisture.
5. Low Maintenance:
Laminate floors are relatively easy to maintain. Regular sweeping and occasional damp mopping are typically sufficient to keep them looking their best. However, caution should be exercised to prevent excessive water exposure.
Choosing the Right Flooring for Your Home
Making a decision between vinyl and laminate flooring requires considering your home’s specific requirements, your lifestyle, and your aesthetic preferences. To help you make the right choice, here are a few factors to take into account:
1. Location:
If you’re planning to install flooring in areas that are exposed to moisture or high foot traffic, vinyl might be the better choice due to its water resistance and durability.
2. Budget:
Both vinyl and laminate flooring offer cost-effective alternatives to natural materials, but laminate may be more budget-friendly if you’re aiming for a luxurious look without the premium price.
3. Aesthetics:
Consider the overall design and aesthetic you want to achieve in your space. Vinyl offers a wide variety of designs, including wood and stone patterns, while laminate can mimic the appearance of high-end materials.
4. Installation:
If you’re confident in your DIY skills and prefer a straightforward installation process, laminate’s click-and-lock mechanism could be the way to go. Vinyl flooring installation might require more expertise, particularly when dealing with larger areas.
5. Maintenance:
If ease of maintenance is a top priority, both options are relatively simple to clean, but vinyl’s water resistance can provide an added advantage in spaces prone to spills and moisture.
When it comes to choosing between vinyl and laminate flooring, there’s no one-size-fits-all answer. Both options have their strengths and are suitable for various settings. Consider your specific needs and preferences to make an informed decision that enhances the beauty and functionality of your home. Whether you opt for vinyl or laminate, Tiletoria has a wide range of options to help you find the perfect flooring solution for your space.
Disclaimer:
Tiletoria offers advice in this article for construction and renovation purposes. However, it’s crucial to recognize that this advice does not replace the expertise of certified building contractors. Each project is unique, and
potential complexities vary. Readers should consult professionals before undertaking any projects. Our network of approved contractors ensures tailored guidance for safety and quality. While our article provides insights,
collaboration with contractors remains vital. Contact us for assistance or connections with reputable professionals. Your project’s success and longevity are our priority.