So, you’ve decided that tiling is the perfect option for your latest project, but how do you decide which tiles are best suited for each room of your home? We’re here to simplify the tiling selection process by sharing some tips and considerations for choosing the right tiles for each room.
Table of Content:
Smaller Rooms: Bathroom and Laundry Room
The Kitchen: The Heart of the Home
Hallways: Making a Great First Impression
Bedroom: A Growing Trend
Living Room: High Traffic and High Style
Outdoor: Extend Your Living Space
Smaller Rooms: Bathroom and Laundry Room
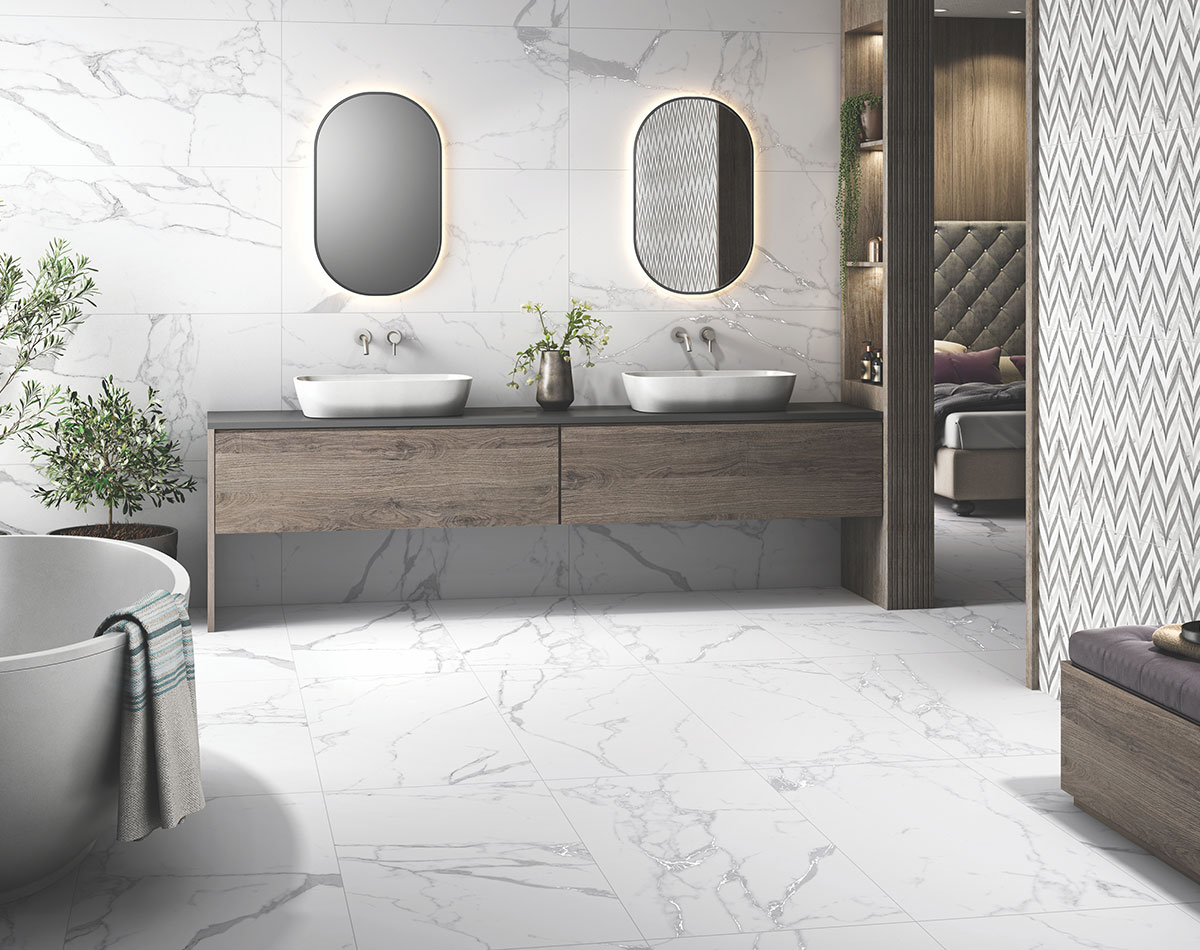
For smaller spaces like bathrooms and laundry rooms, smaller tiles are generally recommended. They can be fitted around fixtures and appliances more easily, reducing the need for extensive tile cutting. Popular options include marble or marble-inspired tiles, mosaic tiles, monochromatic tiles, and subway tiles.
Credits: @in.house.design
However, larger tiles like large format tiles can also work well in smaller rooms because they have fewer grout lines, creating the illusion of a larger space.
When choosing bathroom tiles, prioritize slip-resistant options that are easy to clean.
Browse some of our most popular bathroom and laundry room tiles to get started:
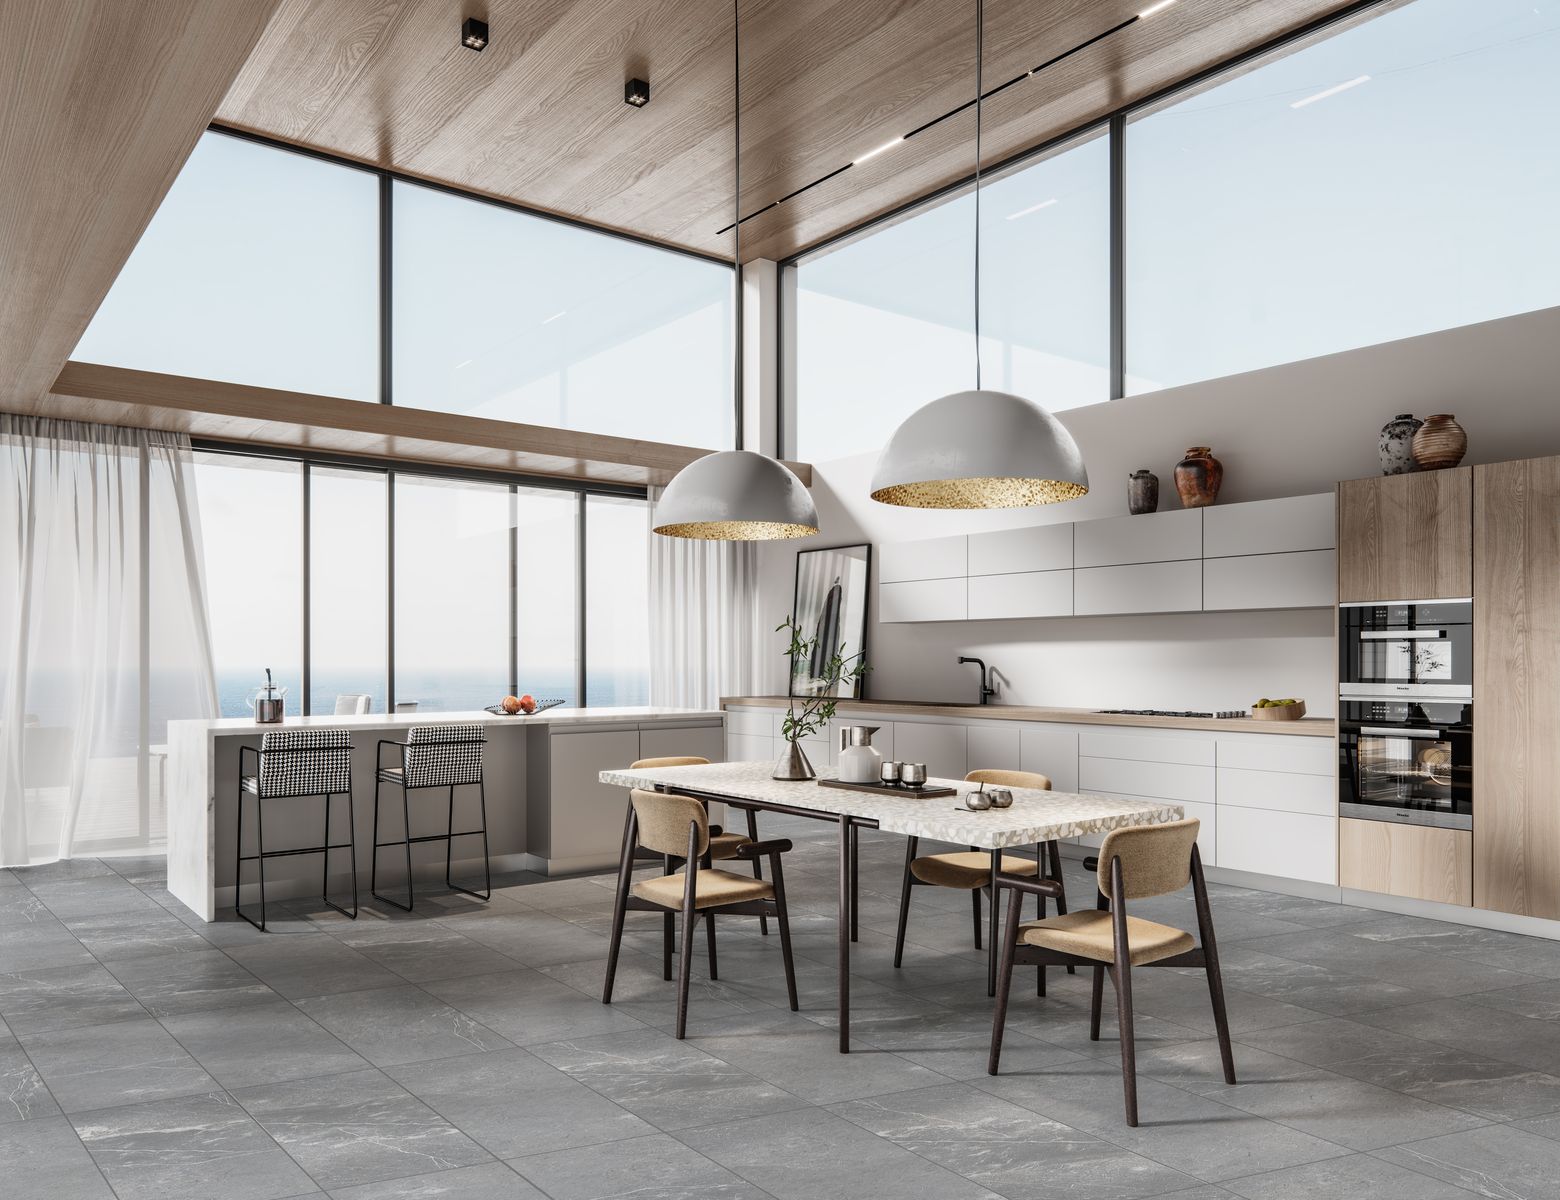
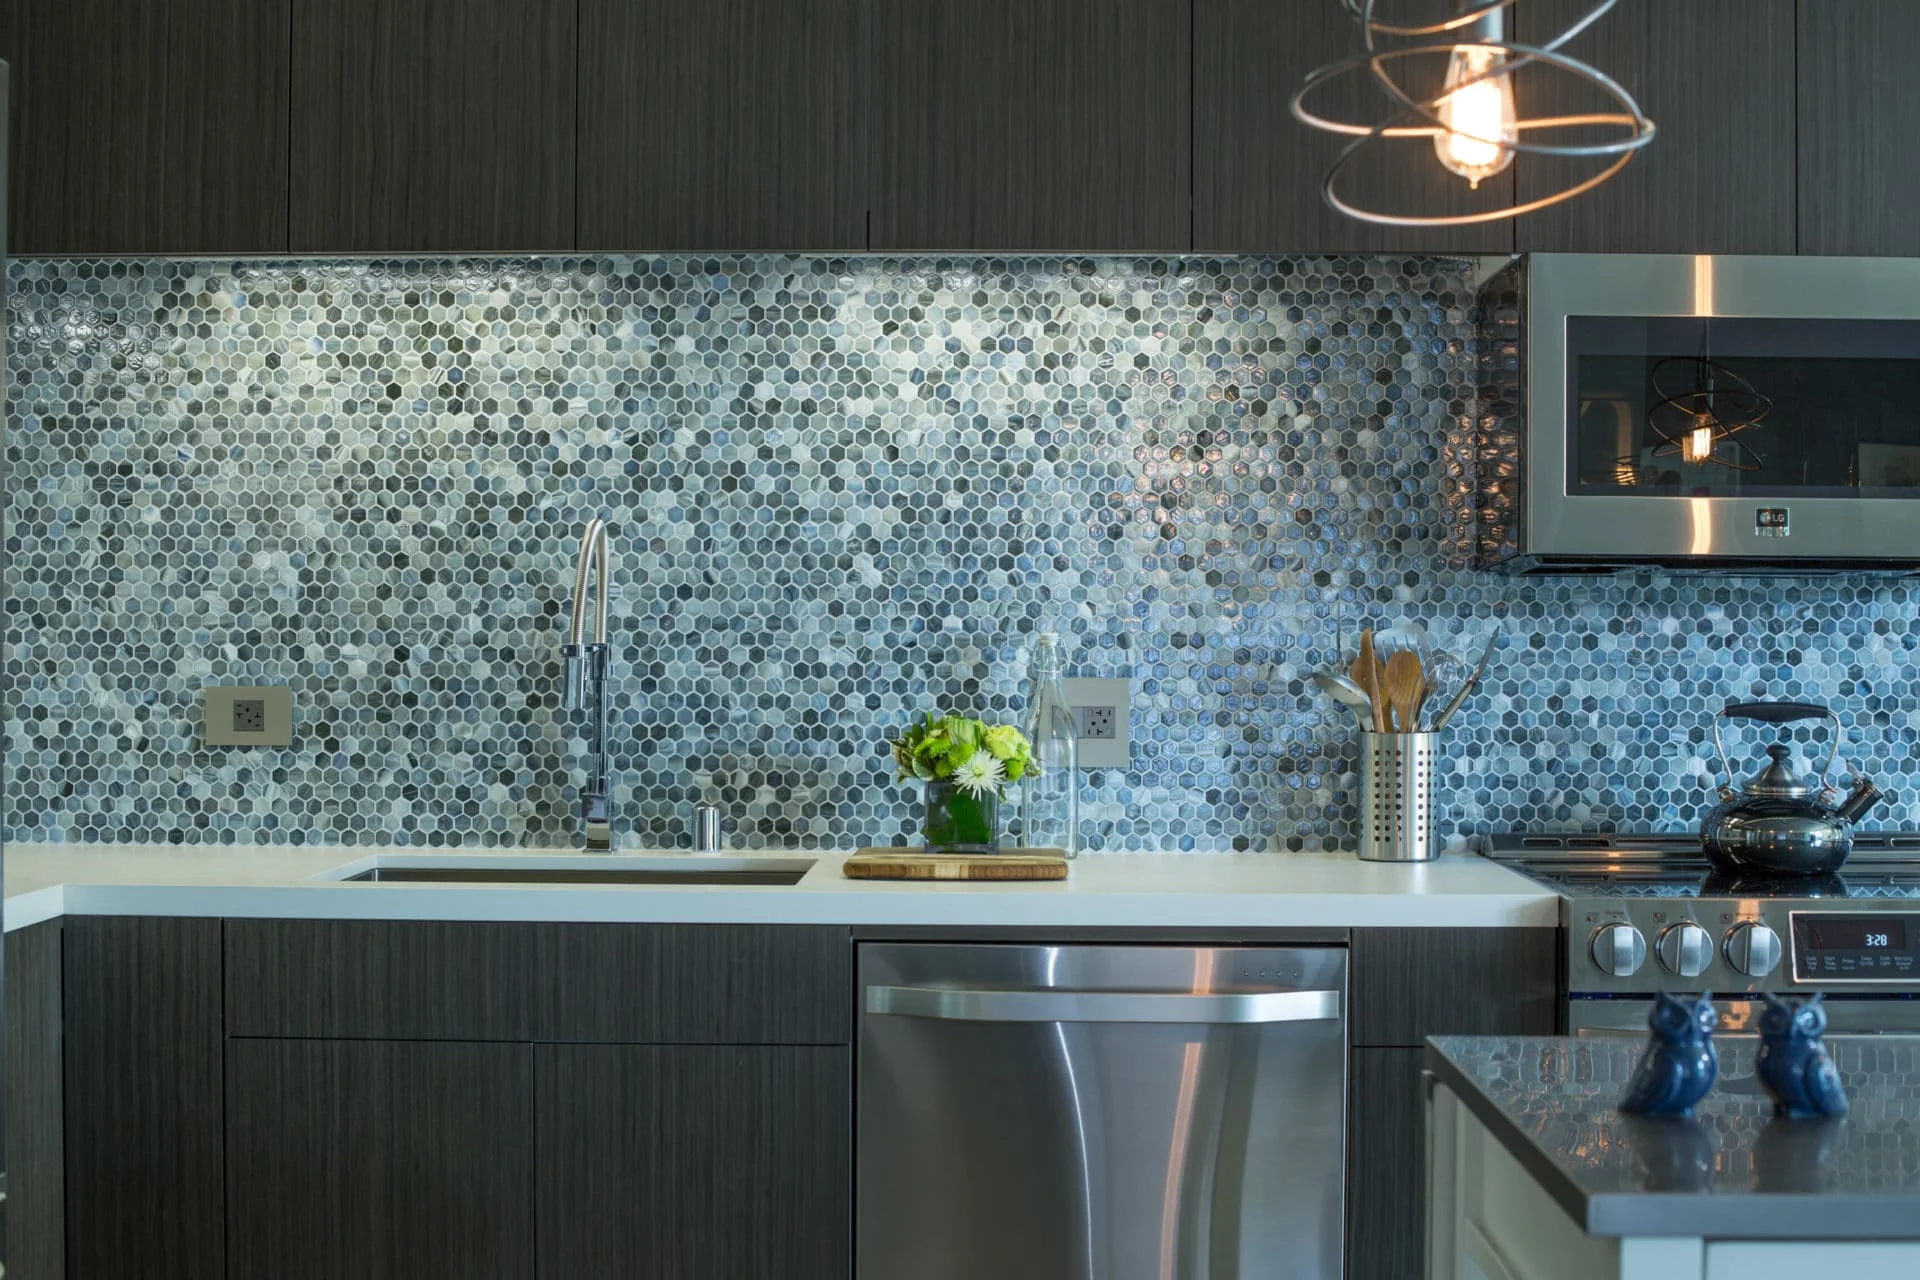
The Kitchen: The Heart of the Home
In larger rooms and open spaces, large format tiles can be the perfect choice. They create a uniform flooring and are becoming increasingly popular in open plan kitchens and living rooms. Large tiles offer a contemporary, hard-wearing feel, and slip-resistant tiles are recommended for the kitchen since it is a wet area.
Browse some of our most popular kitchen tiles to find the perfect match for your home:
Hallways: Making a Great First Impression
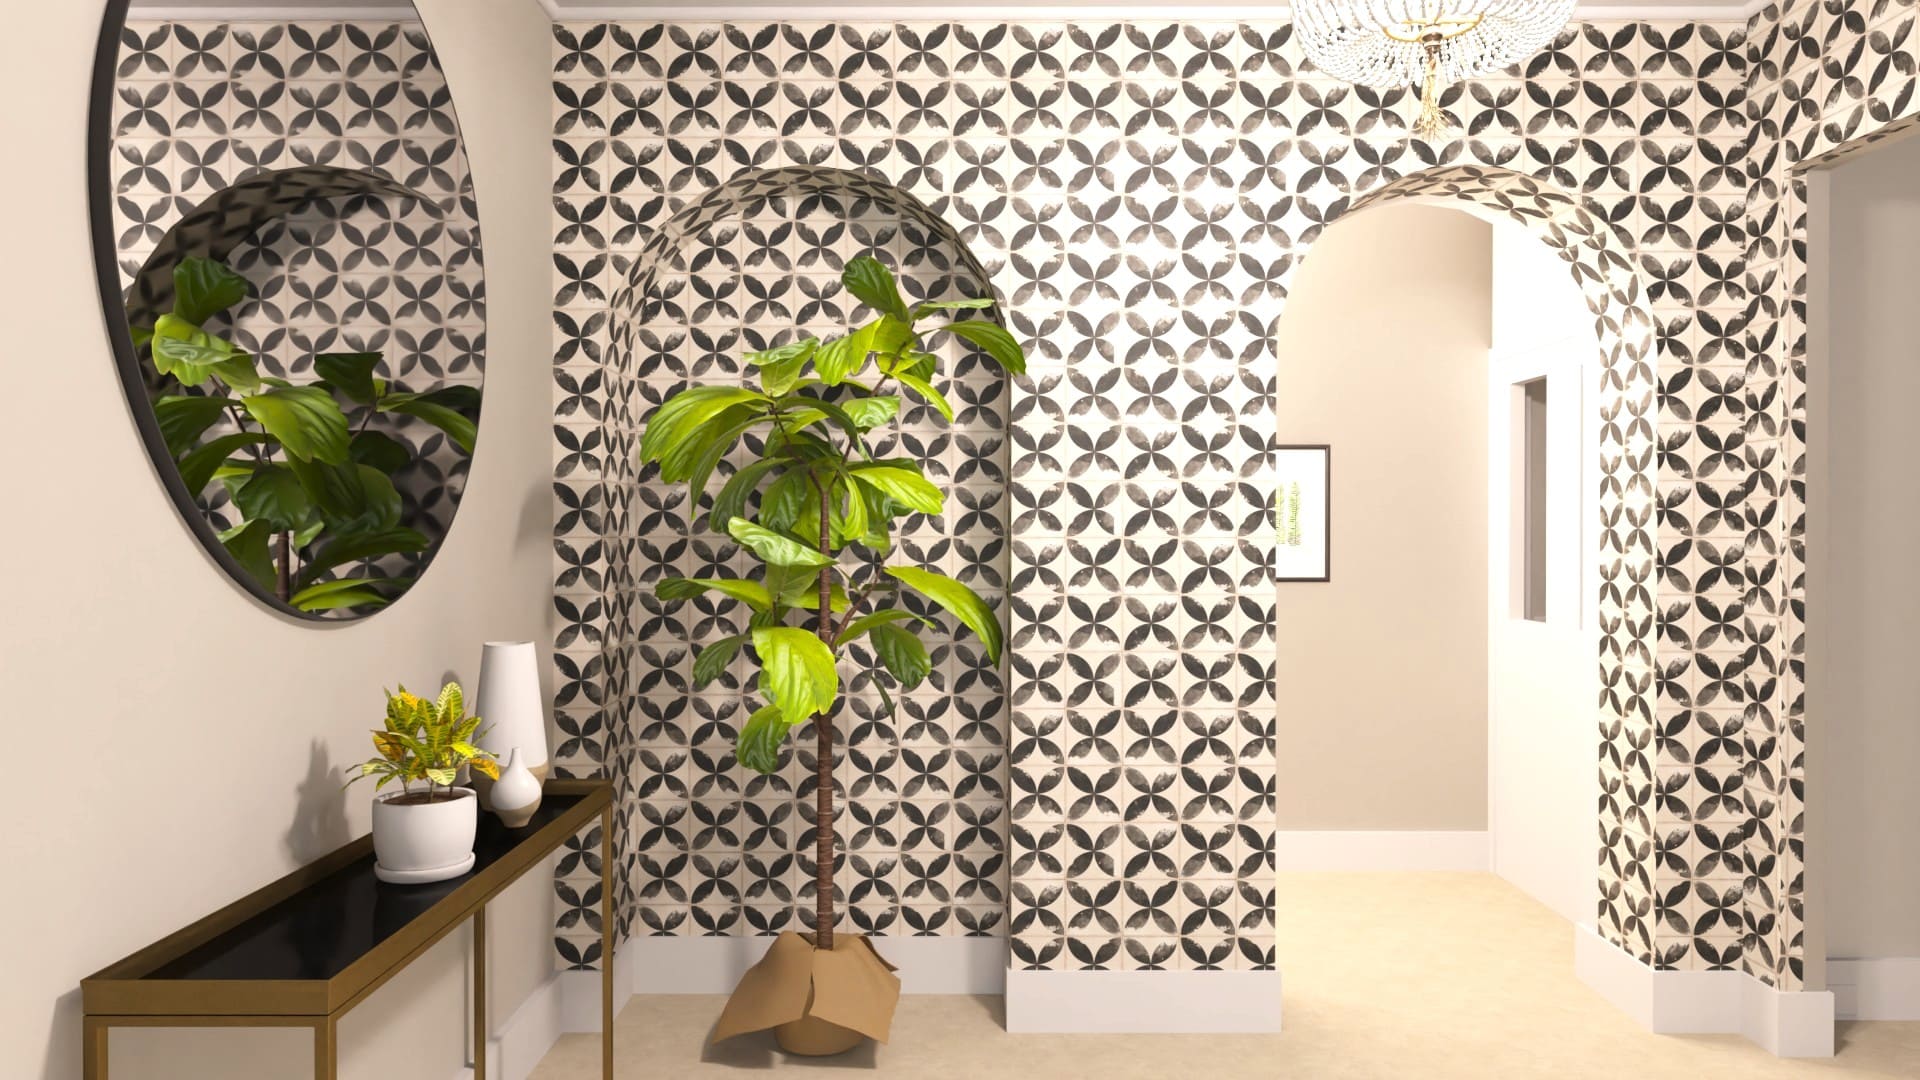
Hallways are often the first area guests see, so it’s important to make a lasting impression. Hallways need to be welcoming and attractive but also hard-wearing, as they endure a lot of foot traffic.
Ceramic tiles are a great choice because they are easy to clean and come in various bright colors and patterns.
Alternatively, large format tiles in neutral colors can create a simple, easy-to-clean look.
Decorative tiles are another popular option, adding a trendy touch to your hallway.
The choice depends on your style and whether you want a cohesive look throughout your home or different styles in each room.
Browse some of our most popular hallway tiles for inspiration:
Bedroom: A Growing Trend
Tiles in the bedroom are growing in popularity. Wood-look tiles add rustic, traditional charm to your cozy bedroom while offering ease of installation, cleaning, and maintenance.
Alternatively, large format glossy or matte tiles in neutral colors can provide the finishing touch to a minimalistic, contemporary-styled bedroom.
Credits: Emilgroup
Browse some of our most popular bedroom tiles to create your dream space:
Living Room: High Traffic and High Style
The living room is another high-traffic area. It’s important to choose tiles that are durable, hard-wearing, and easy to clean. For a unified look, consider using the same tiles throughout your home, from the kitchen to the bedroom to the living room. Wood-look tiles are a great option for creating a warm, homely feel in the living room.
Browse some of our most popular living room tiles to find your perfect fit:
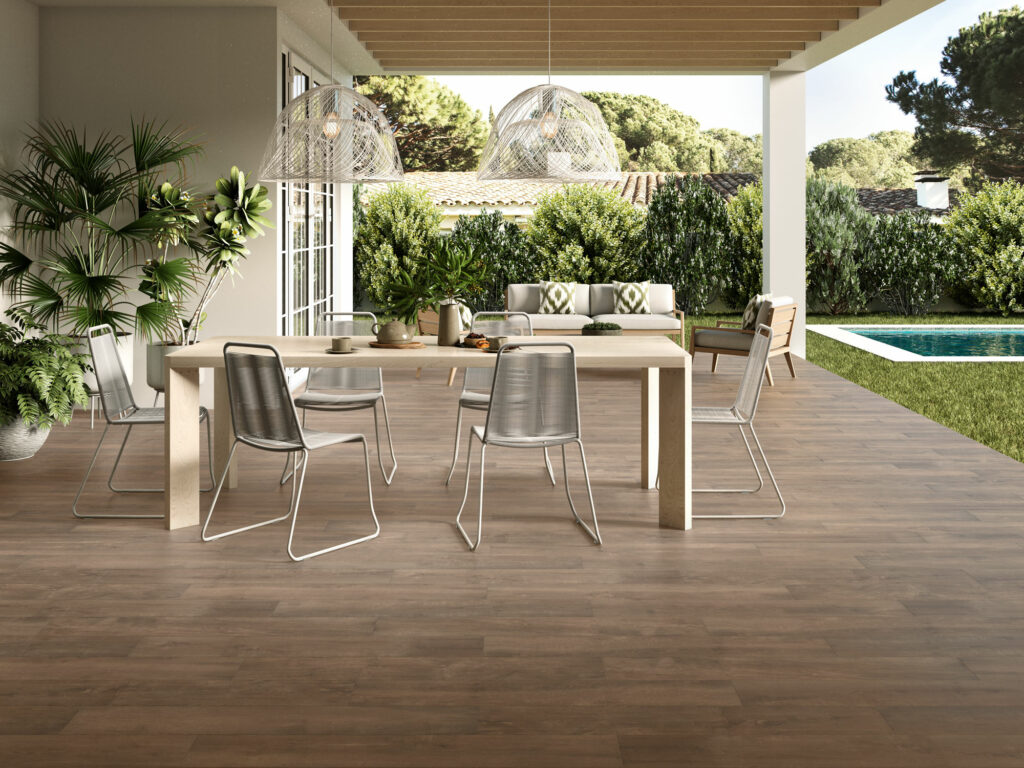
Outdoor: Extend Your Living Space
Let’s take this conversation outside. Slip-resistantporcelain and ceramic tiles are ideal for outdoor areas because they are moisture and water-resistant. Porcelain tiles are particularly suitable for outdoor use due to their higher water resistance. A matte glazed finish can offer even more slip resistance.
Wood-look tiles are another excellent option for the outdoors if you prefer the look of a wooden deck but without the maintenance required with real wood decking.
Credits: Archi Expo
Browse some of our most popular outdoor tiles to enhance your outdoor living space:
Prefer to Watch?
Check out our two-part episode where Ryan and Deon walk you through everything you need to know and share some inspiration for tiles for each room of your home.
Tiletoria Trends – How to Choose Tiles By Room (Part 1)
Tiletoria Trends – How to Choose Tiles By Room (Part 2)
For more expert advice on which tiles are best suited for each room of your home, visit your nearest Tiletoria showroom or check out our website for more information.
Are you considering upgrading your floors with tiles? Whether you’re looking for durability, easy maintenance, or a refreshed look, tiles can be the perfect solution for you.
But before you dive into your next DIY project or start browsing floor tiles for sale, you might have a few questions. Here are the answers to some of the most frequently asked questions about floor tiles:
Installing tile floors may seem daunting, but it’s actually quite manageable with the right tools and preparation. Here’s a basic overview:
Make sure you have the right tools. For a breakdown of all the tools and accessories you need for a successful tile installation, read our guide here.
Prepare the surface: Ensure it’s clean, flat, and dry.
Lay the tiles: Start in the center of the room and work your way outwards, using spacers to maintain even spacing between tiles.
Apply adhesive: Spread a thin layer of adhesive with a trowel and press the tiles into place. To achieve professional results and create a durable tiled surfaces, read our guide to using adhesives for tiling here.
Grout the tiles: Once the adhesive is completely dry, fill the gaps between tiles with grout and wipe away excess. The tile grout colour you choose to use on your wall or floor plays an important part in the overall room design. Read our guide on how to choose the right grout colour.
For a step by step guide on how to tile put tiles on the floor, read our guide here.
Installing mosaic tiles? We’ll walk you through the steps to install mosaic tiles like a pro here.
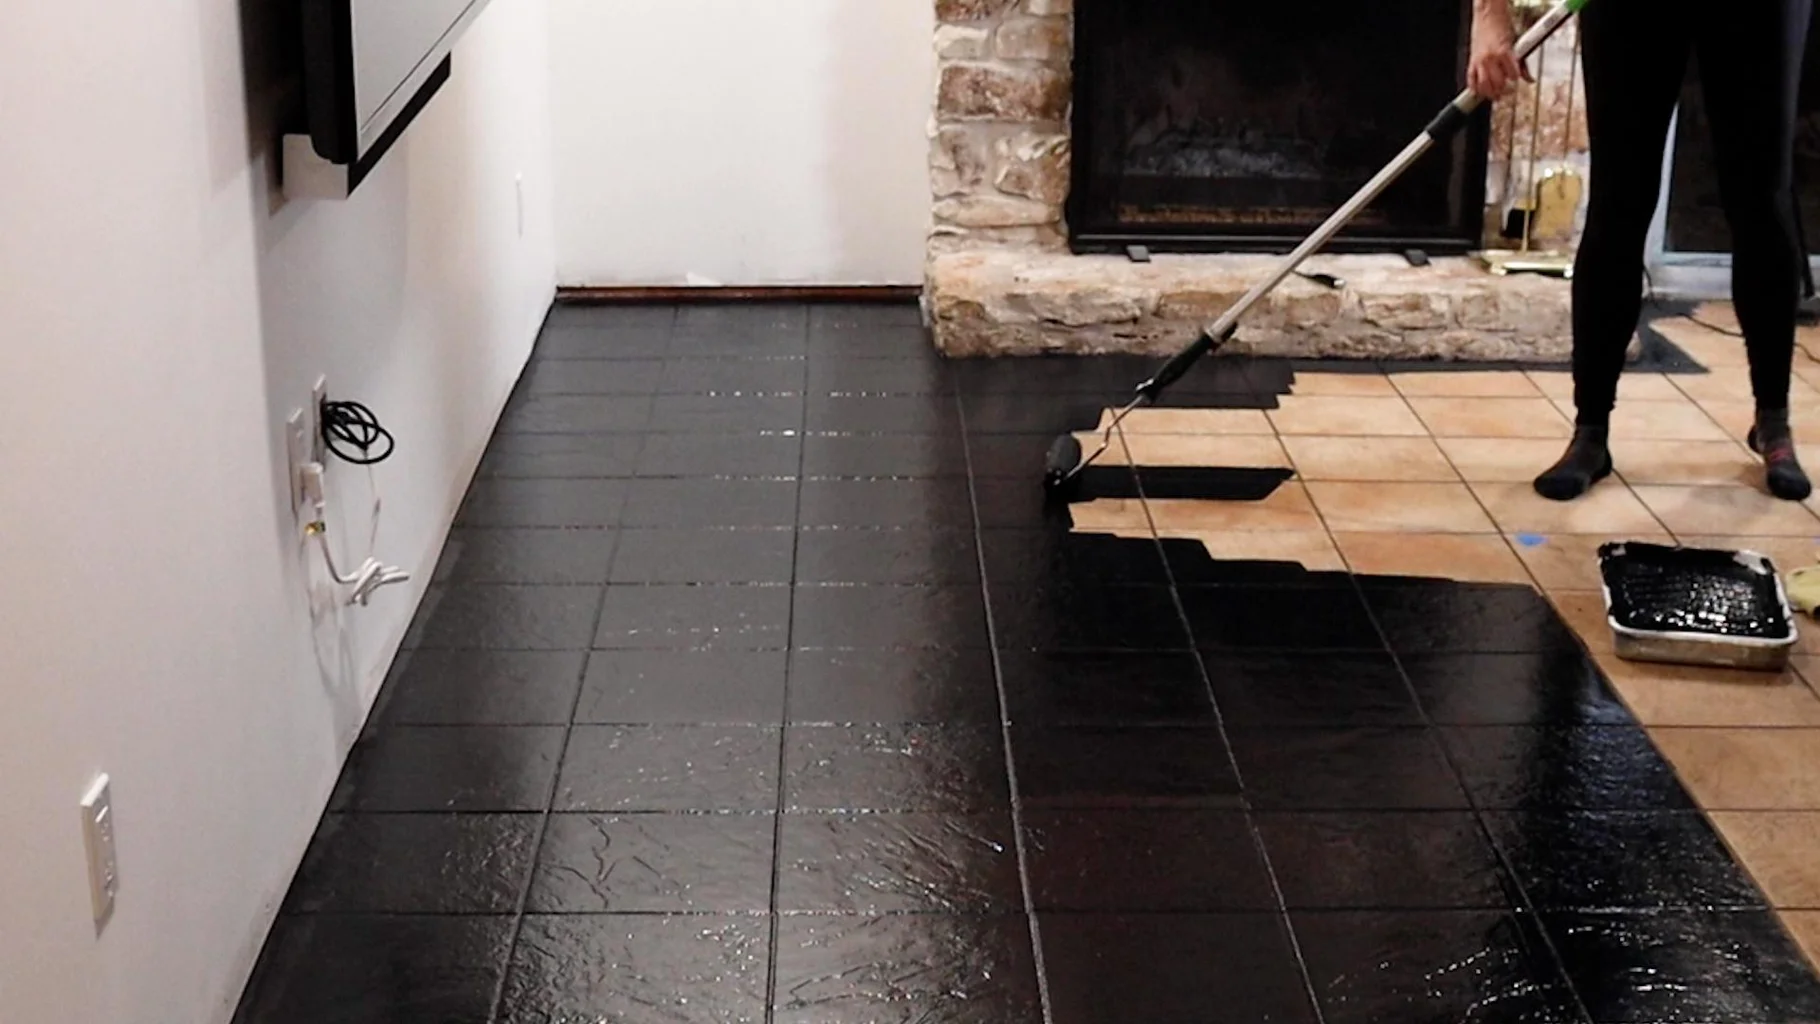
2. Can I paint floor tiles?
The answer is yes- you can paint tiles on the floor to give them a refreshed look and enhance your space! Make sure to clean and prime the tiles before painting, and use a durable enamel paint designed for floors. Proper preparation and sealing are key to ensuring a long-lasting finish.
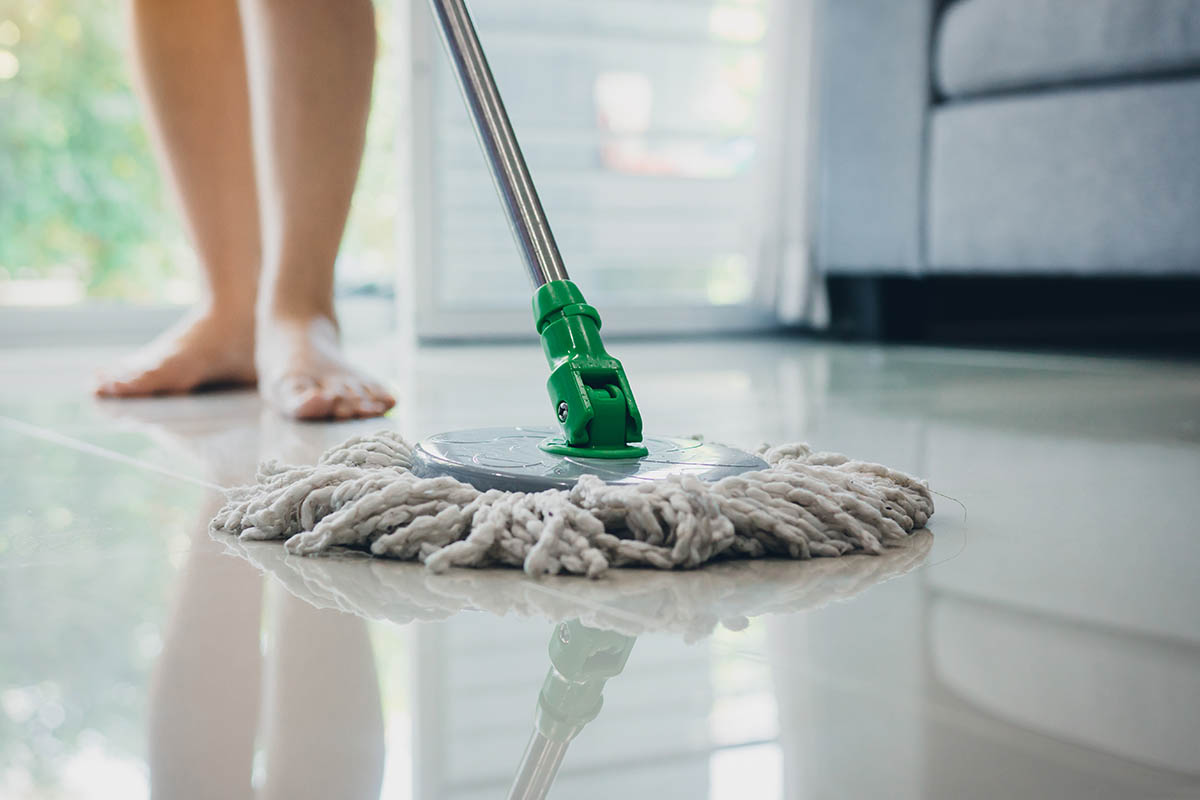
Cleaning porcelain tile floors is easy and simple. Sweep or vacuum regularly to remove dirt and debris. Mop your tiles with clean water and a mild detergent or cleaning solution as needed. Avoid using harsh cleaners or abrasive tools that could scratch your tiles.
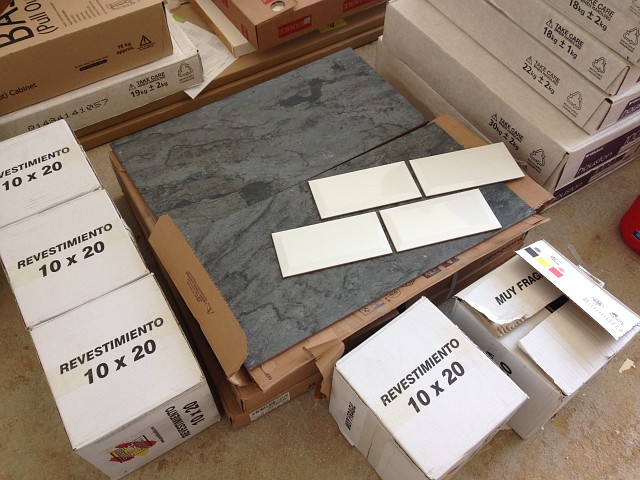
The number of tiles in a box can vary depending on the size and type of tile. Typically, manufacturers will indicate the coverage area on the box. This will allow you to calculate the number of tiles you need based on your floor size.
Calculate how much tile you will need for your project here.
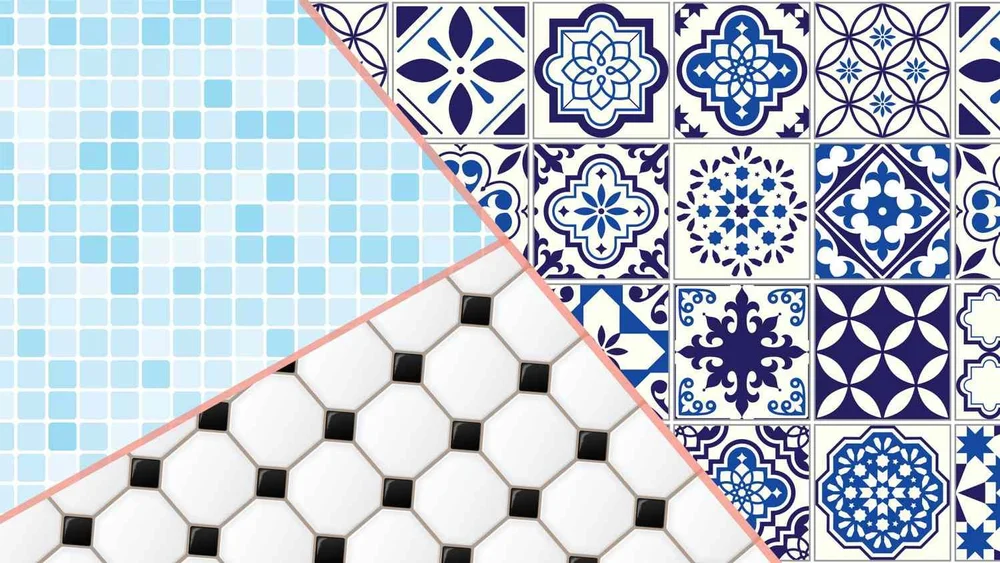
5. What are patterned floor tiles?
Patterned floor tiles feature decorative designs or motifs that add visual interest to your floors. From geometric patterns to intricate designs inspired by nature, patterned tiles can elevate the style of any room.
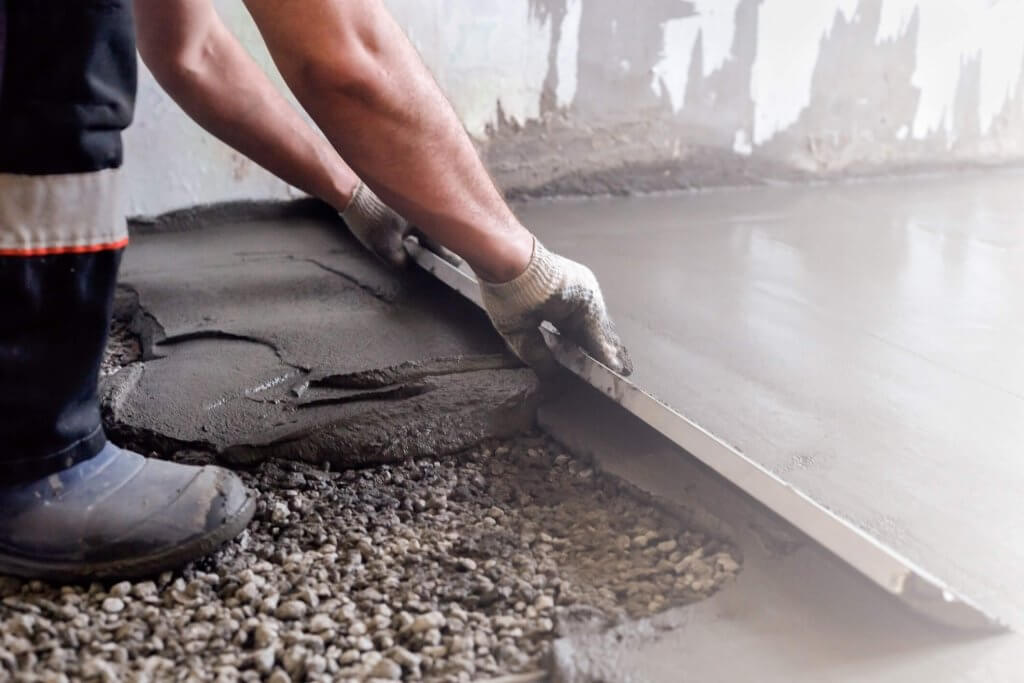
Screeding a floor involves leveling and smoothing the surface to prepare it for tiling. While it’s possible to do it yourself, it requires careful attention to detail and the right tools. Consider hiring a professional if you’re unsure about tackling this task.
Removing tile floor can be a labor-intensive process. Start by breaking up a tile with a hammer and chisel, then use a pry bar to remove the remaining tiles and adhesive. Take care to protect yourself and your surface during the removal process.
Large format tiles are tiles that are larger in size compared to standard tiles. These tiles typically have dimensions of 1200 x 600mm.
Large format tiles offer a more modern look with fewer grout lines. This makes them easier to install because they cover more space with each tile. Designers often use them in modern design for floors, walls, and countertops to create a clean and open look.
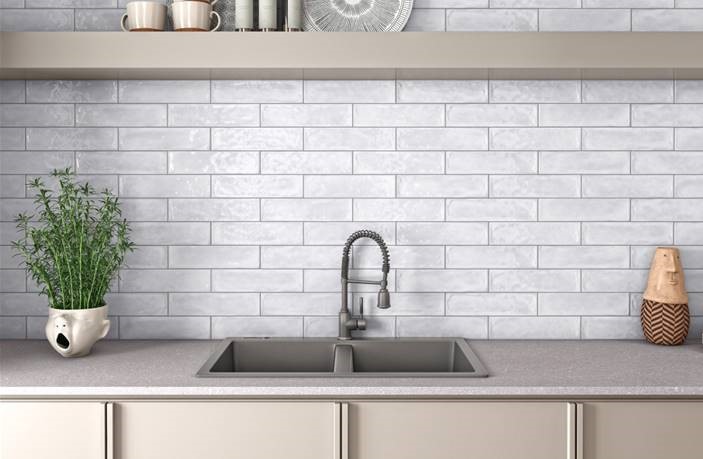
Subway tiles are ceramic tiles that became popular in the early 20th century. They first used them to decorate subway stations in New York City. These tiles are typically rectangular in shape, with dimensions of approximately 300 x 100mm, however, their sizes vary.
Subway tiles are versatile and work well in different spaces, such as kitchen backsplashes, bathroom walls and feature walls. Subway tiles have a timeless and classic appearance that is popular for traditional and modern designs.
Tile layout patterns are tiles laid in a specific pattern or arrangement. These patterns include classics like herringbone, basketweave, chevron, and diamond. You can also use modern layouts like checkerboard or random offset.
You can create patterns by using tiles that are the same size and shape. You can also mix different sizes, colors, or textures for a unique and custom look. These layouts add visual interest and dimension to floors, creating a dynamic and engaging environment.
Experimenting with tile patterns can enhance the floor tiles design. This applies to kitchens, bathrooms, living areas, and entryways.
Do you have another question about tiles that we haven’t addressed? Stop by your closest Tiletoria showroom and our team will gladly help with any questions you have or leave your questions in the comments!
Choosing your shower and shower doors is crucial for creating a luxurious and functional bathroom space. A well-chosen shower not only enhances the aesthetics but also ensures a seamless experience.
Prefer watching over reading? Explore this topic by tuning in to the episode on Tiletoria Trends here.
Measure your available space before selecting your bathroom shower doors, as the choice can significantly impact functionality. For instance, choosing a pivot door might not work in a small bathroom with limited space for the door to open.
If you’re unsure how to measure for a shower door – check out this measurement guide
Shower Curtains vs Shower Doors
One aspect that significantly elevates your experience and aesthetic is the choice between curtains and doors. Unlike curtains, doors provide a water-tight enclosure, ensuring a cleaner bathroom and a more enjoyable bathing experience.
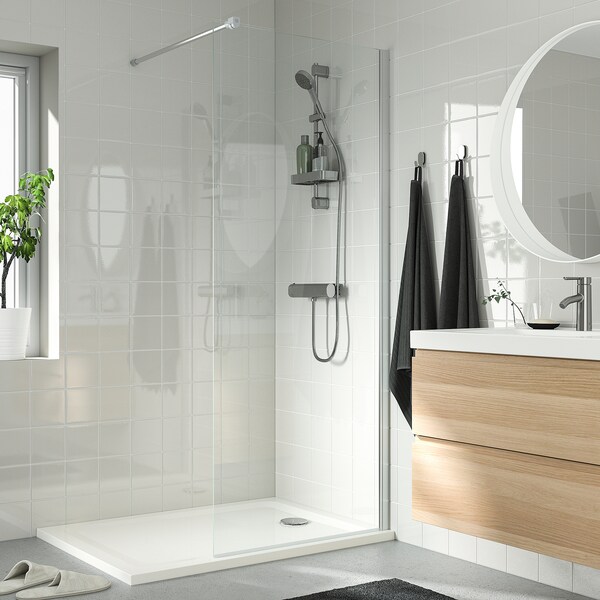
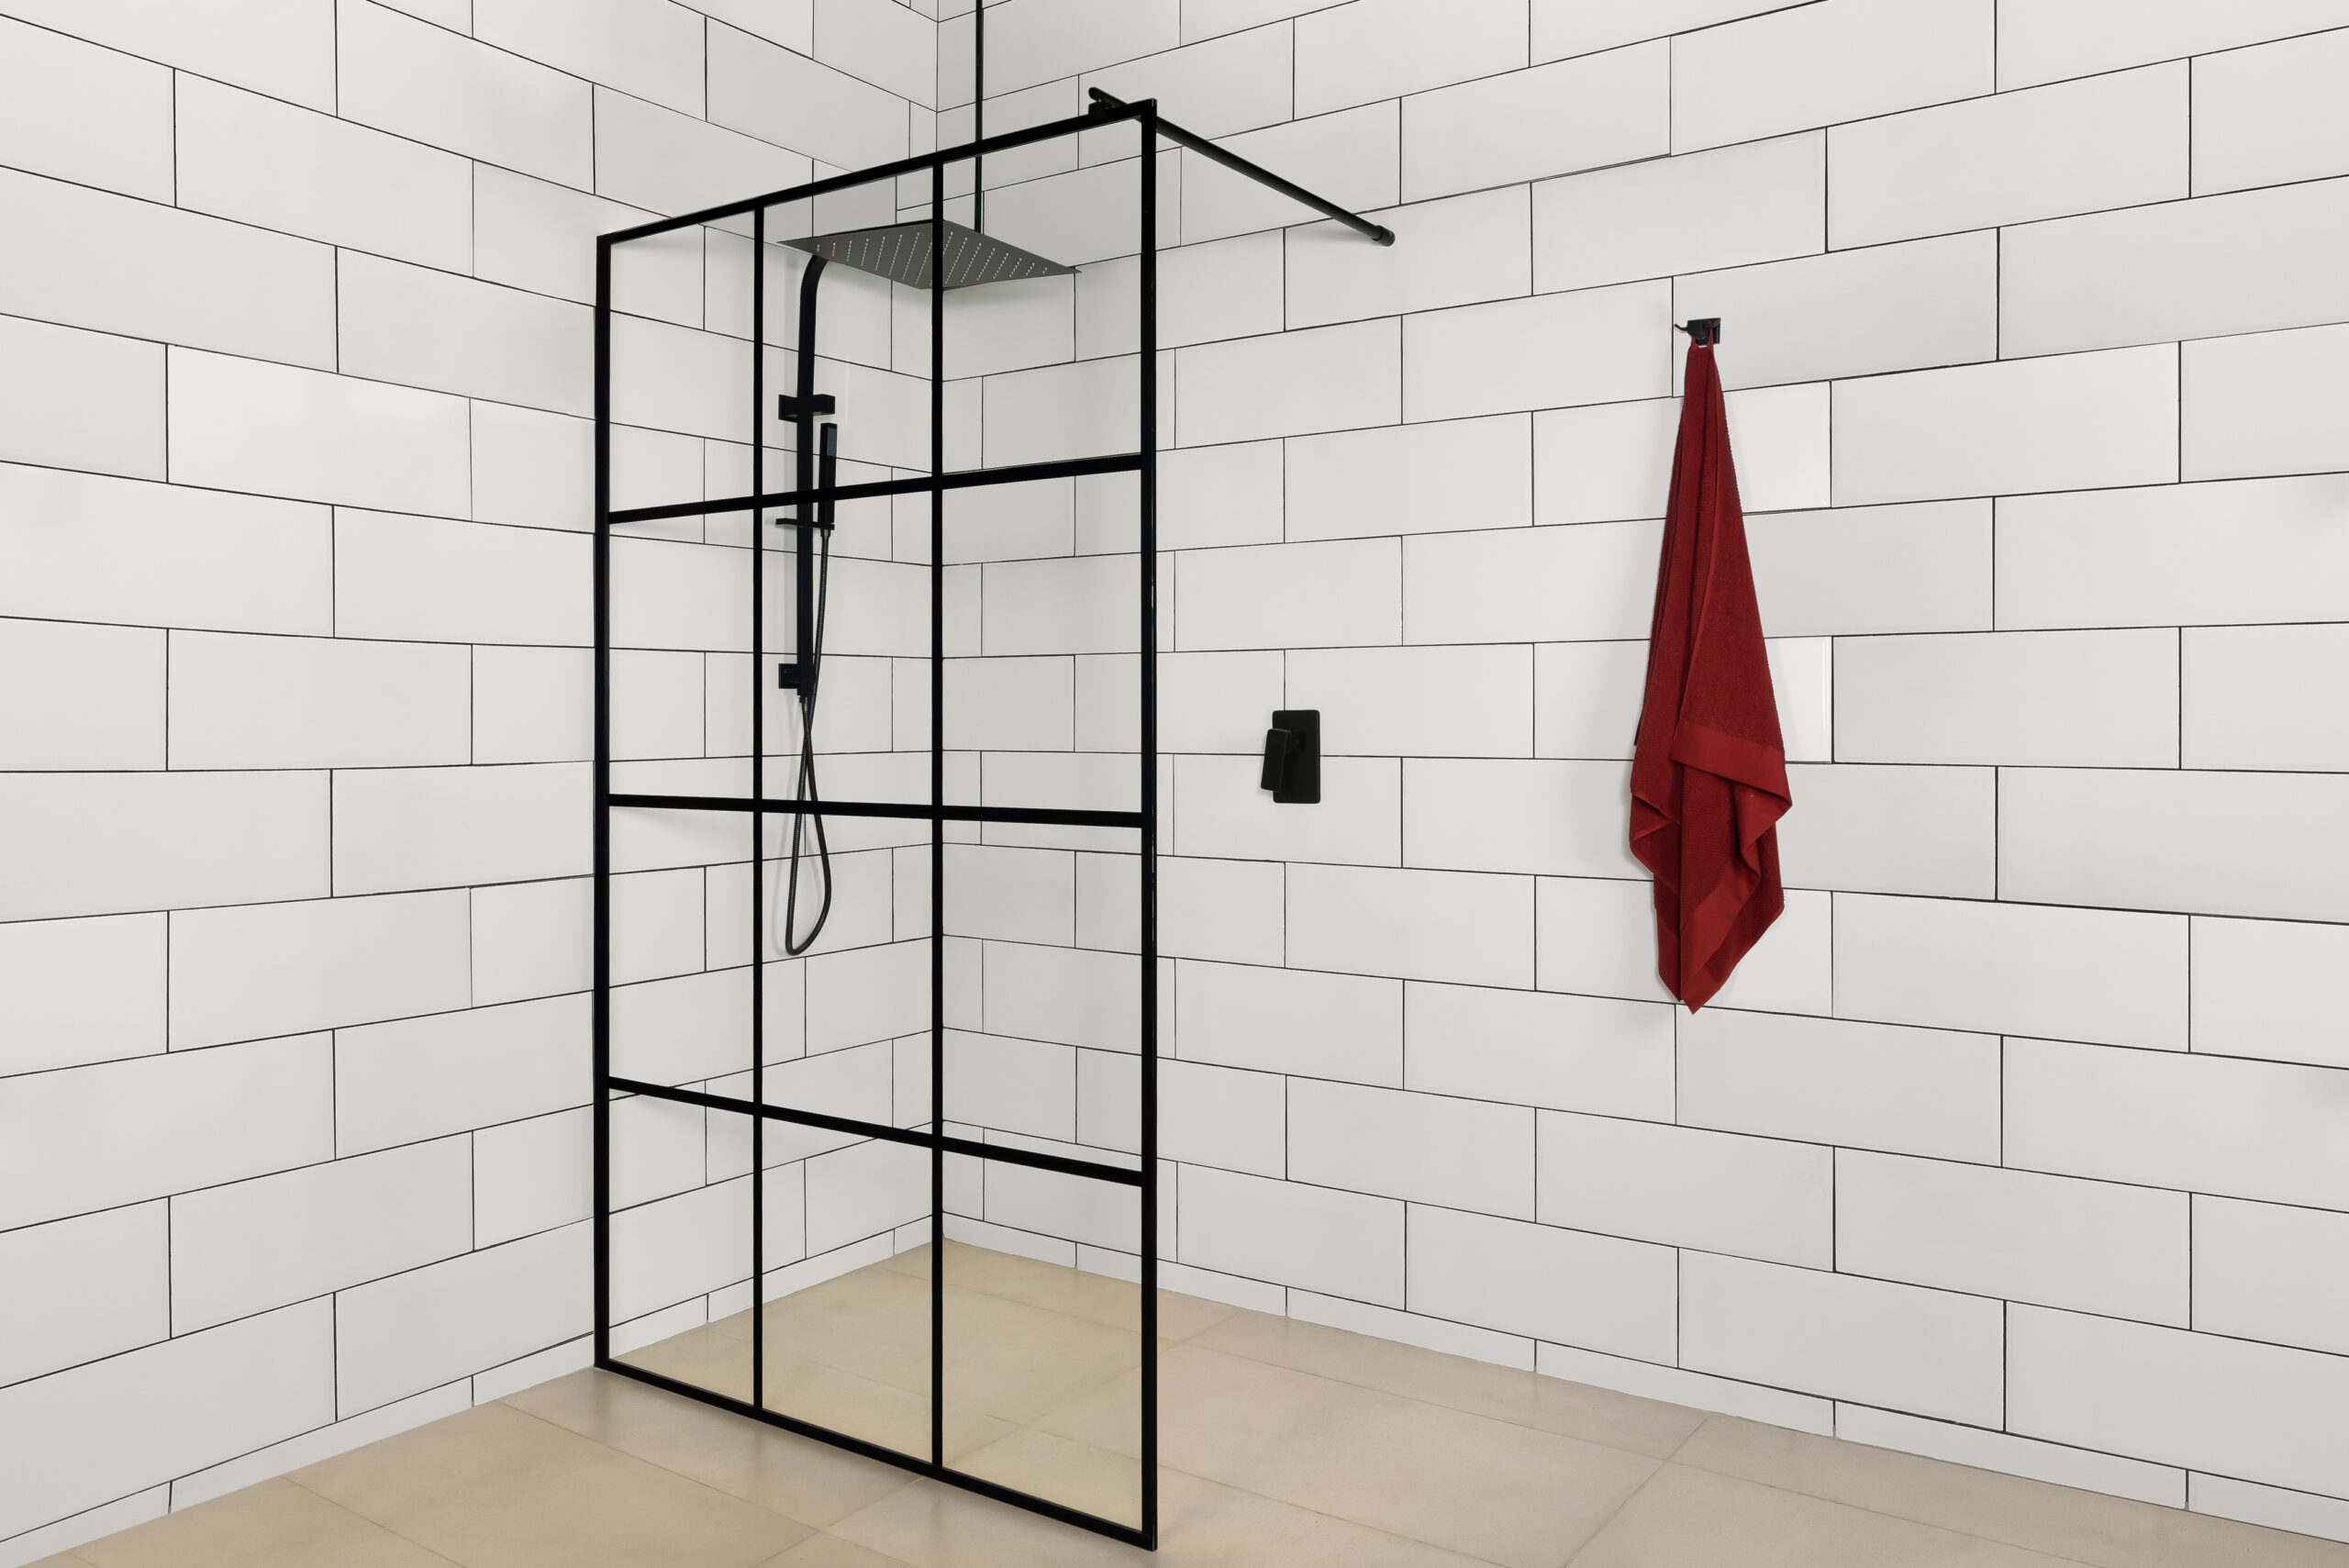
Shower Screen
A typically shower enclosure, offers a contained space for bathing. A glass panel or a shower screen, open on one side, provides a minimalistic and open feel to your bathroom. This choice conveys the sensation of a walk-in shower. Remember, the choice impacts not only functionality but also the overall aesthetics of your space.
Clear Glass vs Frosted glass
Clear shower glass panels provide a sleek look, allowing you to showcase the beauty of your tiles and fixtures.
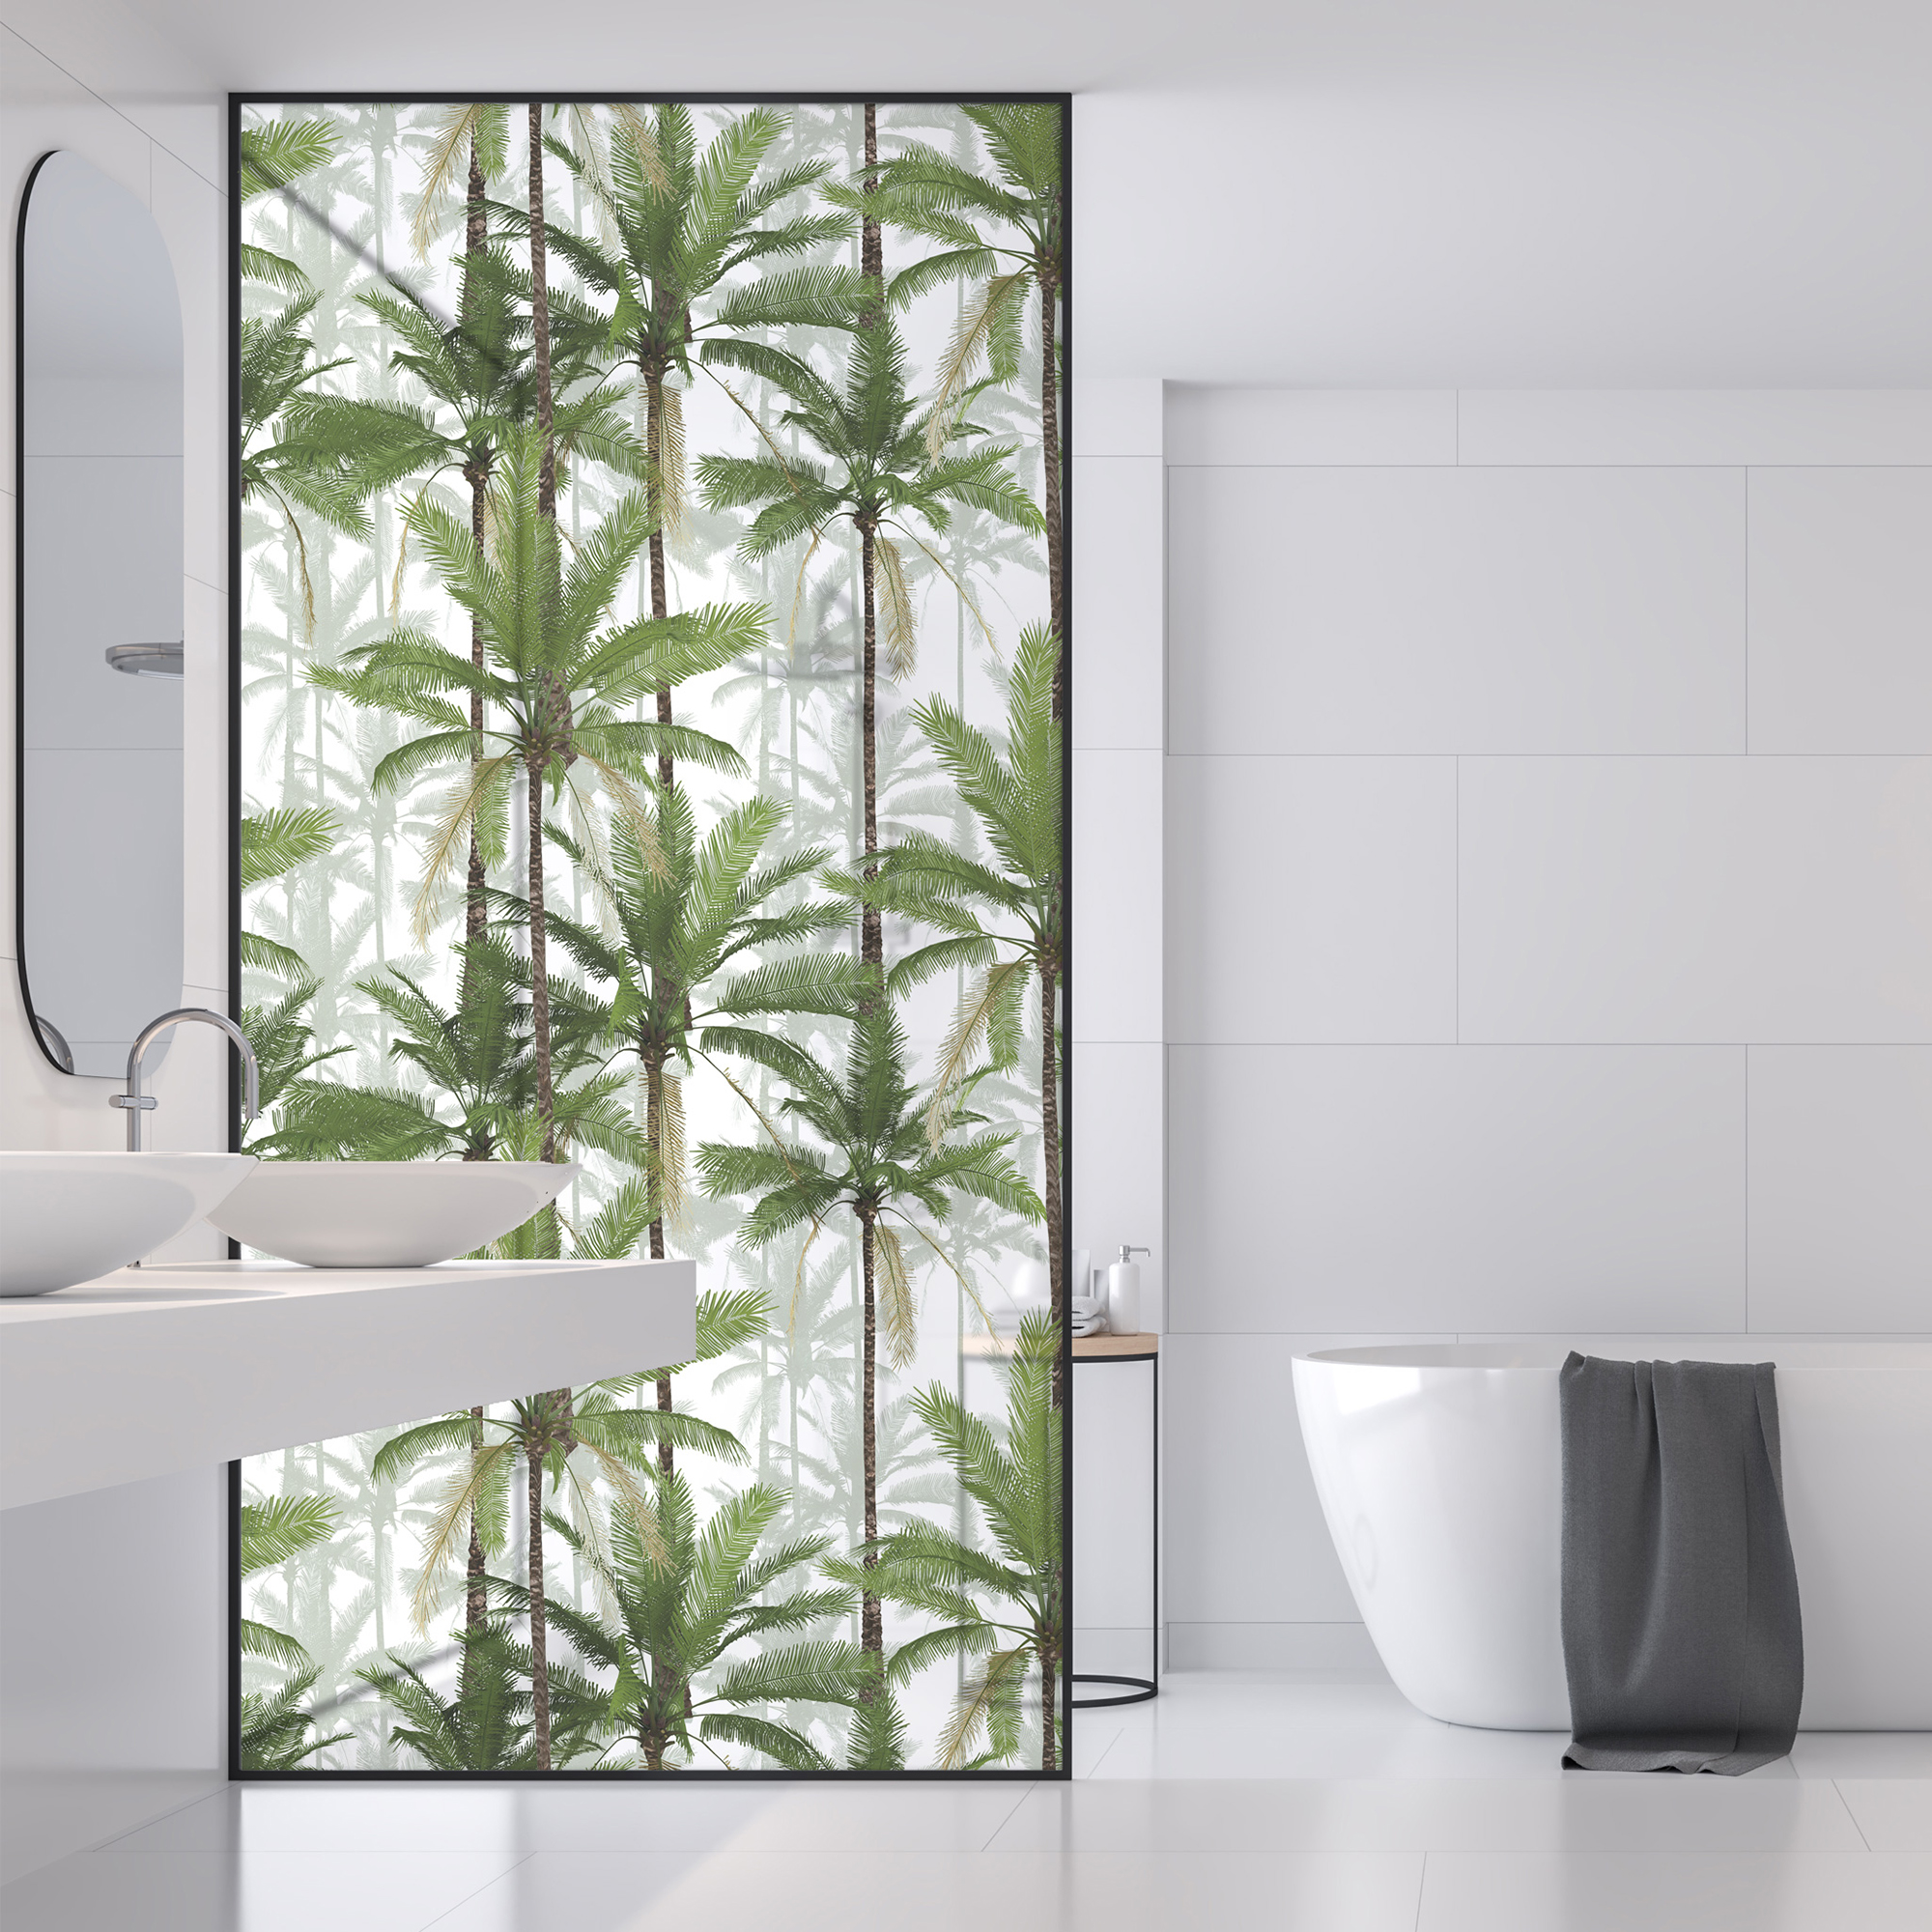
On the other hand, frosted glass panels add a layer of privacy while still allowing natural light to filter through. Frosted glass shower doors also offer decorative patterns which can add character into your space.
If you’re considering frosted shower doors but not quite ready for a commitment, consider Robin Sprong Shower Panel Vinyl. These easy-to-apply vinyl stickers offer a frosted glass effect. They are long-lasting, and leave absolutely no damage or residue upon removal. You can also fully customize them to suit your unique style and taste.
For those who appreciate a clean, minimalist look, frameless shower doors are the epitome of sophistication. With no visible frames, these doors provide an unobstructed view, adding a touch of luxury to your space.
Framed and Semi-Frameless
Framed shower doors, with a sturdy metal frame, provide added stability and support. Semi-frameless doors combine the best of both worlds, offering a sleek design with a minimal frame. These options are excellent choices for those seeking a balance between durability and traditional aesthetics.
Different types of shower doors
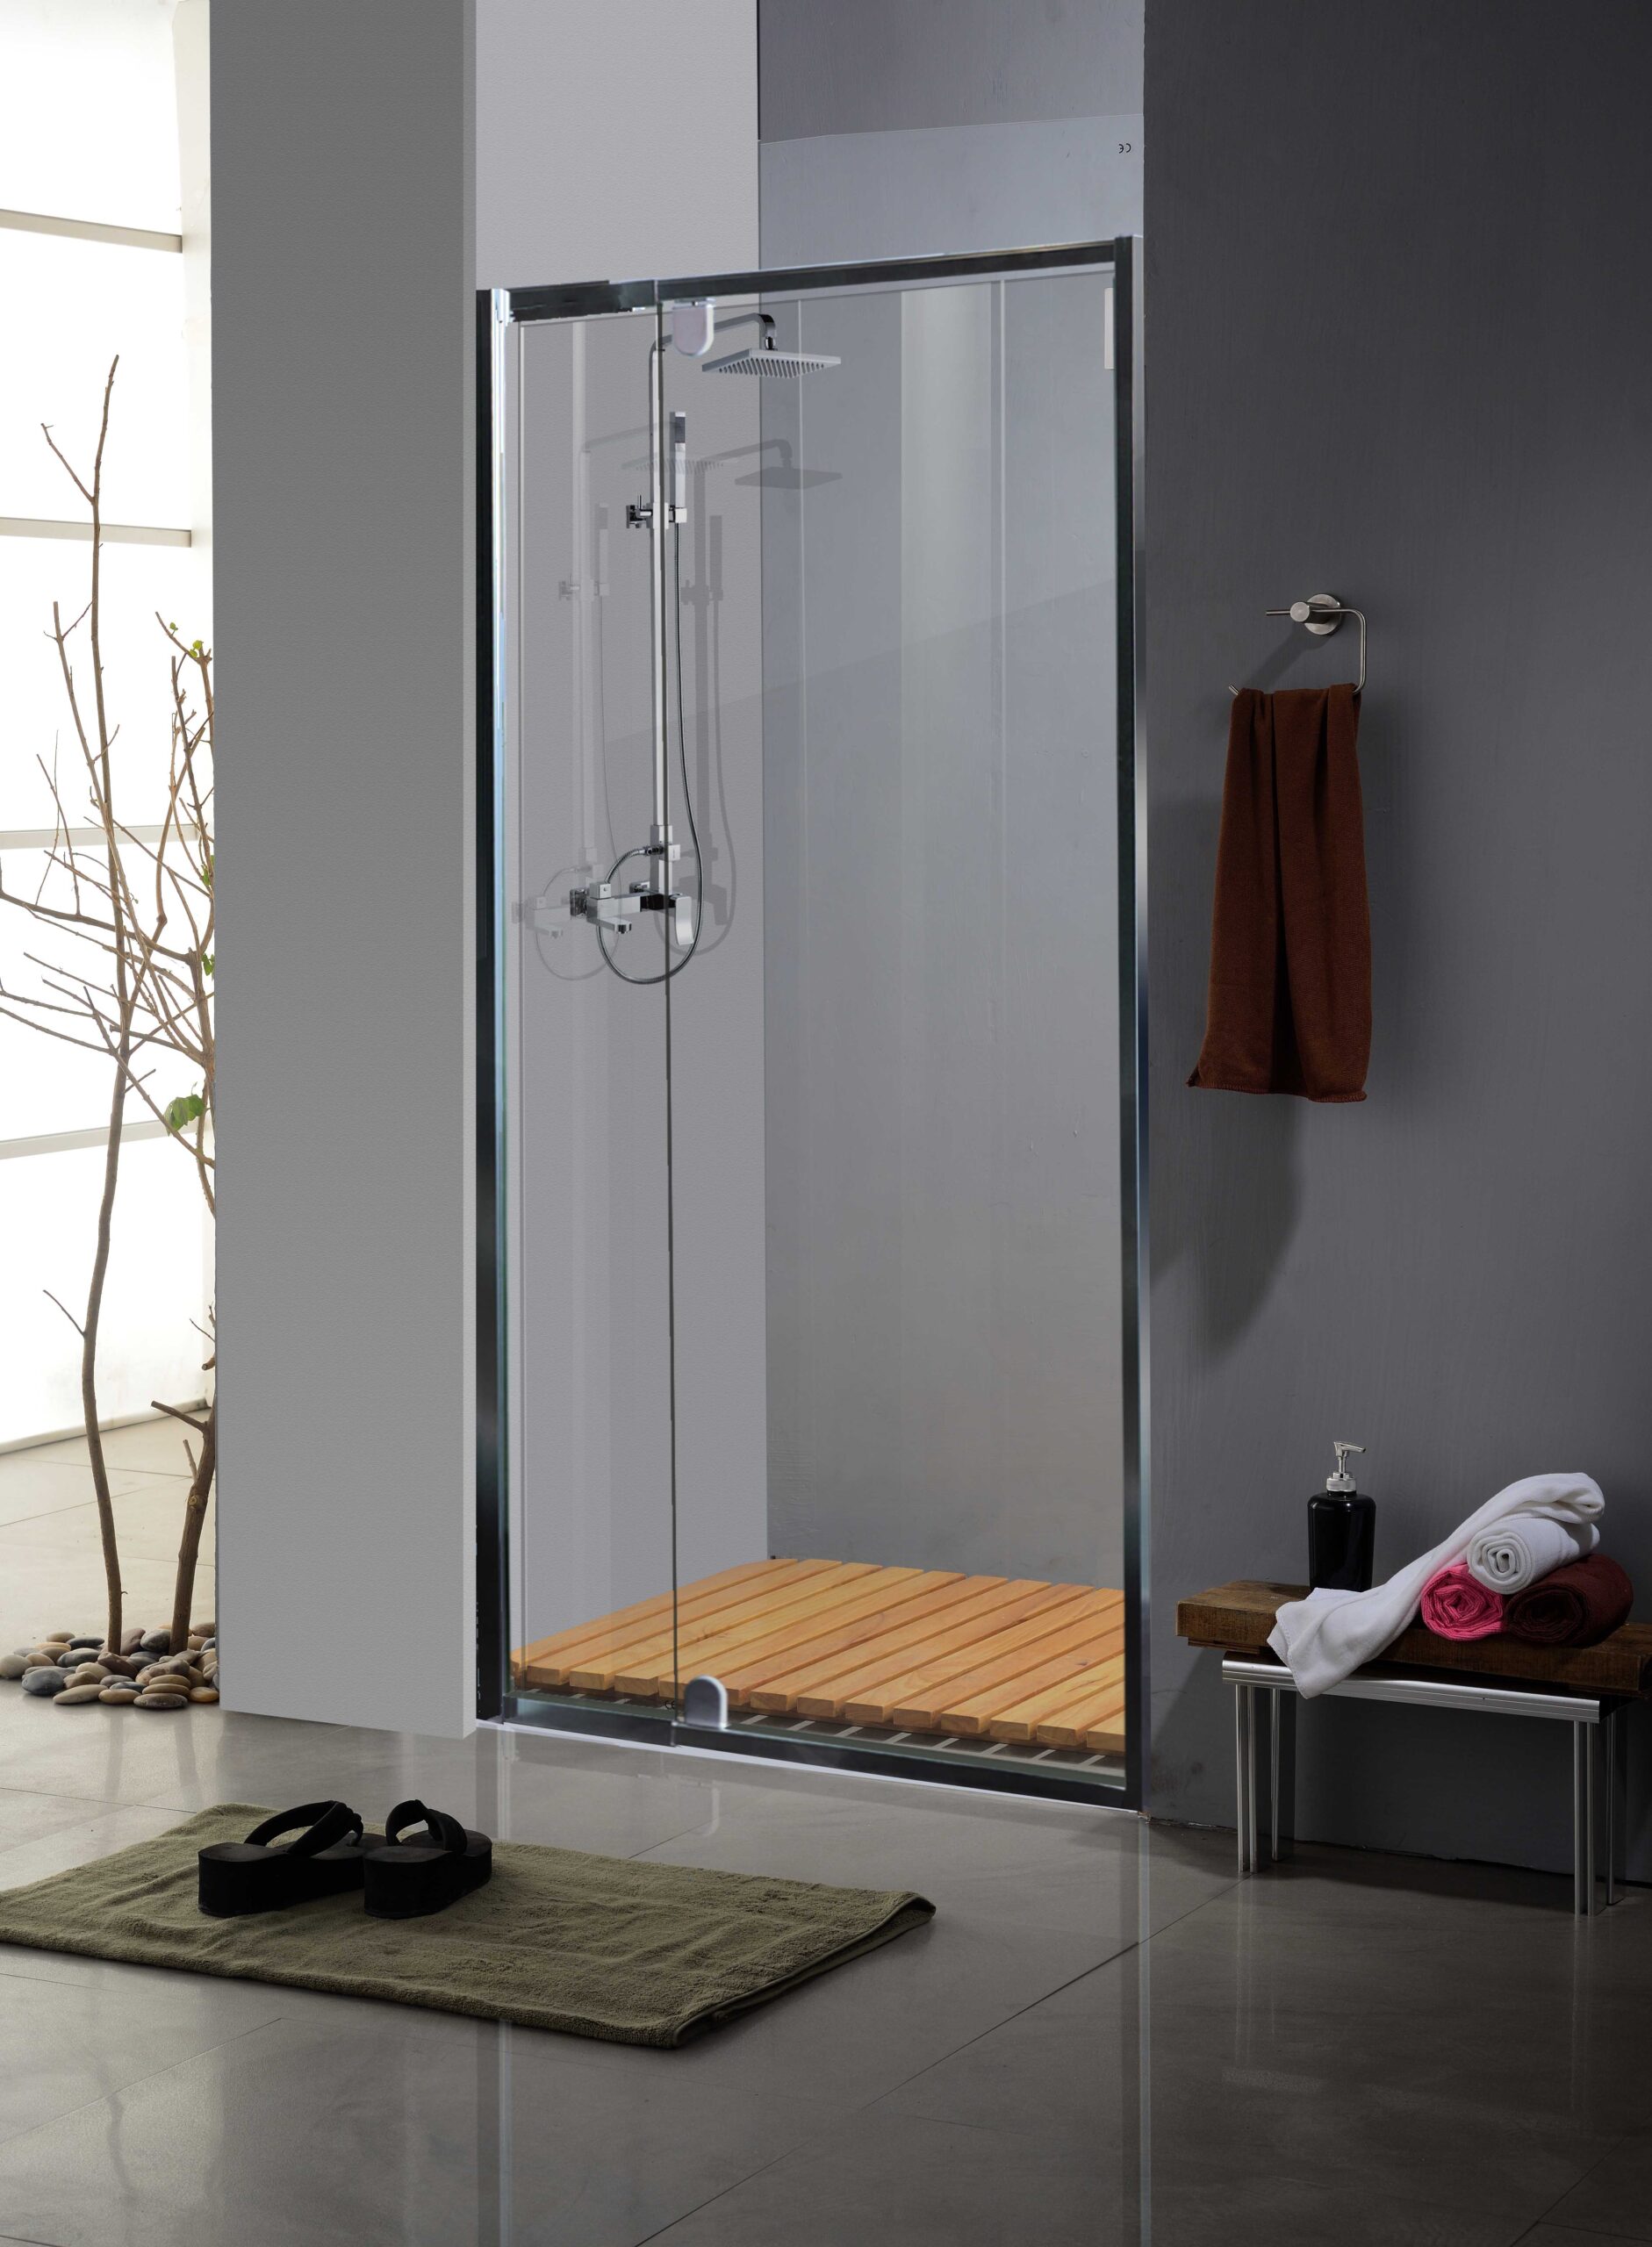
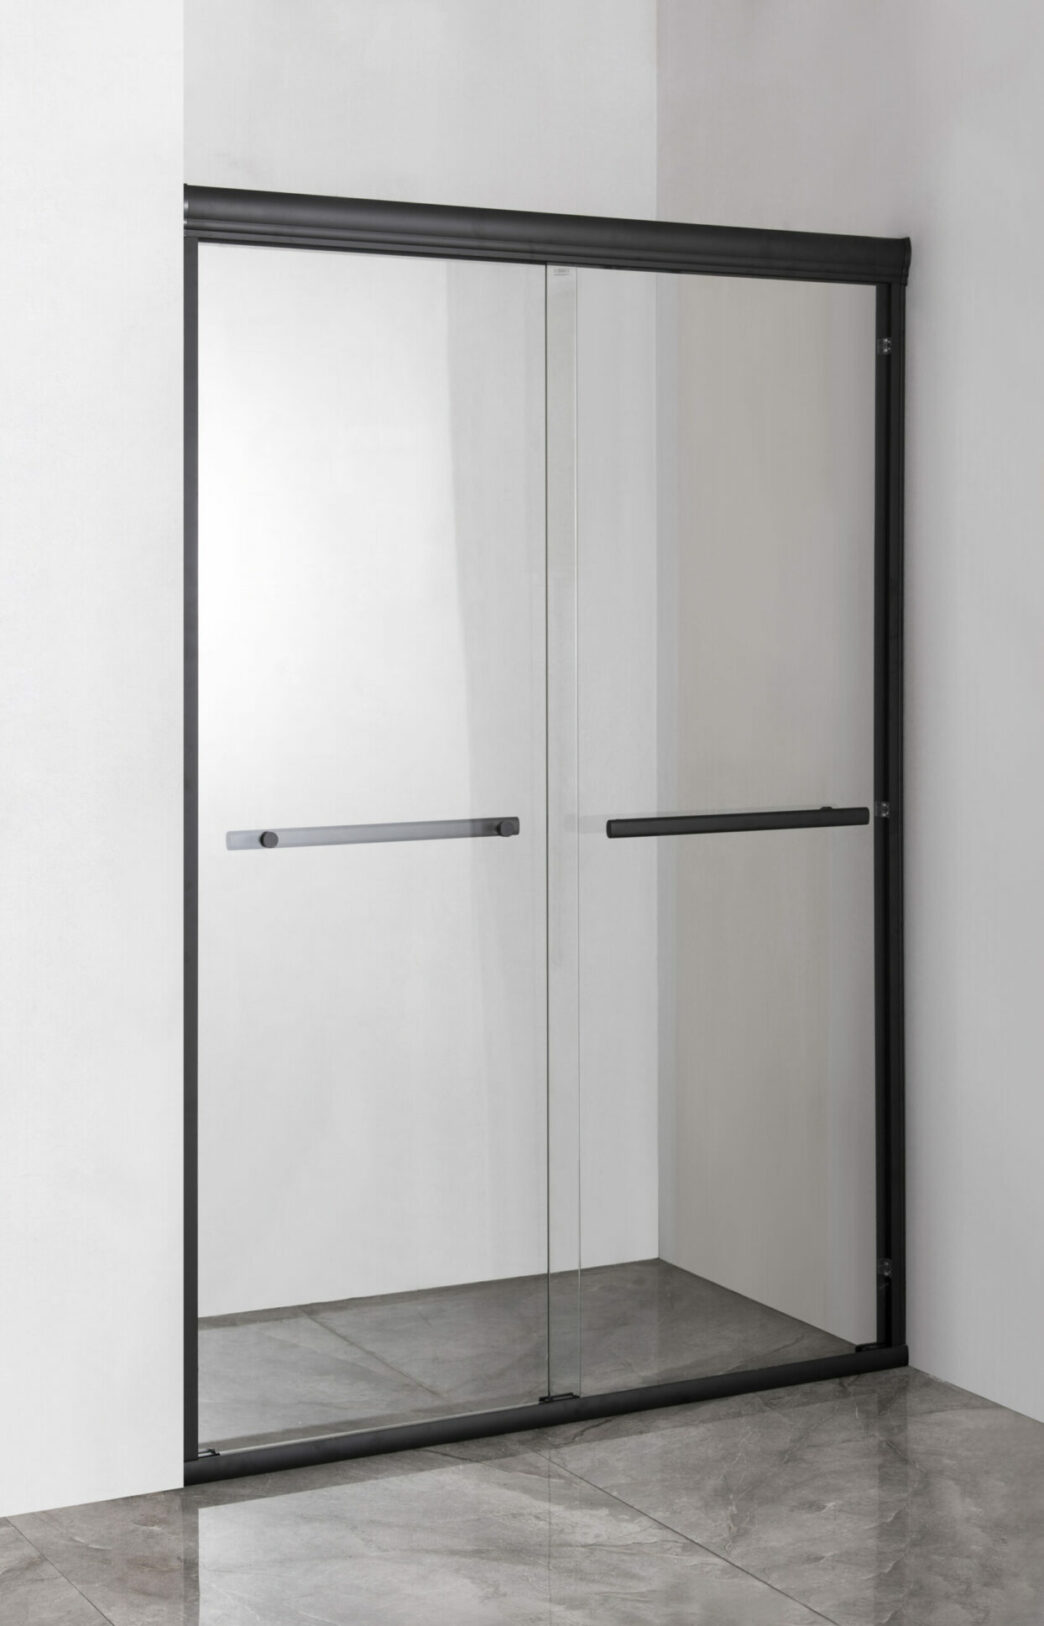
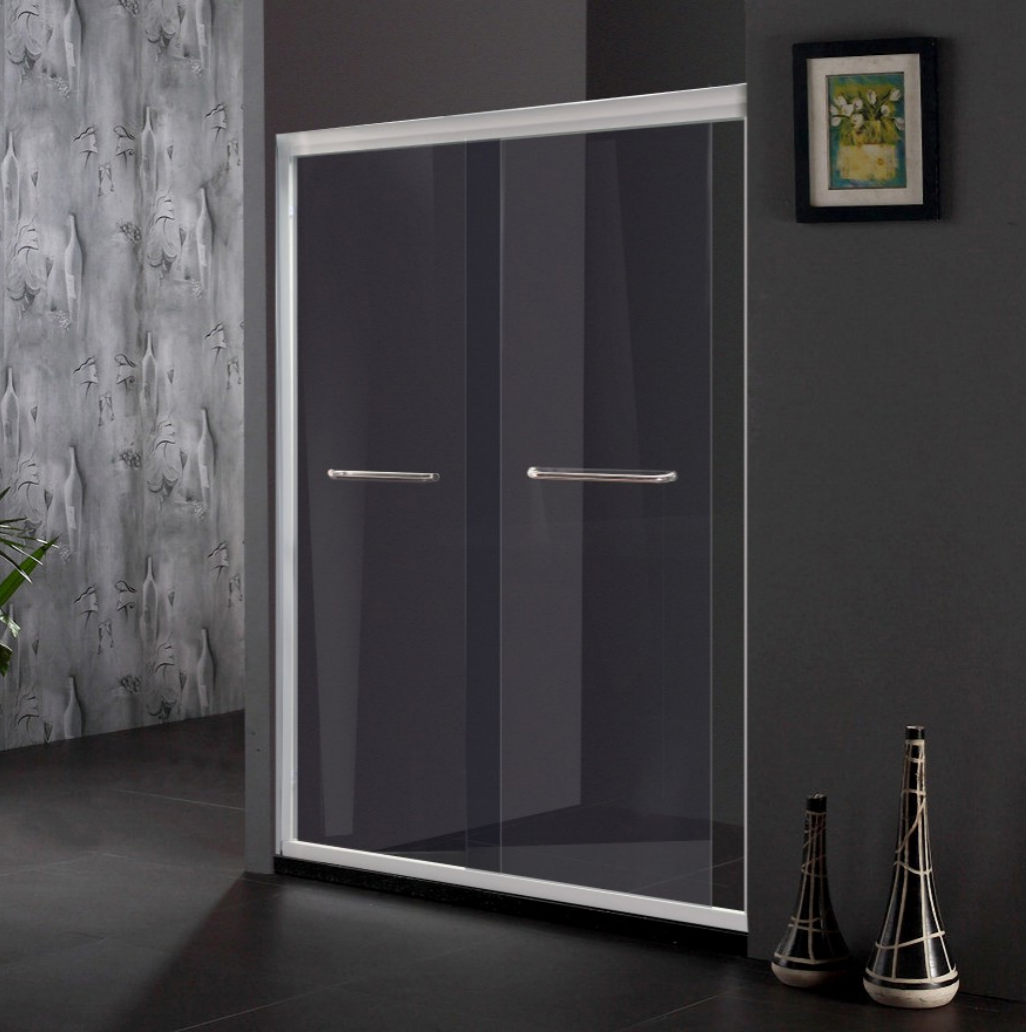
Sliding doors
Suitable for compact spaces, sliding shower doors exude simplicity and functionality. Their smooth gliding mechanism ensures a hassle-free entry and exit, making them a practical choice for smaller bathrooms.
Pivot doors
Offering a traditional yet stylish look, pivot shower doors open on a pivot hinge. They provide a classic aesthetic while ensuring ease of use. Remember, these may not be suitable for smaller bathrooms with limited space.
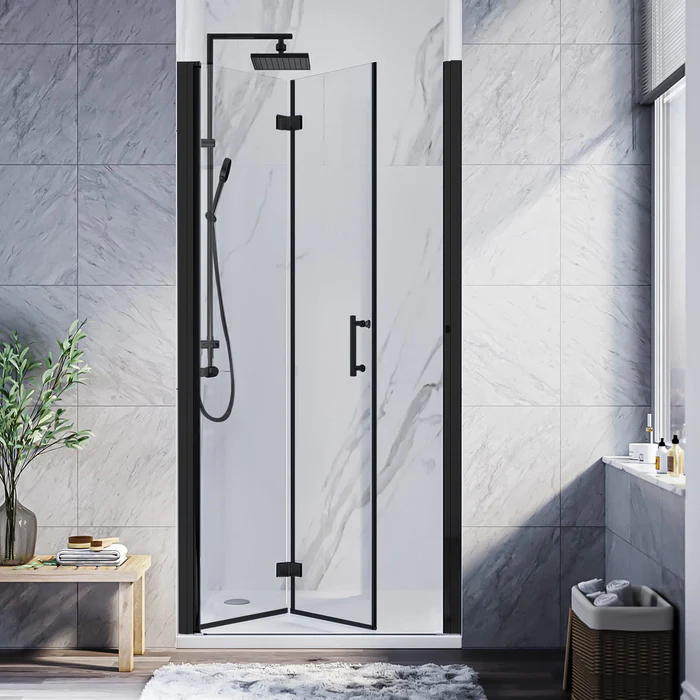
Folding doors
Folding shower doors are perfect for tight spaces. Their accordion-like design allows them to fold neatly against the wall, offering convenience without compromising on style.
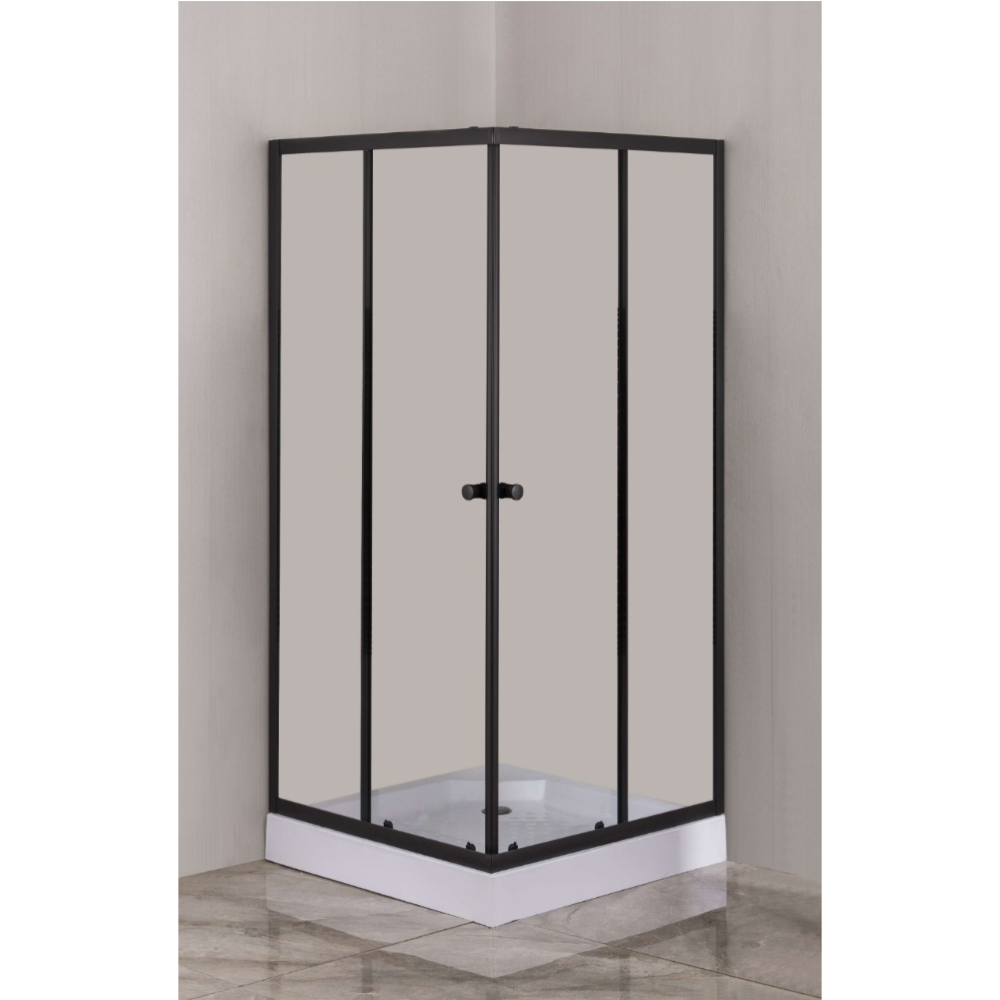
If space is a concern, corner shower doors optimize the layout of your bathroom. They fit seamlessly into corners, making the most of available space while adding a unique visual appeal.
Glass vs. Plastic vs. Acrylic – Material Considerations
When choosing your material, it’s essential to weigh the pros and cons.
Glass shower doors are durable and easy to clean but can be heavy and expensive. On the other hand, acrylic and plastic doors are lightweight and budget-friendly but may not be as durable as glass. Consider the material that best suits your budget and needs.
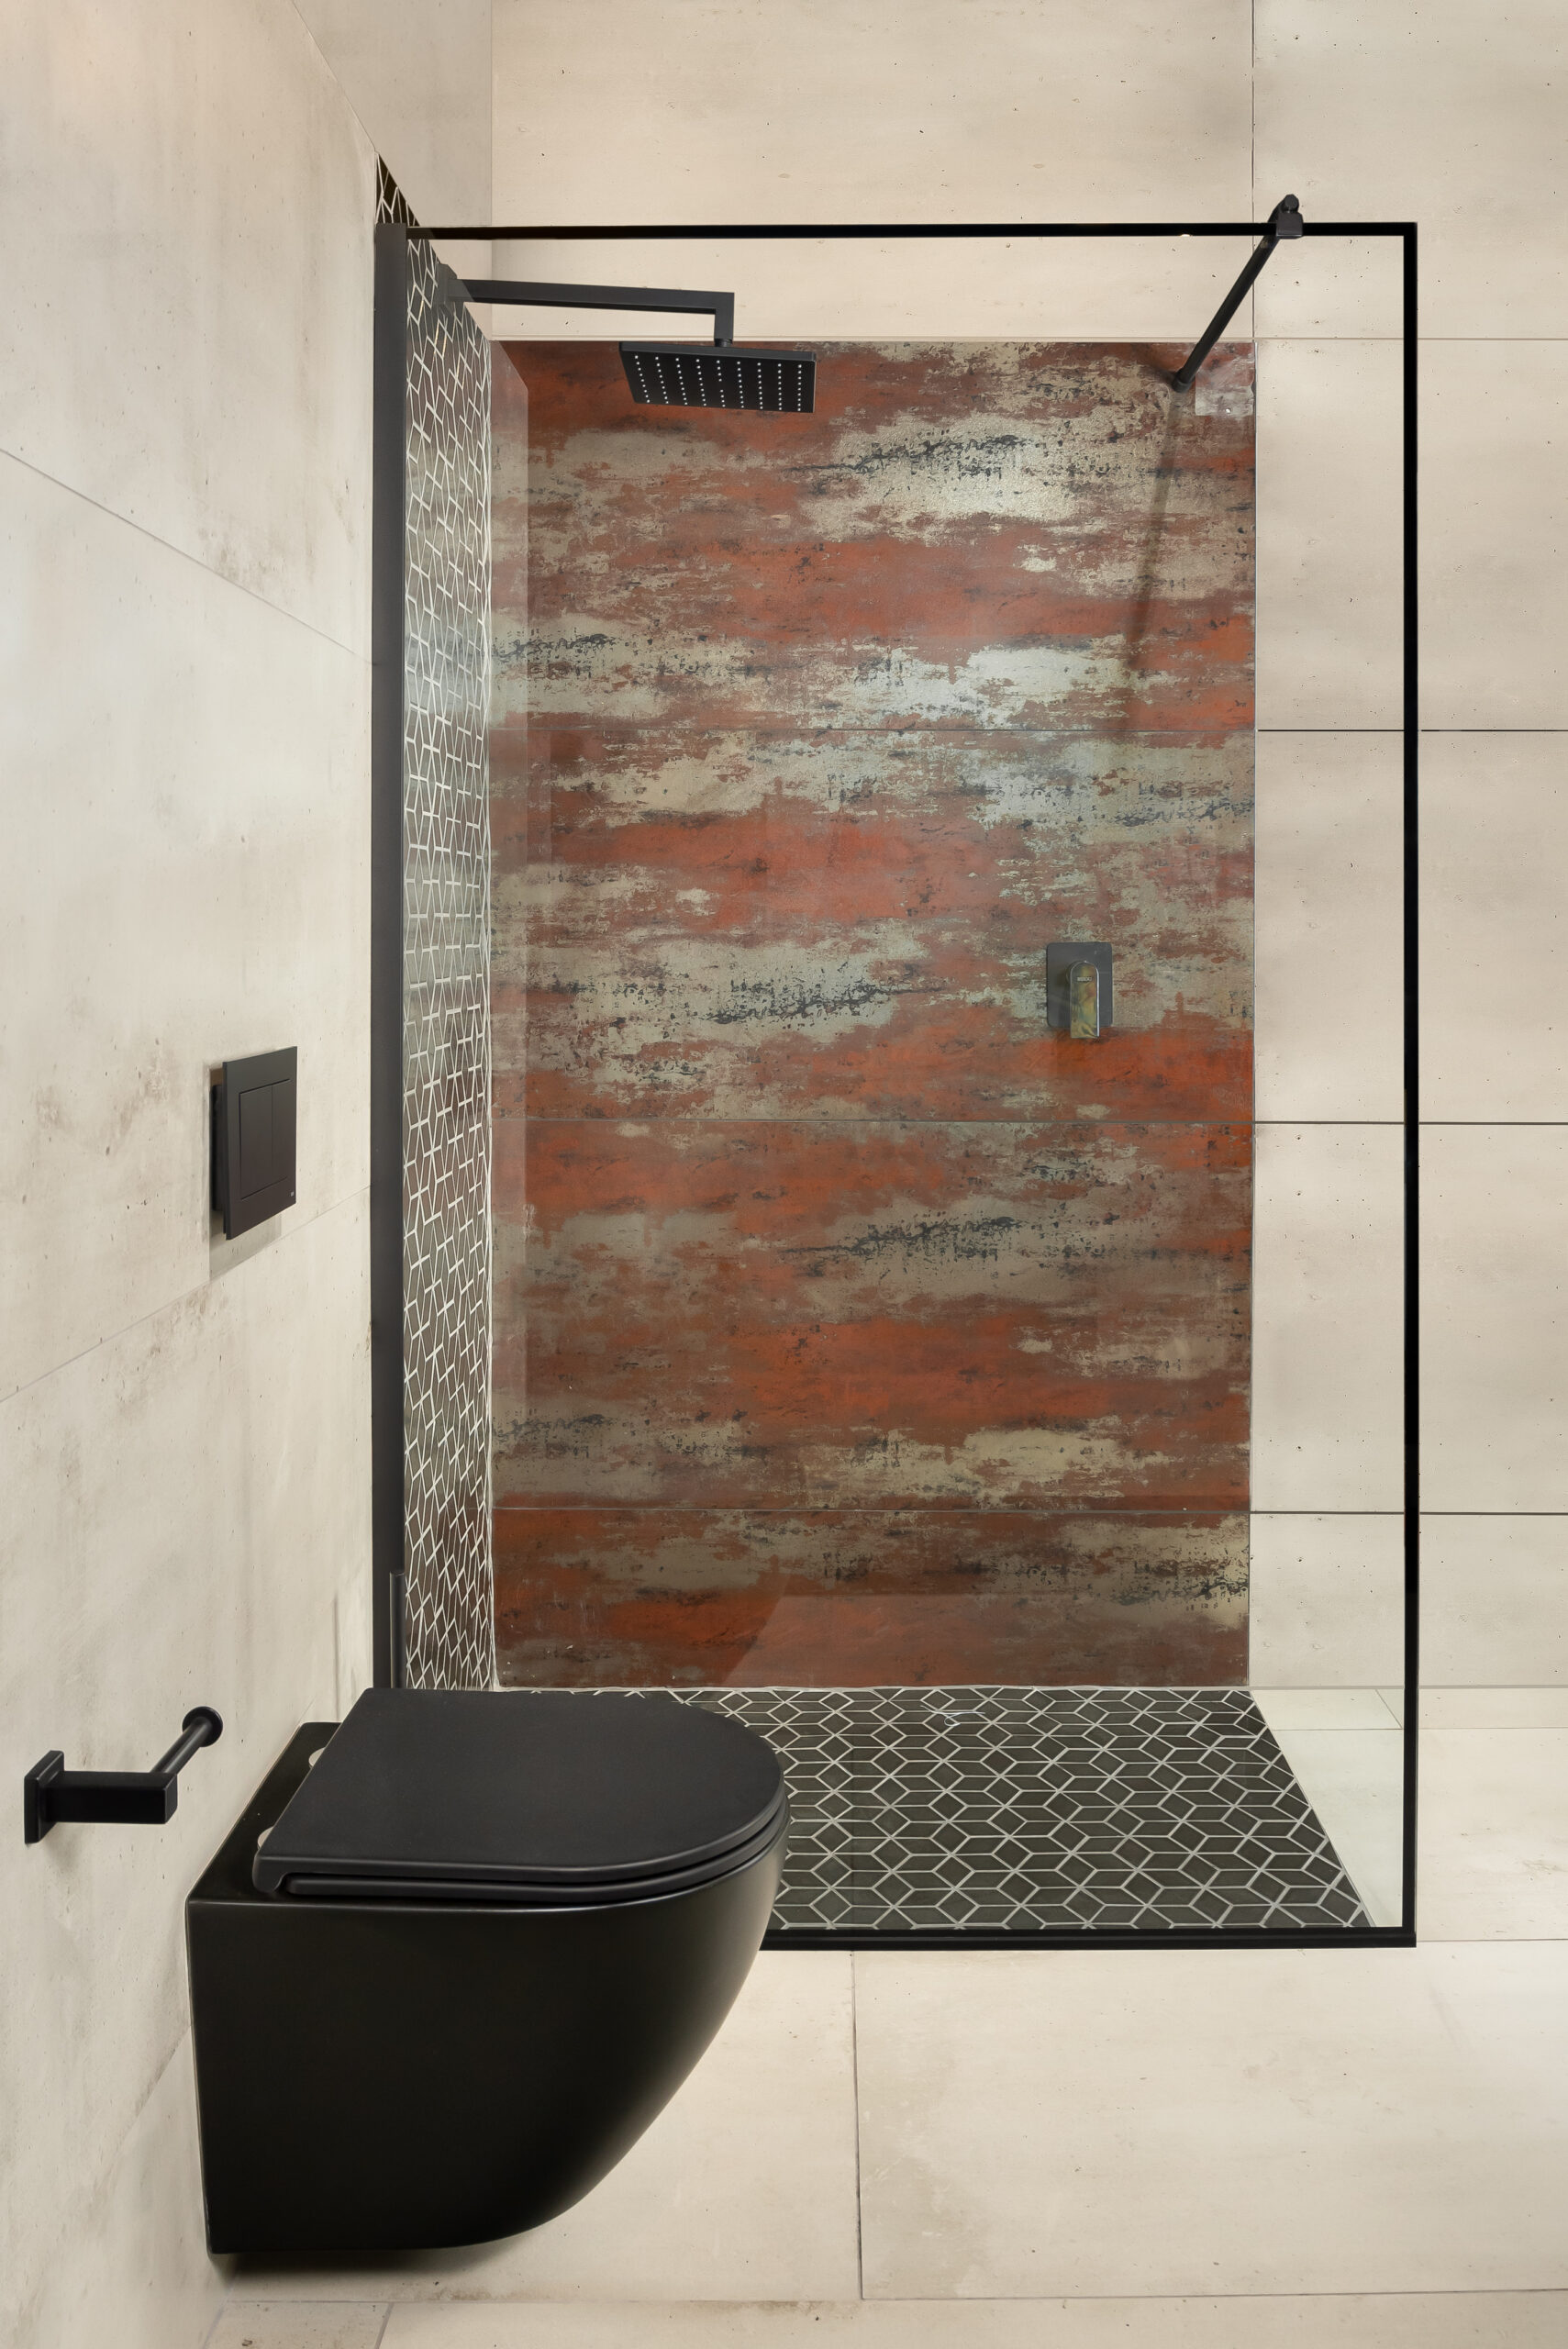
Colours – Setting the Tone
The colour of your shower door can significantly impact the overall aesthetic. Black shower doors offer a bold and modern look, while white shower doors evoke a sense of cleanliness and simplicity. Choose a colour that complements your bathroom’s theme and overall aesthetic.
Specials
To sweeten the deal, we regularly offer shower and shower door specials throughout the year. Keep an eye on our social media platforms for real-time updates on discounts and promotions.
For an exclusive heads-up, sign up for our newsletter, and be the first to know about upcoming sales. You’ll also get an exclusive sneak peek at all discounted products before their public release.
Selecting the perfect shower is not only about functionality. It involves enhancing your bathroom’s aesthetic and transforming your daily routine into a luxurious experience. The diverse range available allows you to tailor your choice to fit both your space and style.
Remember, the key is to strike a balance between practicality and elegance. So, measure your space, consider your preferences, and let your shower be a statement of sophistication!
View our range of showers for sale and shower doors for sale
Embarking on a tile installation project can be both exciting and daunting. Whether you’re revamping your kitchen, bathroom, or any other space, the success of your project hinges on the tools and accessories you use. Choosing the right equipment can make the difference between a flawless installation and a frustrating ordeal. In this comprehensive guide, we’ll explore the crucial tools and accessories that are indispensable for a successful tile installation.
Measuring and Layout Tools:
Accurate measurements and precise layout are the foundation of any successful tile installation. Invest in quality measuring tools, such as a tape measure, straight edge, and a framing square. A laser level is an excellent addition to ensure a level and straight installation.
Tile Cutter:
A tile cutter is a must-have tool for any tile installation project. There are various types of tile cutters available, including manual snap cutters, electric wet saws, and handheld tile cutters. Choose the one that best suits your needs and the type of tiles you’re working with.
Tile Nippers:
Tile nippers are essential for making small, detailed cuts or shaping tiles to fit around obstacles. They are especially handy when dealing with ceramic or porcelain tiles that may require slight adjustments for a perfect fit.
Tile Spacers:
Achieving consistent and even spacing between tiles is crucial for a professional-looking finish. Tile spacers come in various sizes and are used to maintain uniform gaps, ensuring that the tiles are properly aligned during installation.
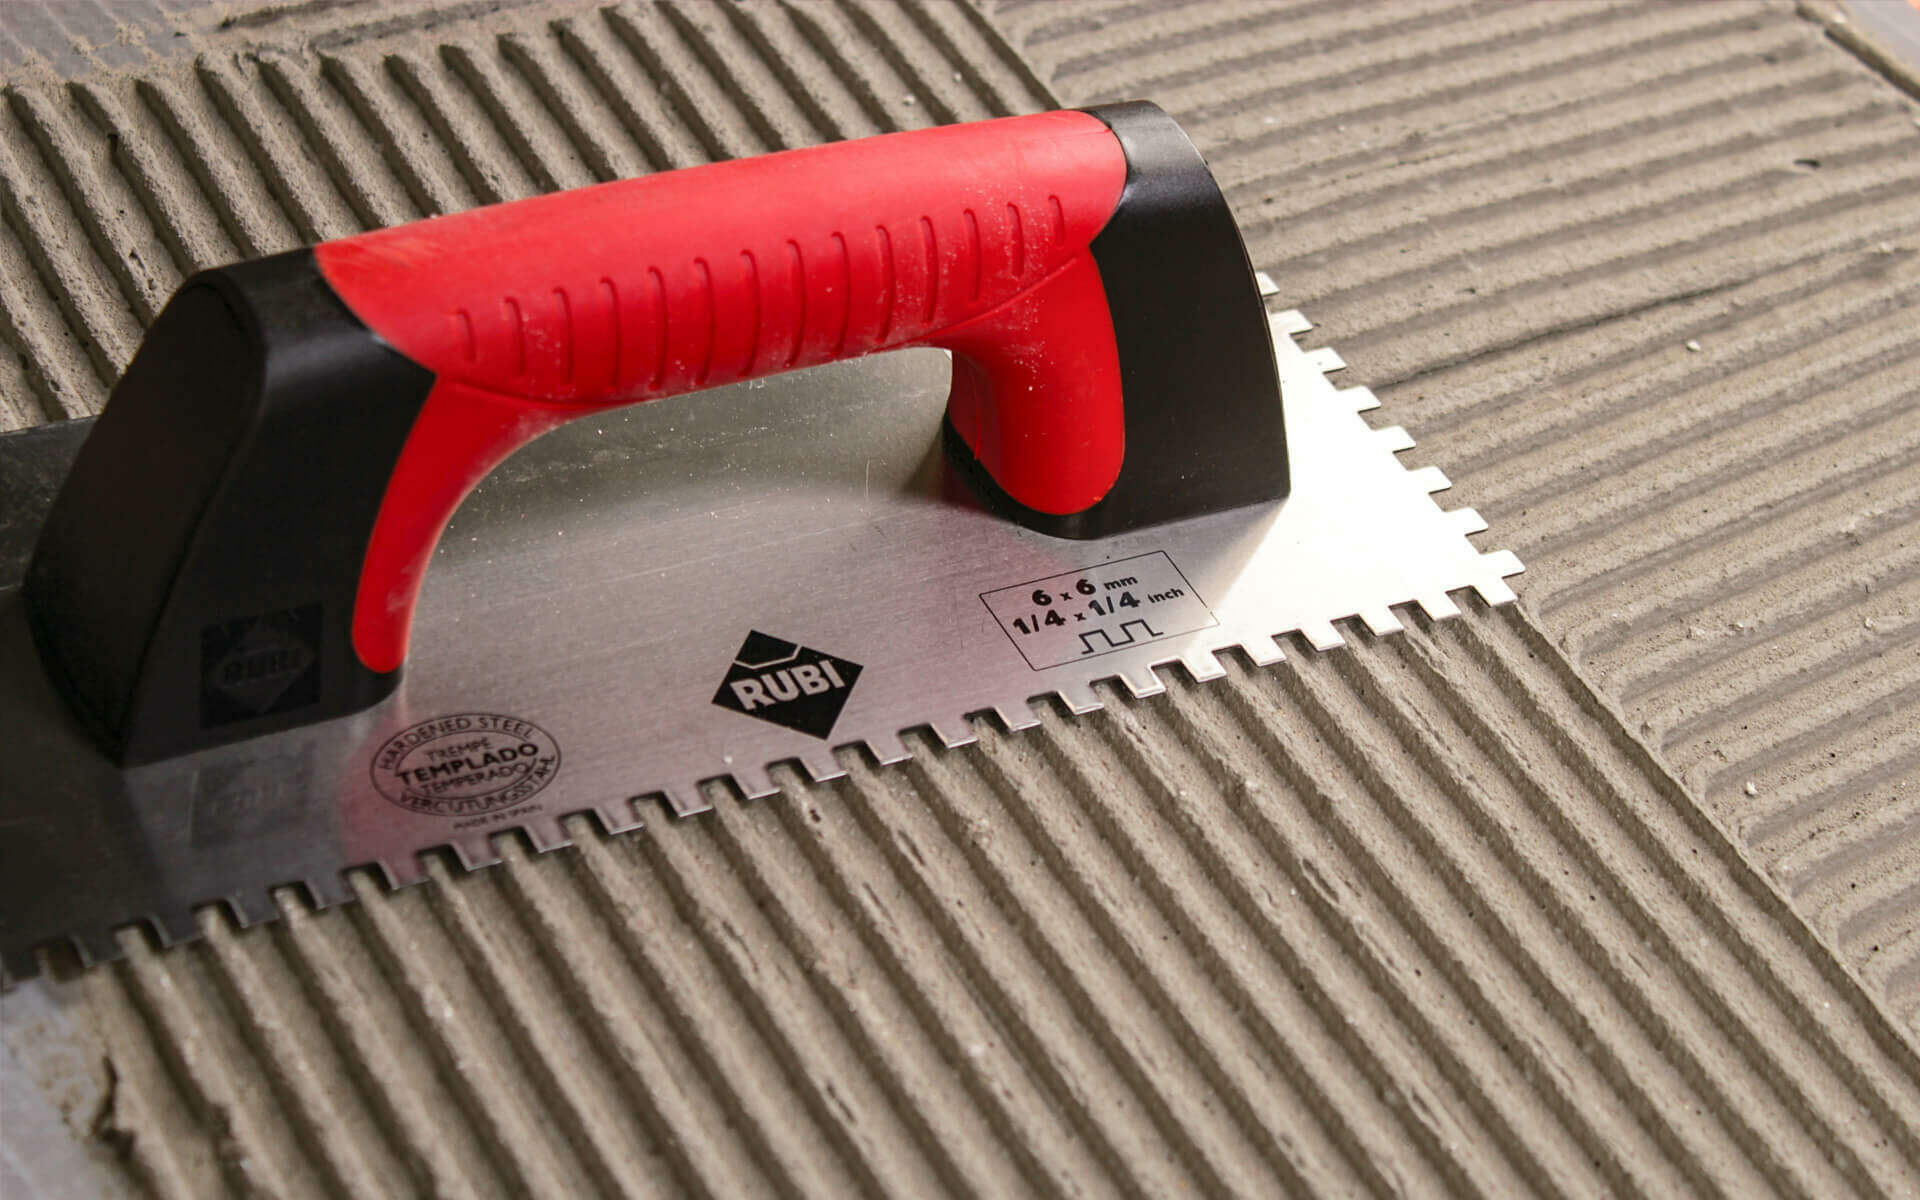
Trowels and Notched Trowels:
Trowels are used to spread adhesive or mortar evenly on the substrate before laying the tiles. Notched trowels have ridges that help create uniform grooves in the adhesive, promoting better adhesion and reducing the risk of air pockets.
Grout Float:
Once the tiles are in place, a grout float is used to apply and press grout into the spaces between tiles. Choose a rubber float for standard applications or a harder plastic float for epoxy grouts.
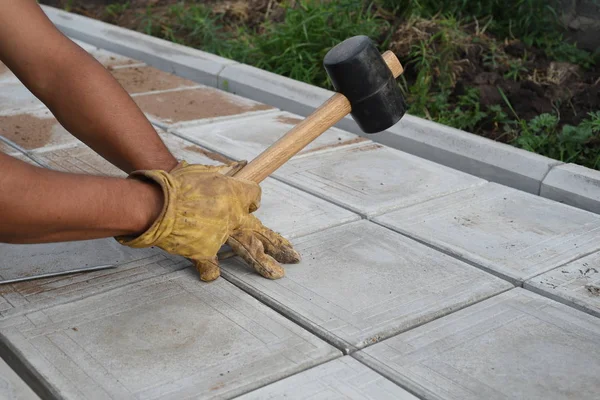
Rubber Mallet:
A rubber mallet is essential for gently tapping tiles into place without damaging them. It’s particularly useful when adjusting tiles that may be slightly uneven or need to be leveled with neighboring tiles.
Wet Saw:
For cutting through hard materials like natural stone or porcelain tiles, a wet saw is indispensable. The continuous flow of water helps keep the blade cool and minimizes dust, ensuring clean and precise cuts.
Knee Pads:
Tile installation often involves spending a significant amount of time on your knees. Invest in quality knee pads to provide comfort and protection, reducing strain on your joints during the installation process.
Safety Gear:
Protect yourself with the appropriate safety gear, including safety glasses and gloves. Tile cutting and installation can generate dust and debris, and protecting your eyes and hands is essential for a safe working environment.
Mixing Drill and Paddle:
For large tile installations, using a mixing drill with the appropriate paddle attachment is essential for efficiently mixing mortar or adhesive. This ensures a consistent and lump-free mixture, promoting a secure bond between the tiles and the substrate.
Sponges and Buckets:
Keep a bucket of clean water and a sponge handy for wiping off excess grout and adhesive during and after the installation. A clean sponge helps achieve a professional finish by preventing grout haze and residue on the tiles.
Sealer and Applicator:
Depending on the type of tile you’re using, applying a sealer may be necessary to protect against stains and moisture. Invest in a high-quality sealer and the appropriate applicator to ensure thorough and even coverage.
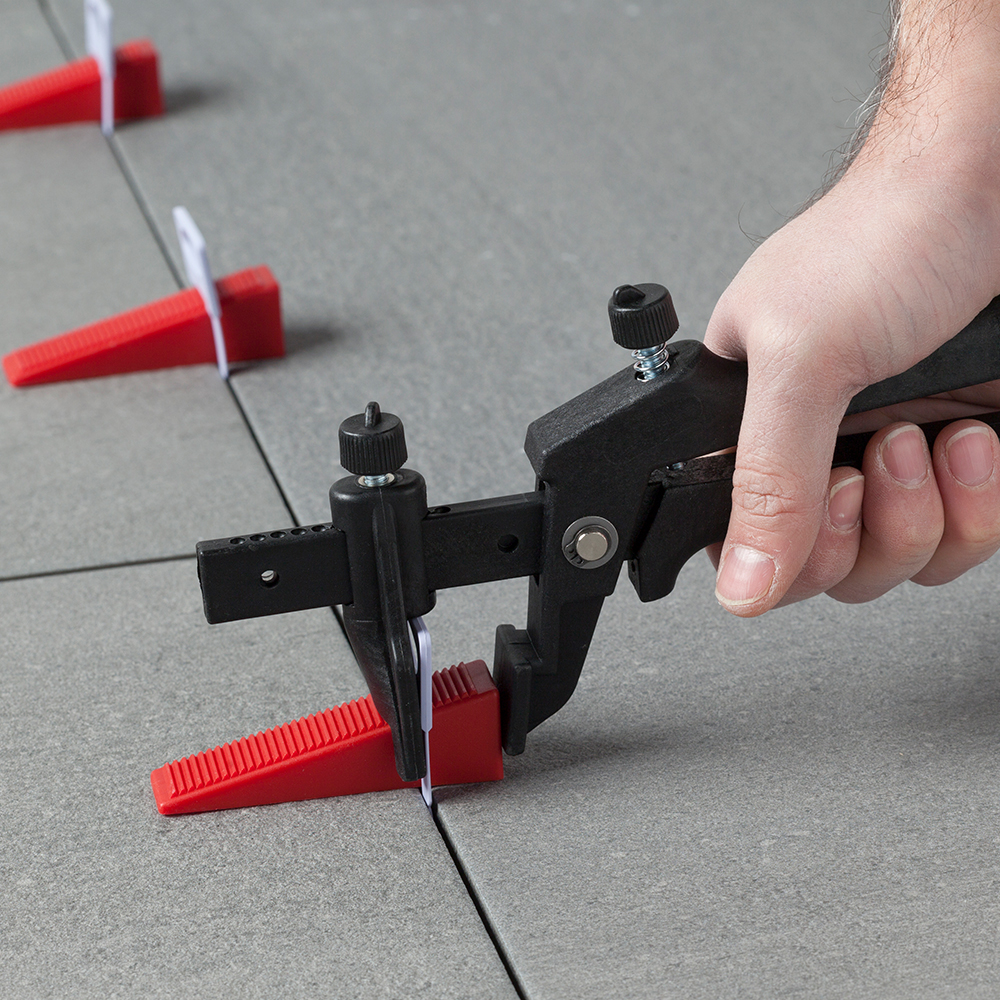
Tile Leveling System:
To achieve a perfectly flat and level surface, consider using a tile leveling system. These systems use clips and wedges to ensure that tiles are flush with each other, preventing lippage and creating a seamless finish.
Caulk and Caulk Gun:
Finish the edges of your tile installation with a high-quality caulk that matches the grout colour. A caulk gun makes the application process clean and precise, providing a professional look while also sealing gaps and preventing water intrusion.
A successful tile installation requires more than just the tiles themselves. The right tools and accessories play a crucial role in achieving a professional and long-lasting result. By investing in high-quality equipment and taking the time to plan and measure accurately, you’ll set the stage for a smooth and successful tile installation project. Whether you’re a seasoned DIY enthusiast or a professional contractor, having the essential tools at your disposal will make the entire process more efficient and enjoyable.
Mosaic tiles have an undeniable charm that can add a touch of artistry and sophistication to any space. Whether you’re planning to transform your kitchen backsplash, bathroom, or any other area in your home, installing mosaic tiles can be a fulfilling DIY project if done correctly. In this comprehensive guide, we’ll walk you through the steps to install mosaic tiles like a professional, ensuring a stunning and lasting result for your home improvement project.
Why Choose Mosaic Tiles?
Before we dive into the installation process, it’s essential to understand why mosaic tiles are a popular choice for homeowners. Mosaic tiles are characterized by their small size and intricate designs. Here are some reasons to consider them:
Visual Appeal: Mosaic tiles come in a wide range of colours, materials, and patterns, allowing you to create unique and eye-catching designs. Their small size often makes them ideal for detailed and intricate patterns.
Versatility: You can use mosaic tiles in various applications, including backsplashes, showers, floors, and even as decorative accents. They can be applied to almost any surface that can support tiles.
Durability: Mosaic tiles are typically made from materials like glass, ceramic, porcelain, and natural stone, making them durable and long-lasting. They are resistant to moisture, stains, and wear and tear.
Easy Maintenance: Mosaic tiles are relatively easy to clean and maintain, thanks to their non-porous surface. A simple wipe-down or mopping will keep them looking new.
Value Addition: Installing mosaic tiles can increase the value of your home. Potential buyers often find them attractive and appreciate the attention to detail they bring to a space.
Now that you know why mosaic tiles are a great choice let’s get into the step-by-step guide for a professional installation.
Tools and Materials You’ll Need
Before you begin the installation, gather the following tools and materials to ensure a smooth and efficient process:
Before you start installing mosaic tiles, it’s crucial to ensure that the surface you’re tiling is clean, smooth, and free from any dust or debris. The quality of your installation depends on a well-prepared surface. If you’re working on a wall, patch any holes or imperfections. If you’re tiling a floor, make sure it’s level.
Tips:
– Repair any existing damage or imperfections on the surface before starting.
– Sand down rough or uneven areas to create a smooth and even substrate for your tiles.
– Cover surrounding areas with a drop cloth or plastic sheeting to protect them from adhesive and grout spills.
Step 2: Plan Your Layout
Before you start attaching tiles, it’s a good idea to plan the layout to avoid potential problems later. Here’s how to do it:
Dry-Fit Your Tiles: Lay out your mosaic tiles on the surface without adhesive to get a sense of how they will look. Experiment with different arrangements and patterns to find the one that suits your aesthetic preferences.
Measure and Mark: Use a measuring tape and pencil to mark the center point of your surface. This will serve as your starting point for tile installation.
Create a Grid: Use a level and pencil to create a grid of guidelines that intersect at the center point. This grid will guide your tile placement and ensure a balanced design.
Adjust and Cut Tiles: Depending on your layout, you may need to trim tiles to fit along the edges and borders of your surface. Use a tile cutter or nipper for this purpose.
Tips:
– Experiment with different arrangements to find the one that suits your aesthetic preferences.
– Make sure that the layout is symmetrical and well-balanced, especially if you’re working with a focal point like a backsplash or a decorative feature.
Step 3: Mix Tile Adhesive
Next, you’ll need to prepare the adhesive that will hold your mosaic tiles in place. Follow the manufacturer’s instructions on the adhesive packaging to create a mixture with the correct consistency.
Tips:
– Mix small batches of adhesive as you work to prevent it from drying out before you can apply the tiles.
– Wear safety glasses and gloves when handling adhesive to protect your eyes and skin.
Step 4: Apply Tile Adhesive
With your adhesive mixture ready, it’s time to apply it to the surface in preparation for your mosaic tiles. Here’s how:
Work in Small Sections: Begin by spreading a layer of adhesive on a small section of the surface. The idea is to work on an area you can tile in about 15-20 minutes to prevent the adhesive from drying out.
Use a Notched Trowel: Use a notched trowel to spread the adhesive evenly over the surface. The notches on the trowel create ridges that help the tiles adhere properly. The size of the notches should match the size of your tiles.
Apply at a 45-Degree Angle: Hold the trowel at a 45-degree angle and apply pressure to ensure that the adhesive is evenly distributed.
Tips:
– Work methodically and avoid applying adhesive to a larger area than you can tile within the specified time to maintain adhesive tackiness.
– Use the notched side of the trowel to create ridges in the adhesive for better tile adhesion.
Step 5: Install Mosaic Tiles
Now comes the exciting part – attaching your mosaic tiles to the adhesive. Follow these steps for a professional-looking installation:
Press Tiles into Adhesive: Carefully press each mosaic tile into the adhesive, following the grid you created during the layout planning. Ensure that each tile is level and properly aligned with the others.
Use Tile Spacers: Insert tile spacers between the tiles to maintain even gaps. The size of the spacers will depend on your design and the desired spacing between tiles.
Trim Tiles When Necessary: You may need to trim tiles to fit along the edges or around obstacles like electrical outlets or plumbing fixtures. Use a tile cutter or nipper for this purpose.
Tips:
– Check your layout and grid lines regularly to ensure that you’re staying on track and that your mosaic design remains balanced.
– Double-check tile alignment and spacing to create a polished look.
Step 6: Allow Adhesive to Dry
After you’ve successfully attached all your mosaic tiles to the adhesive, it’s crucial to allow the adhesive to dry thoroughly. Follow the manufacturer’s instructions for the recommended drying time, which is typically around 24 hours. The drying time may vary based on factors like humidity and temperature.
Tips:
– Avoid any physical contact with the tiles during this drying period to prevent accidental displacement.
Step 7: Prepare Grout
Grout is the material that fills the gaps between your tiles and gives your installation a polished, finished look. Here’s how to prepare it:
Select the Right Grout: Choose a grout colour that complements your mosaic tiles and the design you’ve created. Grout comes in various colours, so take your time to select the one that enhances your design. Access our guide to Choosing The Right Grout Colour here.
Mix the Grout: Follow the manufacturer’s instructions to mix your grout. Typically, you’ll need to combine the grout powder with water until you achieve a smooth, thick consistency, similar to peanut butter.
Tips:
– Make sure to choose the right colour of grout that complements your mosaic tiles.
– Prepare a reasonable amount of grout to work with, as it should be used quickly to maintain its workability.
Step 8: Apply Grout
Applying grout is a crucial step that will not only fill the gaps between your mosaic tiles but also ensure their stability. Here’s how to do it:
Work in Small Sections: Just as with adhesive, it’s best to work in small sections when applying grout. This allows you to manage the process more efficiently.
Spread Grout: Use a grout float to spread the grout evenly over the tiles. Hold the float at a 45-degree angle to the tiles to pack the grout into the gaps.
Hold the Float at an Angle: To ensure the grout gets into the gaps and covers the entire tile surface, hold the float at a slight angle and apply pressure as you move it.
Tips:
– Work methodically to ensure that the grout is evenly applied to all areas of your mosaic tiles.
– Don’t rush this step, as it’s essential to get the grout into all the gaps and ensure a secure bond.
Step 9: Remove Excess Grout
Once you’ve applied the grout, it’s time to clean up the excess to reveal your beautifully installed mosaic tiles. Here’s what you need to do:
Dampen a Tile Sponge: Wet a tile sponge and wring out the excess water. You want the sponge to be damp but not soaking.
Wipe the Tiles: Gently wipe the tiles with the damp sponge to remove excess grout from the tile surfaces. Rinse the sponge frequently to avoid smearing grout over the tiles.
Clean Grout Lines: Use the sponge to shape and clean the grout lines, ensuring they are even and smooth.
Tips:
– Work carefully but quickly to prevent the grout from hardening on the tiles.
– Rinse the sponge thoroughly to avoid spreading grout residue on the tiles.
Step 10: Final Cleaning
Once you’ve removed most of the excess grout from the tiles, allow the grout to set for a short period before doing a final cleaning. Here’s how to do it:
Allow Grout to Set: Let the grout dry for a short time, typically for about 15-30 minutes, or as recommended by the grout manufacturer. The grout should become slightly hazy.
Buff Tiles: Using a clean, dry cloth or a lint-free rag, gently buff away the remaining grout haze from the tiles. This will reveal the full beauty of your mosaic tiles.
Tips:
– Be patient while buffing the tiles to avoid scratching the surface.
Step 11: Seal the Grout (Optional)
While this step is optional, it’s recommended if you want to protect your grout from staining and make maintenance more manageable. Sealing the grout creates a barrier that prevents moisture and debris from penetrating the porous material. Follow these steps if you choose to seal your grout:
Select a Grout Sealer: Choose a high-quality grout sealer that suits your needs. Grout sealers come in two main types: penetrating sealers and membrane-forming sealers. Penetrating sealers are absorbed into the grout, providing protection without altering its appearance, while membrane-forming sealers create a protective film over the grout.
Apply the Sealer: Follow the manufacturer’s instructions for applying the sealer. Typically, you’ll use a brush, roller, or applicator bottle to spread the sealer over the grout lines. Be careful not to get sealer on the tile surfaces.
Wipe Off Excess Sealer: After allowing the sealer to set for a few minutes (as per the manufacturer’s recommendations), use a clean, dry cloth to wipe off any excess sealer from the tile surfaces.
Tips:
– Make sure the grout is fully dry before applying the sealer.
– Some sealers may require multiple coats, so be sure to follow the product’s specific instructions.
Step 12: Enjoy Your Newly Tiled Surface
With the grout fully cured, which typically takes 24-72 hours, your mosaic tile installation is complete. Step back and admire your professional-looking mosaic tile work that enhances the beauty of your space. You’ve now added a touch of artistry and sophistication to your home.
Tips:
– Clean and maintain your mosaic tiles regularly to keep them looking their best.
– Consider using a tile and grout cleaner to remove dirt and stains without damaging your installation.
Installing mosaic tiles may seem like a daunting task, but with the right tools, materials, and a methodical approach, you can achieve professional-looking results. The beauty of mosaic tiles lies in their ability to add a unique and elegant touch to any room, and this step-by-step guide can help you achieve just that.
Whether you’re a seasoned DIY enthusiast or a first-time tiler, follow this guide, take your time, and enjoy the process. With patience and attention to detail, your mosaic tile installation will be a stunning addition to your home, elevating the aesthetics of your space and adding value to your property.
Now that you’ve learned how to install mosaic tiles like a pro, it’s time to roll up your sleeves and get started on your own tiling project. Whether you’re revamping your kitchen, upgrading your bathroom, or creating a beautiful mosaic masterpiece, you’re well-prepared for success. Happy tiling!
Master the art of tile maintenance and cleaning with our comprehensive guide to ensure your tiles stay sparkling and fresh.
Tiles can transform your space with their elegance and functionality. Whether you have glazed or unglazed tiles, proper maintenance is essential to preserve their beauty and longevity. In this guide, we’ll walk you through the steps of cleaning and maintaining your tiles, whether they’re in your bathroom, kitchen, or any other area of your home. With the right approach, your tiles will continue to shine for years to come.
Regular Cleaning Routine for Glazed Tiles
Glazed tiles are a popular choice for various applications, including walls, baths, and showers.
To keep them looking their best, follow these steps:
1. Choose the Right Cleaner: Opt for an all-purpose, low VOC, household or commercial cleaner that is compatible with grout joint cleaning. Avoid harsh chemicals, as they can damage the tile’s glazed surface and the grout.
2. Application and Agitation: Use a cotton mop, cloth, sponge, or non-metallic brush to apply the cleaner to the tile surface. Gently agitate the cleaner to remove soap scum, hard water deposits, and mildew.
3. Rinse and Dry: After cleaning, rinse the area with clean water to remove any residue. Thoroughly dry the tiles to prevent water spots.
Unglazed Tiles Require Special Care
Unglazed tiles, on the other hand, need a slightly different cleaning approach:
1. Neutral pH Cleaners: Choose concentrated tile cleaners with a neutral pH for routine cleaning. These cleaners effectively remove grease, oils, and normal spills from unglazed tiles.
2. Application and Compatibility: Apply the chosen cleaner according to the manufacturer’s instructions. Ensure the cleaner is compatible with your specific type of grout.
Removing Sealers and Waxes
Glazed ceramic tiles do not require sealing, but grout should be sealed. If you need to remove a topical sealer or floor wax, follow these steps:
1. Use a Sealer and Adhesive Remover: Apply an undiluted tile sealer and adhesive remover to a small area. Allow it to soften the coating or residue.
2. Agitate and Wipe: If needed, agitate the area with a white nylon scrub pad. Wipe up the residue using a cotton towel or sponge. Rinse thoroughly with clean water.
Taking Care of Grout
Grout plays a vital role in tile installations. To maintain it properly:
1. Sealing Grout: Grout should be sealed regularly to preserve its color and protect it from stains. Choose a penetrating/impregnating sealer for cementitious grouts. Epoxy grouts do not require sealing.
2. Grout Maintenance: Clean grout periodically using a concentrated household or commercial cleaner. For heavy-duty cleaning, use a professional strength tile and grout cleaner with non-polluting chemicals and low VOC levels.
3. Grout Colour Restoration: When grout is stained beyond maintenance, you can use a grout stain to restore its color. Clean the grout thoroughly before applying the stain.
Proper Grout Installation and Care
During and after installation, follow these steps to ensure the best outcome:
1. Immediate Protection: Cover newly installed and grouted tile with brown paper to shield it from debris. Dampen the grout daily during the first week to aid in curing and colour lock.
2. Grout Haze Removal: After at least 24 hours, remove grout haze with water or a grout haze remover. Avoid using harsh chemicals on natural stone products.
Safety Precautions & Maintenance
Always prioritize safety when handling tile installation and maintenance products. Test products in a small area before widespread use. Follow the manufacturer’s instructions and heed any warnings. Additionally, consider the specific needs of natural stone products, which may require different maintenance methods.
In conclusion, maintaining your tiles doesn’t have to be a daunting task. With the right products and techniques, you can keep your tiles looking pristine and attractive. Regular cleaning, proper sealing, and careful maintenance will ensure that your tiles continue to enhance your living spaces for years to come. Remember, a little effort now can lead to long-lasting beauty and functionality for your home.
Disclaimer: Tiletoria offers advice in this article for construction and renovation purposes. However, it’s crucial to recognize that this advice does not replace the expertise of certified building contractors. Each project is unique, and potential complexities vary. Readers should consult professionals before undertaking any projects. Our network of approved contractors ensures tailored guidance for safety and quality. While our article provides insights, collaboration with contractors remains vital. Contact us for assistance or connections with reputable professionals. Your project’s success and longevity are our priority.
pricing and stock information displayed on this site will be of the branch you select.
it will remain your default branch until you change it. all prices are inclusive of VAT.


