blog
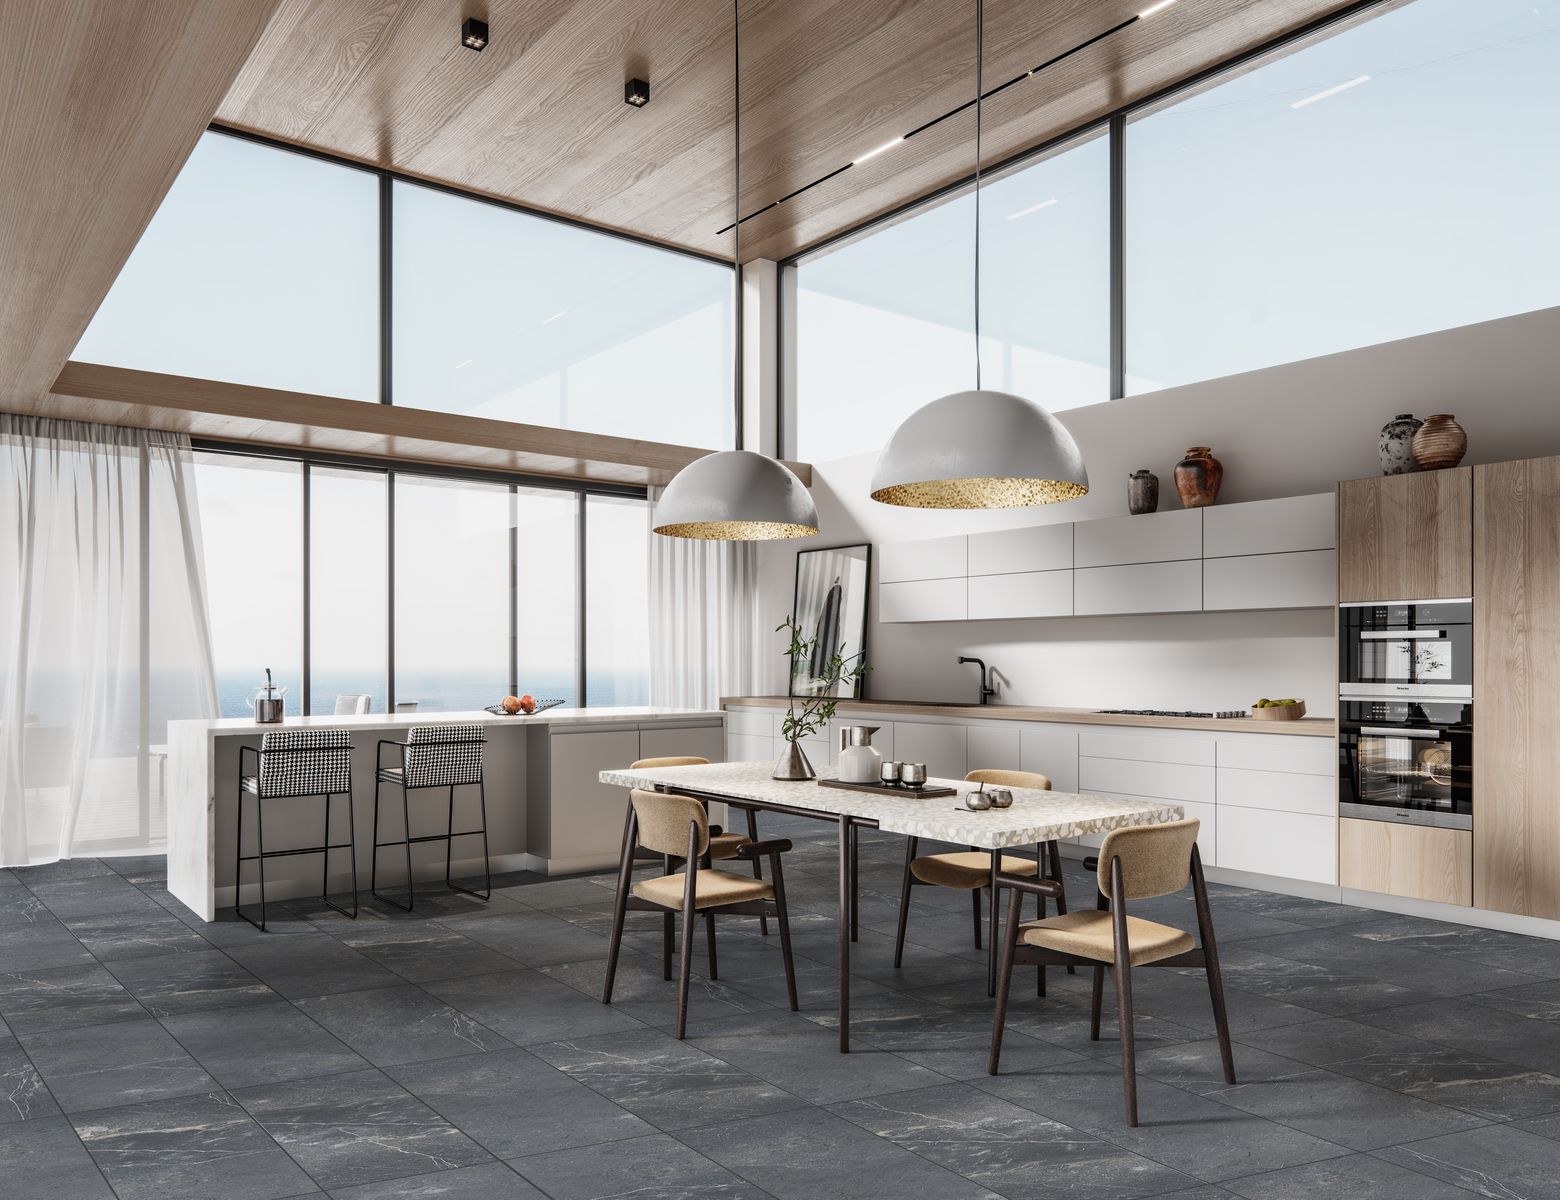
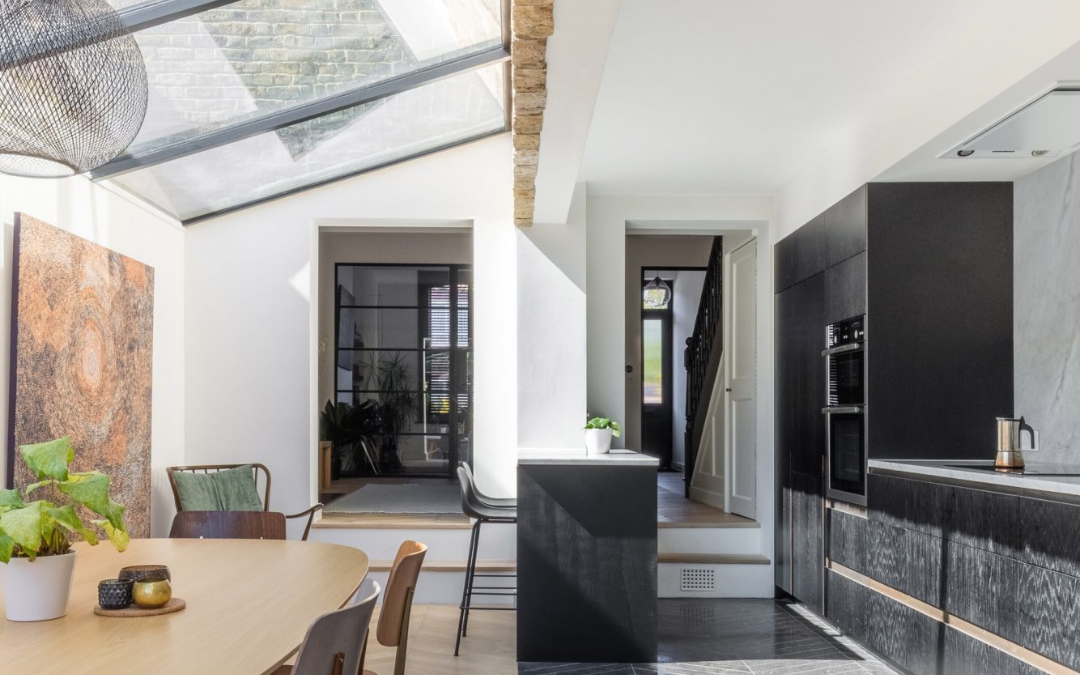
Open-plan homes are all about flow, light and creating a sense of spaciousness. But when it comes to flooring, using just one material across the entire space can sometimes fall flat. Mixing and matching different flooring types is a smart way to define areas, add texture and enhance the overall aesthetic of your home — without compromising the open-plan feel.
Done right, this approach brings warmth, personality and functionality to your layout. Here’s how to successfully mix and match flooring in an open-plan home.
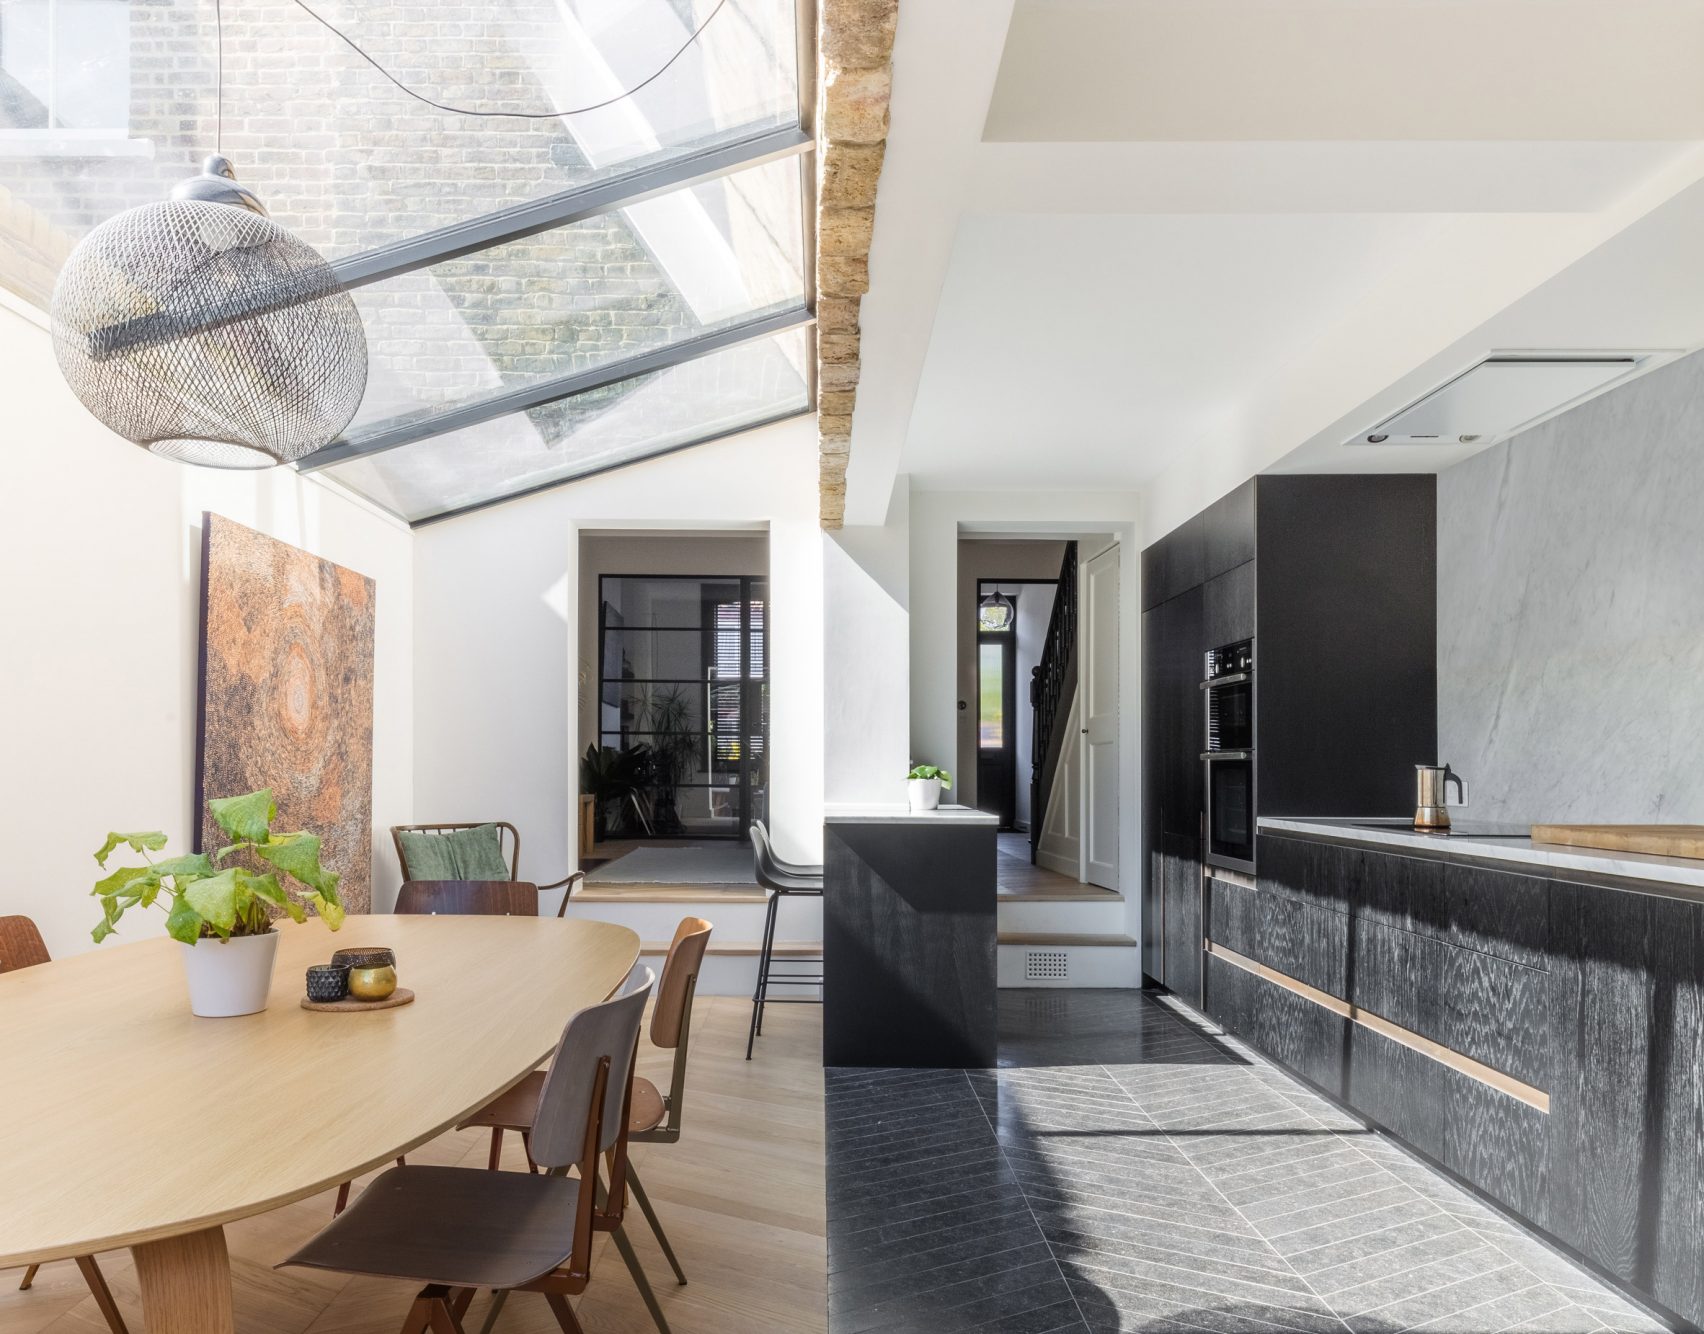
Image credit: livingetc.com
Table of Content:
Define Zones with Flooring
Choose Complementary Colours and Textures
Use Transition Strips or Patterns
Consider Practical Needs for Each Area
Keep the Flow with Consistency
Don’t Be Afraid to Get Creative
Define Zones with Flooring
The beauty of an open-plan design is the ability to move freely between living, dining and kitchen areas. But to avoid a space that feels too blended or confusing, it helps to use different flooring types to create subtle boundaries.
For example:
Use luxury vinyl tiles or ceramic tiles in the kitchen area for easy cleaning and water resistance.
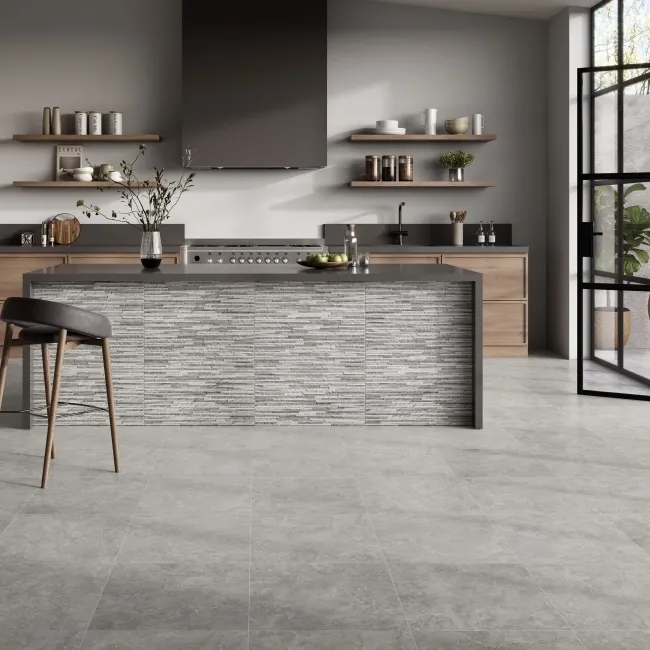
Image credit: tilemountain.co.uk
Transition to wood-look laminate or engineered wood in the dining and living areas to bring warmth and comfort.
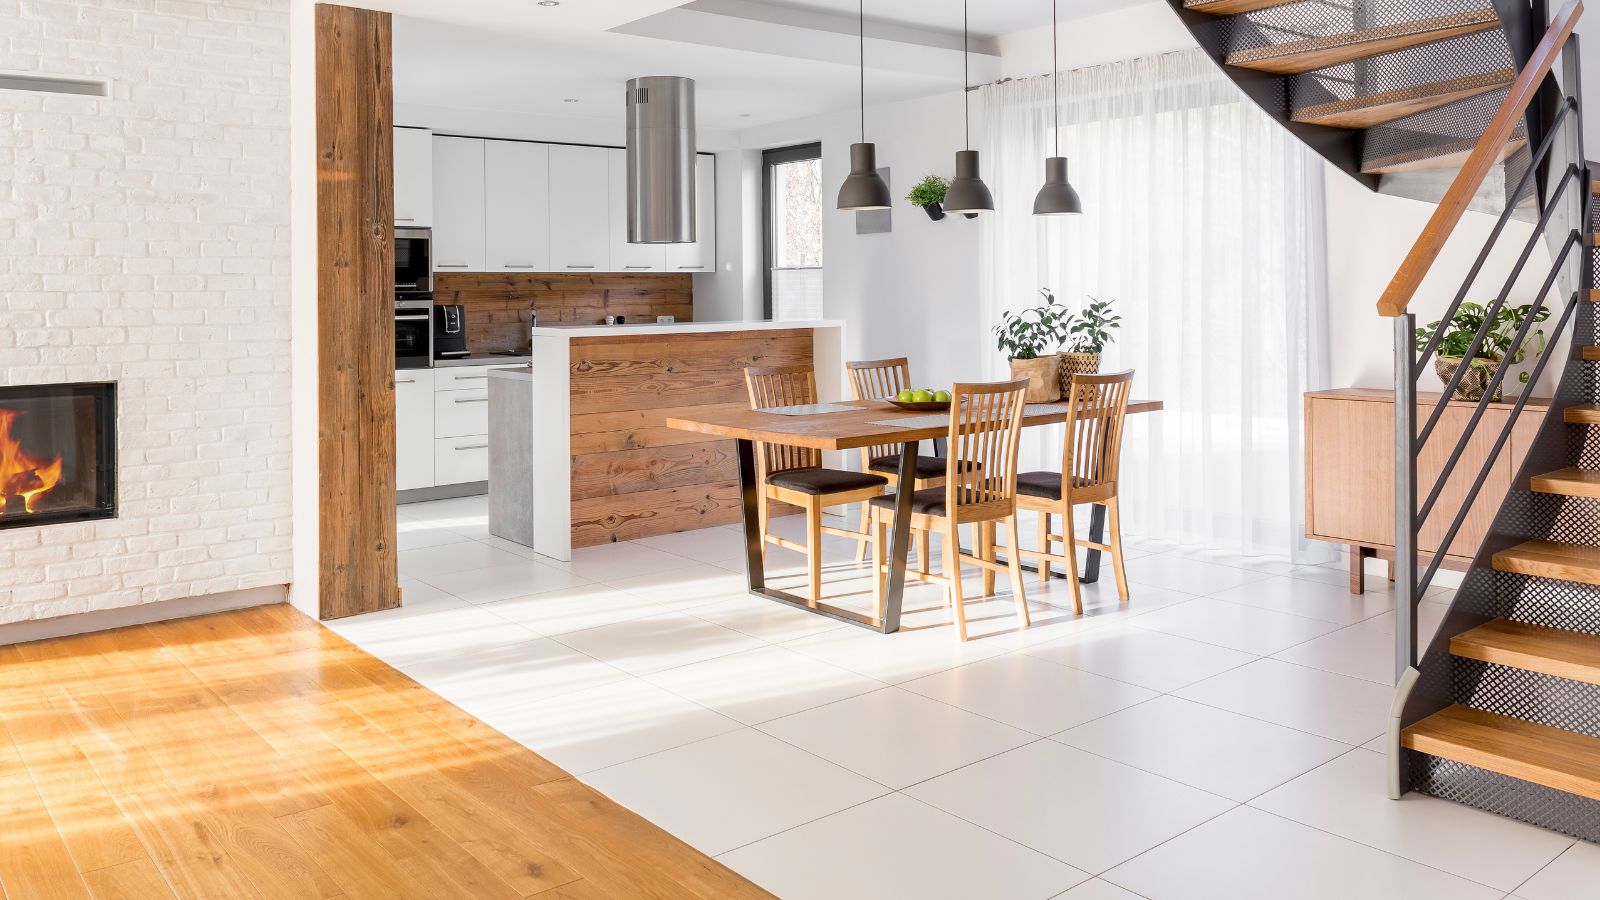
Add a rug in the lounge to further define the space without changing the hard flooring underneath.
This zoning technique helps guide the eye and naturally separates functional areas, while still feeling cohesive.
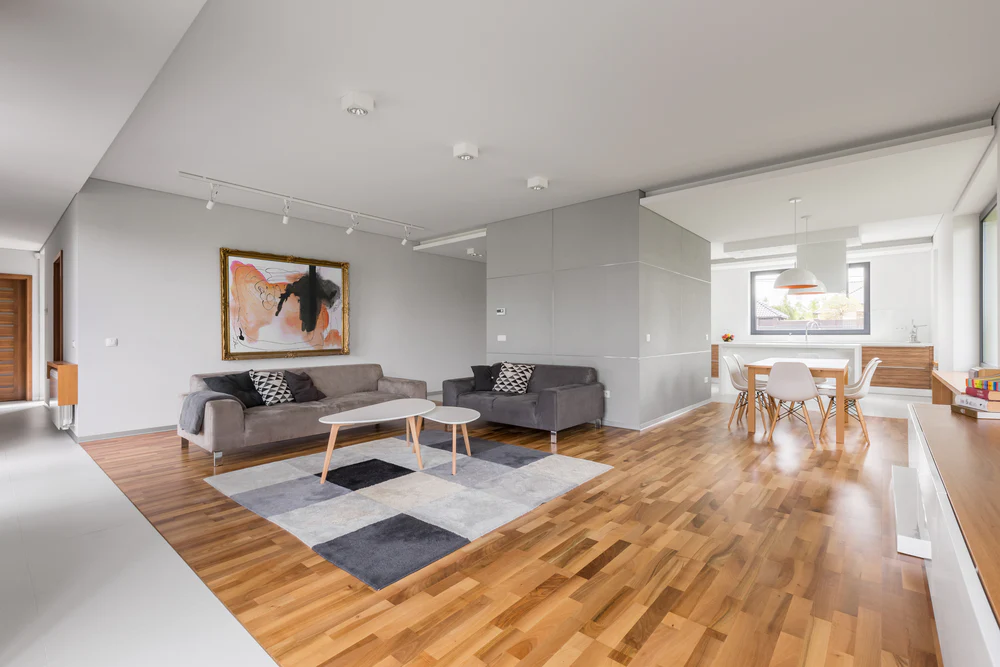
Choose Complementary Colours and Textures
One of the biggest mistakes people make when mixing flooring is choosing styles that clash. To keep things visually balanced:
Stick to the same colour palette or tones — cool greys with cool browns, or warm beiges with honey woods.
Mix textures, not chaos. Combine a smooth polished tile with a matte timber-look laminate or a tactile vinyl plank.
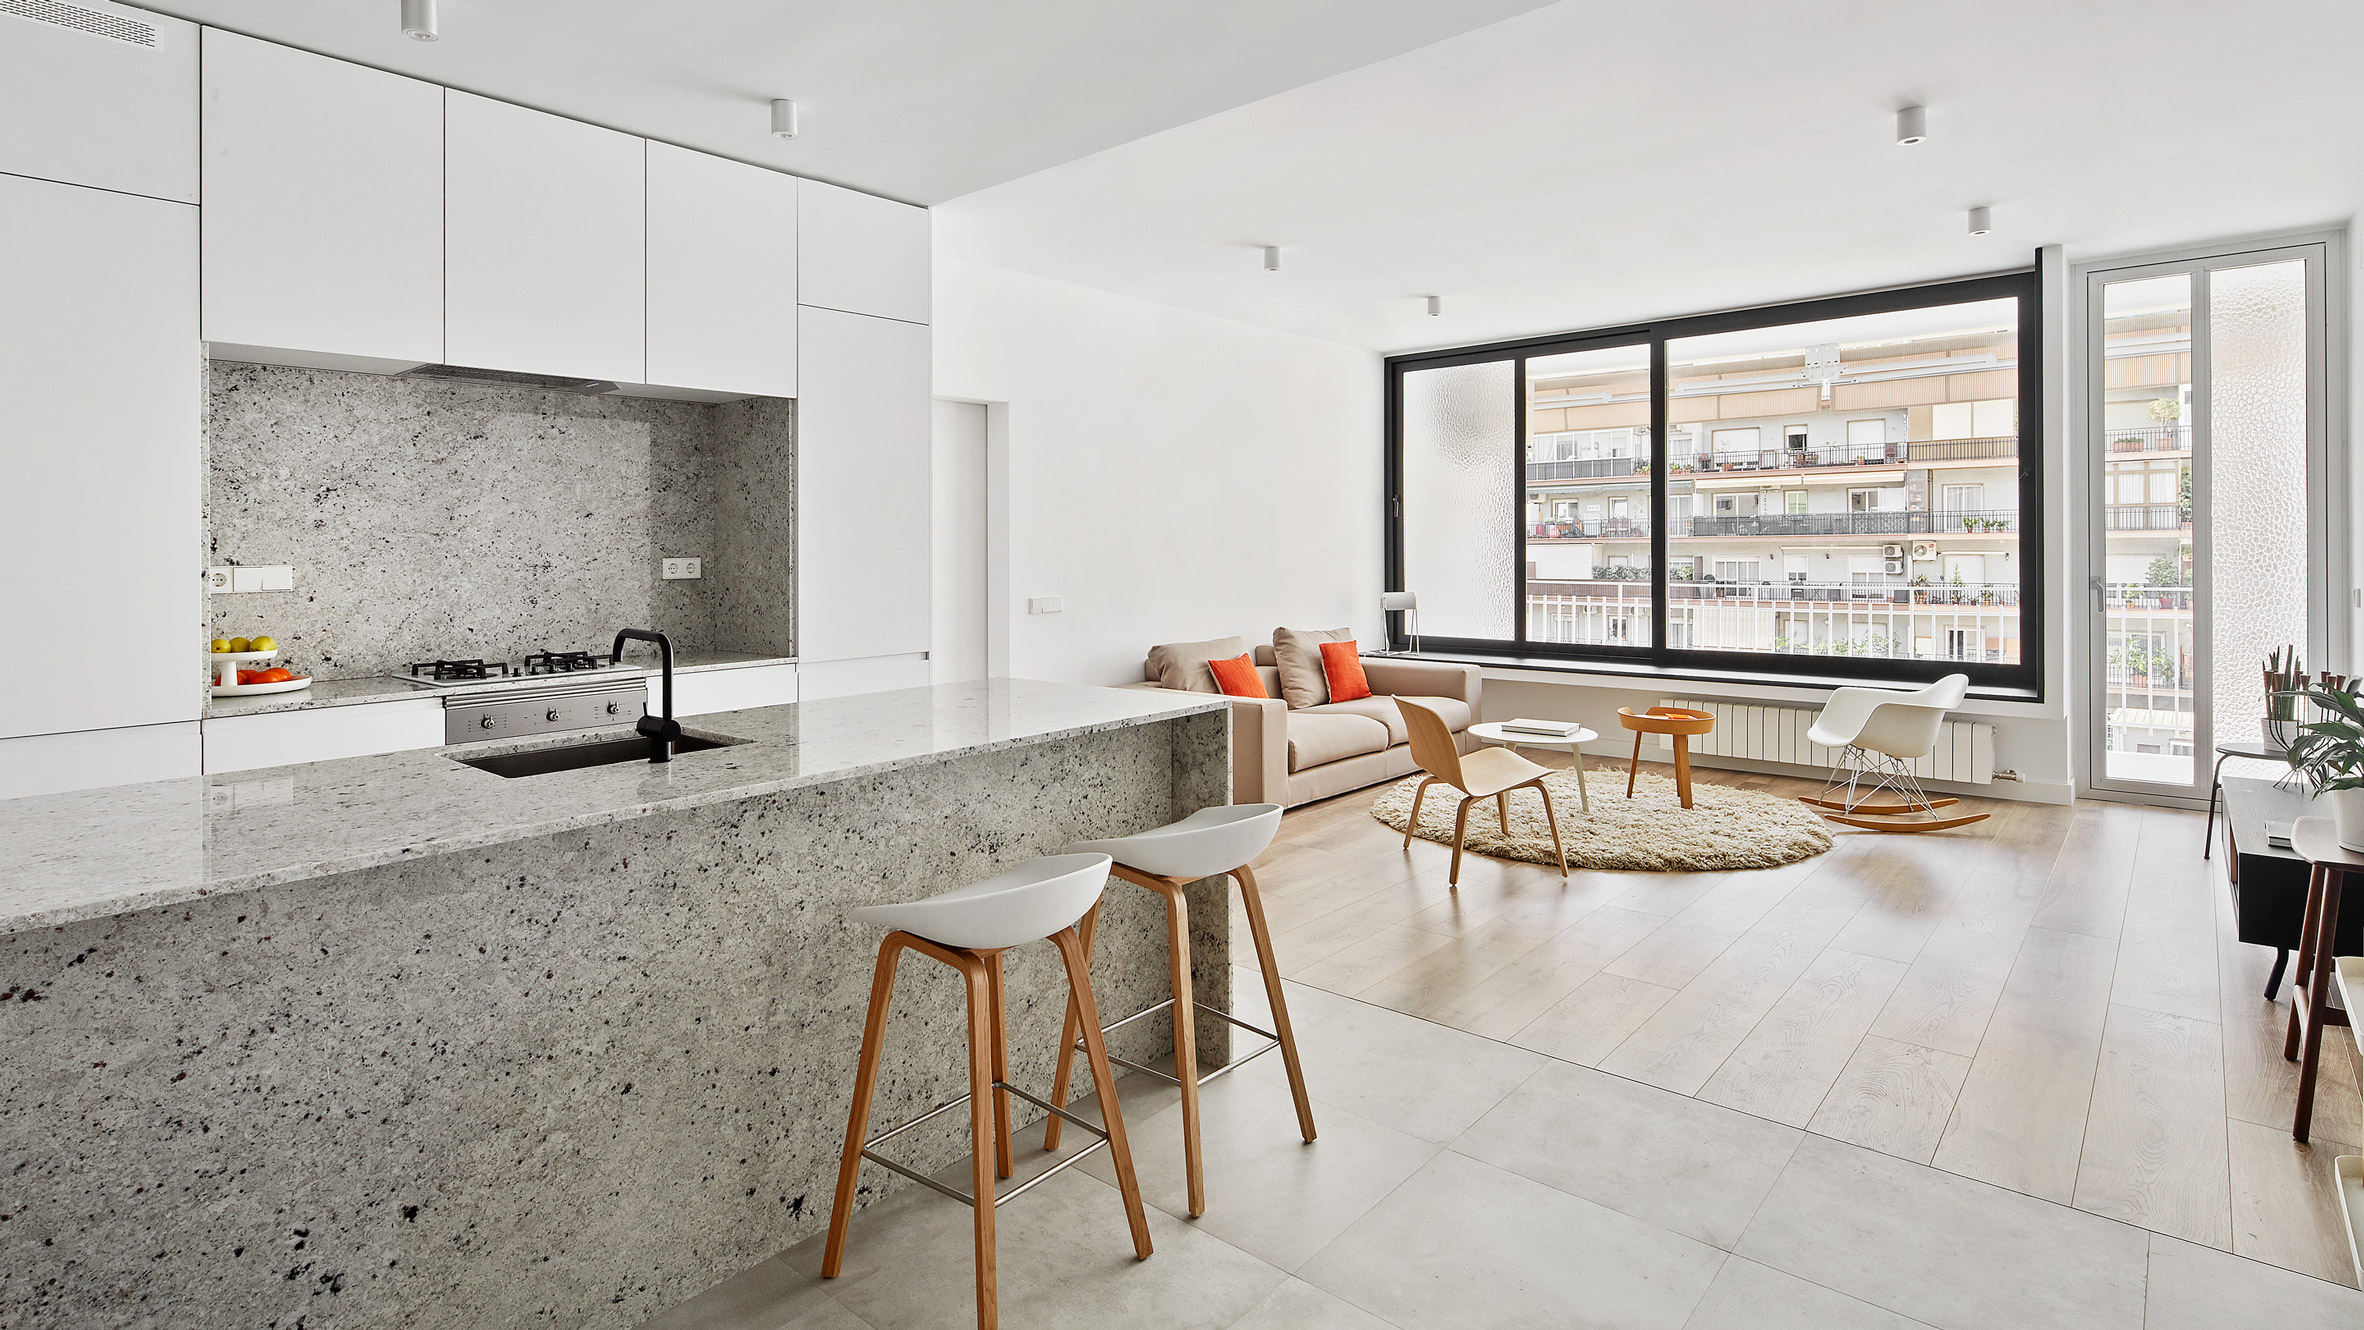
Image credit: dezeen.com
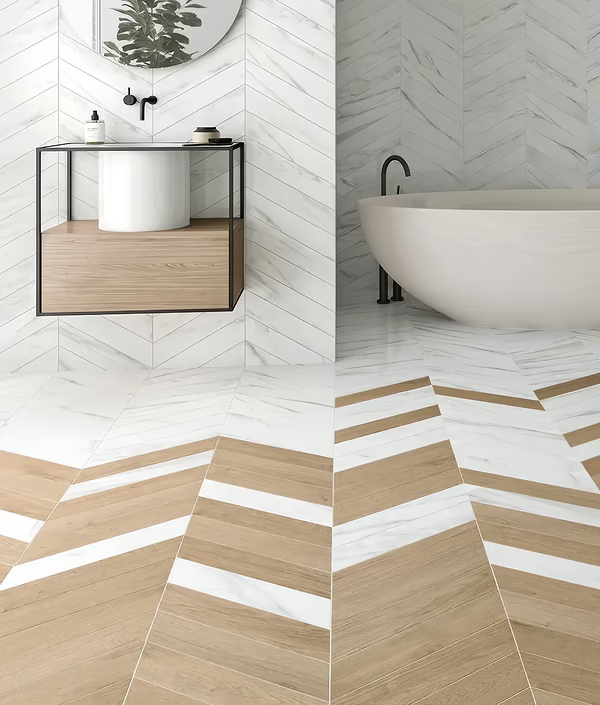
Use contrast for impact, but keep it intentional. For instance, pairing dark herringbone wood with pale concrete-look tiles can create a bold and modern finish.
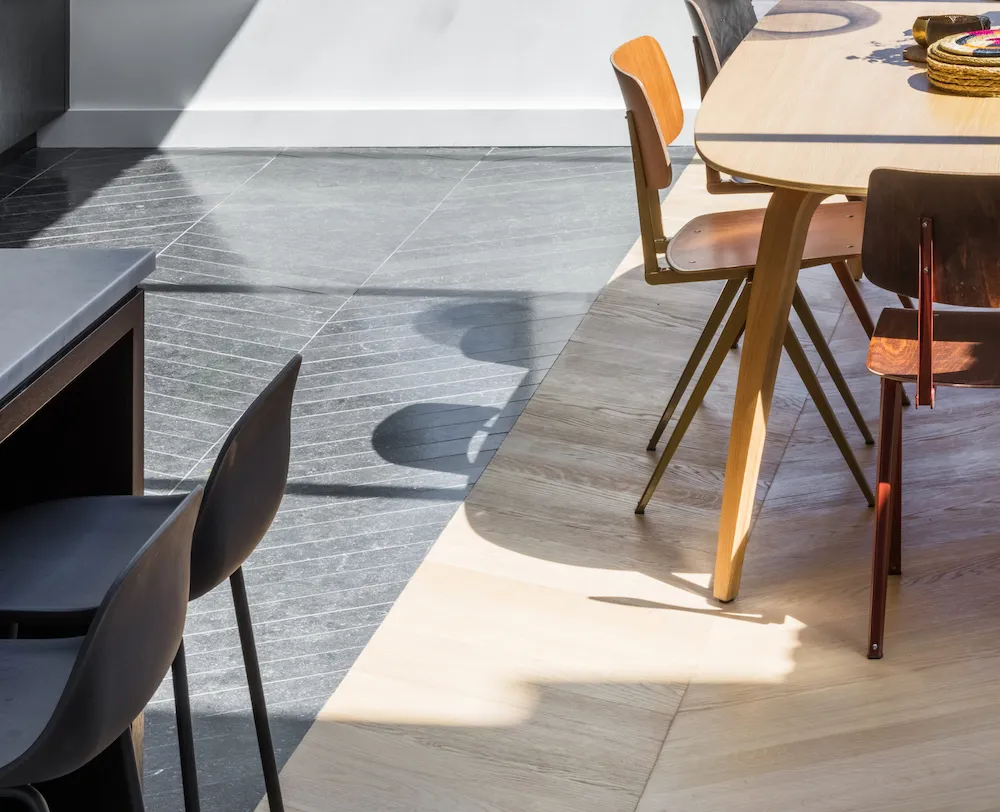
Image credit: livingetc.com
The goal is harmony, not uniformity.
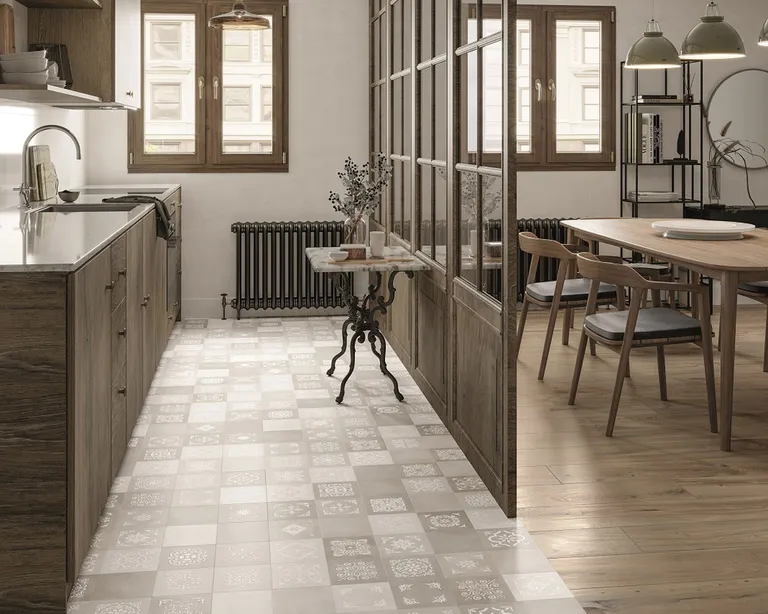
Use Transition Strips or Patterns
When moving from one flooring type to another, a transition strip keeps the change clean and professional. These strips come in various styles — wood, metal or rubber — and they help avoid trip hazards while giving your floors a polished look.
Alternatively, use layout patterns to your advantage. Think:
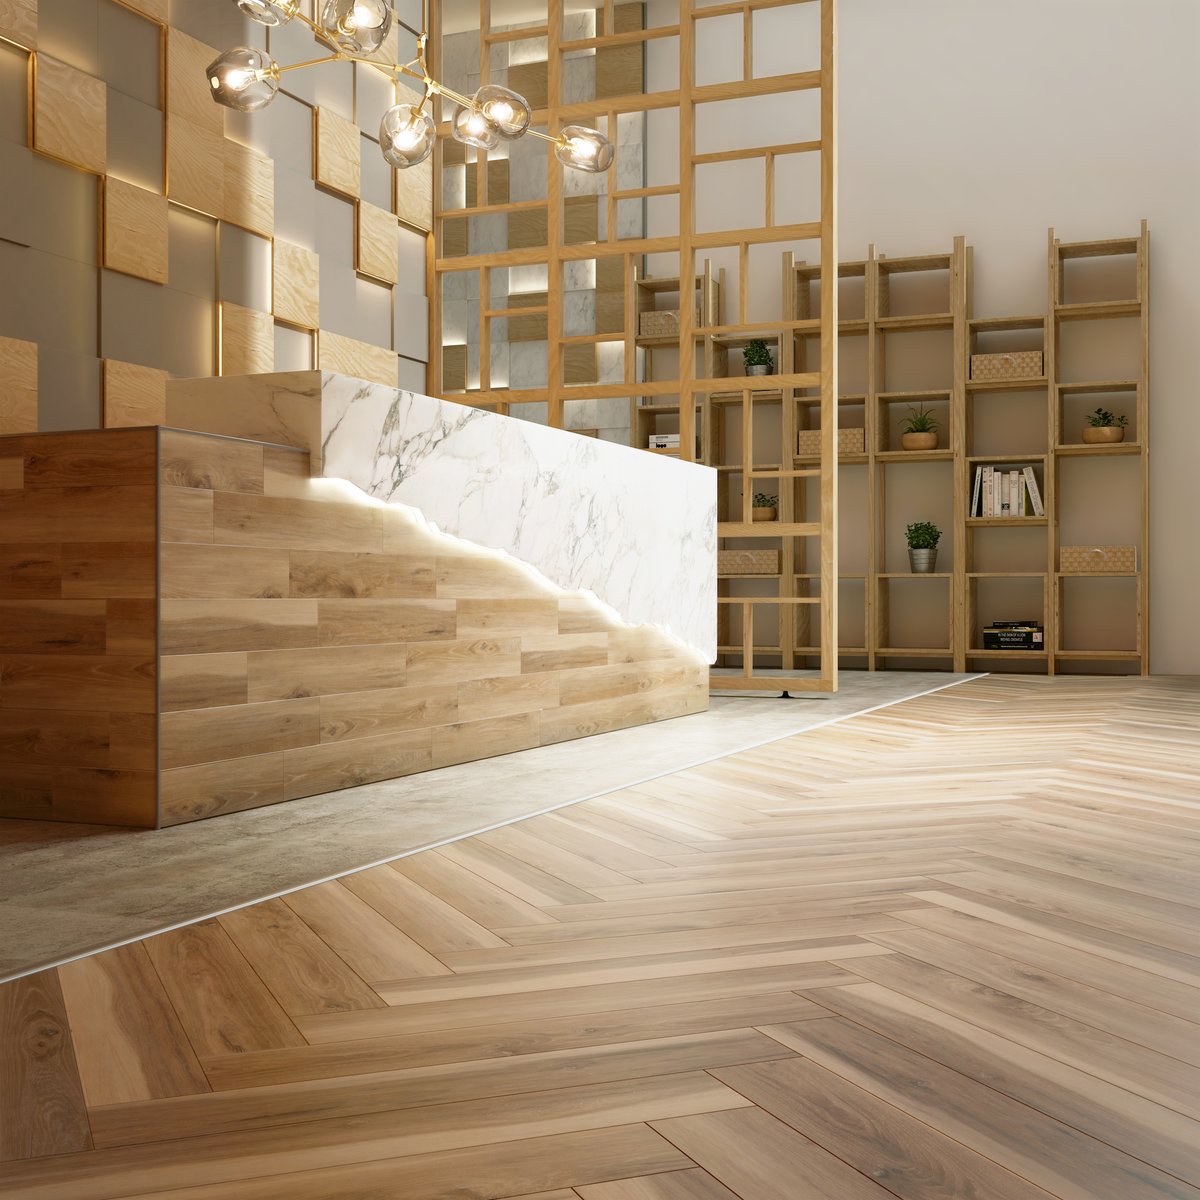
A herringbone wood floor meeting large-format tiles with a diagonal line.
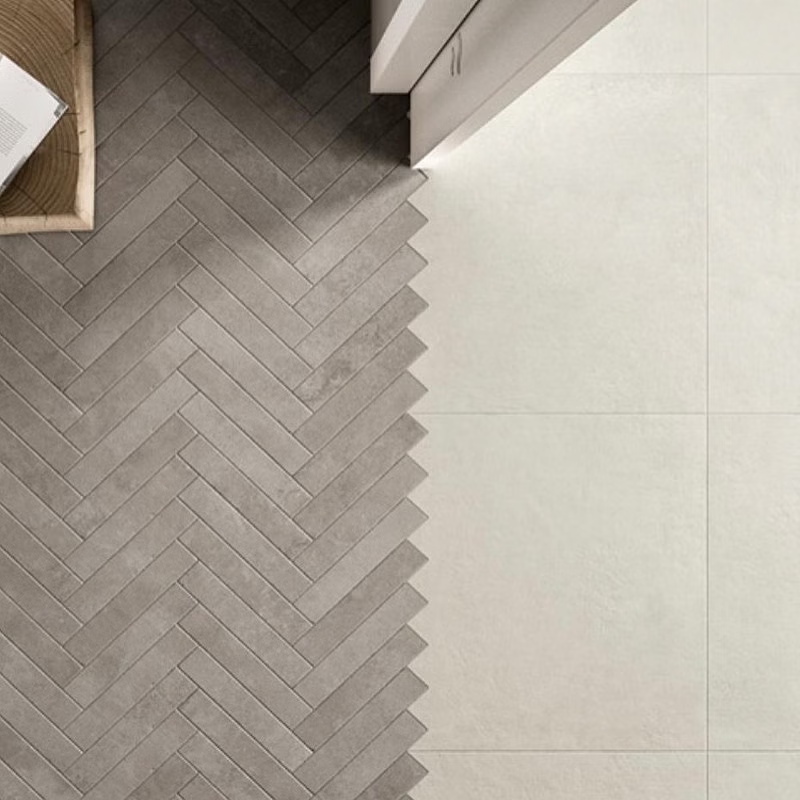
Image credit: houszed.com
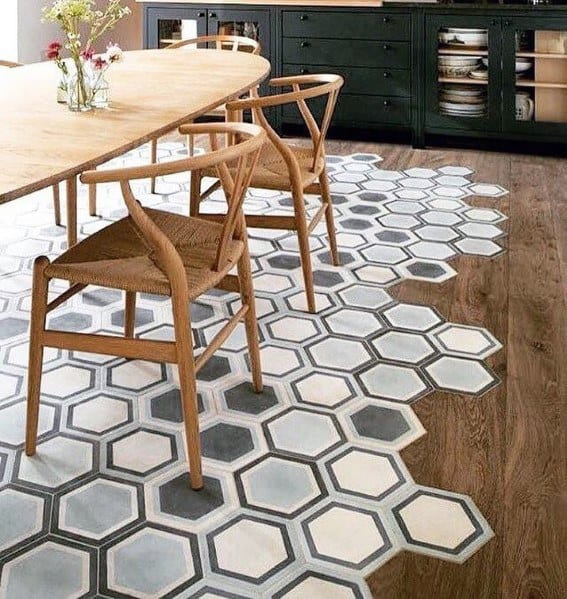
Hexagonal tiles fading into oak planks for a seamless, artistic transition.

Image credit: houszed.com
These small design choices make a big visual impact and are perfect for modern open-plan interiors.
Consider Practical Needs for Each Area
Different rooms have different requirements. In an open-plan home, you’ll want flooring that’s:
Water-resistant for kitchens and utility zones.
Durable and scratch-resistant for high-traffic living and dining areas.
Comfortable and warm underfoot for lounging spaces.
By mixing flooring types based on function, you’ll not only improve the look of your home but also extend the lifespan of your surfaces.
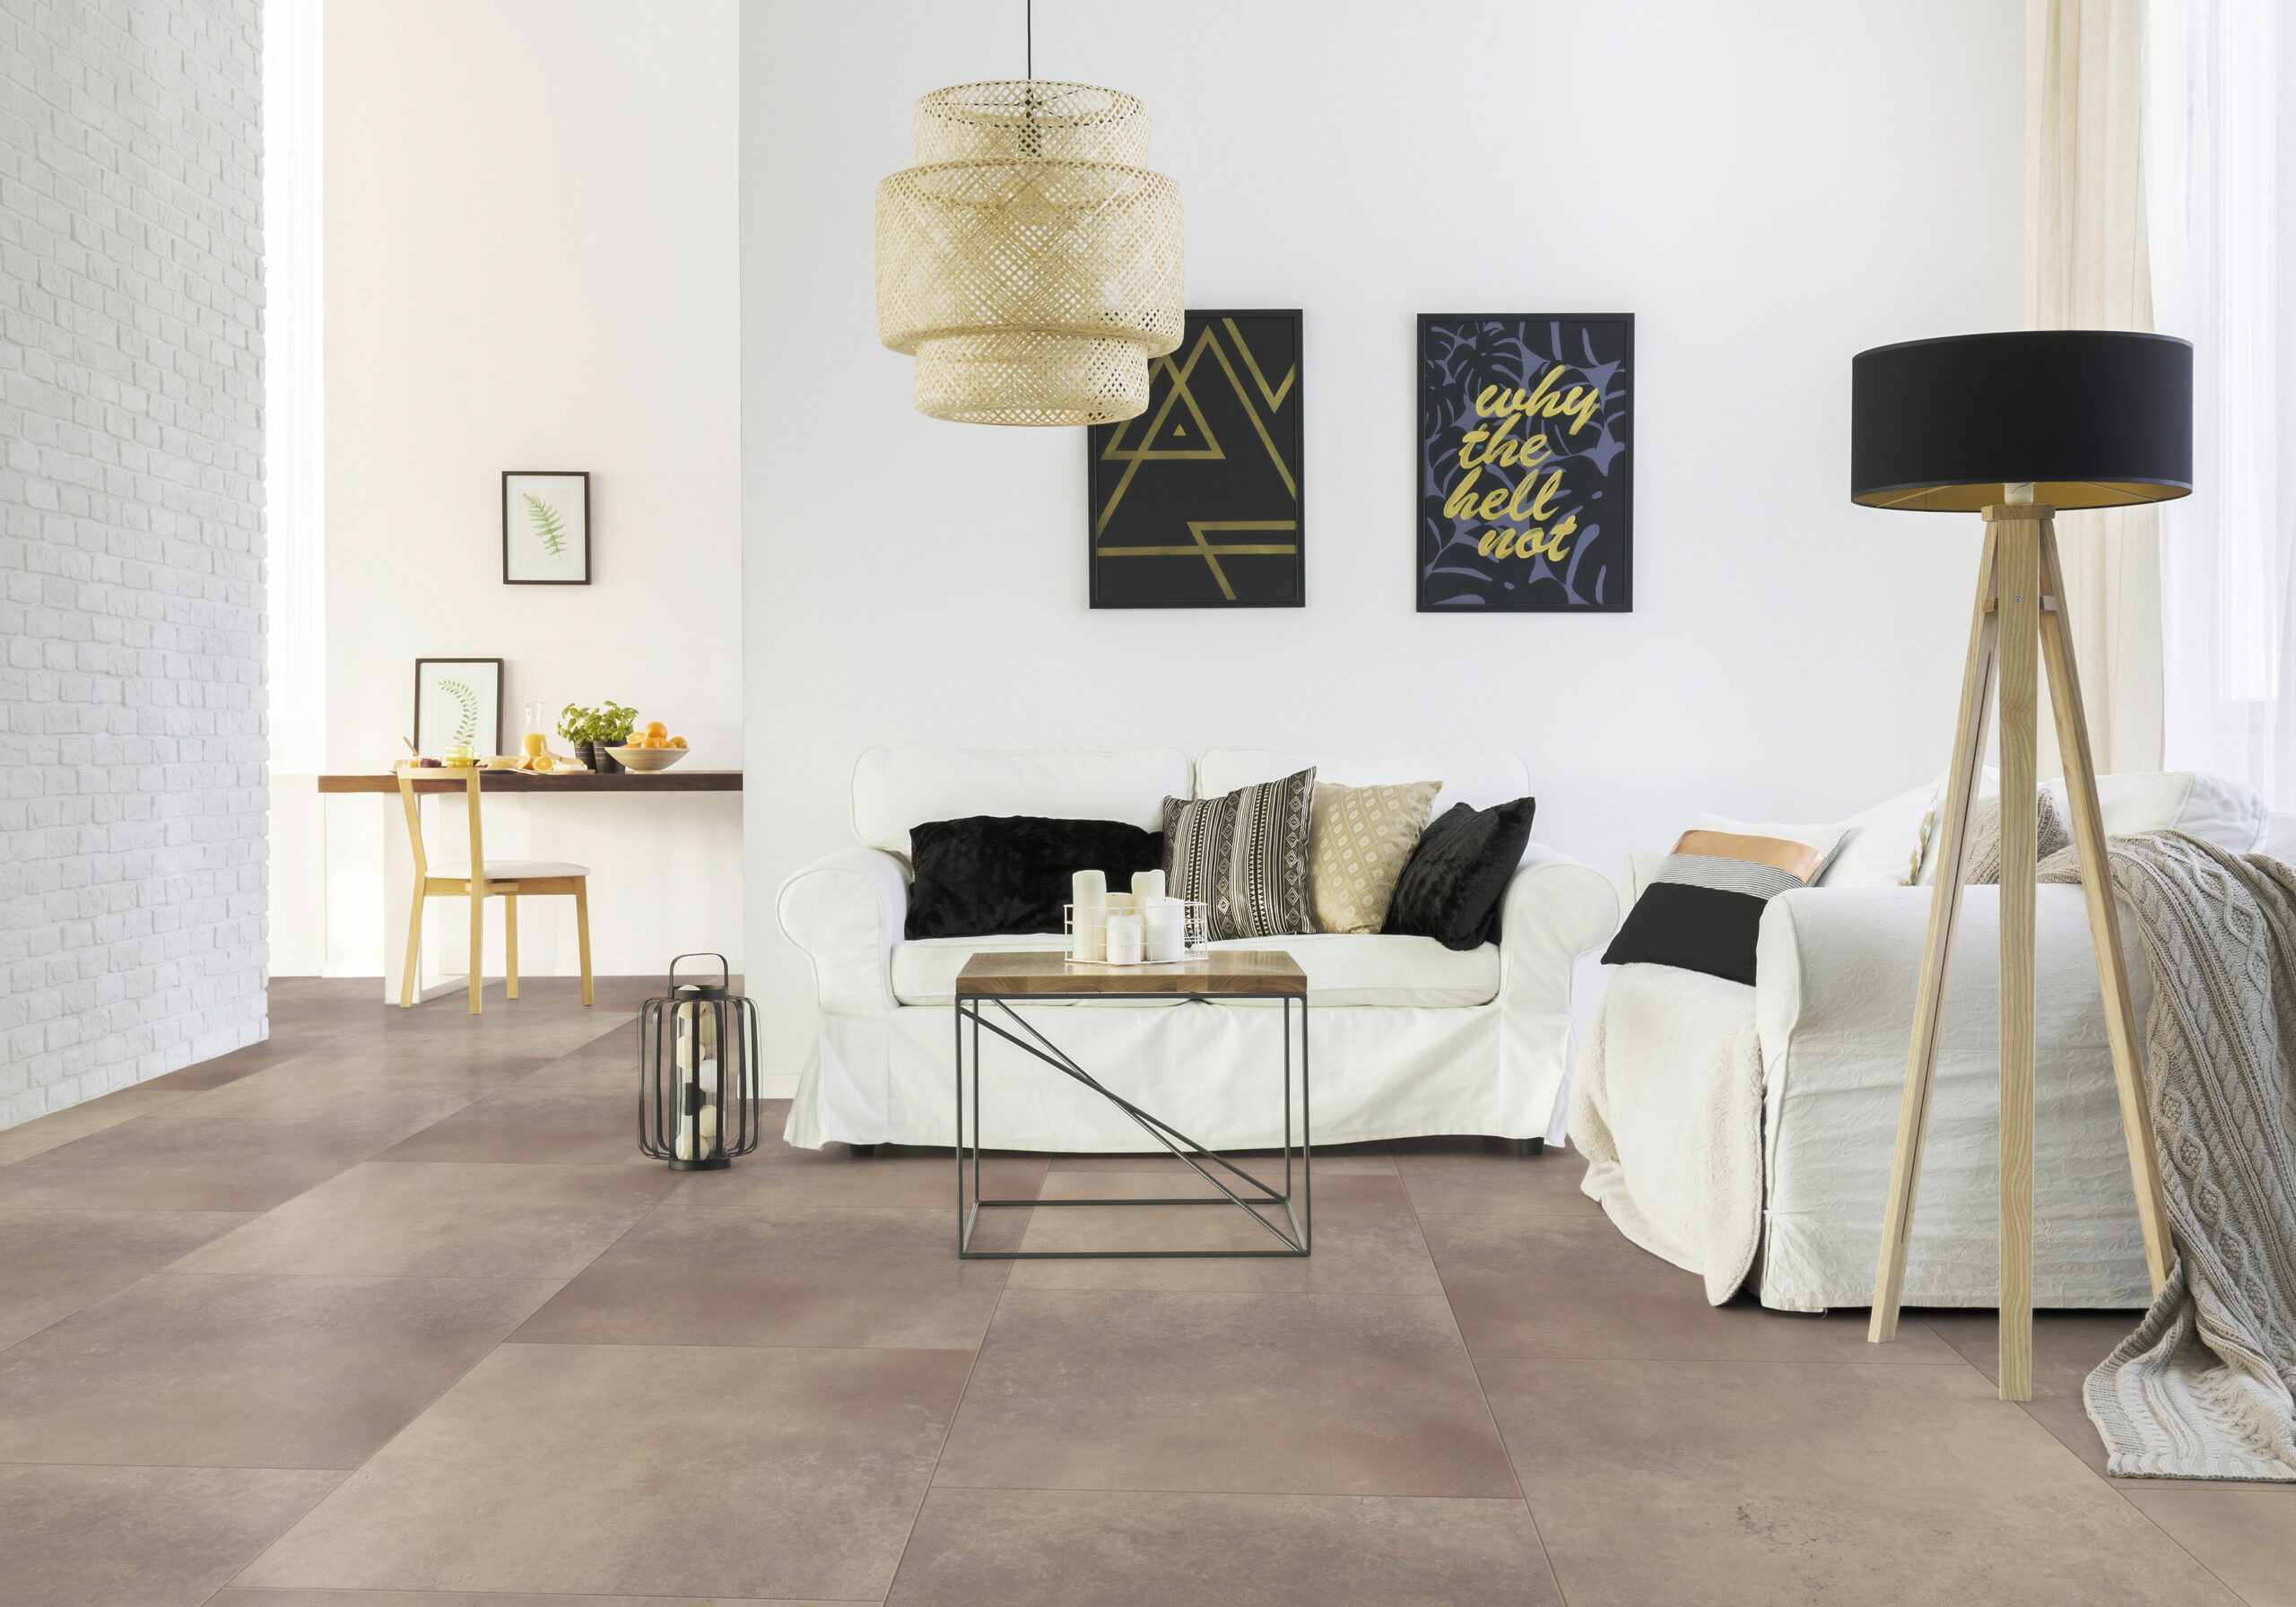
Keep the Flow with Consistency
Yes, mixing flooring adds interest — but it still needs to feel like one cohesive space. To maintain that sense of flow:
Keep the plank size or tile shape consistent across the different materials.
Use the same grout colour if transitioning between tiled areas.

Image credit: houszed.com
For advice on choosing the right grout colour, read our guide “Lesson/Tip: How To Choose The Right Grout Colour“.
Stick with one main visual style, like modern minimalism or rustic charm, so your floors don’t feel mismatched.
Image credit: porcelanosa.com
Don’t Be Afraid to Get Creative
Mixing flooring doesn’t have to be subtle. You can make bold design choices with confidence:
Try patterned tiles under a dining table.
Use dark flooring around the perimeter of a room and a lighter option in the centre.
Mix wood-look vinyl with real wood to play with natural and industrial textures.
Open-plan flooring design is your chance to showcase personality, and a creative combo can turn a practical layout into something truly unique.
When it comes to flooring in an open-plan home, variety is your friend — as long as it’s intentional. Mixing flooring types lets you define spaces, add visual interest and choose the best material for each area’s function. With the right approach, your open-plan home will feel cohesive, stylish and practical.
Looking for the perfect mix of flooring? Explore Tiletoria’s wide range of tiles, laminate, vinyl and more to create a home that flows beautifully from one space to the next.
blog, floors, trends, walls
When you think of tiles, you probably picture them on kitchen splashbacks or bathroom floors — but what about the ceiling? That’s right — tiling your ceiling is becoming one of the hottest interior design trends right now. It’s bold, creative and offers a fresh way to add texture, pattern and drama to your home. If you’re after a design statement that turns heads and sparks conversation, this trend might just be for you.
Let’s take a closer look at why ceiling tiles are making a stylish comeback and how you can incorporate them into your space.

Image credit: decorpad.com
Table of Content:
Why Tile the Ceiling?
Best Rooms for Ceiling Tiles
Choosing the Right Tiles for the Ceiling
Installation Considerations
Low-Maintenance and Long-Lasting
Why Tile the Ceiling?
Traditionally, ceilings have been left plain, painted white and largely forgotten. But with more homeowners and designers pushing creative boundaries, ceilings are finally getting the attention they deserve. Tiling your ceiling adds an extra layer of interest and elegance that transforms a room from basic to beautiful.
Here’s why it’s catching on:
Creates a focal point
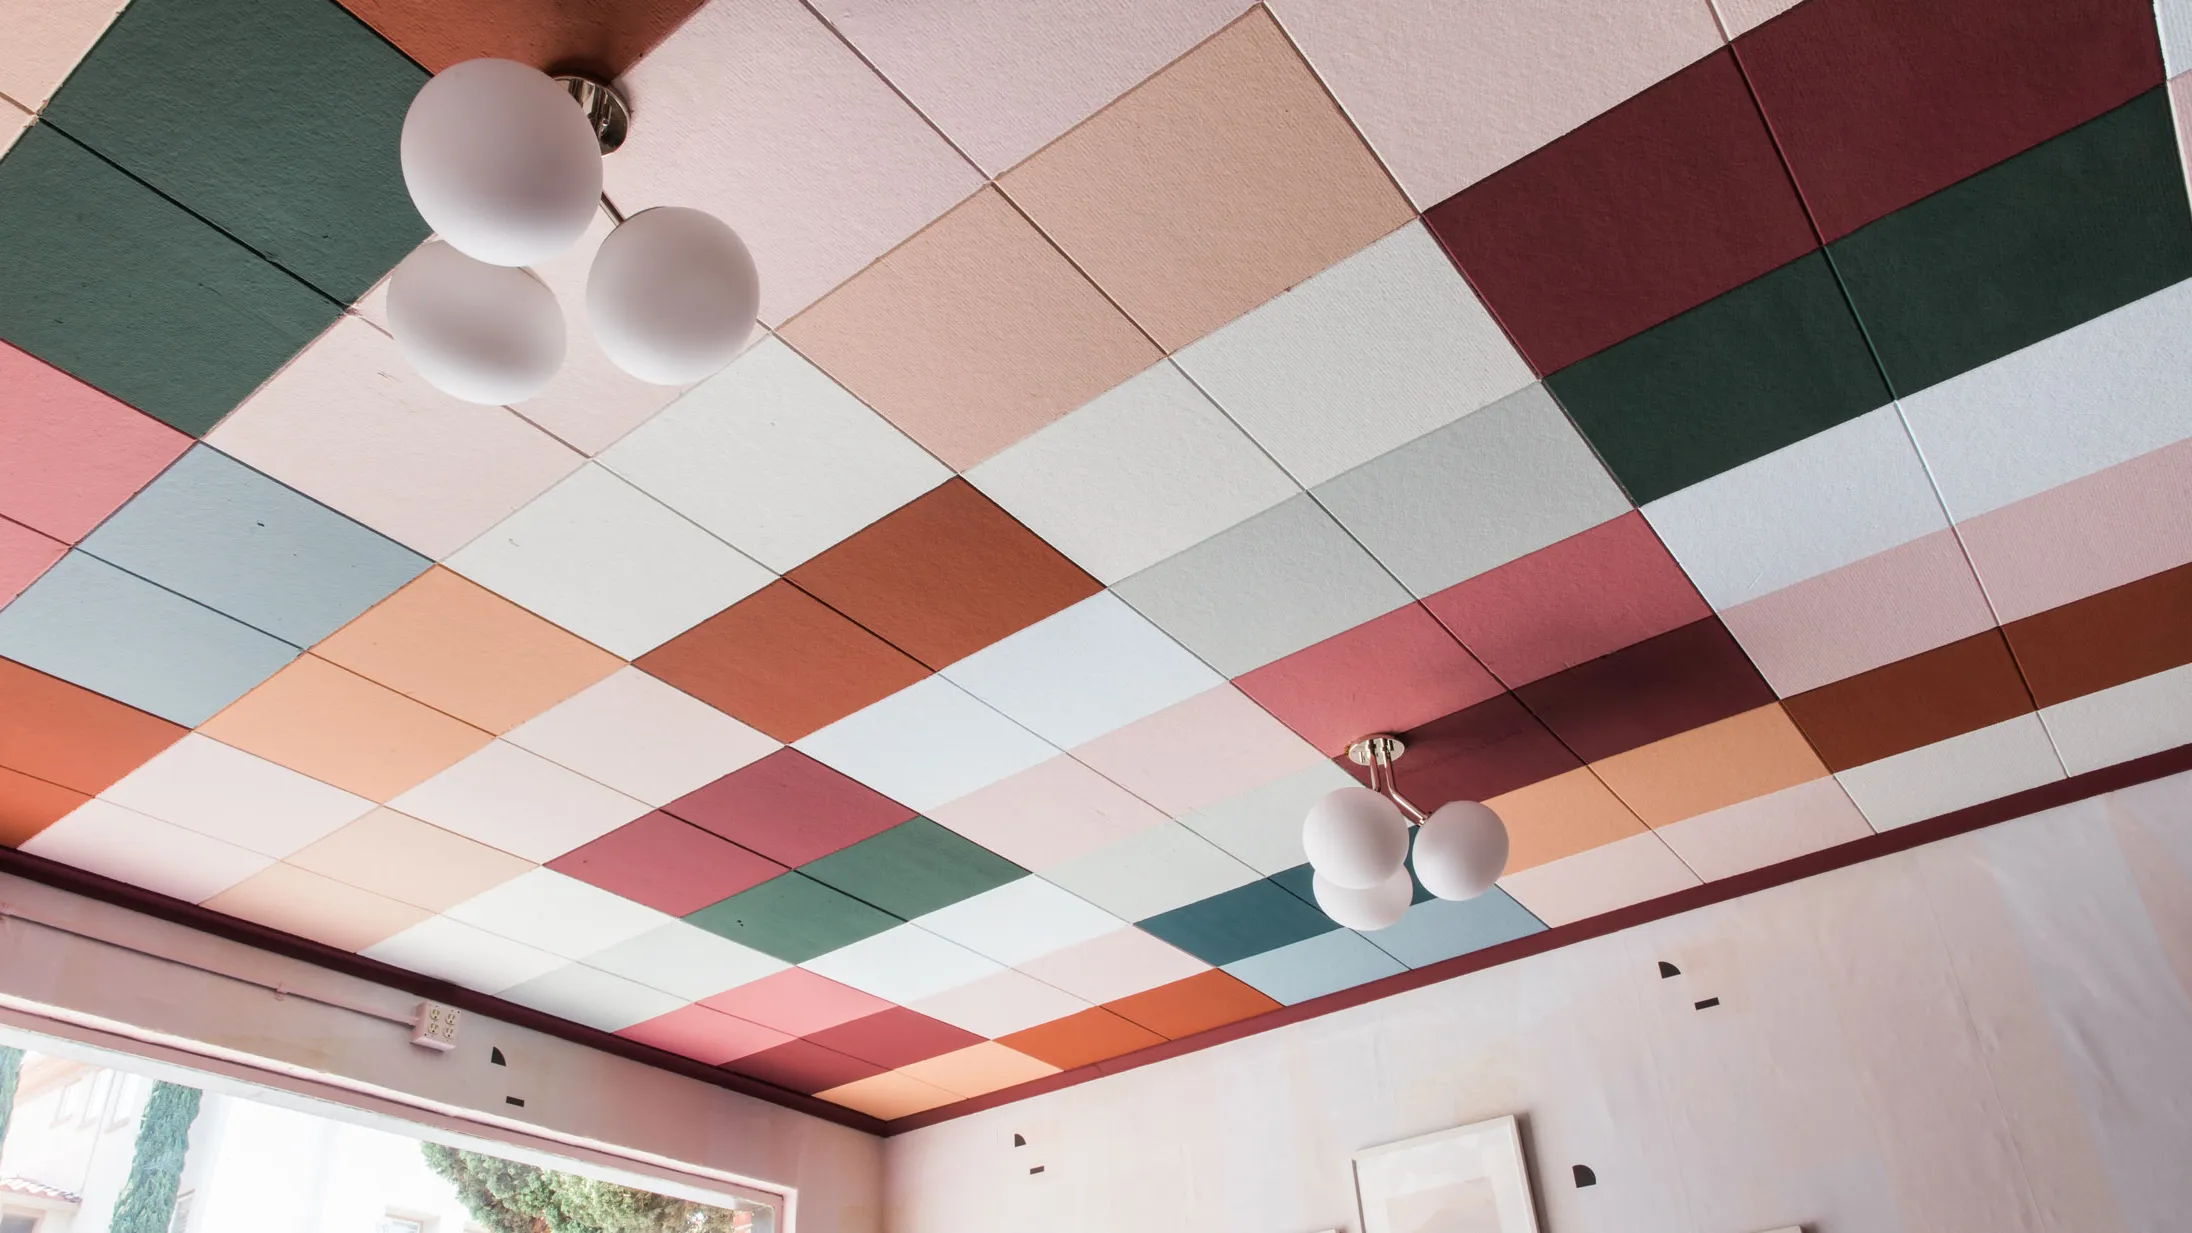
Image credit: architecturaldigest.com
A tiled ceiling instantly draws the eye upward, making the space feel more curated and considered.
Adds texture and depth
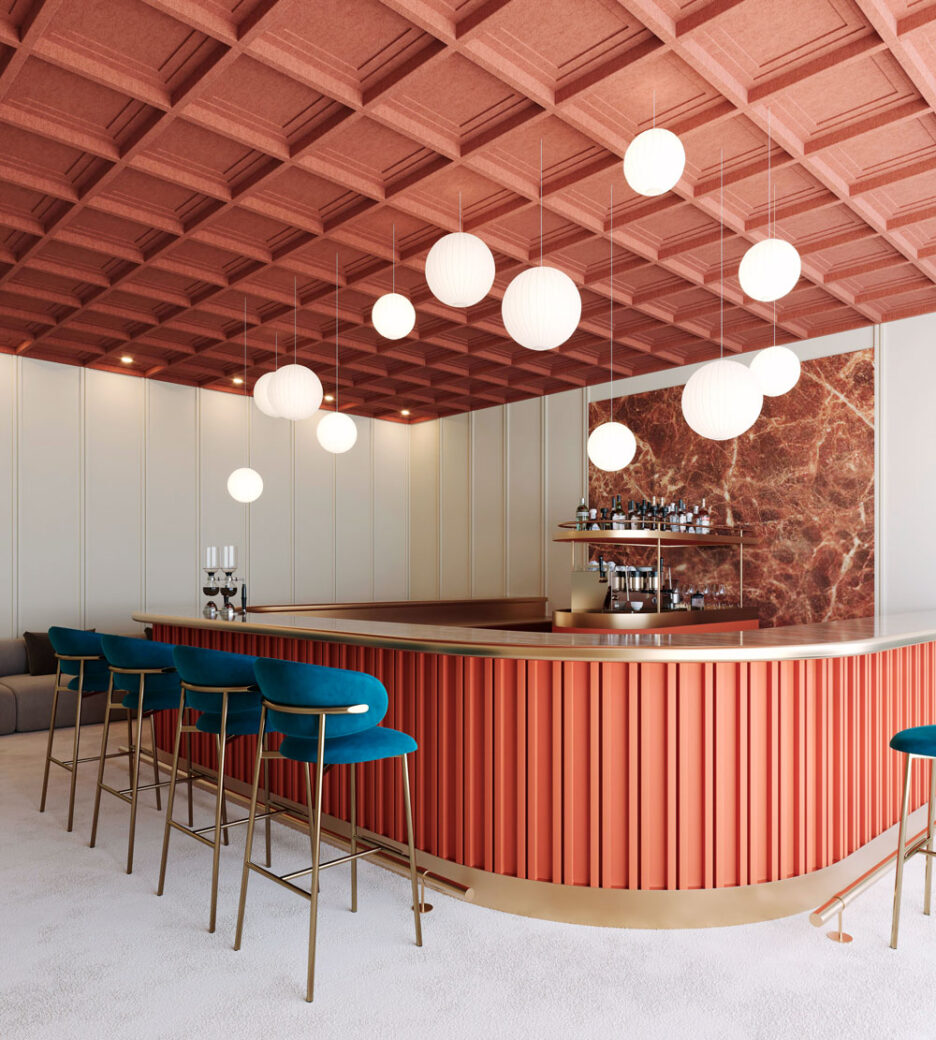
Image credit: mixinteriors.com
Especially in rooms with high ceilings, tiles can bring warmth, character and balance to the overall design.
Elevates small spaces
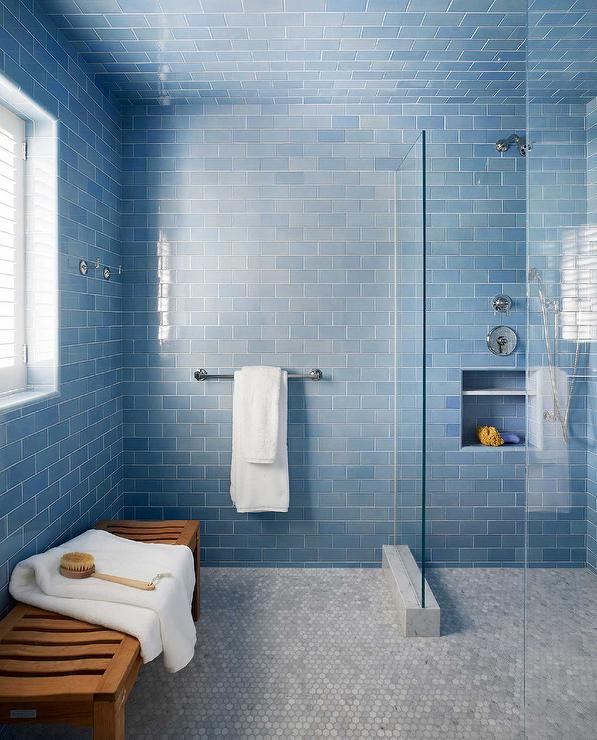
Image credit: decorpad.com
Powder rooms, entryways and other compact areas benefit from this unexpected twist.
Best Rooms for Ceiling Tiles
Not every room will suit a tiled ceiling, but when done right, it can completely change the vibe of a space. Here are a few areas where ceiling tiles really shine:
Bathrooms
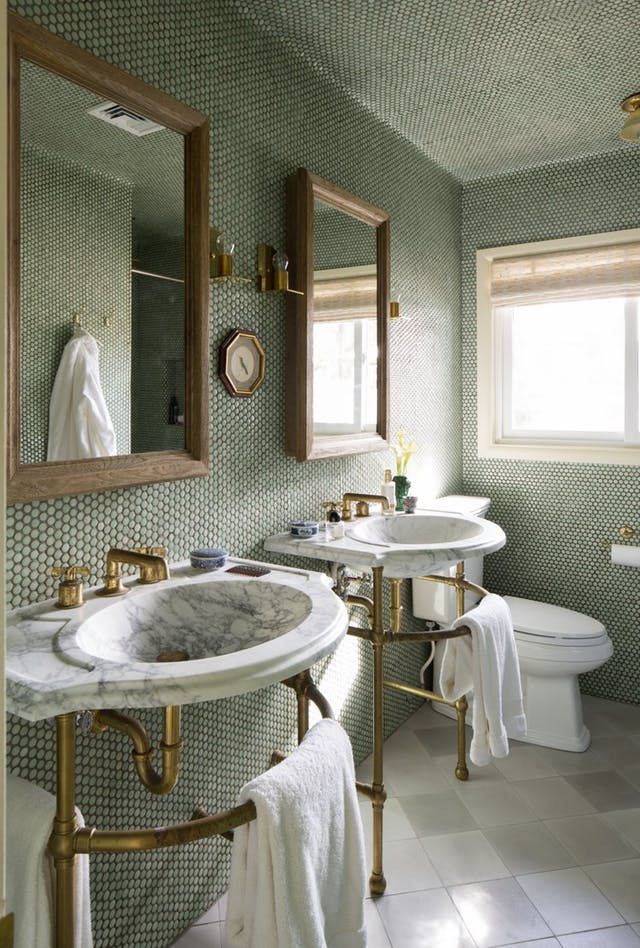
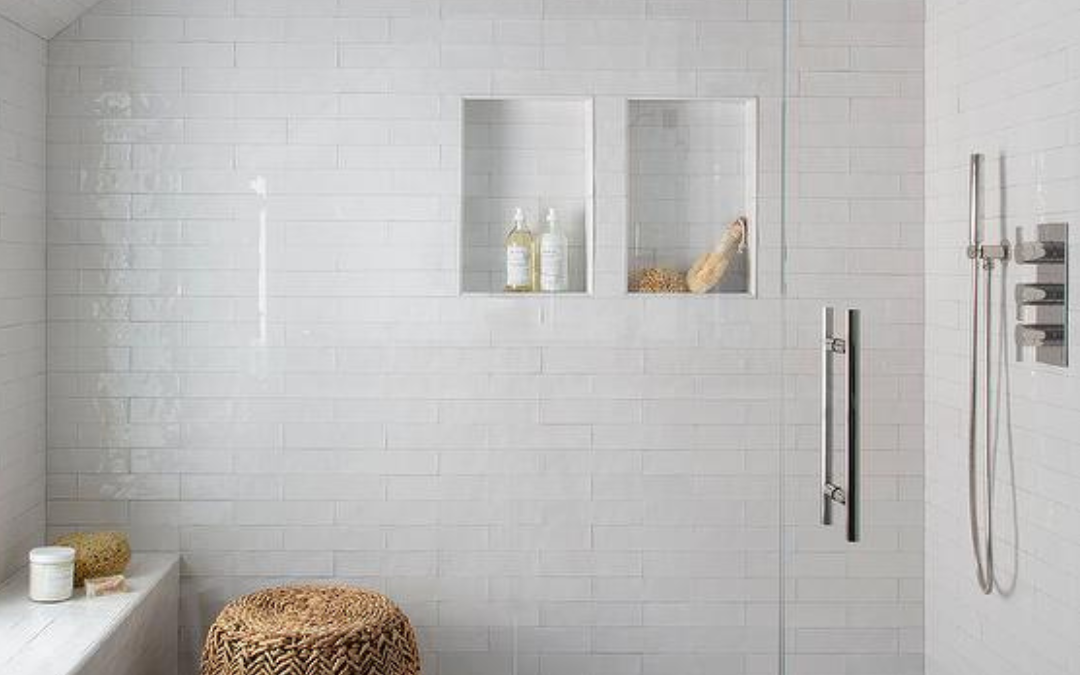
Tiling the ceiling in your shower or above a freestanding bath not only looks stunning but also offers practical water resistance.
Kitchens
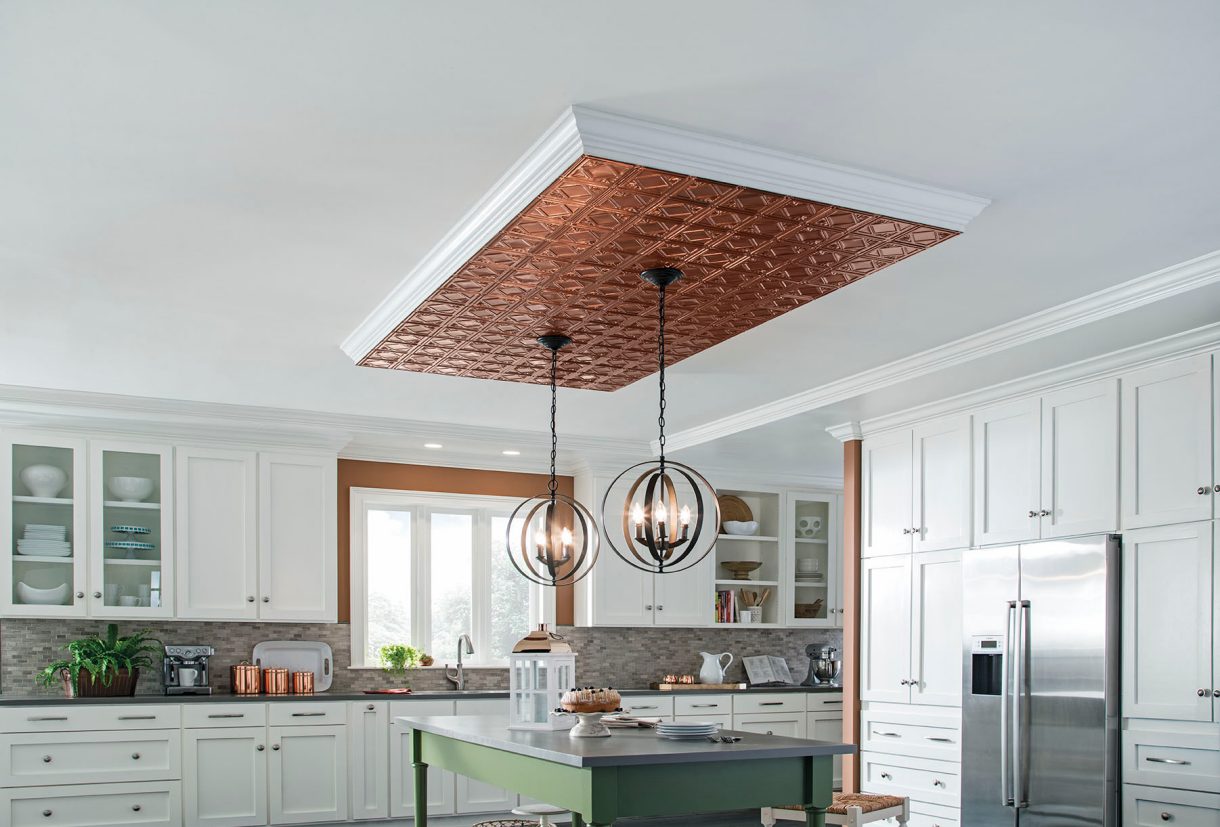
Image credit: armstrongceilings.com
A tiled ceiling above a kitchen island or in a scullery can create a sophisticated look and tie in with splashbacks or countertops.
Living Rooms
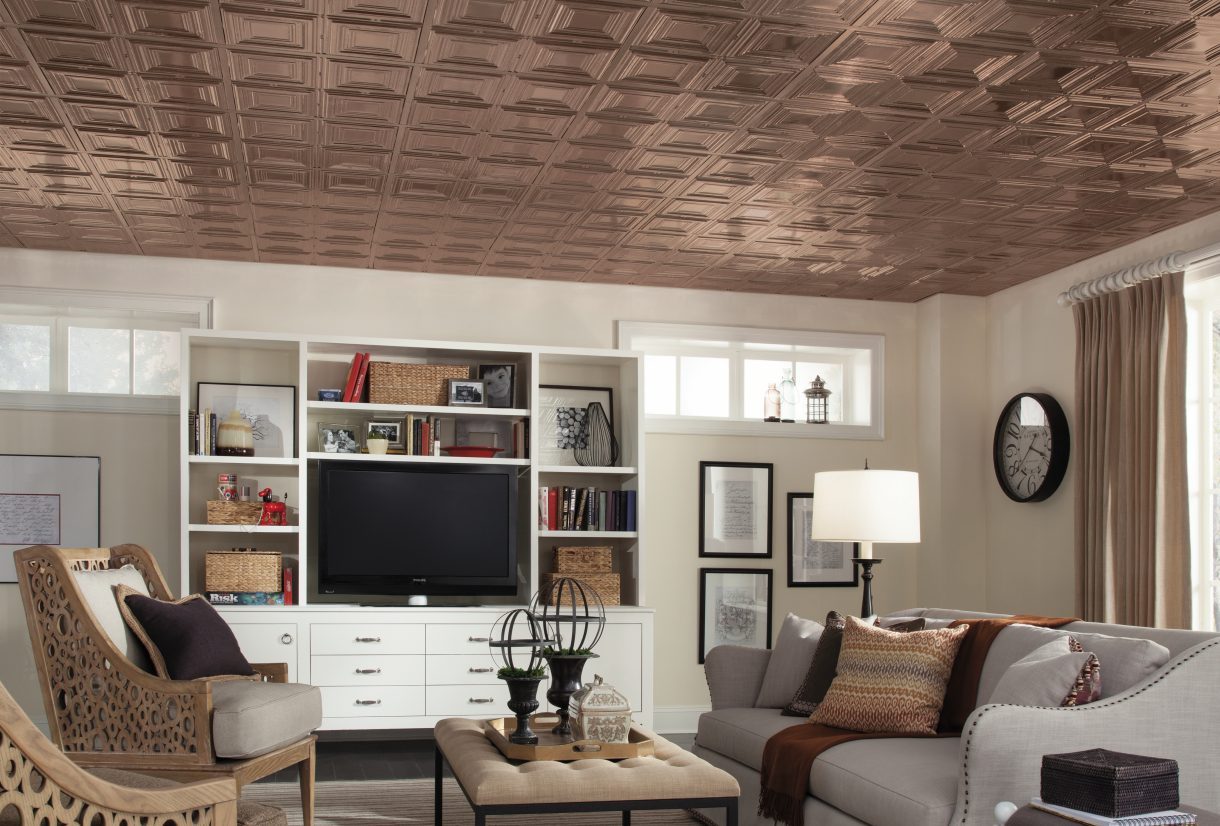
Image credit: armstrongceilings.com
Add elegance and texture with patterned or neutral tiles on the ceiling, paired with minimalist lighting for a luxe finish.
Entrances & Hallways
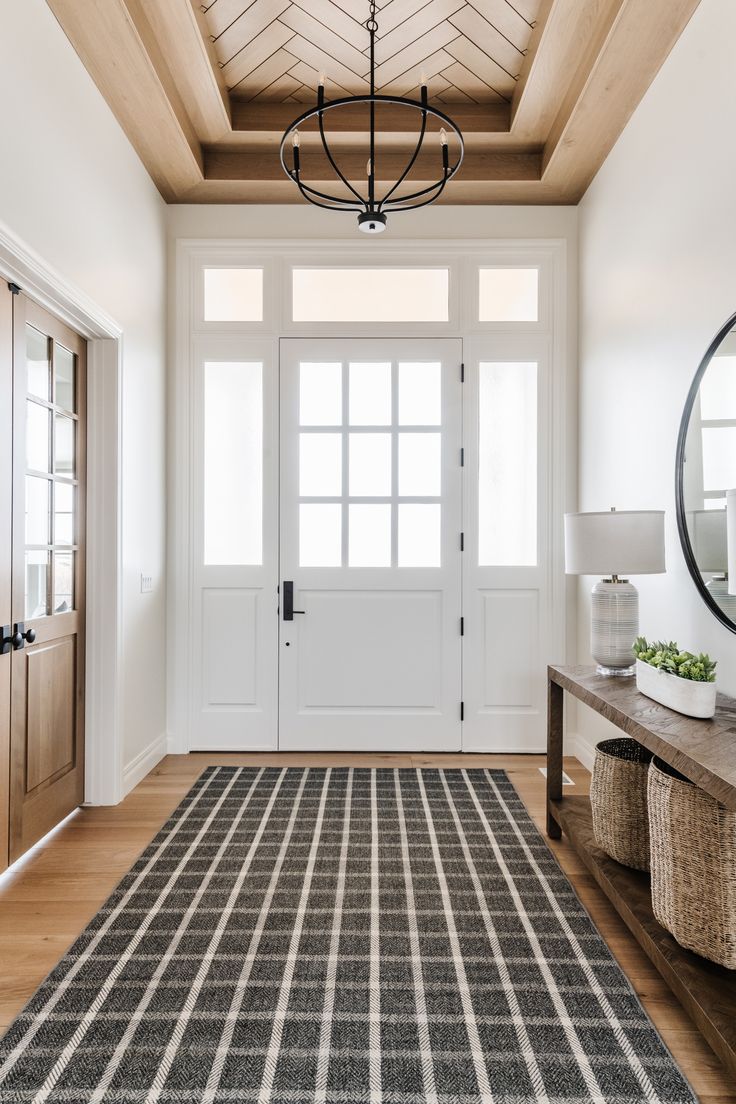
Image credit: houzz.com
First impressions count, and a tiled ceiling in your foyer or hallway sets a tone of luxury from the moment guests walk in.
Choosing the Right Tiles for the Ceiling
Not all tiles are created equal — especially when they’re going overhead. Here are a few tips when choosing tiles for your ceiling:
Go lighter
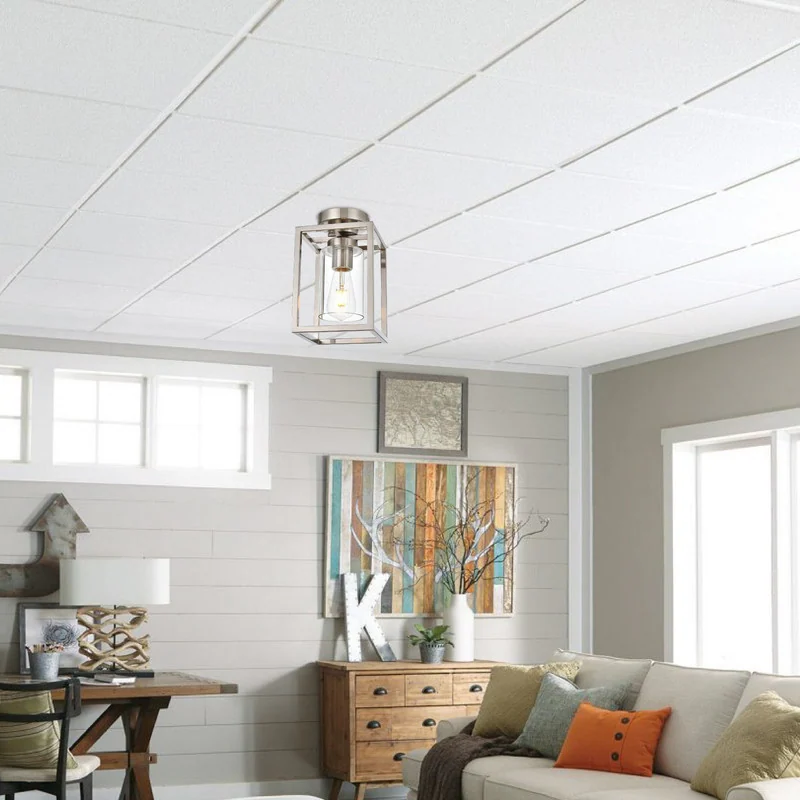
Image credit: bedbathandbeyond.com
Large, heavy tiles might be risky. Opt for lighter porcelain or ceramic tiles where possible.
Think texture
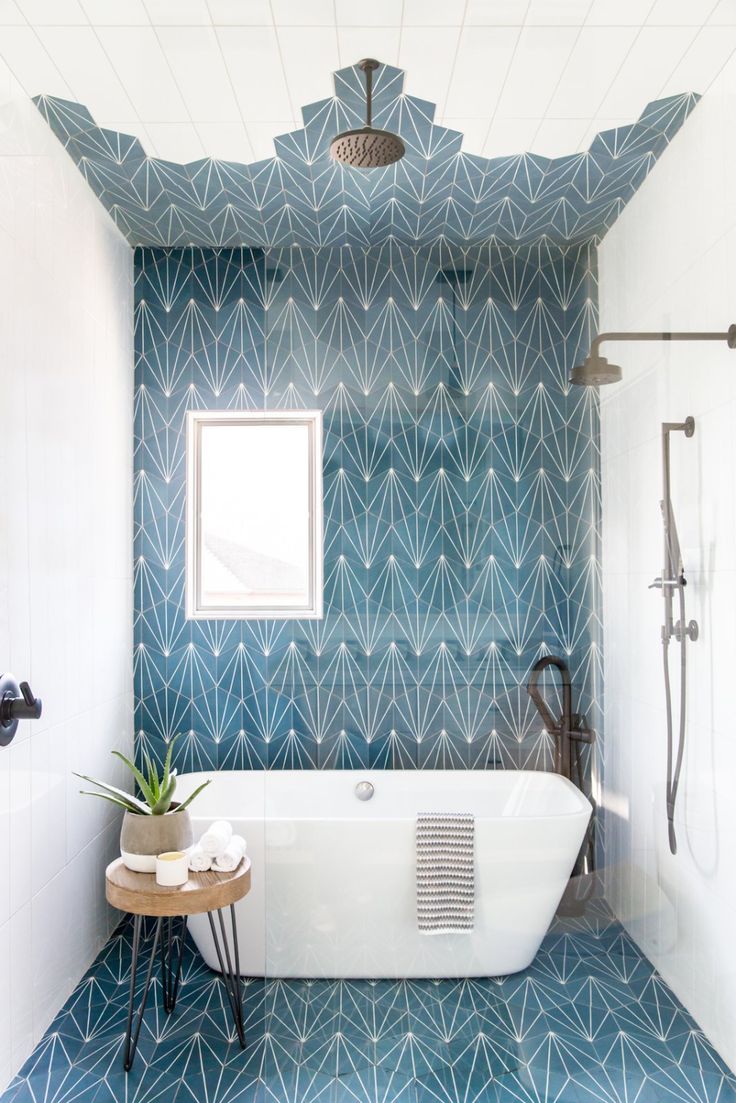
Image credit: houzz.com
3D or textured tiles can really make a statement but be careful not to go overboard in smaller rooms.
Stick with neutrals
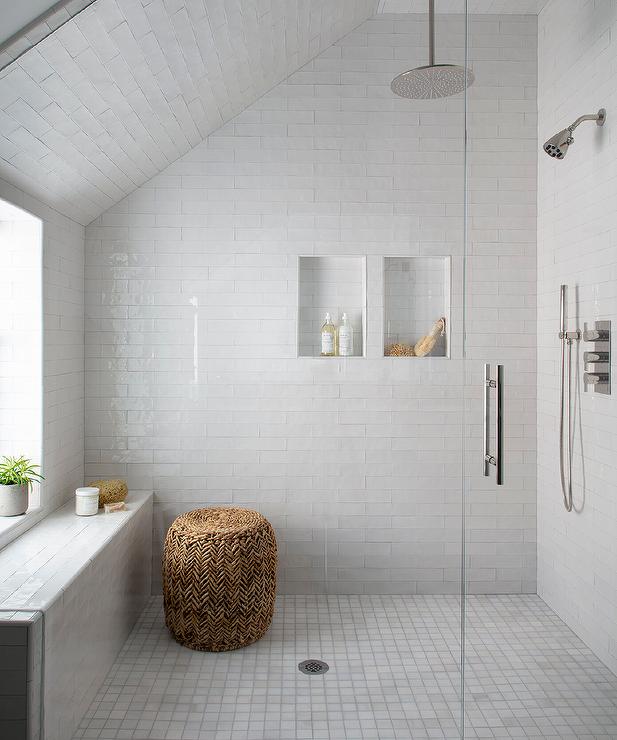
Image credit: decorpad.com
If you’re worried about commitment, soft tones and neutral shades keep things elegant without being overpowering.
Gloss vs. matte
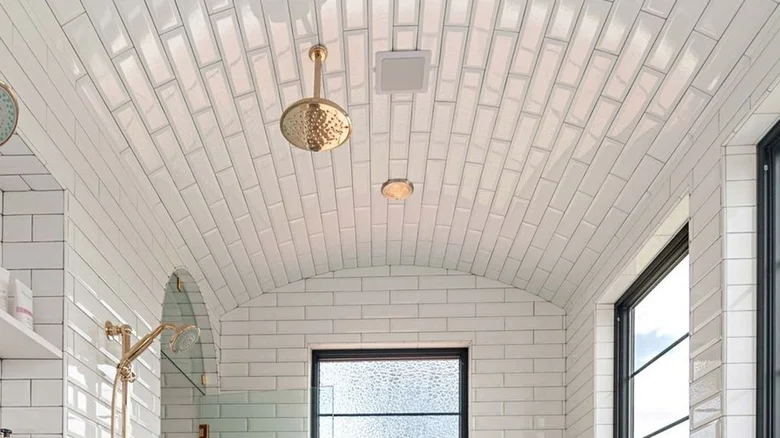
Image credit: housedigest.com
Glossy tiles reflect more light, which can help brighten a space, but matte tiles create a softer, more modern feel.
Installation Considerations
Tiling a ceiling requires a little more planning than walls or floors. Here are a few things to keep in mind:
Use a professional installer
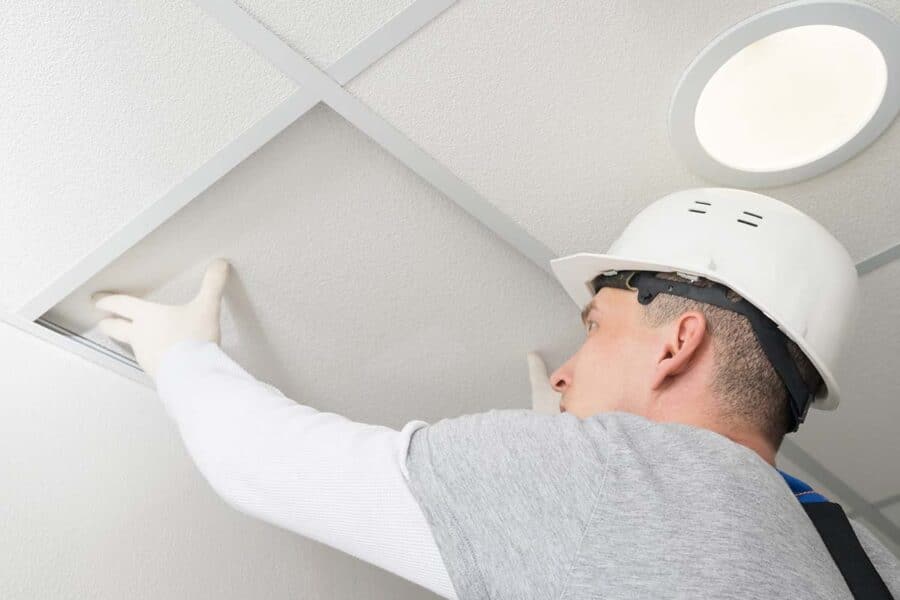
Precision is key. Uneven tiles or poor adhesion can become a safety hazard.
Check structural integrity

Make sure your ceiling can support the weight of the tiles and adhesive.
Waterproofing
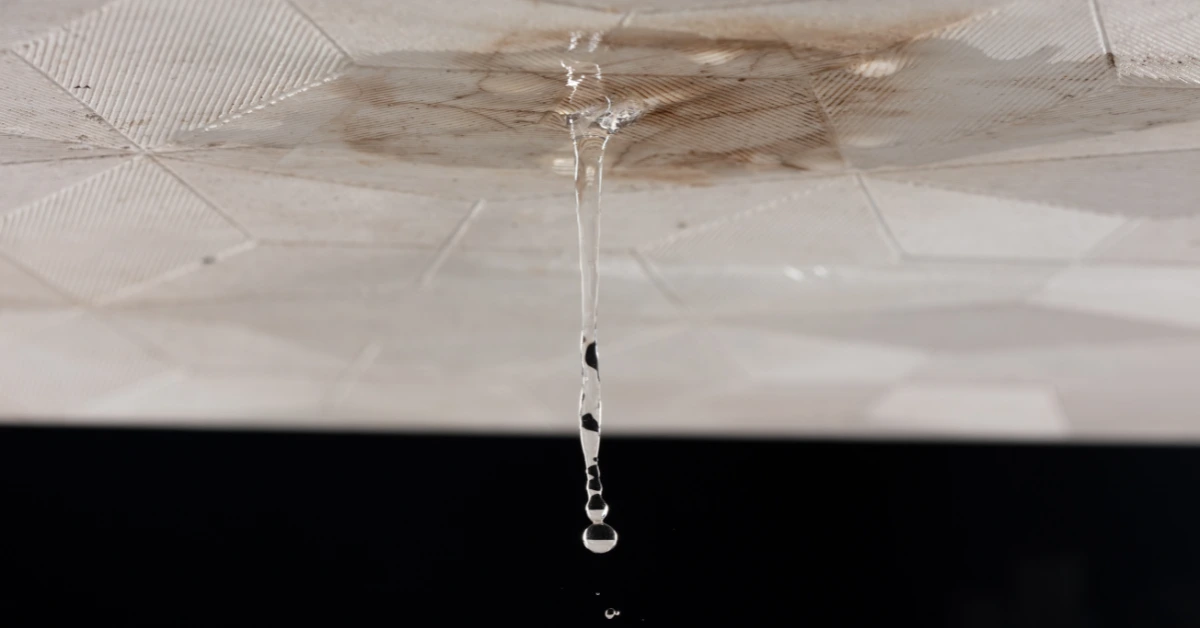
In bathrooms or kitchens, proper sealing is essential to prevent moisture damage.
Low-Maintenance and Long-Lasting
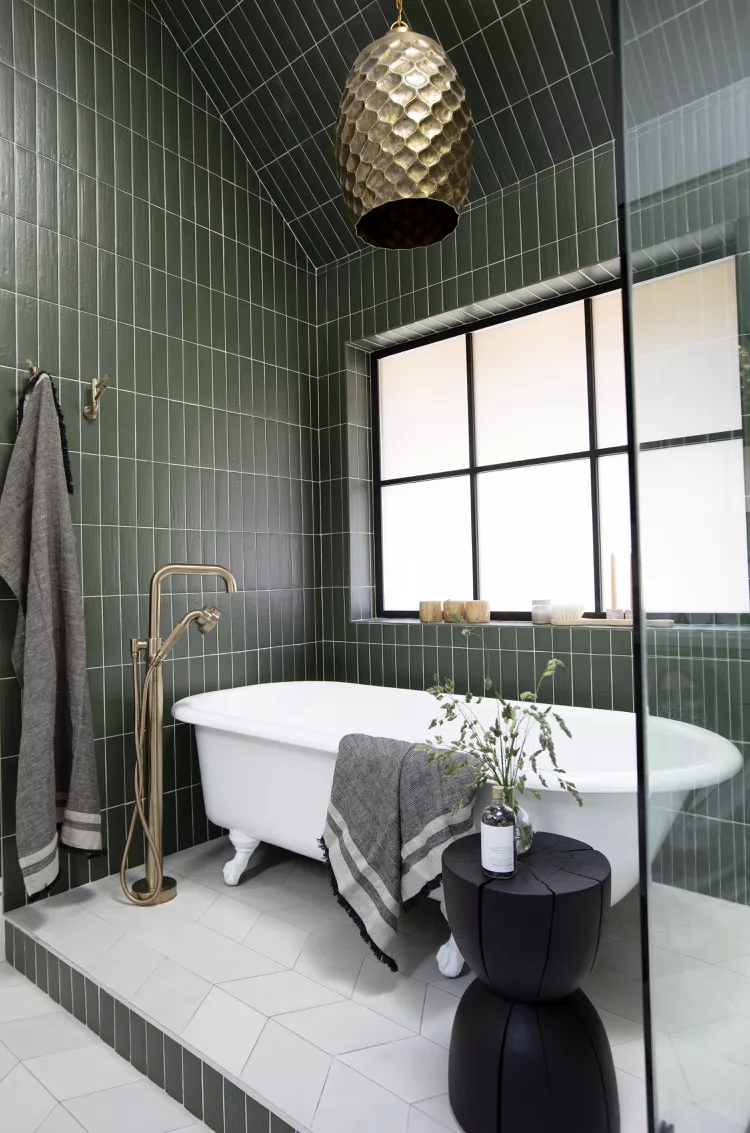
Image credit: thespruce.com
One of the biggest perks of ceiling tiles? They’re incredibly low maintenance. Unlike painted or plastered ceilings, tiles are easy to clean, durable and resistant to mould and mildew — making them perfect for moisture-prone areas.
If you’re ready to break the mould and embrace something bold, tiling your ceiling could be your next home improvement project. It’s a modern, functional way to add character and style to any space while also reaping the benefits of durability and easy maintenance.
Whether you’re planning a full renovation or just looking to update a single room, ceiling tiles might just be the statement finish you’ve been searching for.
Ready to explore your options? Visit Tiletoria for a wide range of ceiling-friendly tiles that can take your interiors to new heights — literally.

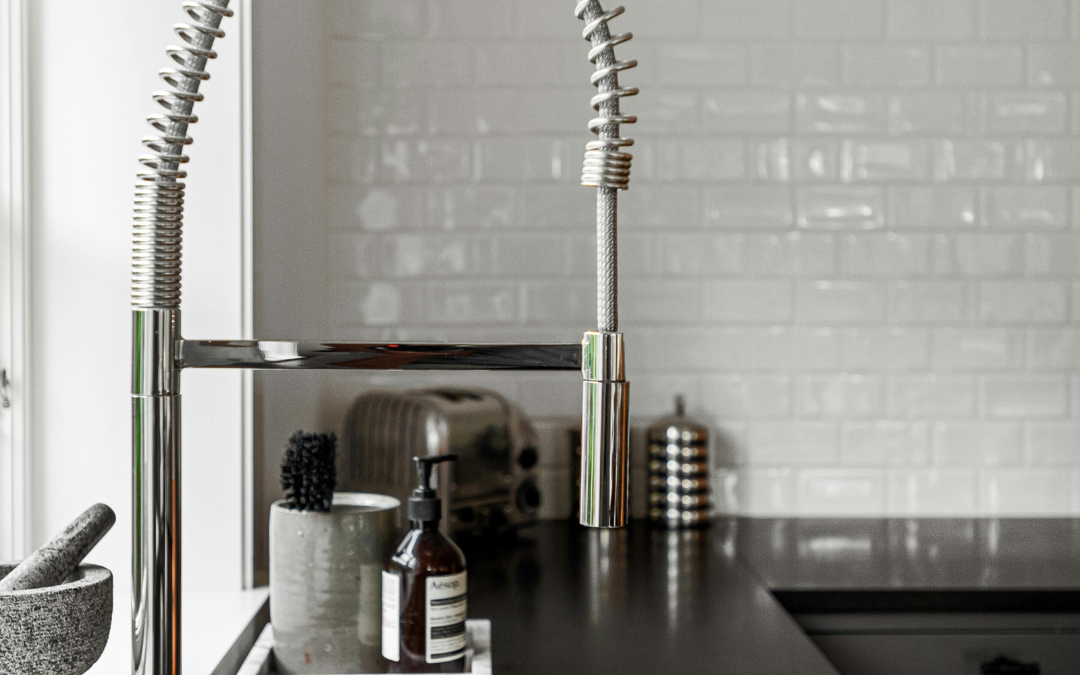
bathroom, blog, kitchen
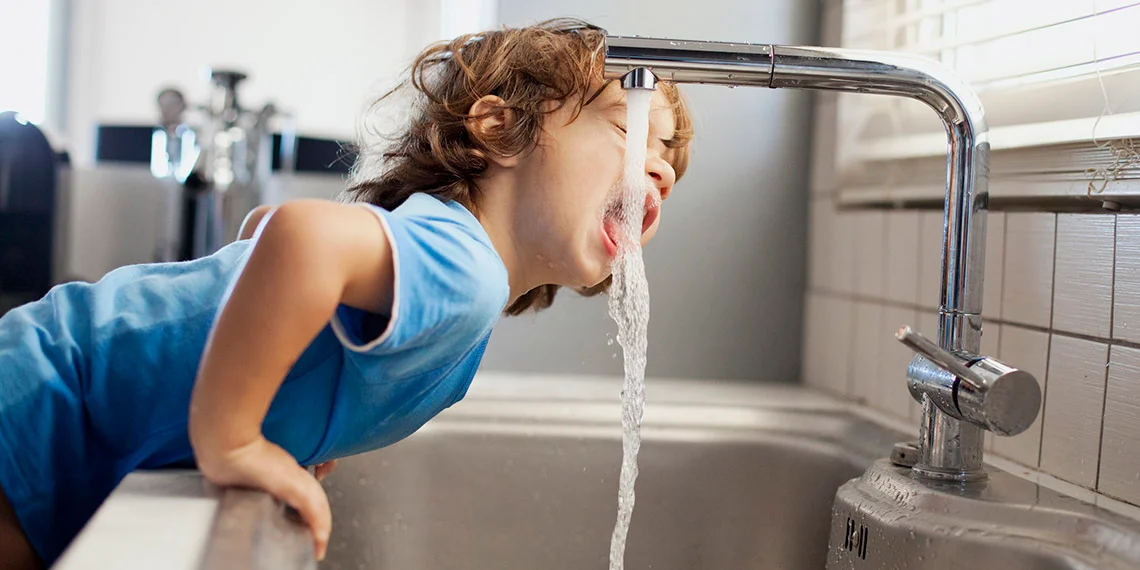
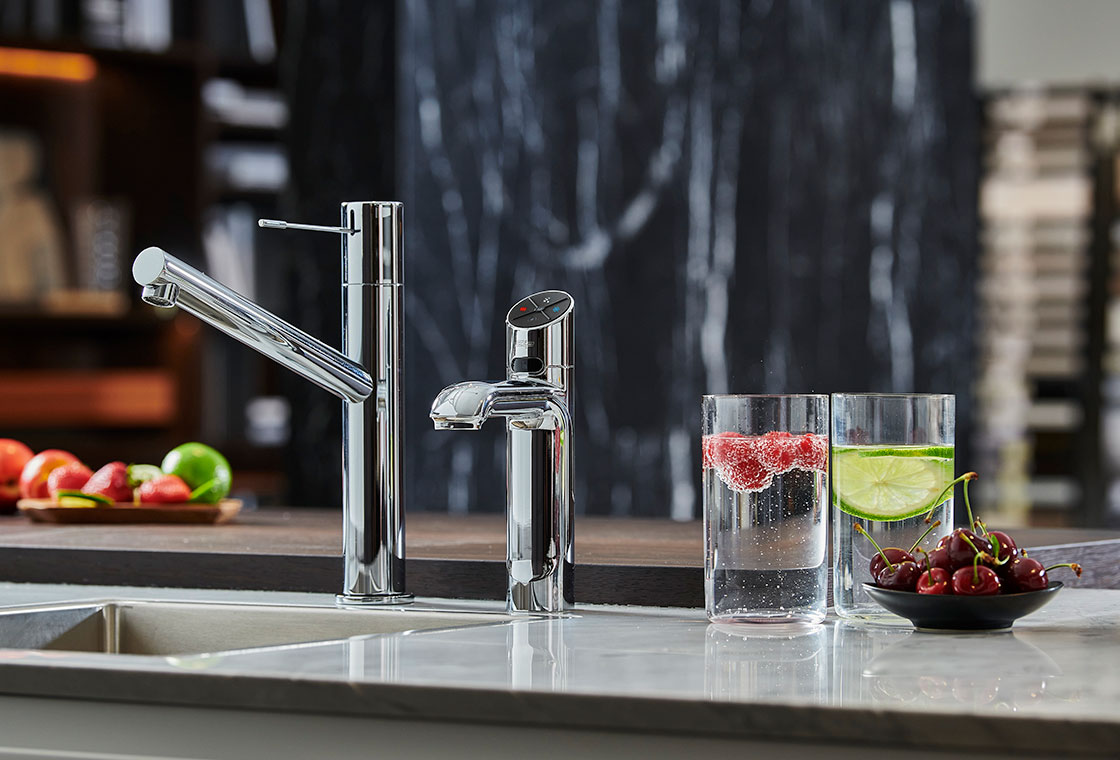
When it comes to improving your home’s water quality, convenience, and sustainability, filtered taps are a game-changer. Instead of constantly buying bottled water or relying on bulky filtration jugs, a filtered tap gives you clean, great-tasting water straight from the source. But what makes filtered taps such a smart choice? Let’s dive into the benefits.

Table of Content:
Enjoy Cleaner, Healthier Water
Say Goodbye to Plastic Waste
Save Money in the Long Run
Better-Tasting Water for Cooking & Drinking
Easy & Convenient Filtration
Protects Your Appliances
Upgrade Your Shower Experience with a Filtered Shower Head
Enjoy Cleaner, Healthier Water
Why Filtered Taps Are a Game-Changer for Your Home – Benefits of filter taps: Enjoy Cleaner, Healthier Water
Unfiltered tap water can contain impurities like chlorine, heavy metals and microplastics. A filtered tap removes these contaminants, providing you with fresh, purified water every time you turn it on. This is especially important for families, as cleaner water can contribute to better overall health.
Say Goodbye to Plastic Waste

If you’re looking to reduce your environmental impact, switching to a filtered tap is a great step. Bottled water contributes to plastic pollution, with millions of bottles ending up in landfills every year. By using a filtered tap, you eliminate the need for single-use plastics while still enjoying high-quality drinking water.
Save Money in the Long Run
Bottled water isn’t just bad for the planet — it’s expensive! Investing in a filtered tap means you no longer have to spend money on bottled water or replacement filter jugs. Over time, this adds up to significant savings while still ensuring your water is safe to drink.
Better-Tasting Water for Cooking & Drinking
Filtered water isn’t just for drinking — it enhances the taste of your food and beverages. Whether you’re making tea, coffee, or cooking pasta purified water helps bring out the natural flavours of your ingredients. No more unwanted chlorine taste interfering with your morning brew!
Easy & Convenient Filtration

Unlike water filter jugs that need constant refilling, filtered taps provide an endless supply of clean water at the turn of a handle. Modern filtration systems are designed to be low-maintenance, with filters that last for months before needing a replacement. This means less hassle and more convenience for your household.
Protects Your Appliances
Filtered water can also extend the lifespan of your kitchen appliances. Hard water and impurities can lead to mineral buildup in kettles, coffee machines and dishwashers. A filtered tap reduces these issues, keeping your appliances running efficiently for longer.
Upgrade Your Shower Experience with a Filtered Shower Head
Filtered water isn’t just for drinking — it can also transform your shower experience. Hard water and chlorine can dry out your skin and hair, leading to irritation and dullness. A filtered shower head helps remove these harsh elements, leaving your skin feeling softer and your hair shinier. It’s an easy upgrade that can make a big difference in your daily routine, especially for those with sensitive skin or allergies.
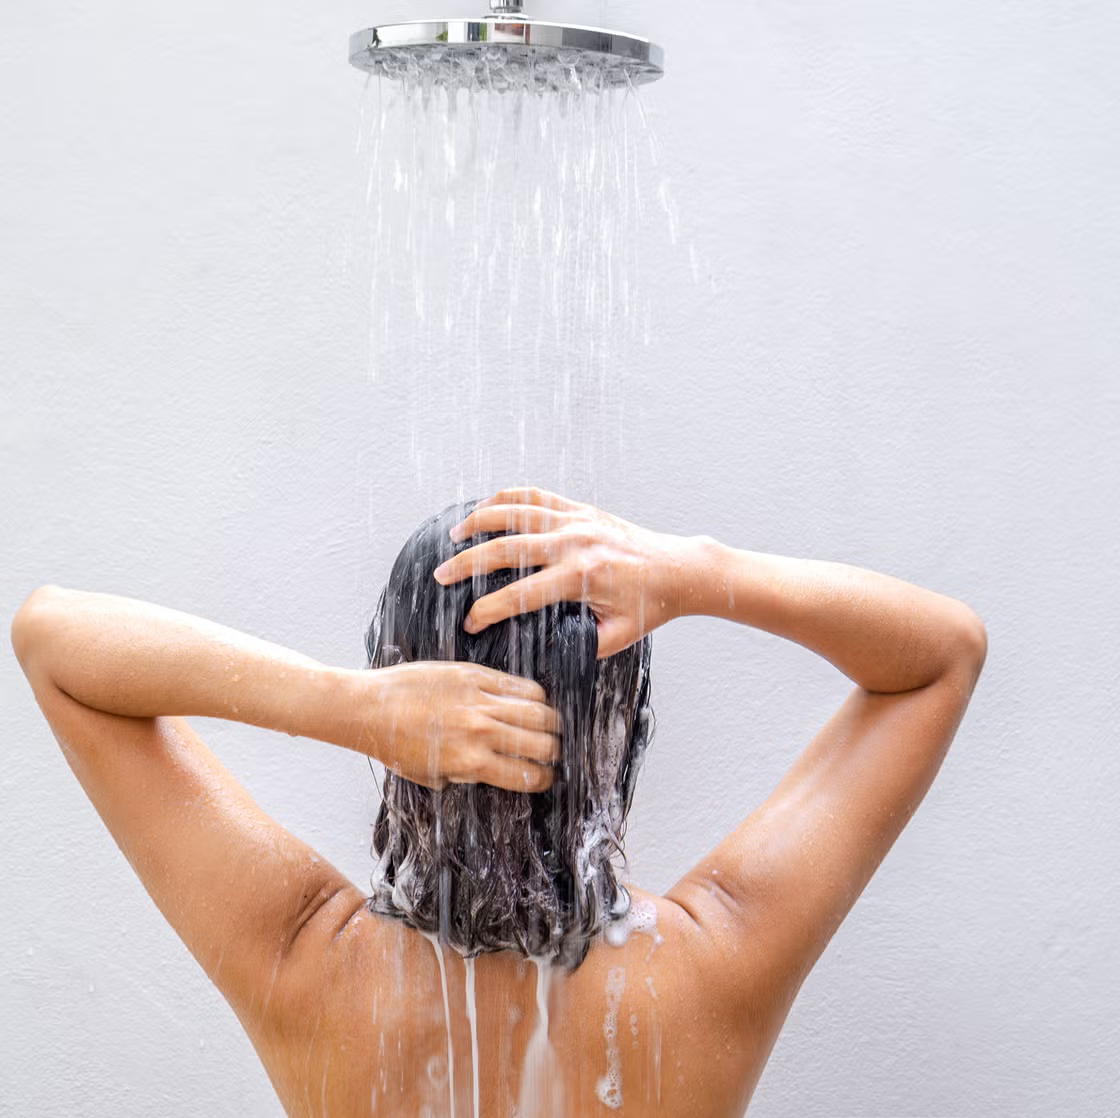
In addition to benefiting your skin and hair, a filtered shower head also helps protect your bathroom. Hard water deposits and mineral buildup can leave stubborn stains on tiles, glass shower doors, and fixtures. By filtering out these impurities, you can reduce limescale buildup, making cleaning easier and keeping your bathroom looking fresher for longer.
Filtered taps offer a simple yet powerful way to upgrade your home’s water quality. From improving taste and reducing plastic waste, to saving money and protecting your appliances, the benefits are clear.
blog, floors, walls
When choosing tiles for your home, you might focus on colour, texture and size — but have you considered how lighting affects your tiles appearance? The right lighting can enhance the beauty of your tiles, while poor lighting can make them look dull or even change their colour. Before making your final choice, it’s important to understand how lighting impacts your tiles and how you can use it to your advantage.
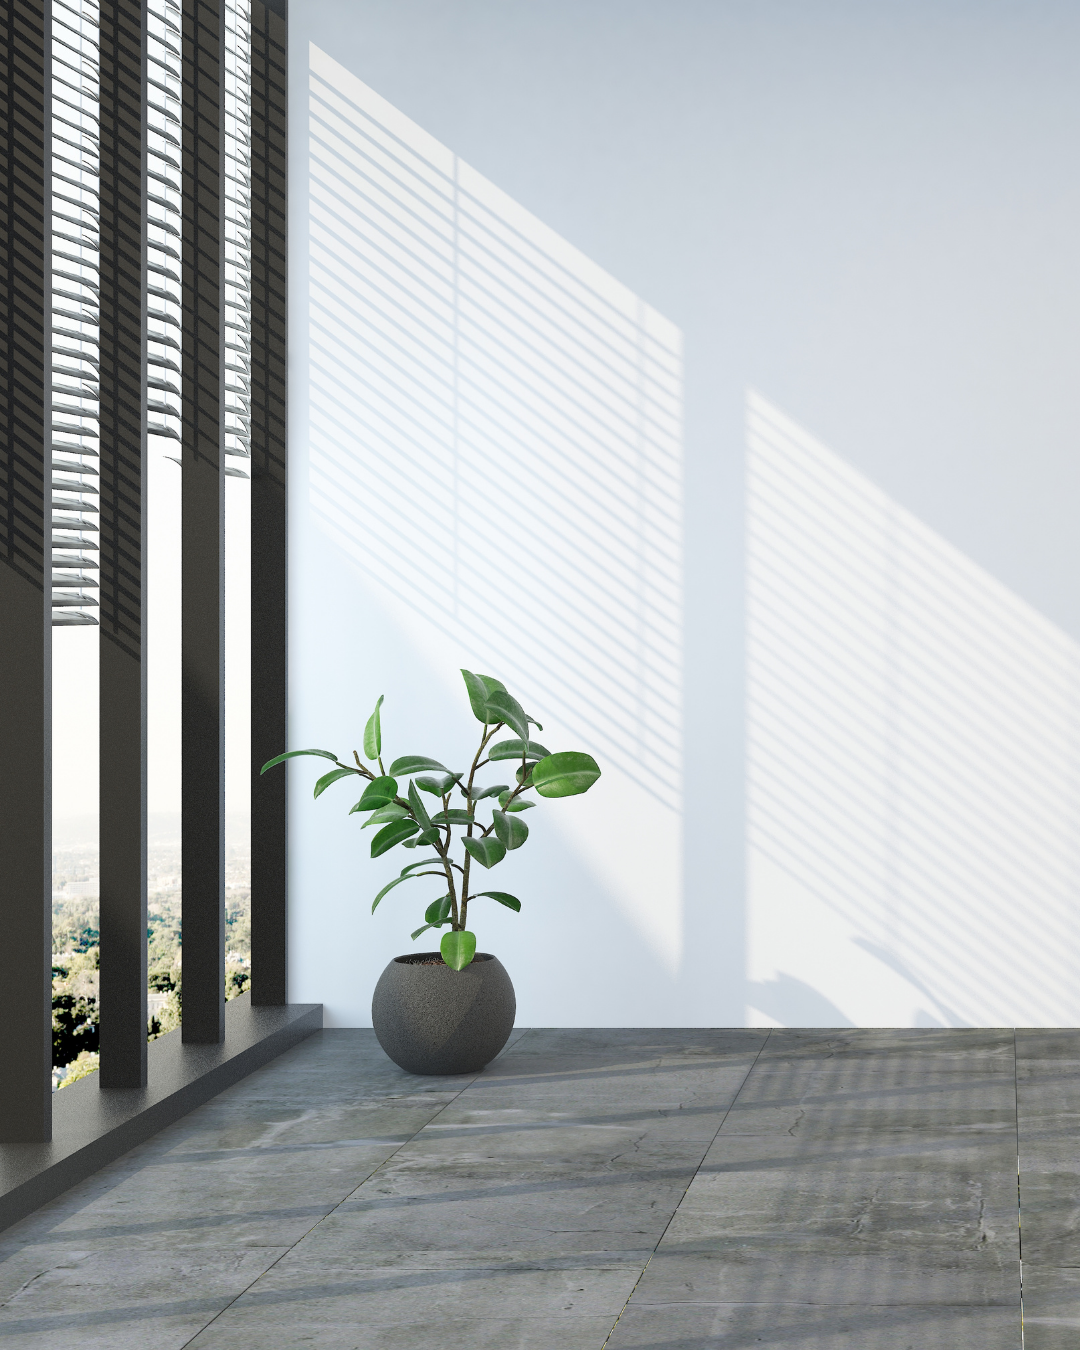
Table of Content:
How Different Lighting Affects Tiles
Tile Finishes and Lighting Effects
Tips for Choosing the Right Tiles Based on Lighting
How Different Lighting Affects Tiles
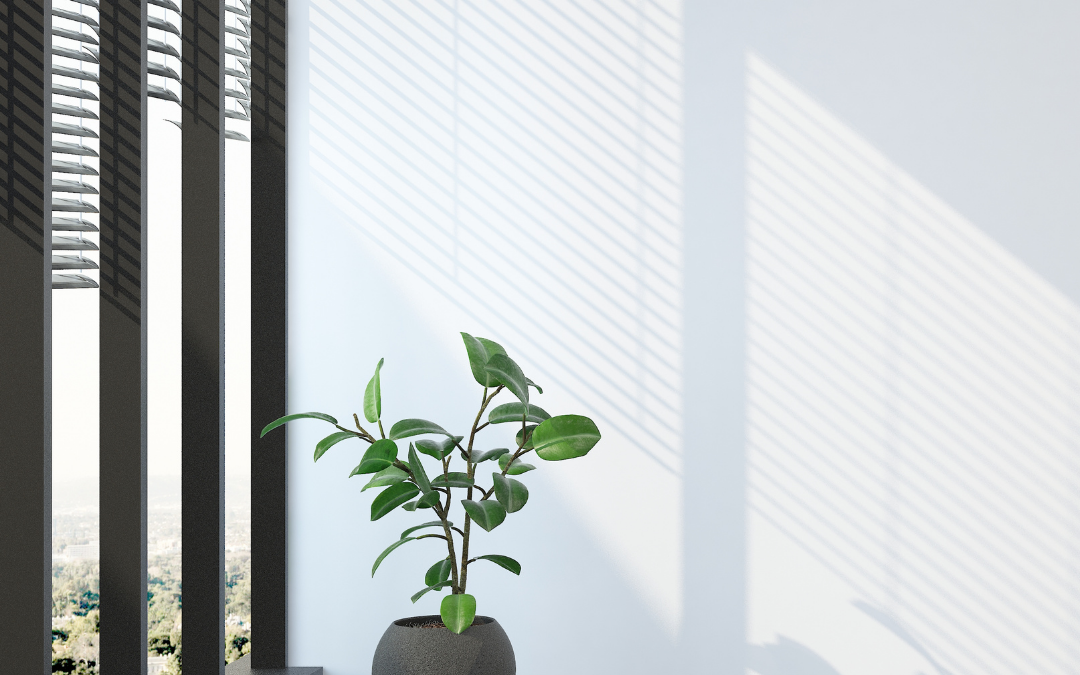
Whether it’s the natural light streaming in through windows or the artificial lighting you choose, each type of light interacts differently with tile colours, textures and finishes. Understanding these effects will help you make the right choice for your space.
Natural Light: Bringing Out True Colours
image credit: casa39
Natural light has a major influence on how tiles appear in a space. The way sunlight filters into a room throughout the day can highlight subtle undertones, making tiles look different in the morning, afternoon, and evening. Large windows, skylights and glass doors allow natural light to highlight the true tones of your tiles. However, be aware that direct sunlight can create glare on glossy tiles and make some colours appear warmer or cooler depending on the time of day.
Artificial Lighting: Setting the Mood
image credit: casa39
Artificial lighting plays a crucial role, especially in rooms with limited natural light. Different types of bulbs create different effects:
Warm White Bulbs
Add a cosy, yellowish tone, perfect for living spaces and bathrooms.
Cool White Bulbs
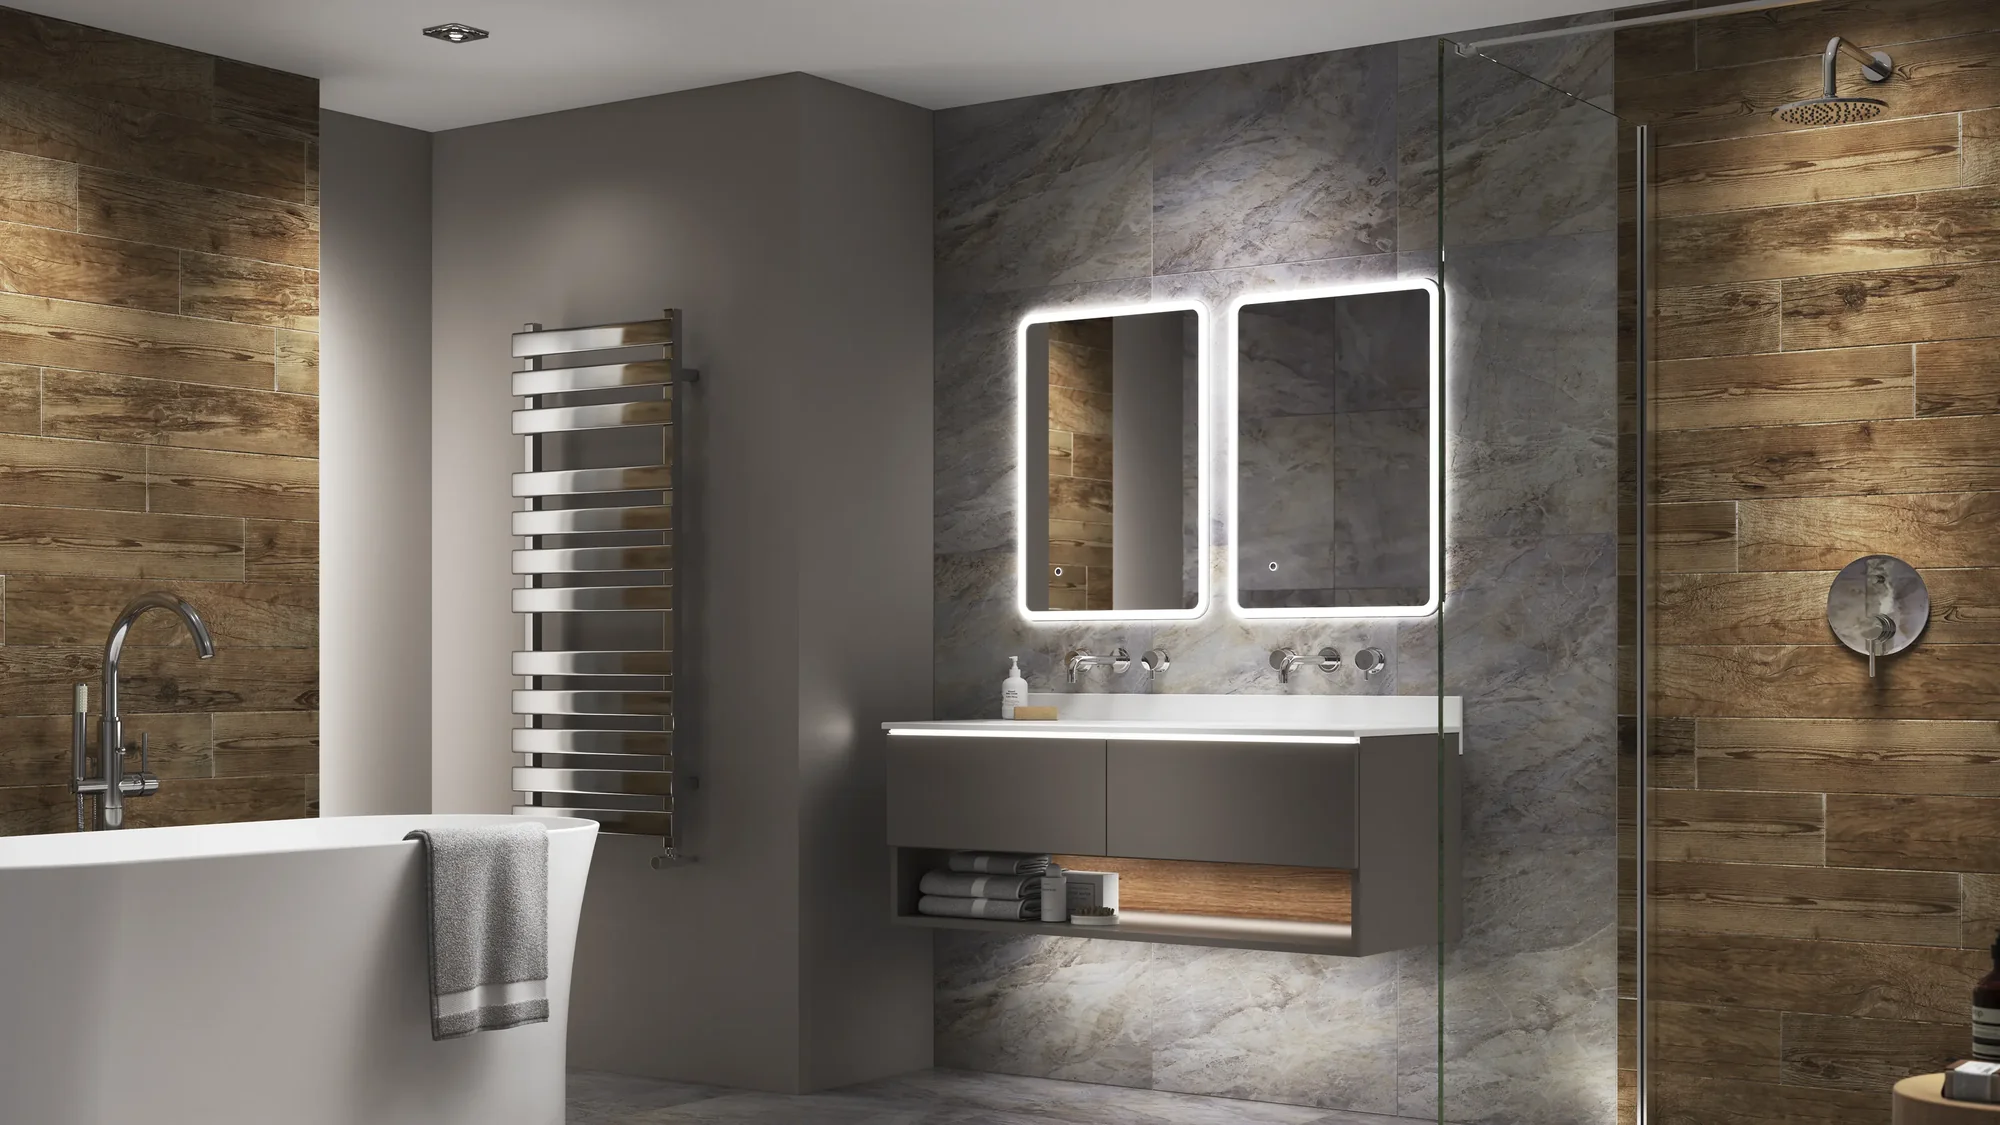
image credit: sensiolighting.com
Enhance crisp, modern looks, ideal for kitchens and bathrooms with neutral-toned tiles.
Daylight Bulbs
Mimic natural light and showcase tile colours accurately, making them a great choice for showrooms or well-lit kitchens.
Tile Finishes and Lighting Effects
The finish of your tiles plays a key role in how they interact with light. Whether you want a bright, reflective space or a soft, elegant feel, choosing the right tile finish can enhance the overall look of your room. Here’s how different finishes respond to lighting.
Glossy Tiles: Reflective and Bright
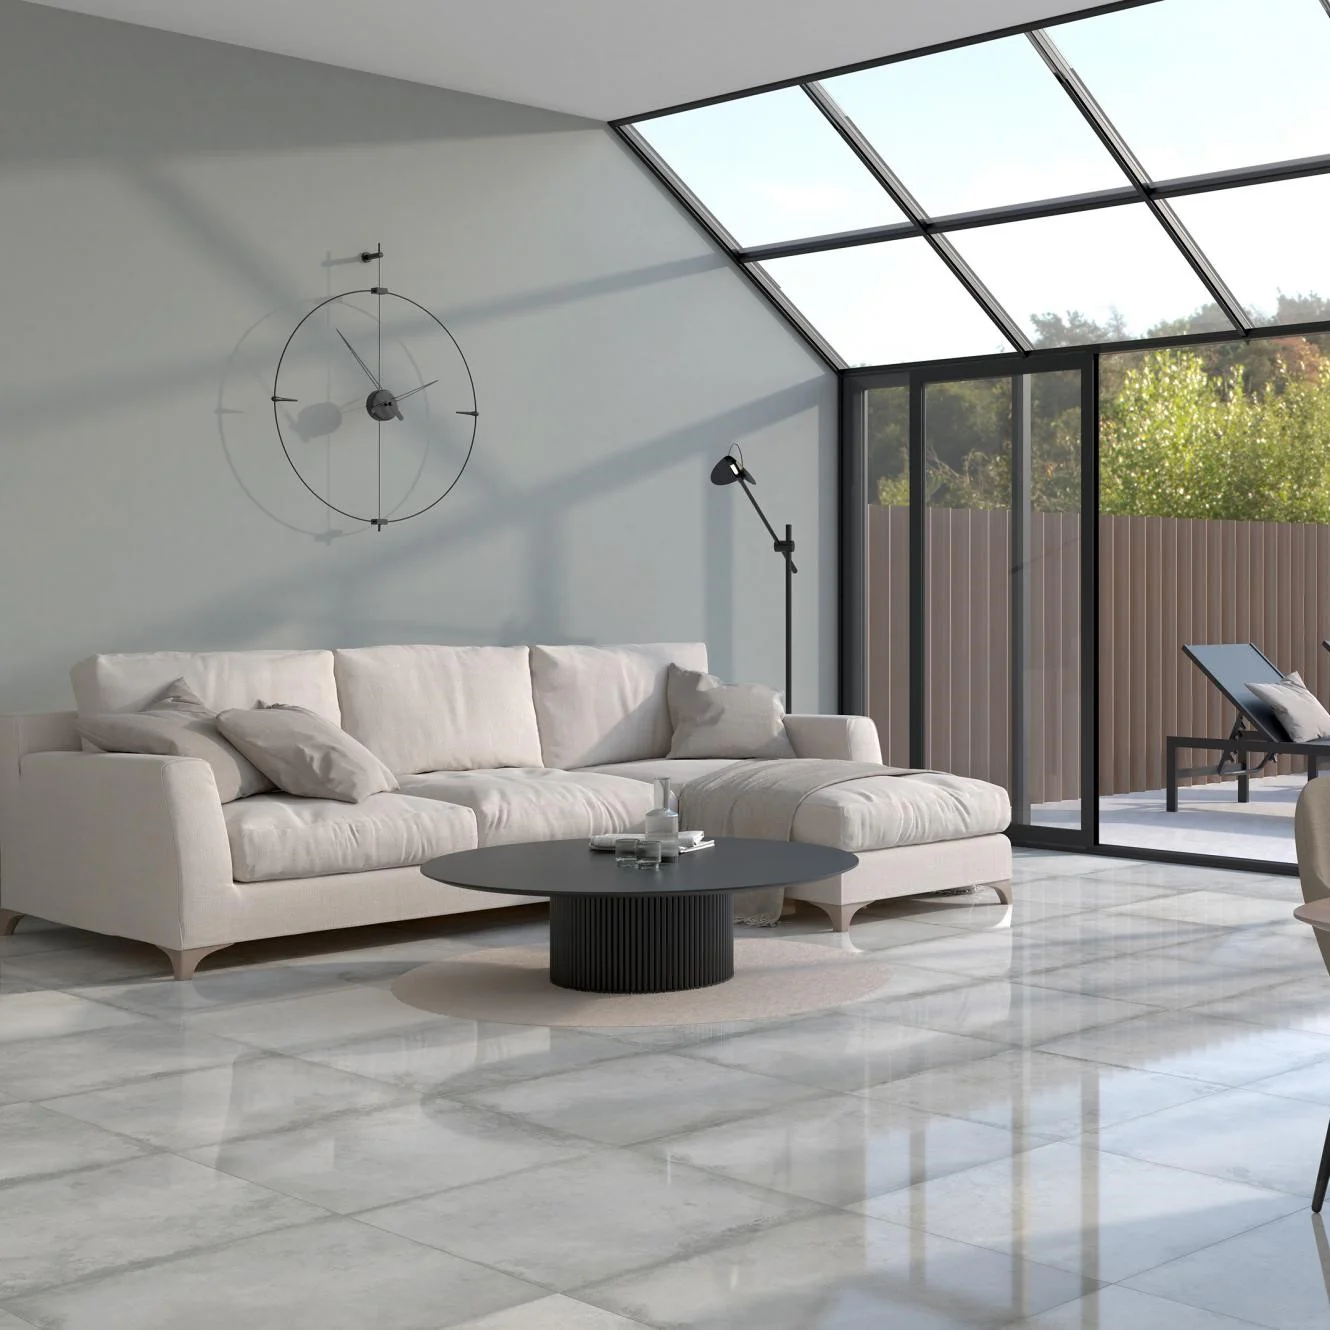
image credit: decobella
Glossy tiles bounce light around the room, making spaces feel bigger and brighter. However, they can also highlight imperfections and water spots, especially under harsh lighting.
Matte Tiles: Soft and Elegant
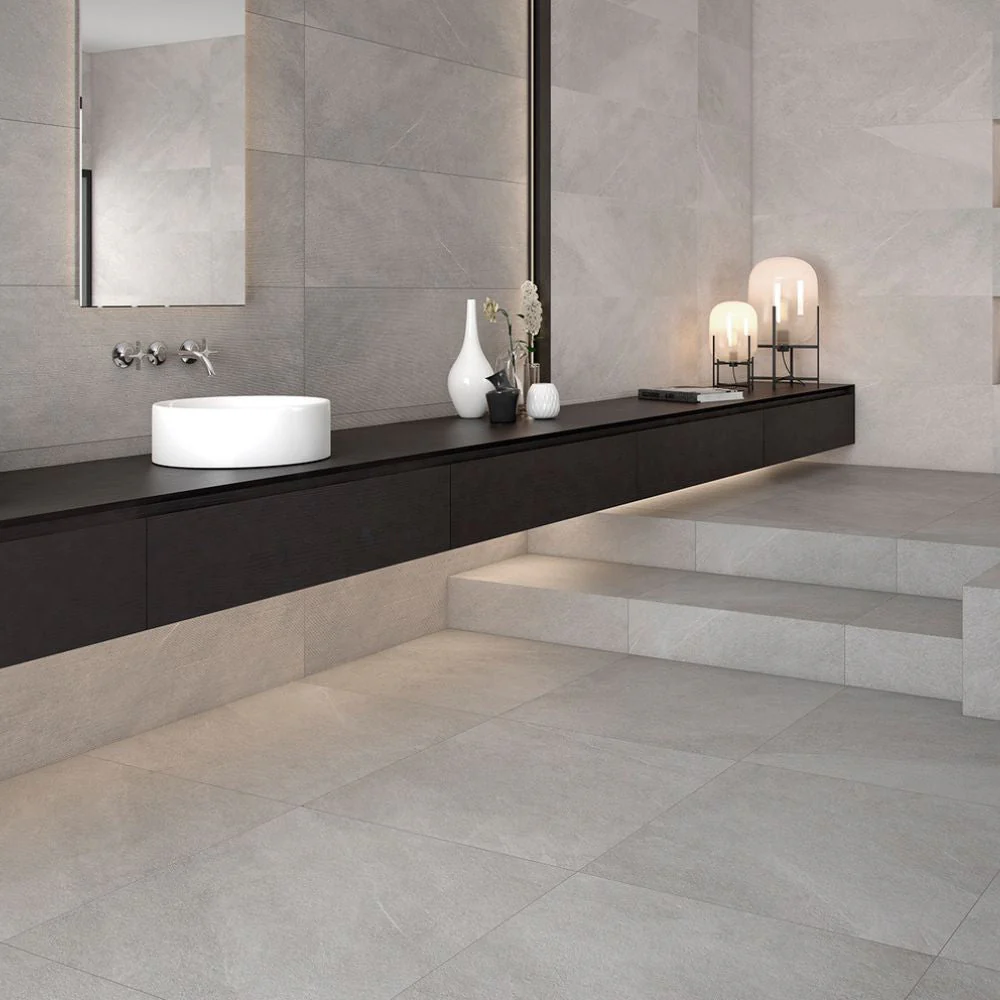
image credit: roccia
Matte tiles absorb light, reducing glare and creating a softer, more sophisticated look. They work well in areas with bright artificial lighting, as they prevent excessive reflections.
Textured Tiles: Depth and Shadows
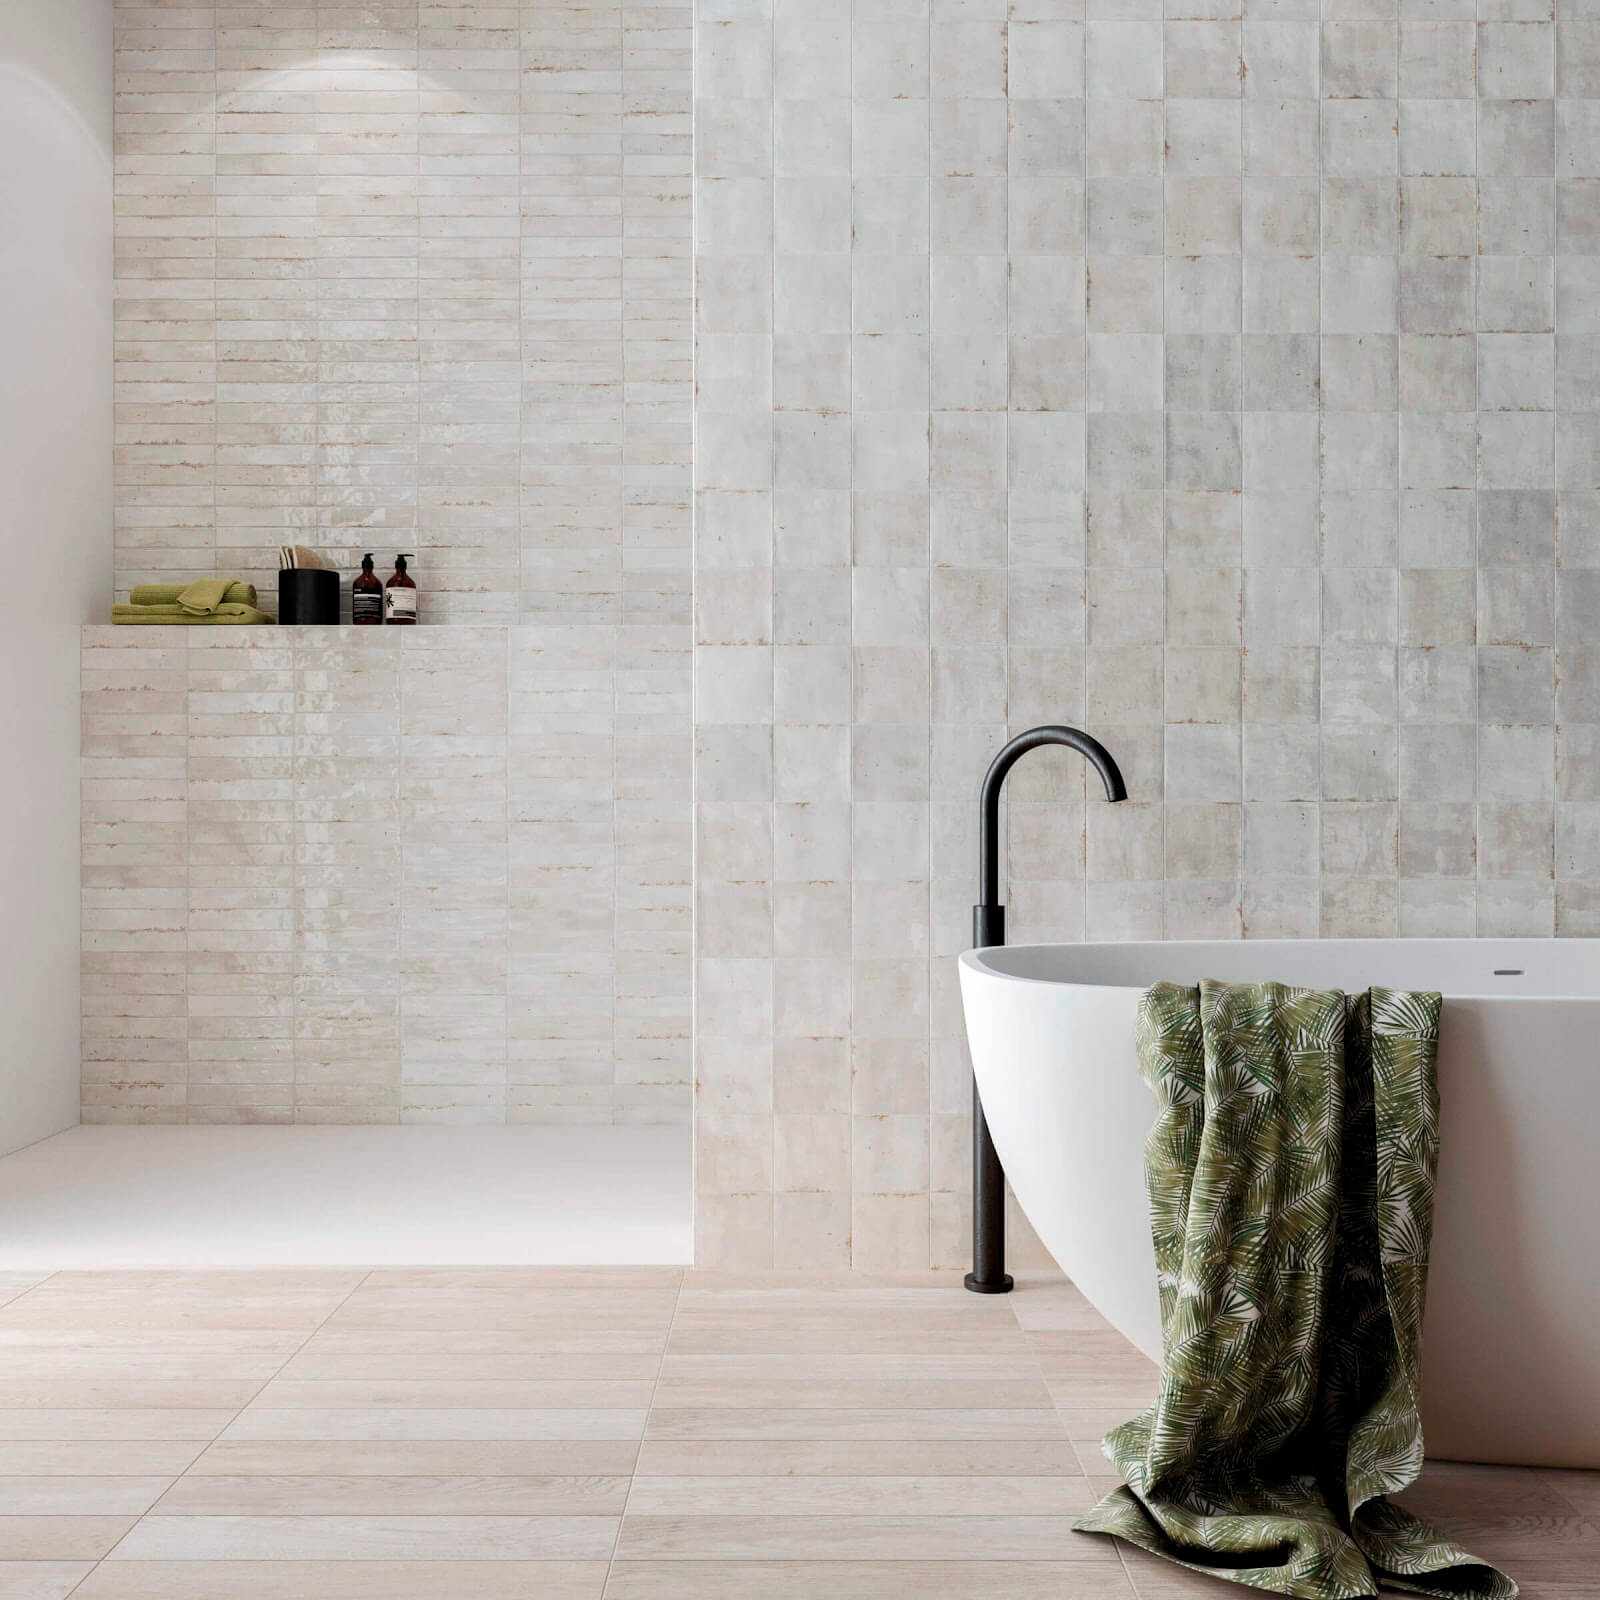
image credit: whytile.com
Lighting can emphasise the depth and patterns of textured tiles, creating dramatic shadows and highlights. This is particularly useful in feature walls or decorative areas.
Tips for Choosing the Right Tiles Based on Lighting
Lighting can dramatically change the way tiles look in a space, so it’s important to choose wisely. Here are some practical tips to help you select tiles that will look their best under different lighting conditions.
Test Samples in Different Lights
Before making a decision, view tile samples under natural light, artificial lighting and evening conditions to see how they change.
Consider the Room’s Function
image credit: homestolove.com
Bright lighting works well in kitchens and bathrooms, while softer lighting is better suited for living rooms and bedrooms.
Balance Reflection and Absorption

image credit: tilesnstone.com
If your space has strong lighting, matte tiles may help soften the effect, while glossy tiles can brighten up a dimly lit room.
Use Accent Lighting for Impact
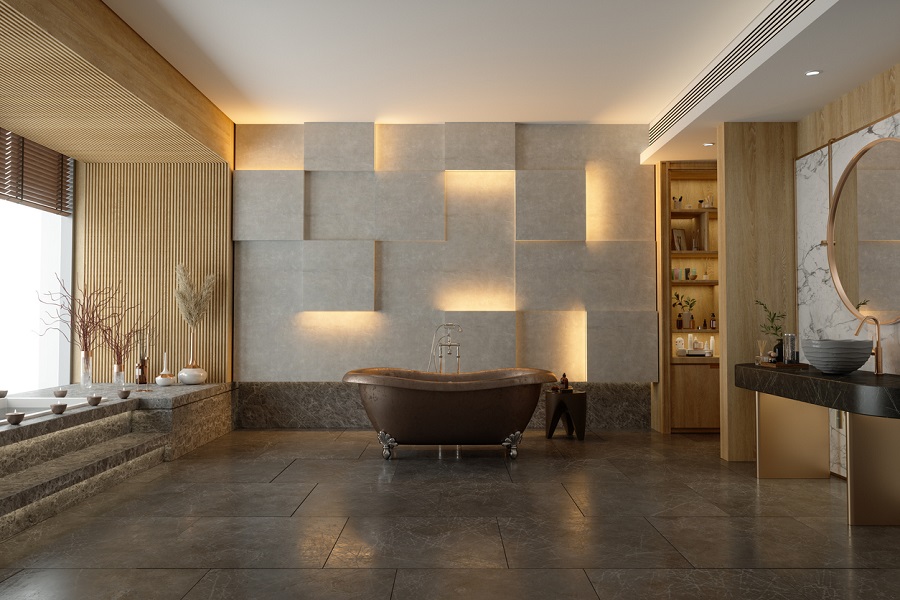
image credit: teammax.uk.com
Spotlights and LED strips can enhance tile textures and colours, especially in bathrooms and kitchens.
Lighting plays a huge role in how your tiles will look once installed. By considering both natural and artificial lighting, as well as tile finishes, you can create the perfect atmosphere in your home. Before making your final tile selection, test them under different lighting conditions to ensure they look just as good in your space as they do in the showroom.
Looking for tiles that will look stunning in any lighting? Visit Tiletoria to explore our wide range of tiles that shine in every setting!
blog, kitchen
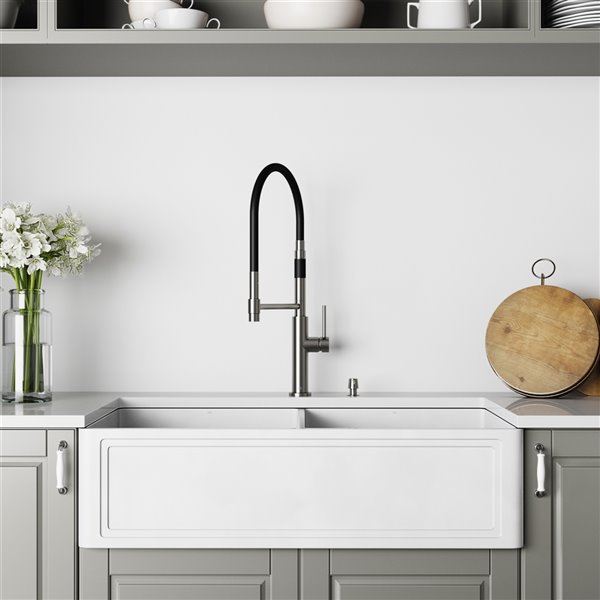
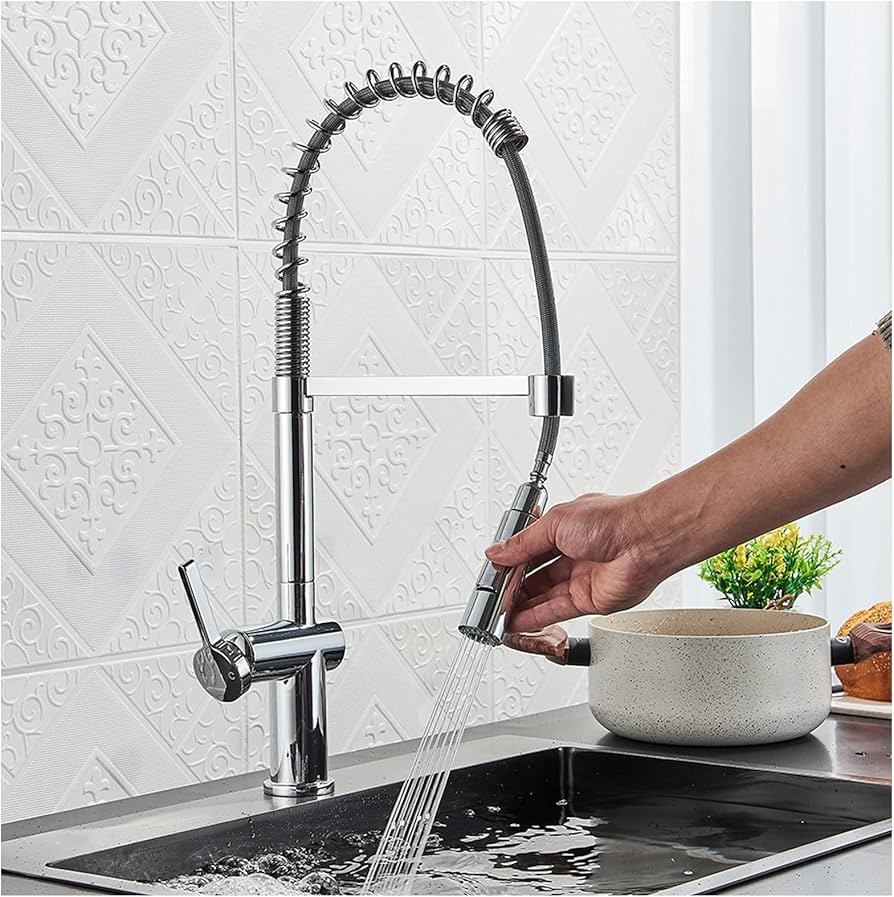
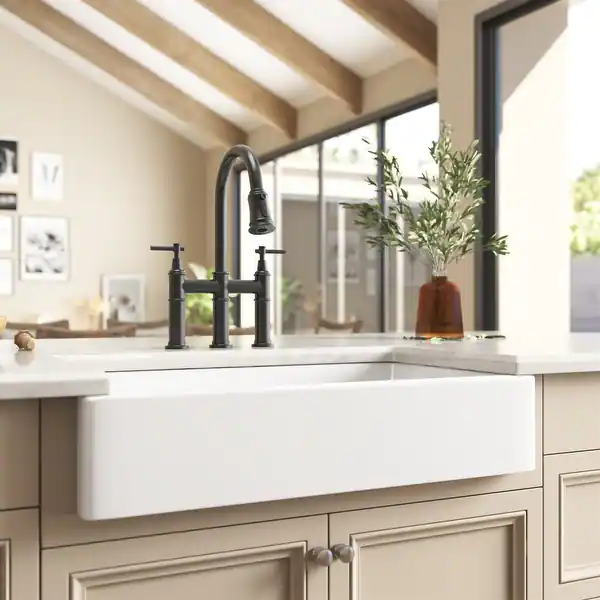
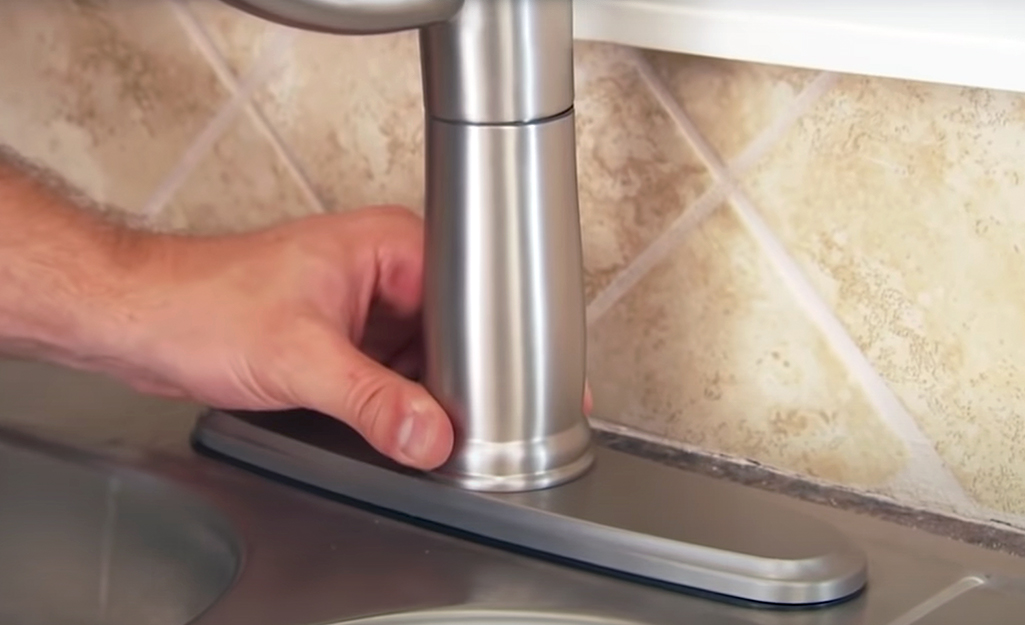
When choosing a new kitchen tap, you might come across two popular options: pull-out and pull-down taps. While they may seem similar, they have key differences that can impact your kitchen’s functionality and style. So, which one is the better choice for your home? Let’s break it down.
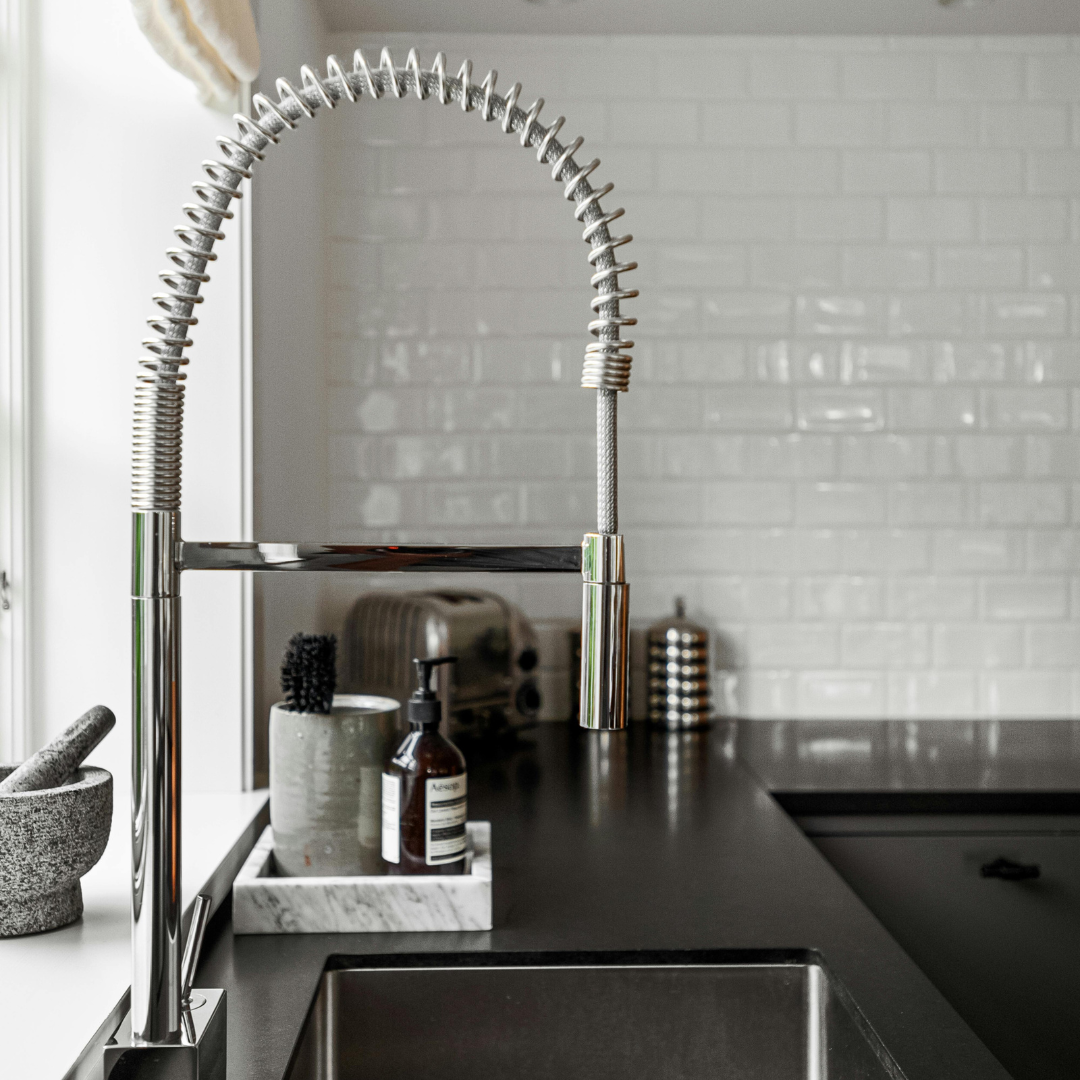
Table of Content:
What’s the Difference?
Benefits of Pull-Down Kitchen Taps
Potential Downsides of Pull-Down Kitchen Taps
Benefits of Pull-Out Kitchen Taps
Potential Downsides of Pull-Out Kitchen Taps
Which One Should You Choose?
Browse our range of Kitchen Taps
What’s the Difference?
Both pull-out and pull-down taps feature a spray head that extends from the spout, giving you greater flexibility in your kitchen. However, their designs and functions differ slightly.
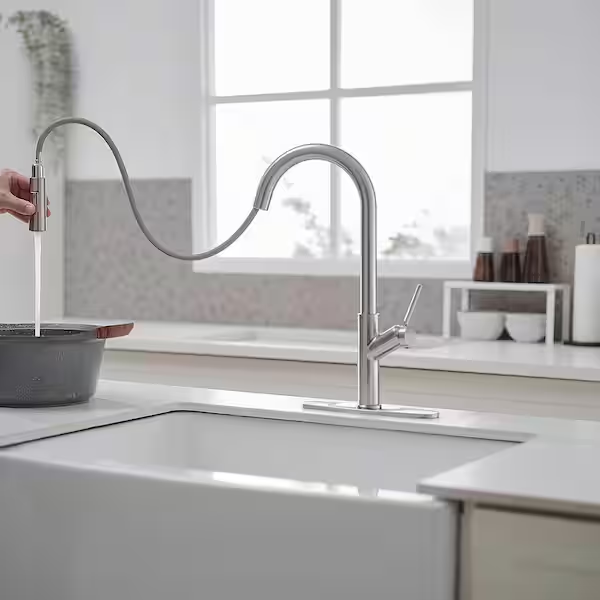
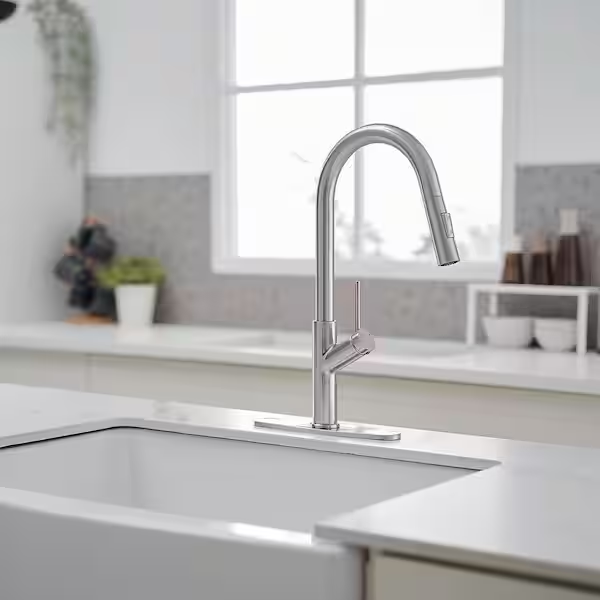
Pull-Down Taps
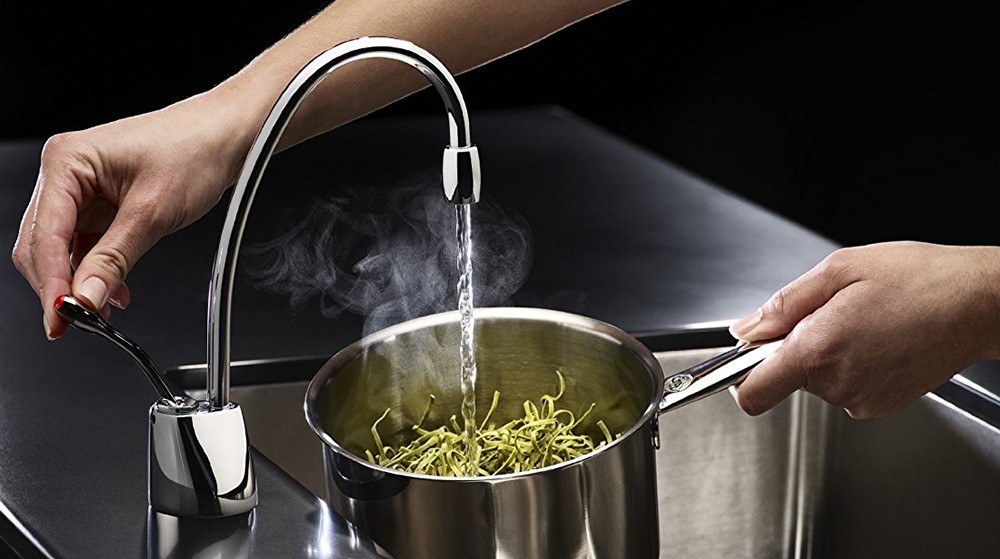
Pull-Down Taps feature a high-arching spout with a spray head that pulls downward into the sink.
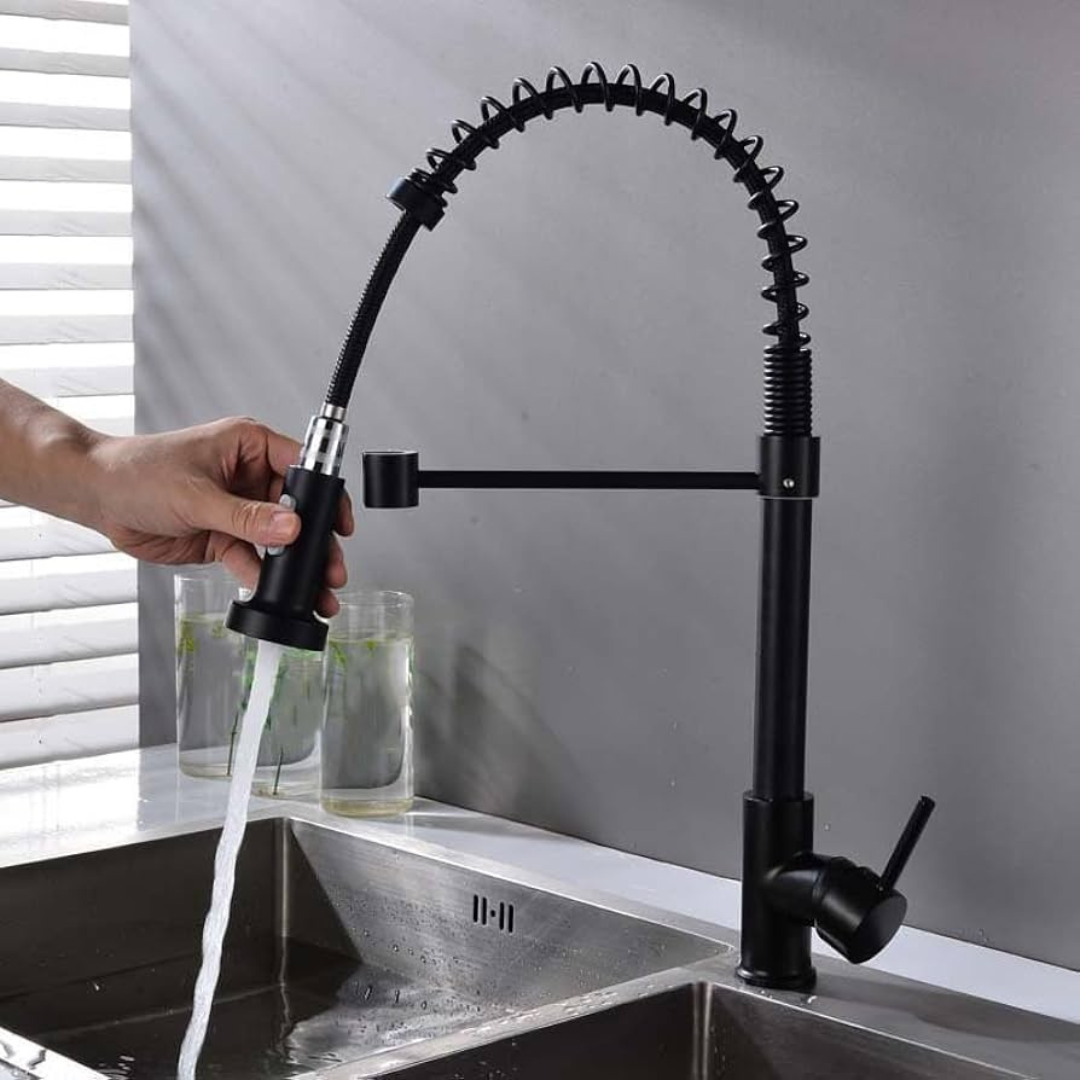
Pull-down taps have a spray head that remains docked in the tap body and extends downward into the sink when in use. This design provides excellent control and flexibility, making it especially useful for washing large dishes or deep pots.
Pull-down taps typically feature a single or dual handle to adjust water temperature and flow. The extended reach of the spray head, combined with a 360-degree swivel function, allows for precise rinsing and effortless filling of containers.
With a pull-down tap, you can easily fill tall jugs, clean oversized cookware and thoroughly rinse your sink. Their sleek, modern design also adds a stylish touch to any kitchen.
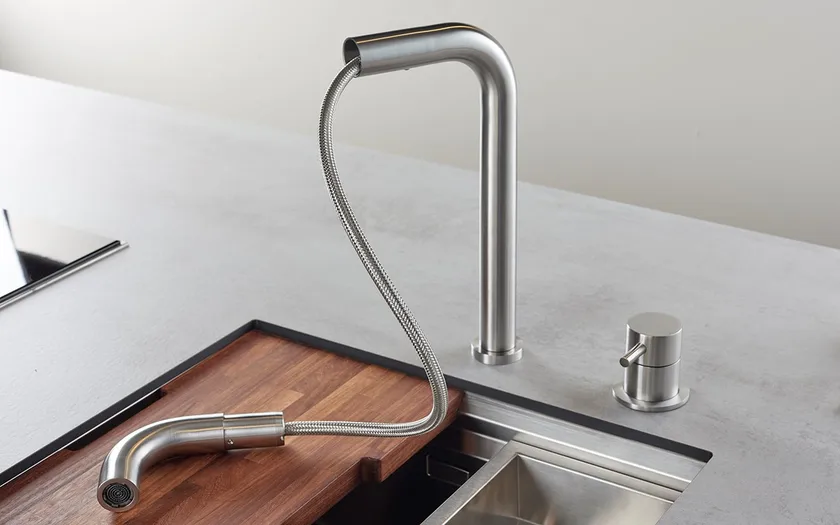
Pull-Out Taps
Pull-Out Taps have a shorter spout with a spray head that extends outward towards you.
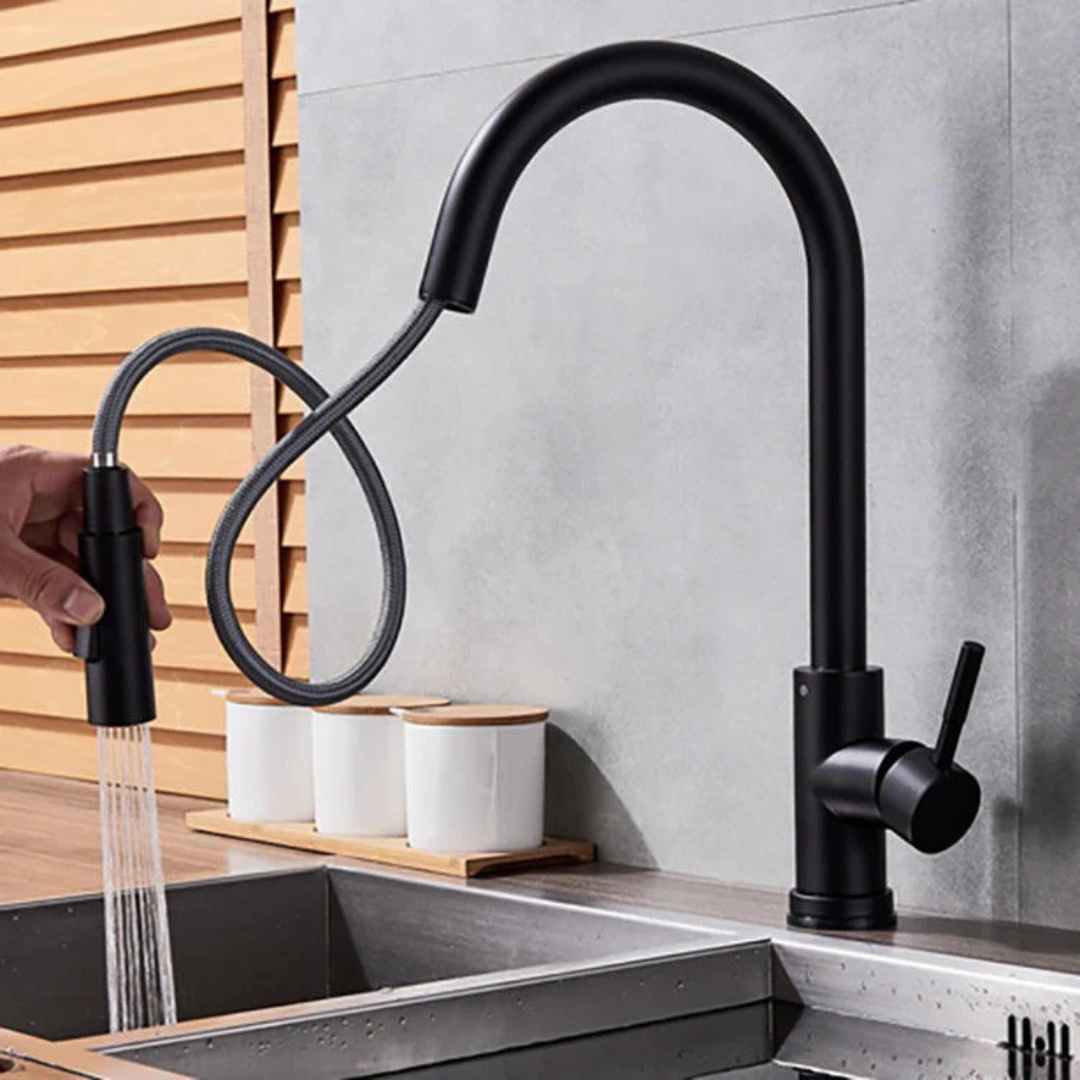
Pull-out taps feature a detachable spray head connected to a flexible hose, allowing for extended reach and enhanced maneuverability. These taps typically come with a single handle to control both water temperature and flow.
A major benefit of pull-out taps is their adaptability. The extendable hose makes it easy to clean every part of the sink, rinse dishes, wash produce, and fill large pots effortlessly.
Many pull-out taps also include multiple spray settings, such as a gentle aerated stream or a more powerful spray, making them suitable for various kitchen tasks. Their compact design makes them a great choice for smaller kitchens or sinks where space is limited, ensuring functionality without taking up unnecessary room.
Benefits of Pull-Down Kitchen Taps
Perfect for Deep Sinks
If you have a large, deep sink, a pull-down tap makes it easy to rinse dishes, fill pots and clean every corner.
Ergonomic Design
With a high-arched spout, pull-down taps allow for a more natural hand movement, reducing strain when using the spray function.
Modern & Stylish
Pull-down taps often have a sleek, contemporary look that enhances modern kitchens.
Installation Requirements
Pull down faucets require a single-hole installation, simplifying the process.
Potential Downsides of Pull-Down Kitchen Taps
Requires More Overhead Space
Pull-down kitchen taps typically have a high-arched spout, which means they need adequate clearance above the sink. If your kitchen has low-hanging cabinets or shelving, a pull-down tap might not fit comfortably or could feel cramped. In smaller kitchens, this can also create a cluttered look, making the space feel more crowded. Before choosing a pull-down tap, it’s important to measure the distance between your sink and any overhead obstacles to ensure a proper fit.
Not Ideal for Smaller Sinks
While pull-down taps offer excellent reach and flexibility, they are best suited for larger, deeper sinks. If you have a compact or shallow sink, using a pull-down tap could lead to excessive splashing, as the spray head is designed for deeper water flow. The high-arched design may also feel oversized in a small sink area, making it harder to control water direction. For smaller kitchens, a pull-out tap might be a more practical option, as it offers similar functionality without taking up as much space.
Benefits of Pull-Out Kitchen Taps
Great for Small Kitchens
If you have a compact kitchen or a shallow sink, a pull-out tap is a space-saving solution that still offers flexibility.
More Reach & Flexibility
Since the spray head pulls outward, it’s easier to direct water where you need it — perfect for filling pots on the counter or watering nearby plants.
Less Splashing
The lower profile helps reduce splashing, making it a great choice for busy kitchens.
Potential Downsides of Pull-Out Kitchen Taps
Less Sleek
Pull-out kitchen taps prioritise functionality and practicality, but they often lack the high-arching, modern look of pull-down taps. Their compact design can appear more utilitarian, which may not suit homeowners looking for a sleek, contemporary aesthetic. While some pull-out taps come in stylish finishes, their lower profile may not make as much of a statement in a modern kitchen. If visual appeal is a top priority, a pull-down tap might better complement a sophisticated kitchen design.
Shorter Spout
Since pull-out taps have a lower spout, they may not be as convenient for deep sinks. If you regularly wash large pots, tall pitchers, or bulky cookware, the shorter reach might require more effort to manoeuvre items under the tap. Unlike pull-down taps, which extend downward into the sink, a pull-out tap’s spray head extends outward, which may not provide the same level of control when directing water flow. If you have a deep sink and frequently handle oversized dishes, a pull-down tap may offer better usability.
Installation Requirements
Pull-out faucets often require an additional hole in the sink or countertop for the sprayer.
Which One Should You Choose?
The best kitchen tap for you depends on your kitchen layout, daily tasks, and design preference.
Opt for a Pull-Down Tap if:
- You have a large sink that can accommodate a tall spout.
- You prefer a modern, high-arched design.
- You want an ergonomic option for regular rinsing and washing.
Opt for a Pull-Out Tap if:
- You have limited space or a small sink.
- You need a versatile option that can be directed outside the sink.
- You want to reduce splashing in your kitchen.
Both styles offer convenience, functionality, and a sleek finish to your kitchen. It all comes down to how you use your tap daily and which design works best for your space.
Looking for the perfect kitchen tap? Browse our wide range of high-quality pull-out and pull-down taps at Tiletoria!
Browse our range of Kitchen Taps
blog, floors, walls
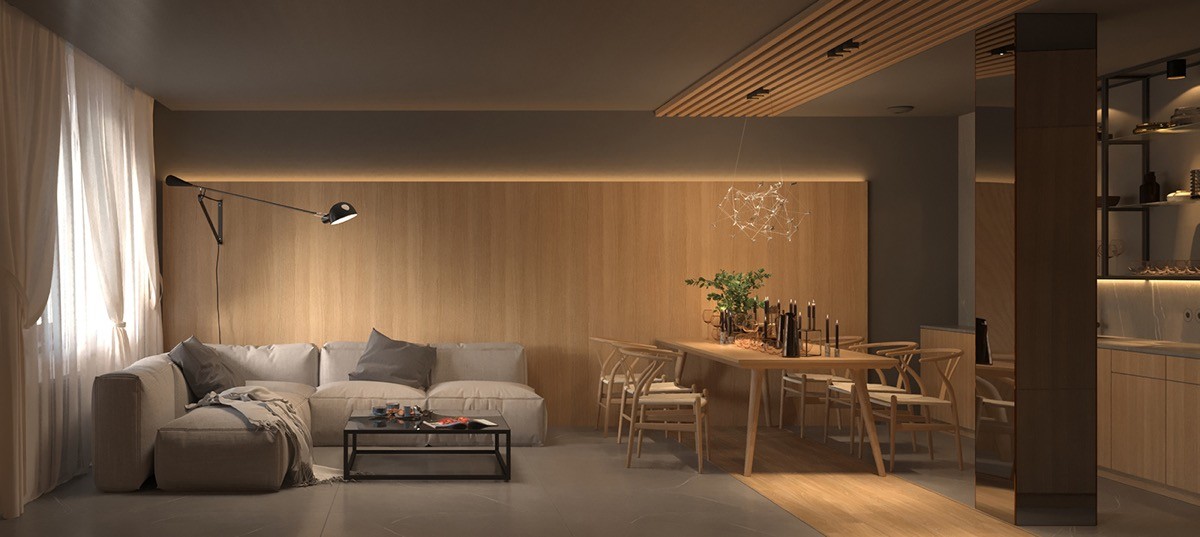
When you think of tiles, your mind probably jumps straight to kitchens and bathrooms. But did you know that tiles can add style, durability and practicality to almost any room in your home?
Whether you’re looking to make a statement or add a touch of functionality, tiles are a versatile choice that go far beyond splashbacks and shower walls. Here are some unexpected places to use tiles in your home that will elevate your space while ensuring long-lasting beauty.
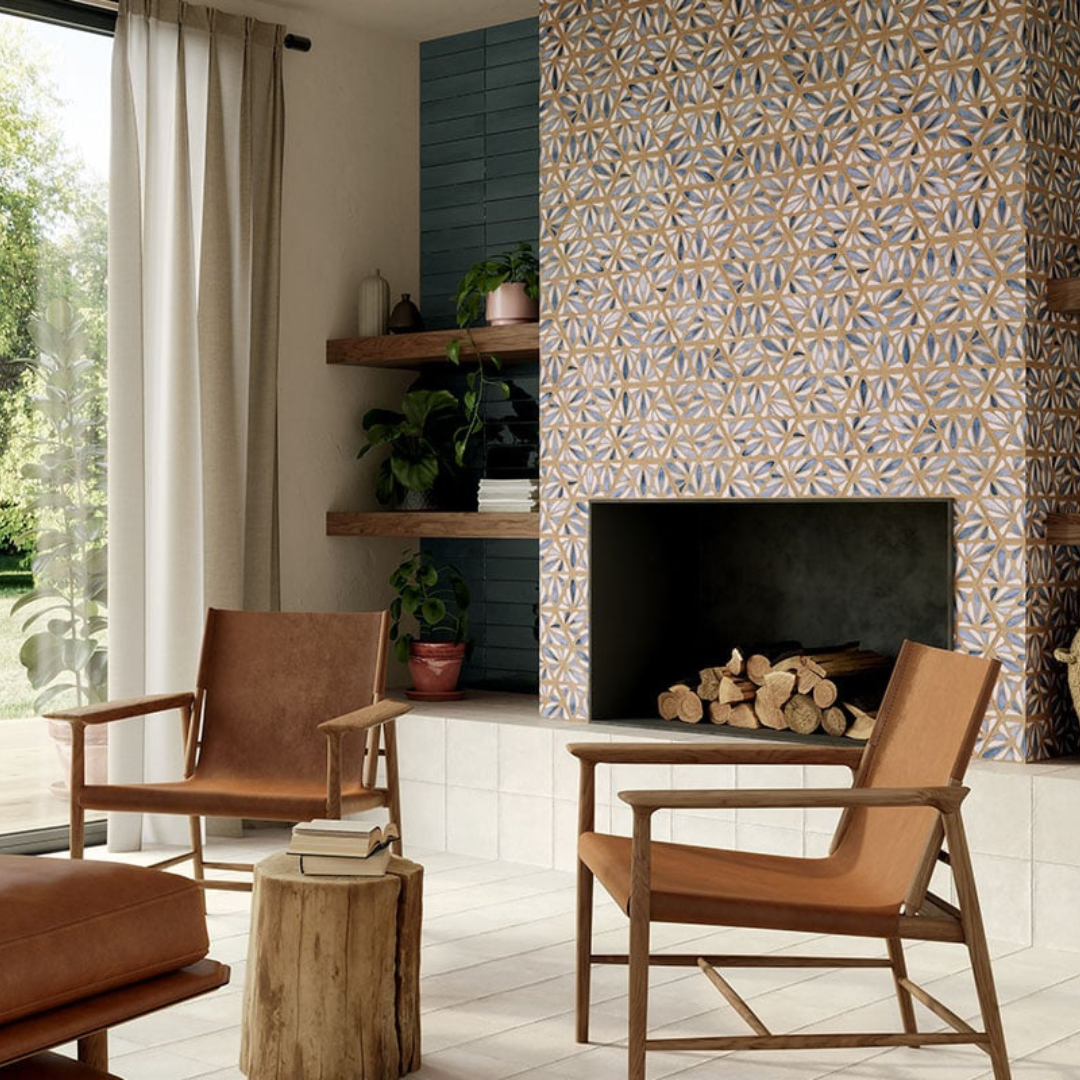
Table of Content:
Living Room Feature Walls
Bedroom Accent Walls & Headboards
Hallways & Entryways
Staircases with Style
Outdoor Entertainment Areas
Laundry Rooms That Shine
Statement Ceilings
Home Offices & Study Nooks
Built-In Shelving & Nooks
Fireplace Surrounds & Hearths
Living Room Feature Walls
Why settle for plain painted walls when you can create a stunning feature with tiles?
Textured tiles, stone cladding or even large-format porcelain tiles can add depth and interest to your living room. A tiled feature wall behind your TV or fireplace creates a striking focal point and requires minimal maintenance compared to wallpaper or painted surfaces.
Bedroom Accent Walls & Headboards
Tiles in the bedroom? Absolutely! Use decorative tiles or geometric mosaic patterns as a headboard alternative. This not only adds a unique design element but also keeps your headboard area easy to clean — perfect for allergy sufferers who want to avoid dust-collecting fabric options. Not a fan of tiles for the bedroom? Consider using vinyl or laminate flooring for a warm and stylish alternative.
Hallways & Entryways
Your hallway or entryway sets the tone for your home, so why not make a lasting impression with tiles? Patterned floor tiles or even wall cladding can make a dramatic entrance while being far more durable than traditional flooring materials. Porcelain or ceramic tiles are ideal for high-traffic areas, resisting wear and tear better than carpet or wood.
Staircases with Style
Tiled stair risers are a growing interior design trend. You can add intricate Moroccan patterns, sleek modern finishes or even classic subway tiles to bring personality to your staircase. Plus, tiles are easy to wipe clean, making them a practical choice for busy households.
Outdoor Entertainment Areas
If you love hosting guests, extend your indoor aesthetic outdoors with tiles. Porcelain or ceramic slip-resistant tiles are perfect for patios, outdoor kitchens and braai areas. They’re weather-resistant, easy to maintain and create a seamless indoor-outdoor flow.
Laundry Rooms That Shine
Laundry rooms often get overlooked in home design, but they deserve just as much attention as any other space. Moisture-resistant tiles on the floor and walls will help protect against spills and humidity while giving the space a polished, clean look. Opt for light-coloured or patterned tiles to brighten up this often small and functional space.
Statement Ceilings
Want to take your home’s design to the next level? Tiling a ceiling might seem unconventional, but it’s a game-changer for spaces like dining rooms, sunrooms or even bathrooms with high humidity. Metallic or textured tiles can create a luxe, eye-catching feature that elevates your space instantly.
Home Offices & Study Nooks
Tiles aren’t just for wet areas — they work beautifully in home offices too! A tiled splashback behind your desk or an accent wall with stylish geometric tiles can enhance focus and creativity. Plus, tiles are easy to clean, making them a great choice for workspaces.
Built-In Shelving & Nooks
Whether it’s a bookshelf, recessed shelving in the living room or a cosy reading nook, adding tiles to the back of built-in shelves creates depth and texture. Glass, mosaic or even decor tiles can make these overlooked areas pop.
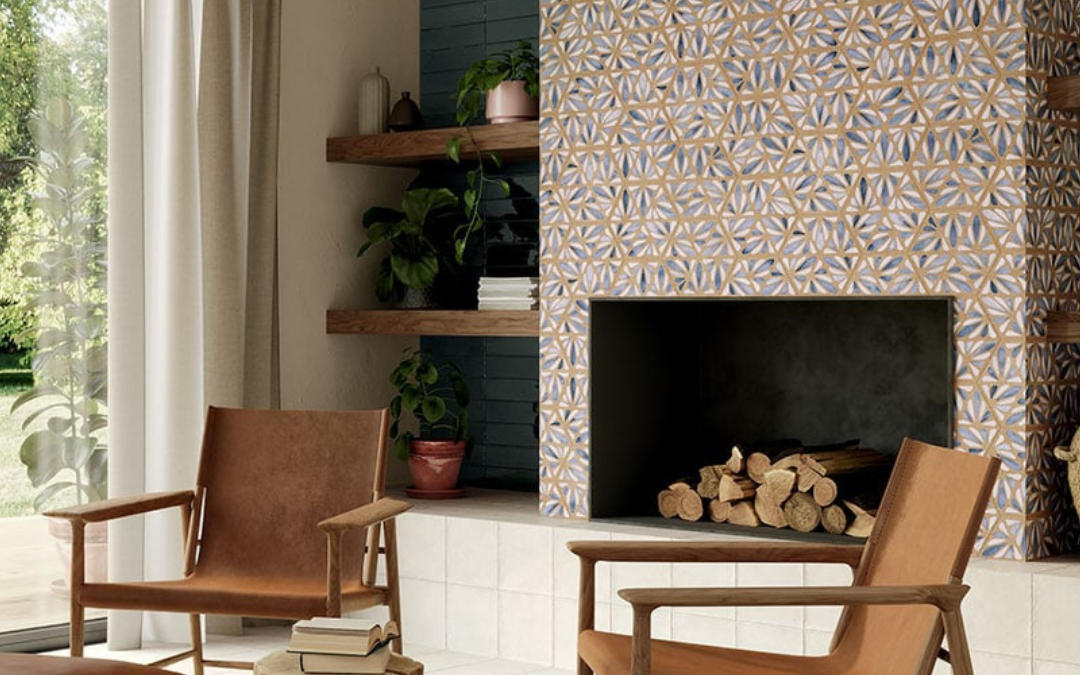
Fireplace Surrounds & Hearths
Heat-resistant and low-maintenance tiles are a perfect choice for fireplace surrounds. Whether you go for a modern, minimalist style with large-format tiles or a traditional look with intricate ceramic designs, tiling around your fireplace enhances both its beauty and durability.
Tiles aren’t just for kitchens and bathrooms — they’re a design powerhouse that can transform any room in your home. Whether you’re looking to make a bold statement or add a touch of elegance, incorporating tiles in unexpected places can elevate your home’s style and create a space that’s truly unique!
Looking for the perfect tiles to bring your vision to life? Explore our wide range of high-quality tiles for every space in your home!