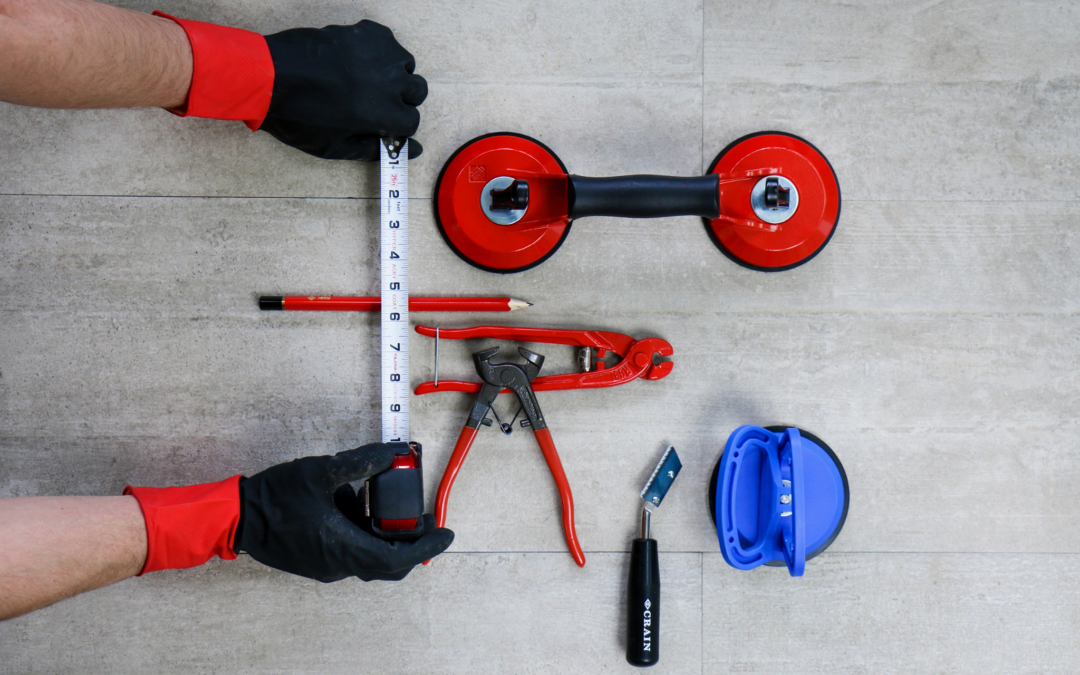
blog, commercial blog, how to articles
Embarking on a tile installation project can be both exciting and daunting. Whether you’re revamping your kitchen, bathroom, or any other space, the success of your project hinges on the tools and accessories you use. Choosing the right equipment can make the difference between a flawless installation and a frustrating ordeal. In this comprehensive guide, we’ll explore the crucial tools and accessories that are indispensable for a successful tile installation.

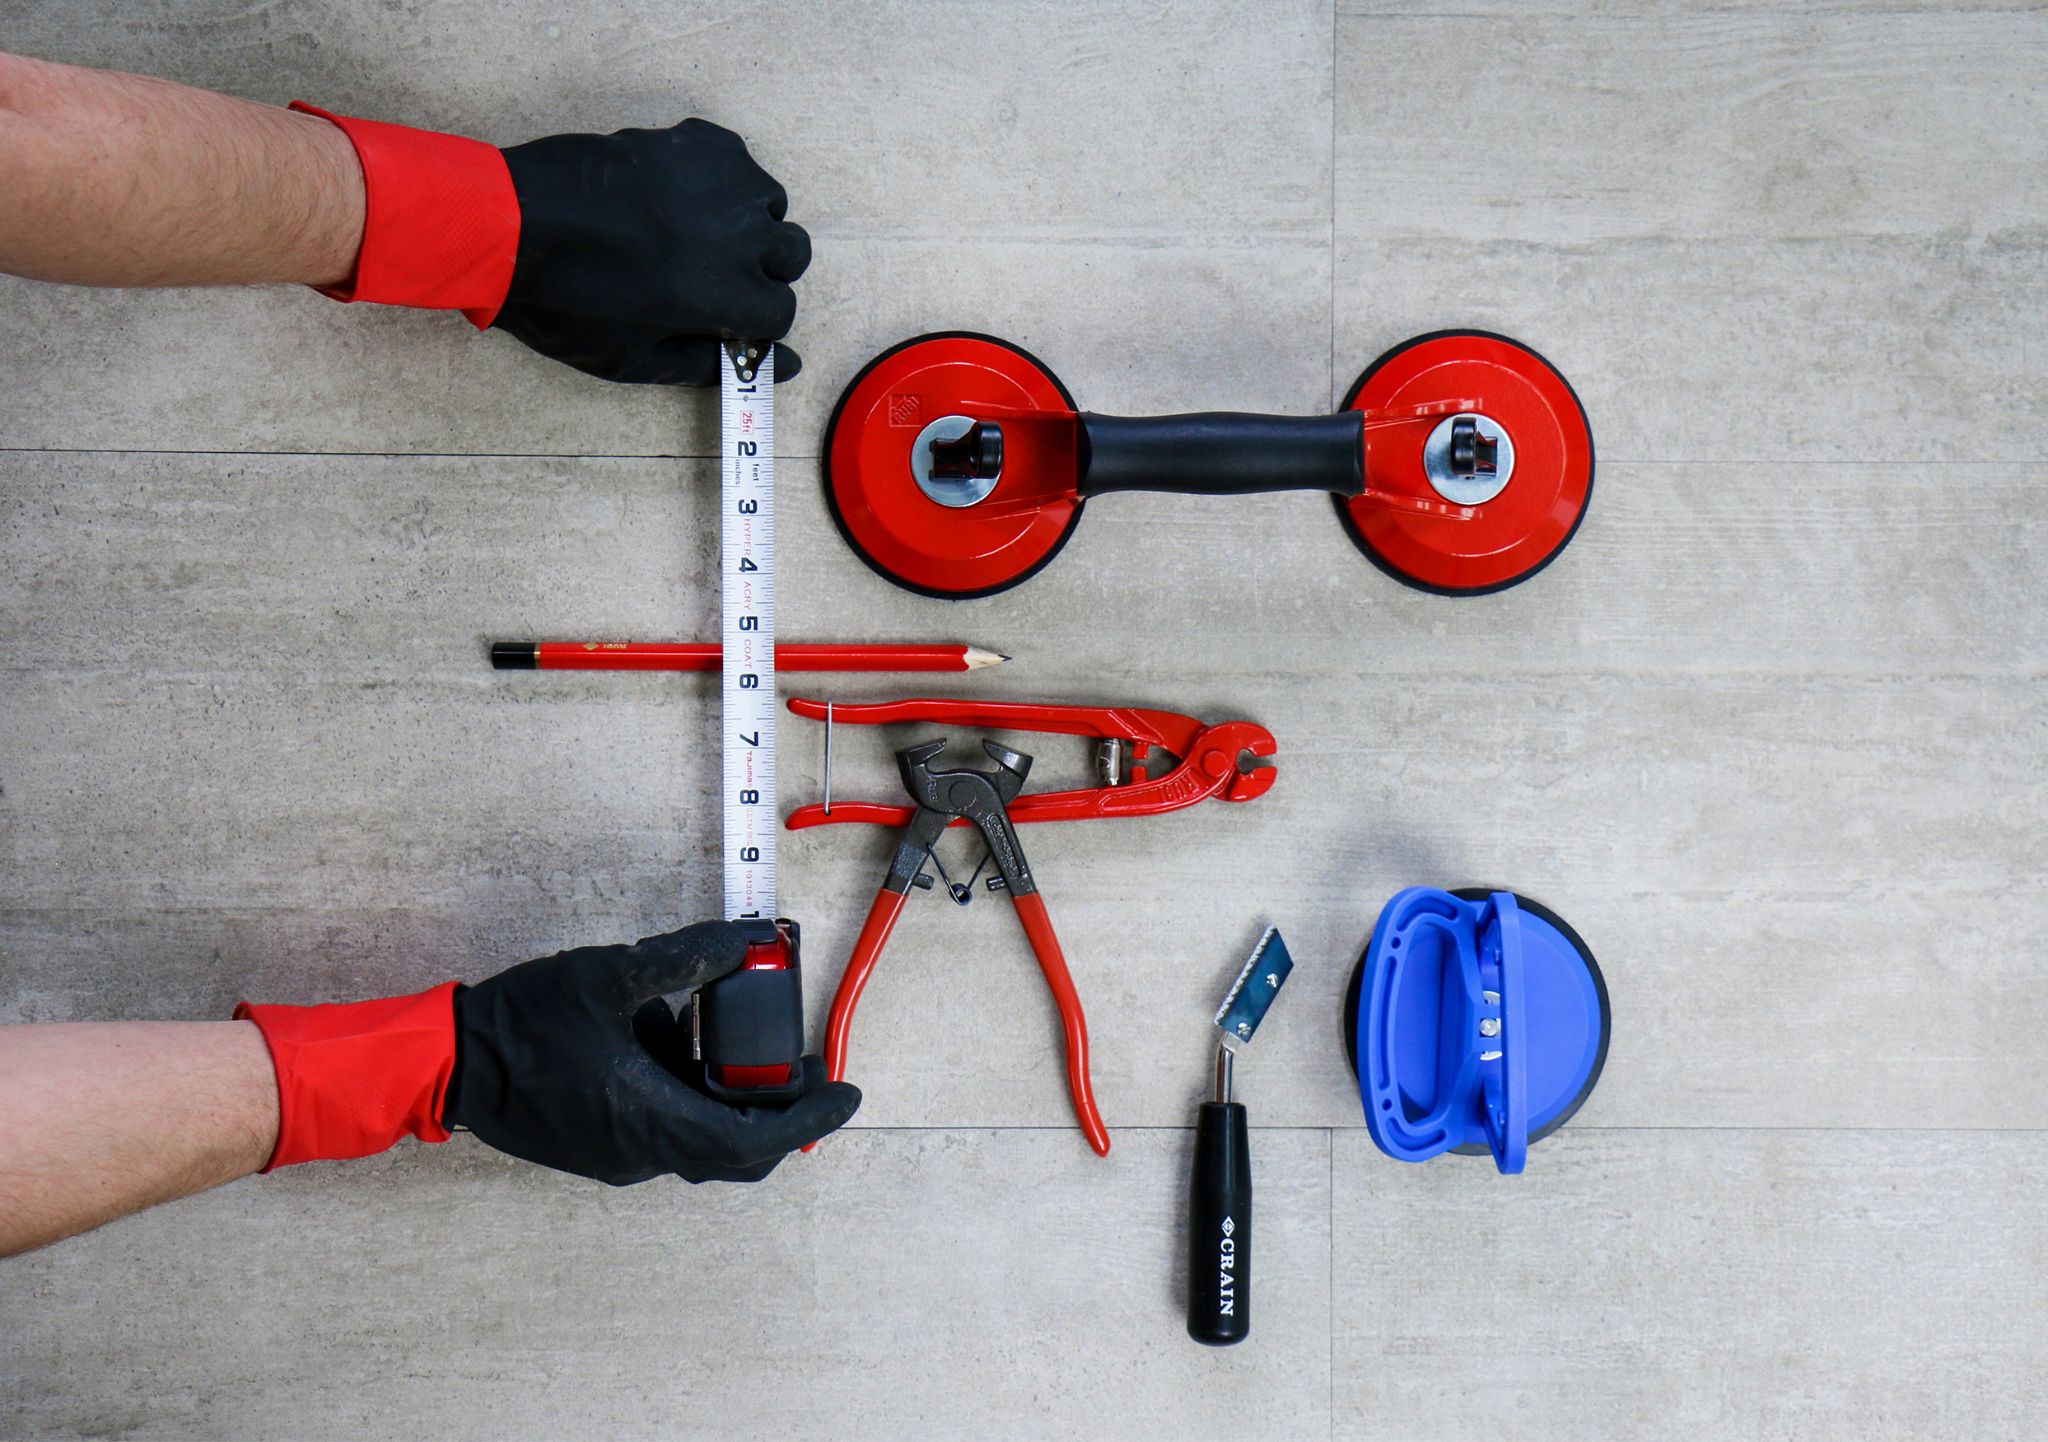
- Measuring and Layout Tools:
Accurate measurements and precise layout are the foundation of any successful tile installation. Invest in quality measuring tools, such as a tape measure, straight edge, and a framing square. A laser level is an excellent addition to ensure a level and straight installation.
- Tile Cutter:
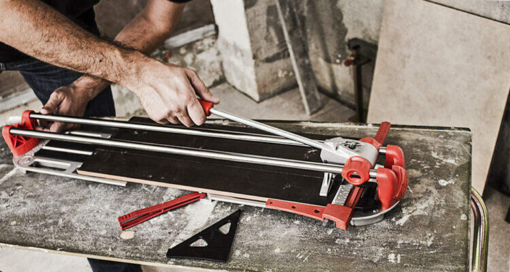
A tile cutter is a must-have tool for any tile installation project. There are various types of tile cutters available, including manual snap cutters, electric wet saws, and handheld tile cutters. Choose the one that best suits your needs and the type of tiles you’re working with.
- Tile Nippers:
Tile nippers are essential for making small, detailed cuts or shaping tiles to fit around obstacles. They are especially handy when dealing with ceramic or porcelain tiles that may require slight adjustments for a perfect fit.
- Tile Spacers:
Achieving consistent and even spacing between tiles is crucial for a professional-looking finish. Tile spacers come in various sizes and are used to maintain uniform gaps, ensuring that the tiles are properly aligned during installation.
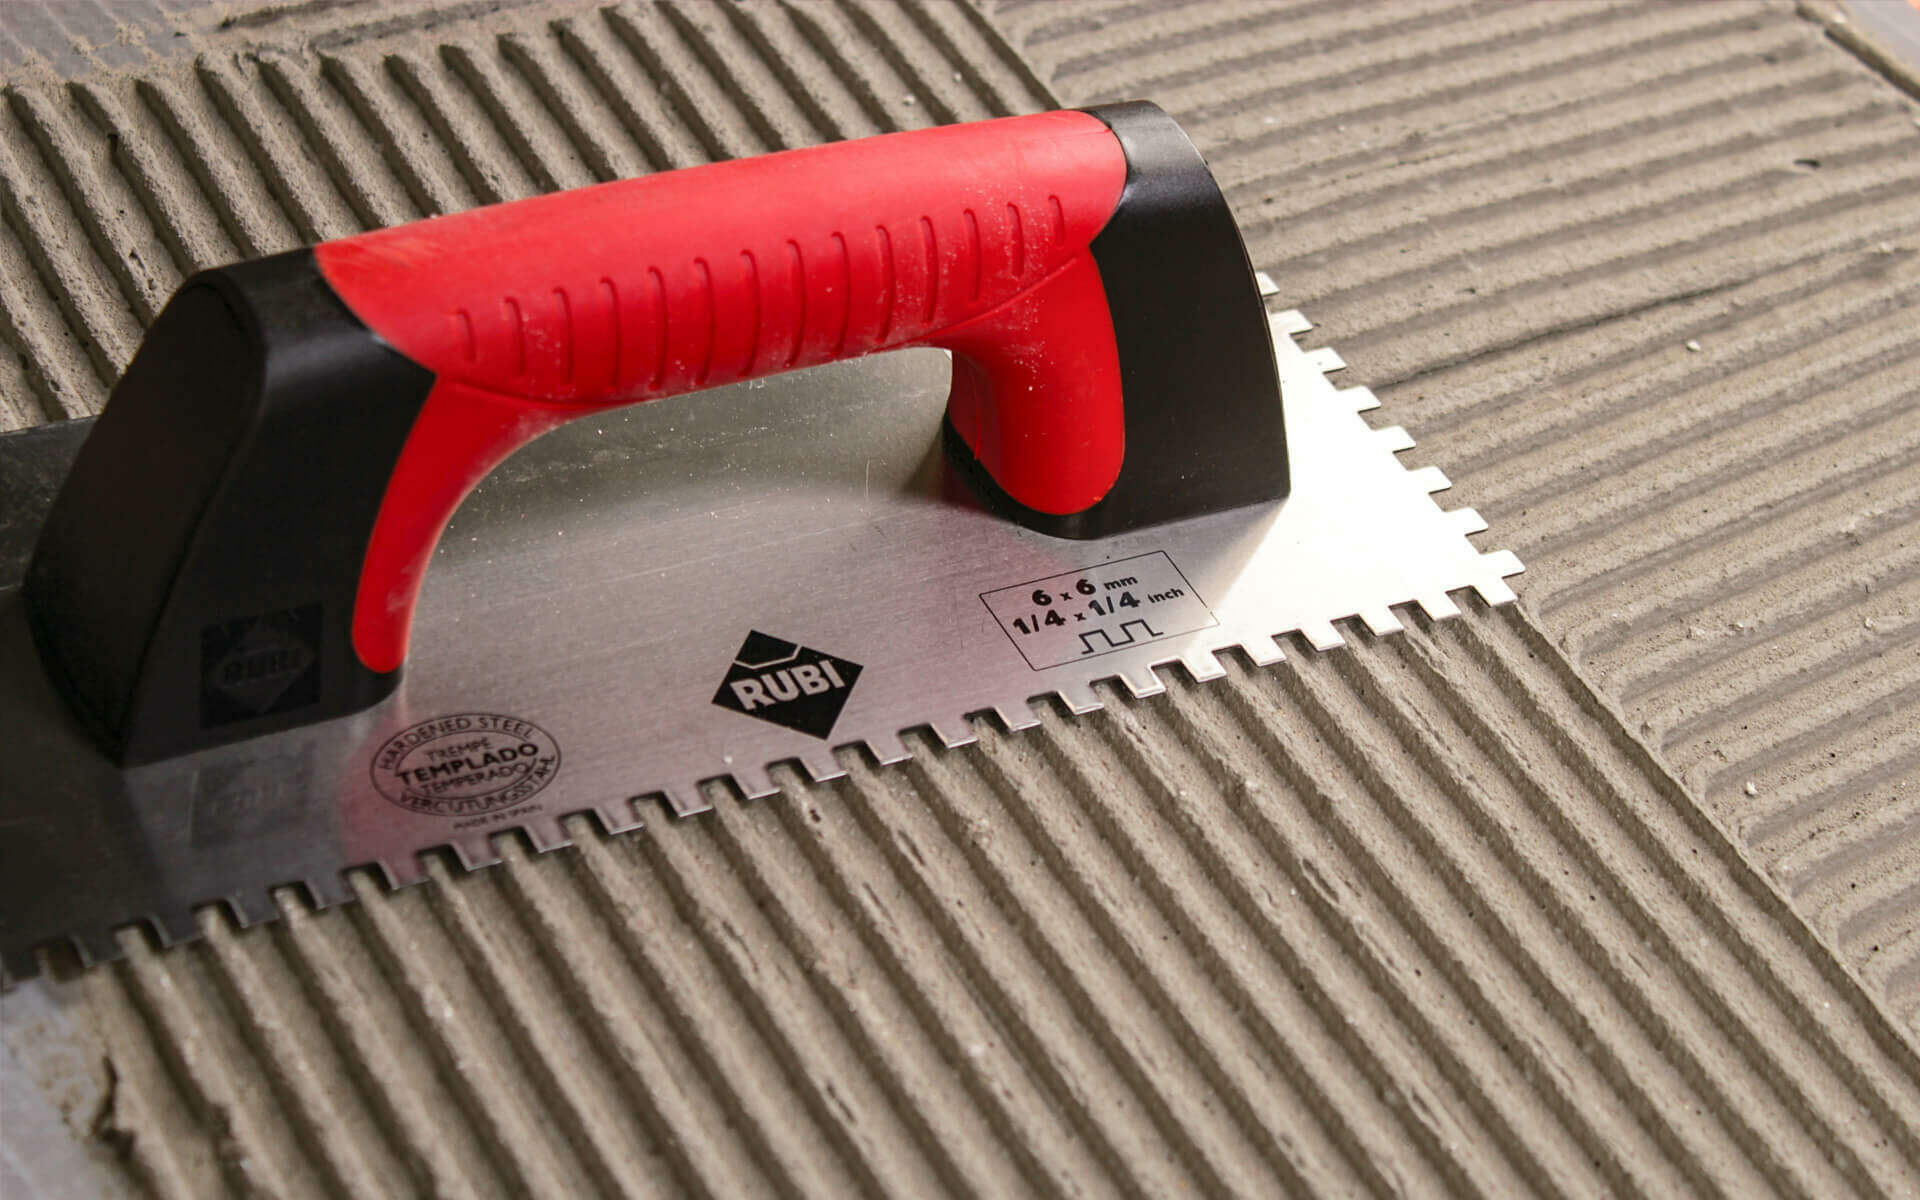
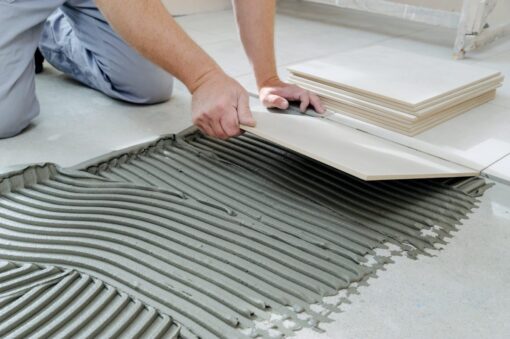
- Trowels and Notched Trowels:

Trowels are used to spread adhesive or mortar evenly on the substrate before laying the tiles. Notched trowels have ridges that help create uniform grooves in the adhesive, promoting better adhesion and reducing the risk of air pockets.
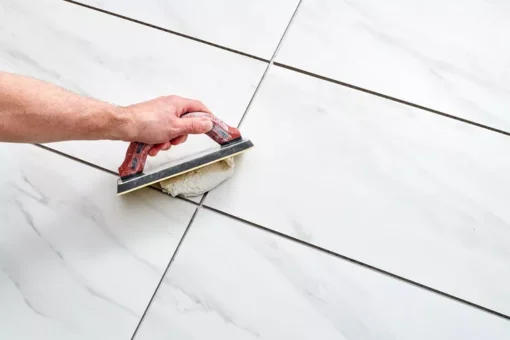
- Grout Float:
Once the tiles are in place, a grout float is used to apply and press grout into the spaces between tiles. Choose a rubber float for standard applications or a harder plastic float for epoxy grouts.
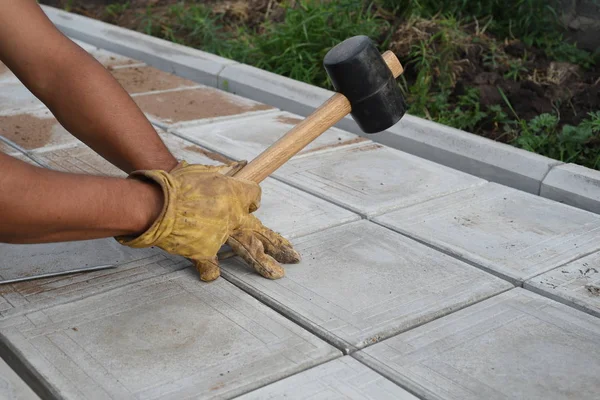
- Rubber Mallet:

A rubber mallet is essential for gently tapping tiles into place without damaging them. It’s particularly useful when adjusting tiles that may be slightly uneven or need to be leveled with neighboring tiles.
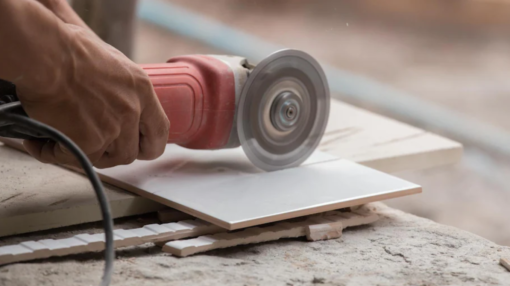
- Wet Saw:
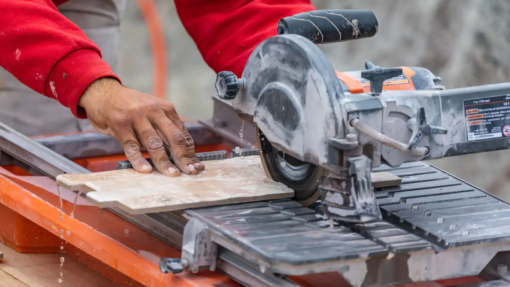
For cutting through hard materials like natural stone or porcelain tiles, a wet saw is indispensable. The continuous flow of water helps keep the blade cool and minimizes dust, ensuring clean and precise cuts.
- Knee Pads:
Tile installation often involves spending a significant amount of time on your knees. Invest in quality knee pads to provide comfort and protection, reducing strain on your joints during the installation process.
- Safety Gear:
Protect yourself with the appropriate safety gear, including safety glasses and gloves. Tile cutting and installation can generate dust and debris, and protecting your eyes and hands is essential for a safe working environment.
- Mixing Drill and Paddle:
For large tile installations, using a mixing drill with the appropriate paddle attachment is essential for efficiently mixing mortar or adhesive. This ensures a consistent and lump-free mixture, promoting a secure bond between the tiles and the substrate.
- Sponges and Buckets:
Keep a bucket of clean water and a sponge handy for wiping off excess grout and adhesive during and after the installation. A clean sponge helps achieve a professional finish by preventing grout haze and residue on the tiles.
- Sealer and Applicator:
Depending on the type of tile you’re using, applying a sealer may be necessary to protect against stains and moisture. Invest in a high-quality sealer and the appropriate applicator to ensure thorough and even coverage.
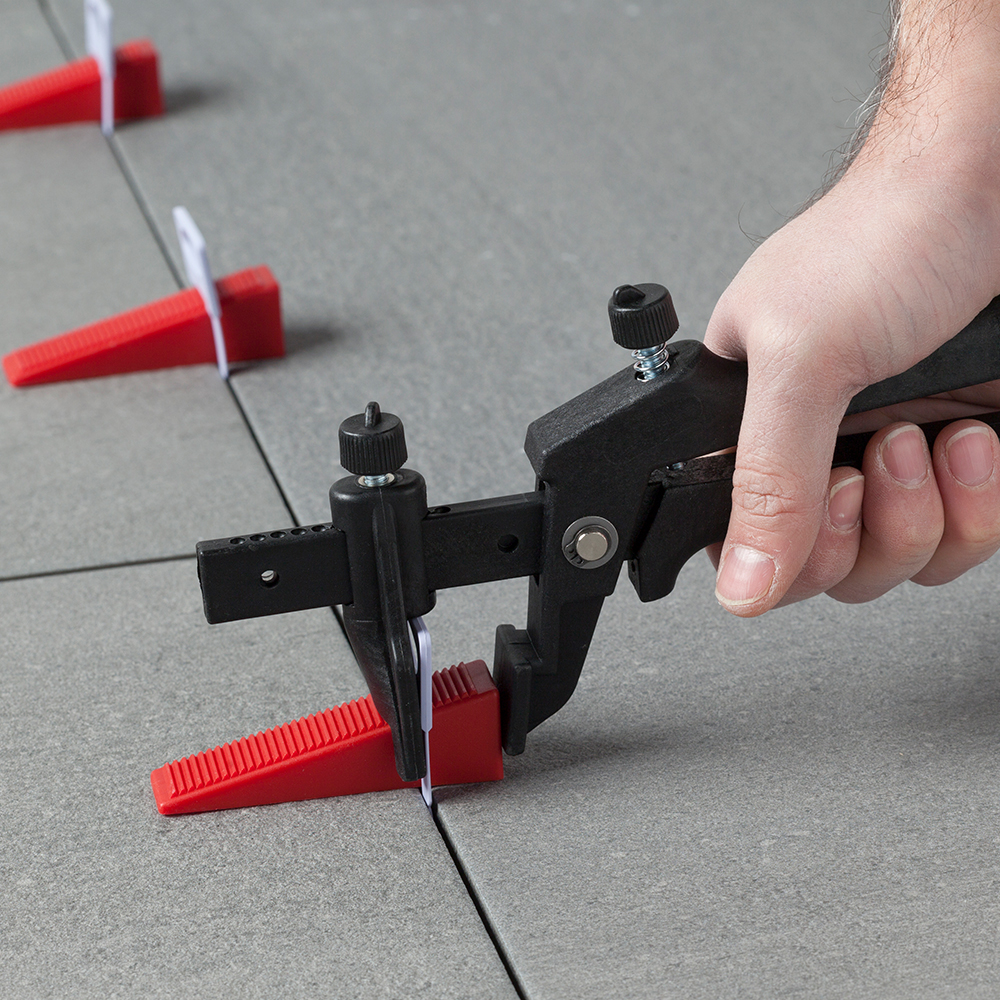
- Tile Leveling System:

To achieve a perfectly flat and level surface, consider using a tile leveling system. These systems use clips and wedges to ensure that tiles are flush with each other, preventing lippage and creating a seamless finish.
- Caulk and Caulk Gun:
Finish the edges of your tile installation with a high-quality caulk that matches the grout colour. A caulk gun makes the application process clean and precise, providing a professional look while also sealing gaps and preventing water intrusion.
A successful tile installation requires more than just the tiles themselves. The right tools and accessories play a crucial role in achieving a professional and long-lasting result. By investing in high-quality equipment and taking the time to plan and measure accurately, you’ll set the stage for a smooth and successful tile installation project. Whether you’re a seasoned DIY enthusiast or a professional contractor, having the essential tools at your disposal will make the entire process more efficient and enjoyable.

blog, commercial blog, how to articles, walls
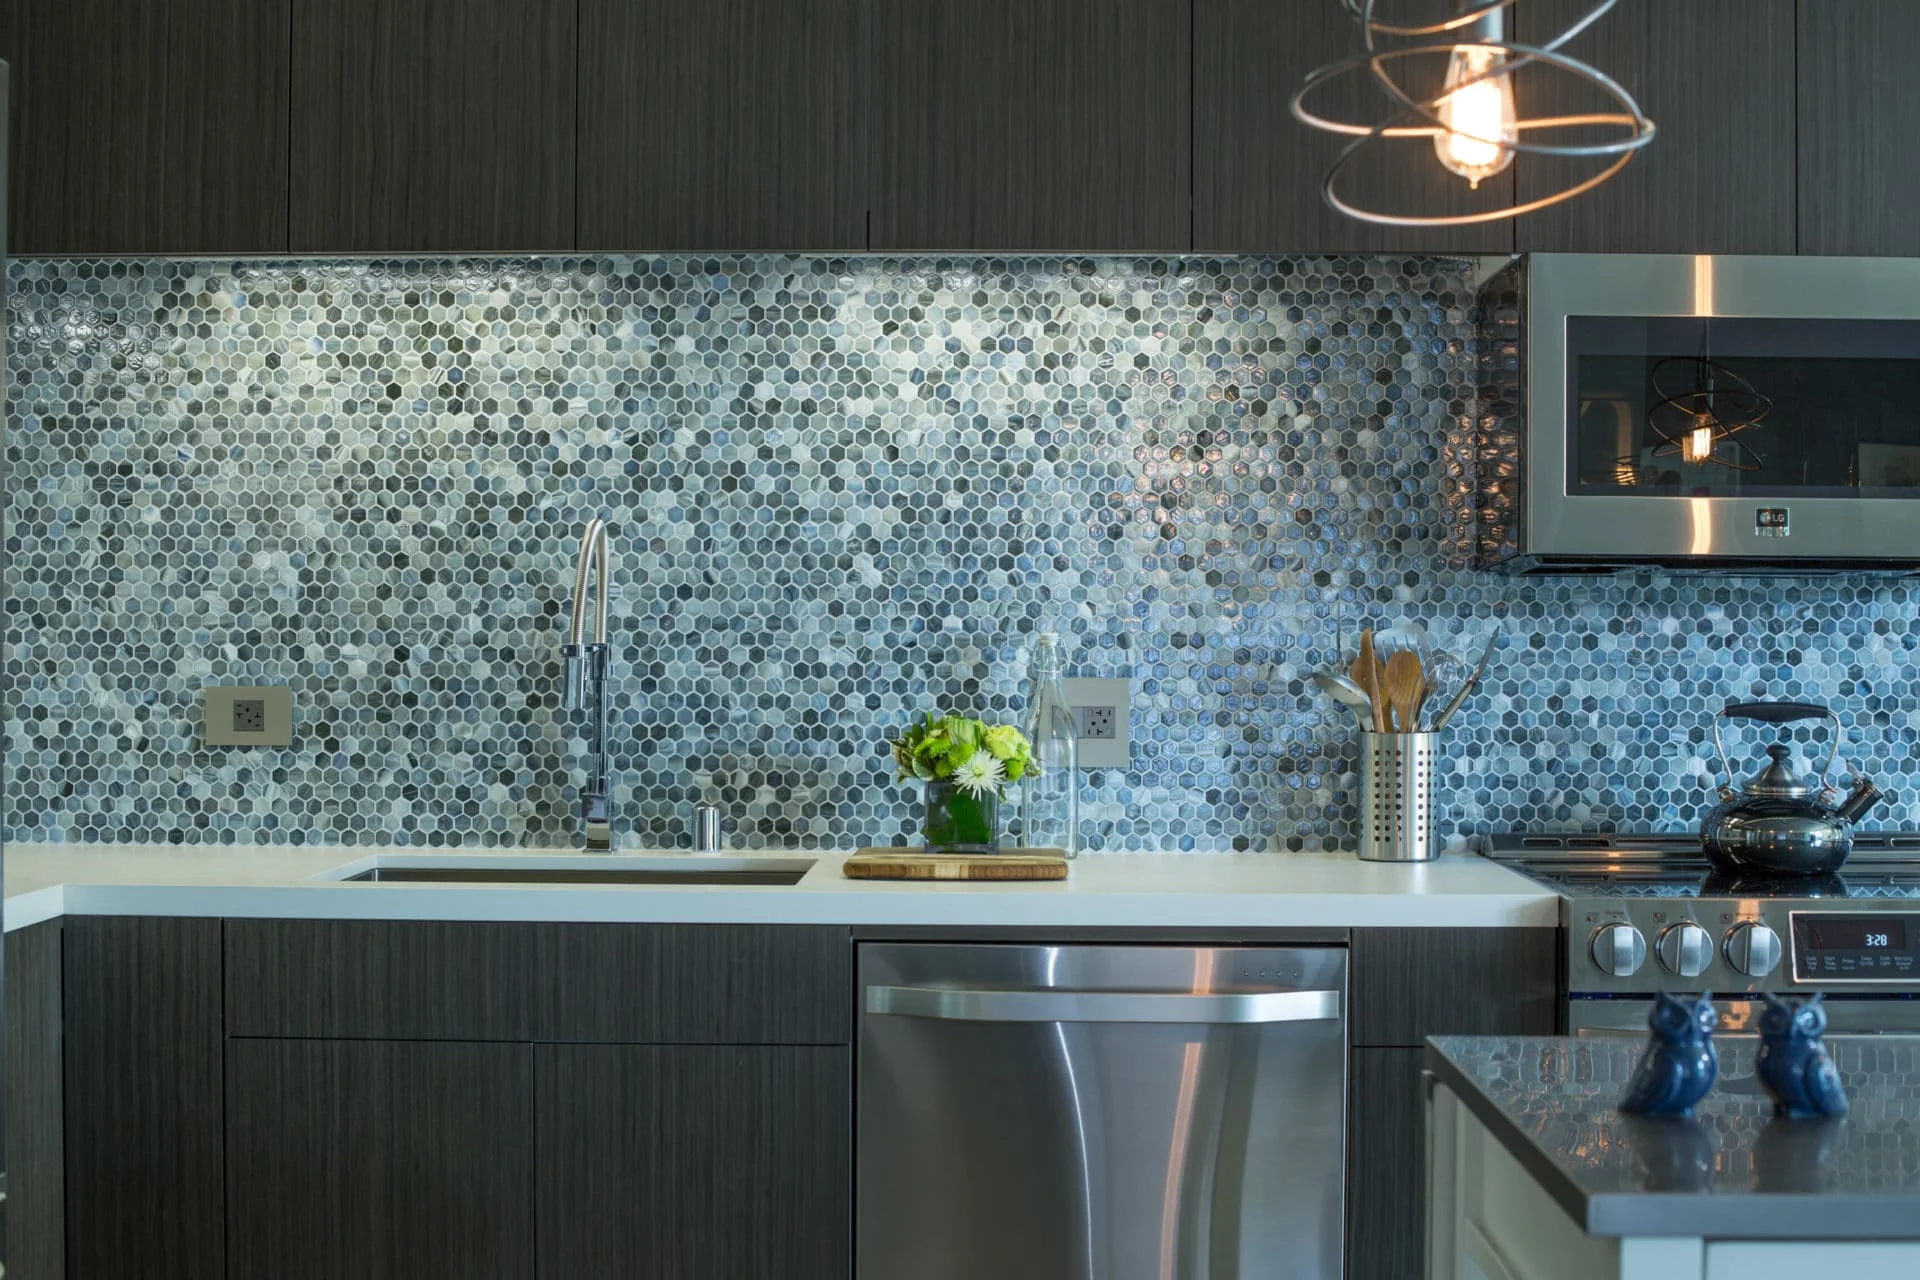
Mosaic tiles have an undeniable charm that can add a touch of artistry and sophistication to any space. Whether you’re planning to transform your kitchen backsplash, bathroom, or any other area in your home, installing mosaic tiles can be a fulfilling DIY project if done correctly. In this comprehensive guide, we’ll walk you through the steps to install mosaic tiles like a professional, ensuring a stunning and lasting result for your home improvement project.
Why Choose Mosaic Tiles?
Before we dive into the installation process, it’s essential to understand why mosaic tiles are a popular choice for homeowners. Mosaic tiles are characterized by their small size and intricate designs. Here are some reasons to consider them:
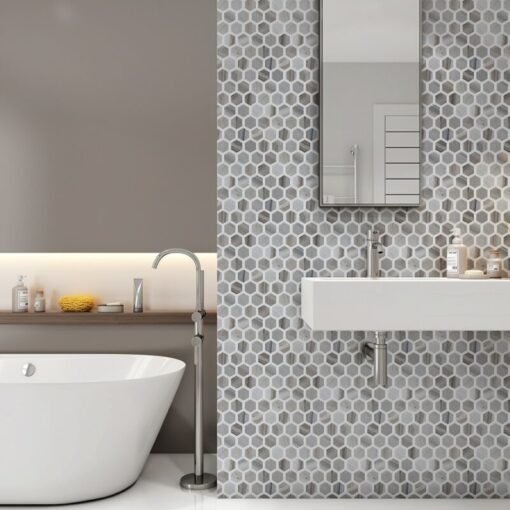
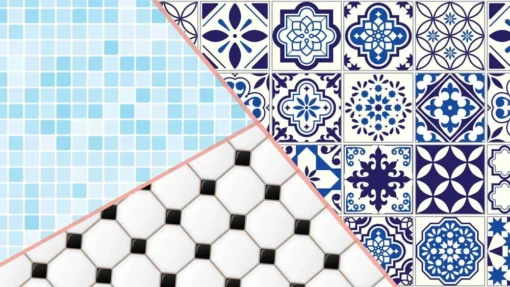
- Visual Appeal: Mosaic tiles come in a wide range of colours, materials, and patterns, allowing you to create unique and eye-catching designs. Their small size often makes them ideal for detailed and intricate patterns.
- Versatility: You can use mosaic tiles in various applications, including backsplashes, showers, floors, and even as decorative accents. They can be applied to almost any surface that can support tiles.
- Durability: Mosaic tiles are typically made from materials like glass, ceramic, porcelain, and natural stone, making them durable and long-lasting. They are resistant to moisture, stains, and wear and tear.
- Easy Maintenance: Mosaic tiles are relatively easy to clean and maintain, thanks to their non-porous surface. A simple wipe-down or mopping will keep them looking new.
- Value Addition: Installing mosaic tiles can increase the value of your home. Potential buyers often find them attractive and appreciate the attention to detail they bring to a space.
Now that you know why mosaic tiles are a great choice let’s get into the step-by-step guide for a professional installation.
Tools and Materials You’ll Need
Before you begin the installation, gather the following tools and materials to ensure a smooth and efficient process:
Tools:
– Mosaic tiles
– Tile adhesive
– Tile spacers
– Tile cutter or nipper
– Notched trowel
– Grout
– Grout float
– Tile sponge
– Bucket for mixing grout
– Level
– Measuring tape
– Pencil
– Safety glasses and gloves
– Drop cloth or plastic sheeting
– Sandpaper
– Masking tape (if needed)
Step 1: Prepare the Surface
Before you start installing mosaic tiles, it’s crucial to ensure that the surface you’re tiling is clean, smooth, and free from any dust or debris. The quality of your installation depends on a well-prepared surface. If you’re working on a wall, patch any holes or imperfections. If you’re tiling a floor, make sure it’s level.
Tips:
– Repair any existing damage or imperfections on the surface before starting.
– Sand down rough or uneven areas to create a smooth and even substrate for your tiles.
– Cover surrounding areas with a drop cloth or plastic sheeting to protect them from adhesive and grout spills.
Step 2: Plan Your Layout
Before you start attaching tiles, it’s a good idea to plan the layout to avoid potential problems later. Here’s how to do it:
- Dry-Fit Your Tiles: Lay out your mosaic tiles on the surface without adhesive to get a sense of how they will look. Experiment with different arrangements and patterns to find the one that suits your aesthetic preferences.
- Measure and Mark: Use a measuring tape and pencil to mark the center point of your surface. This will serve as your starting point for tile installation.
- Create a Grid: Use a level and pencil to create a grid of guidelines that intersect at the center point. This grid will guide your tile placement and ensure a balanced design.
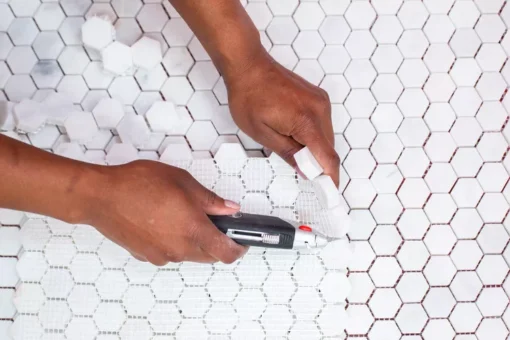
- Adjust and Cut Tiles: Depending on your layout, you may need to trim tiles to fit along the edges and borders of your surface. Use a tile cutter or nipper for this purpose.
Tips:
– Experiment with different arrangements to find the one that suits your aesthetic preferences.
– Make sure that the layout is symmetrical and well-balanced, especially if you’re working with a focal point like a backsplash or a decorative feature.
Step 3: Mix Tile Adhesive
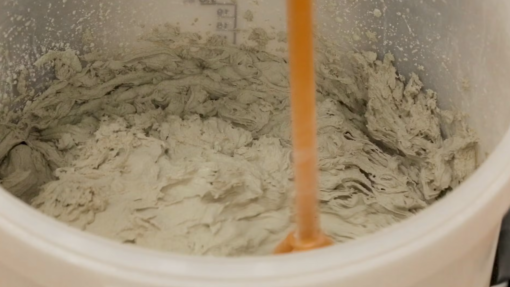
Next, you’ll need to prepare the adhesive that will hold your mosaic tiles in place. Follow the manufacturer’s instructions on the adhesive packaging to create a mixture with the correct consistency.
Tips:
– Mix small batches of adhesive as you work to prevent it from drying out before you can apply the tiles.
– Wear safety glasses and gloves when handling adhesive to protect your eyes and skin.
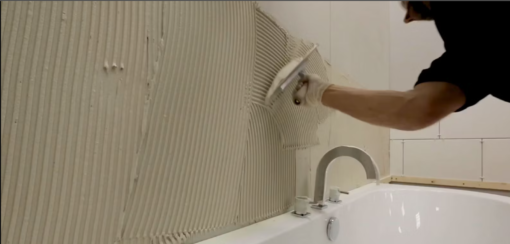
Step 4: Apply Tile Adhesive
With your adhesive mixture ready, it’s time to apply it to the surface in preparation for your mosaic tiles. Here’s how:
- Work in Small Sections: Begin by spreading a layer of adhesive on a small section of the surface. The idea is to work on an area you can tile in about 15-20 minutes to prevent the adhesive from drying out.
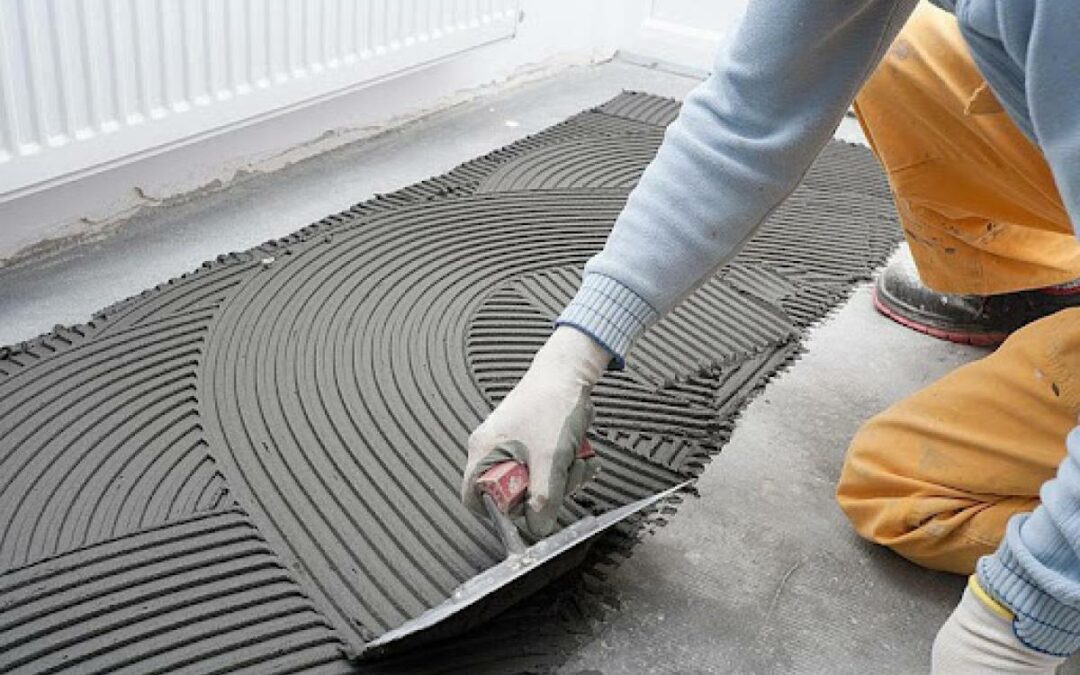
- Use a Notched Trowel: Use a notched trowel to spread the adhesive evenly over the surface. The notches on the trowel create ridges that help the tiles adhere properly. The size of the notches should match the size of your tiles.
- Apply at a 45-Degree Angle: Hold the trowel at a 45-degree angle and apply pressure to ensure that the adhesive is evenly distributed.
Tips:
– Work methodically and avoid applying adhesive to a larger area than you can tile within the specified time to maintain adhesive tackiness.
– Use the notched side of the trowel to create ridges in the adhesive for better tile adhesion.
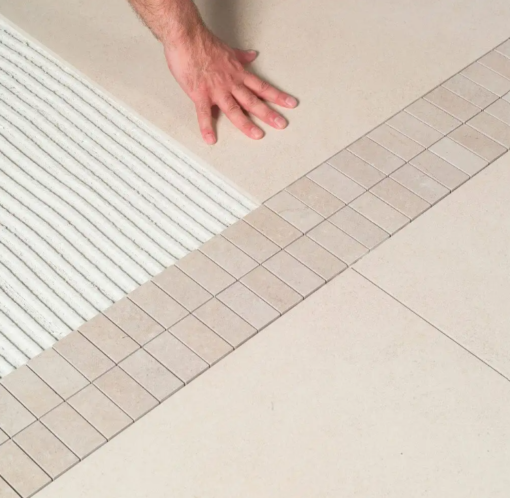
Step 5: Install Mosaic Tiles
Now comes the exciting part – attaching your mosaic tiles to the adhesive. Follow these steps for a professional-looking installation:
- Press Tiles into Adhesive: Carefully press each mosaic tile into the adhesive, following the grid you created during the layout planning. Ensure that each tile is level and properly aligned with the others.
- Use Tile Spacers: Insert tile spacers between the tiles to maintain even gaps. The size of the spacers will depend on your design and the desired spacing between tiles.
- Trim Tiles When Necessary: You may need to trim tiles to fit along the edges or around obstacles like electrical outlets or plumbing fixtures. Use a tile cutter or nipper for this purpose.
Tips:
– Check your layout and grid lines regularly to ensure that you’re staying on track and that your mosaic design remains balanced.
– Double-check tile alignment and spacing to create a polished look.
Step 6: Allow Adhesive to Dry
After you’ve successfully attached all your mosaic tiles to the adhesive, it’s crucial to allow the adhesive to dry thoroughly. Follow the manufacturer’s instructions for the recommended drying time, which is typically around 24 hours. The drying time may vary based on factors like humidity and temperature.
Tips:
– Avoid any physical contact with the tiles during this drying period to prevent accidental displacement.
Step 7: Prepare Grout
Grout is the material that fills the gaps between your tiles and gives your installation a polished, finished look. Here’s how to prepare it:
- Select the Right Grout: Choose a grout colour that complements your mosaic tiles and the design you’ve created. Grout comes in various colours, so take your time to select the one that enhances your design. Access our guide to Choosing The Right Grout Colour here.
- Mix the Grout: Follow the manufacturer’s instructions to mix your grout. Typically, you’ll need to combine the grout powder with water until you achieve a smooth, thick consistency, similar to peanut butter.
Tips:
– Make sure to choose the right colour of grout that complements your mosaic tiles.
– Prepare a reasonable amount of grout to work with, as it should be used quickly to maintain its workability.
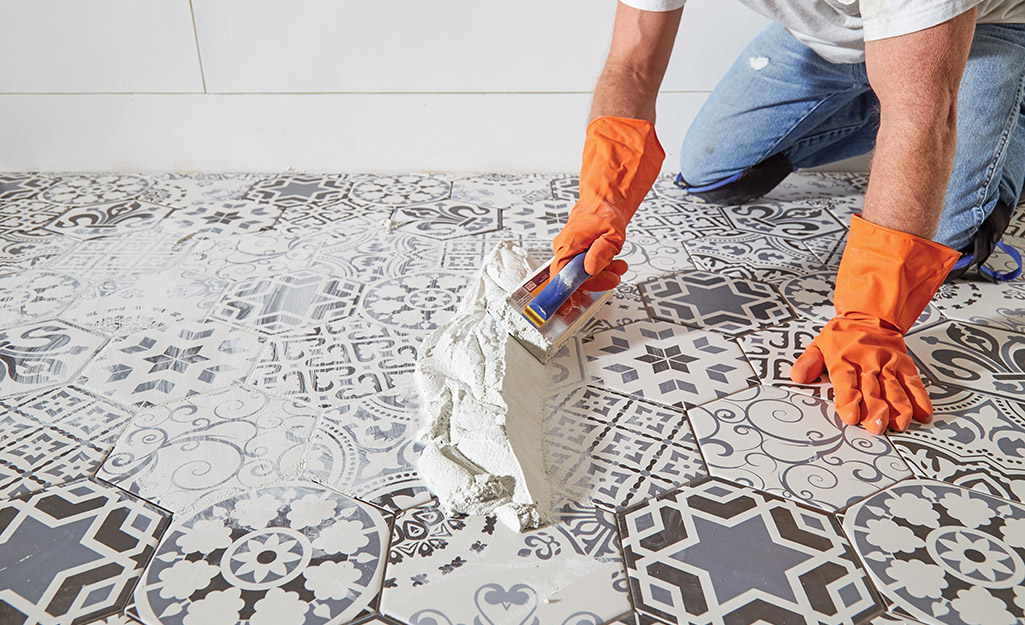
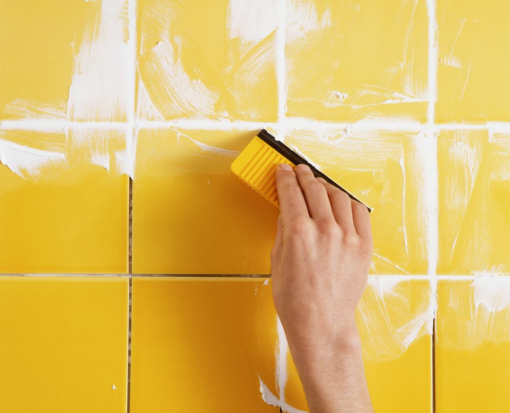
Step 8: Apply Grout
Applying grout is a crucial step that will not only fill the gaps between your mosaic tiles but also ensure their stability. Here’s how to do it:
- Work in Small Sections: Just as with adhesive, it’s best to work in small sections when applying grout. This allows you to manage the process more efficiently.
- Spread Grout: Use a grout float to spread the grout evenly over the tiles. Hold the float at a 45-degree angle to the tiles to pack the grout into the gaps.
- Hold the Float at an Angle: To ensure the grout gets into the gaps and covers the entire tile surface, hold the float at a slight angle and apply pressure as you move it.
Tips:
– Work methodically to ensure that the grout is evenly applied to all areas of your mosaic tiles.
– Don’t rush this step, as it’s essential to get the grout into all the gaps and ensure a secure bond.
Step 9: Remove Excess Grout
Once you’ve applied the grout, it’s time to clean up the excess to reveal your beautifully installed mosaic tiles. Here’s what you need to do:
- Dampen a Tile Sponge: Wet a tile sponge and wring out the excess water. You want the sponge to be damp but not soaking.
- Wipe the Tiles: Gently wipe the tiles with the damp sponge to remove excess grout from the tile surfaces. Rinse the sponge frequently to avoid smearing grout over the tiles.
- Clean Grout Lines: Use the sponge to shape and clean the grout lines, ensuring they are even and smooth.
Tips:
– Work carefully but quickly to prevent the grout from hardening on the tiles.
– Rinse the sponge thoroughly to avoid spreading grout residue on the tiles.
Step 10: Final Cleaning
Once you’ve removed most of the excess grout from the tiles, allow the grout to set for a short period before doing a final cleaning. Here’s how to do it:
- Allow Grout to Set: Let the grout dry for a short time, typically for about 15-30 minutes, or as recommended by the grout manufacturer. The grout should become slightly hazy.
- Buff Tiles: Using a clean, dry cloth or a lint-free rag, gently buff away the remaining grout haze from the tiles. This will reveal the full beauty of your mosaic tiles.
Tips:
– Be patient while buffing the tiles to avoid scratching the surface.
Step 11: Seal the Grout (Optional)
While this step is optional, it’s recommended if you want to protect your grout from staining and make maintenance more manageable. Sealing the grout creates a barrier that prevents moisture and debris from penetrating the porous material. Follow these steps if you choose to seal your grout:
- Select a Grout Sealer: Choose a high-quality grout sealer that suits your needs. Grout sealers come in two main types: penetrating sealers and membrane-forming sealers. Penetrating sealers are absorbed into the grout, providing protection without altering its appearance, while membrane-forming sealers create a protective film over the grout.
- Apply the Sealer: Follow the manufacturer’s instructions for applying the sealer. Typically, you’ll use a brush, roller, or applicator bottle to spread the sealer over the grout lines. Be careful not to get sealer on the tile surfaces.
- Wipe Off Excess Sealer: After allowing the sealer to set for a few minutes (as per the manufacturer’s recommendations), use a clean, dry cloth to wipe off any excess sealer from the tile surfaces.
Tips:
– Make sure the grout is fully dry before applying the sealer.
– Some sealers may require multiple coats, so be sure to follow the product’s specific instructions.
Step 12: Enjoy Your Newly Tiled Surface
With the grout fully cured, which typically takes 24-72 hours, your mosaic tile installation is complete. Step back and admire your professional-looking mosaic tile work that enhances the beauty of your space. You’ve now added a touch of artistry and sophistication to your home.
Tips:
– Clean and maintain your mosaic tiles regularly to keep them looking their best.
– Consider using a tile and grout cleaner to remove dirt and stains without damaging your installation.

Installing mosaic tiles may seem like a daunting task, but with the right tools, materials, and a methodical approach, you can achieve professional-looking results. The beauty of mosaic tiles lies in their ability to add a unique and elegant touch to any room, and this step-by-step guide can help you achieve just that.
Whether you’re a seasoned DIY enthusiast or a first-time tiler, follow this guide, take your time, and enjoy the process. With patience and attention to detail, your mosaic tile installation will be a stunning addition to your home, elevating the aesthetics of your space and adding value to your property.
Now that you’ve learned how to install mosaic tiles like a pro, it’s time to roll up your sleeves and get started on your own tiling project. Whether you’re revamping your kitchen, upgrading your bathroom, or creating a beautiful mosaic masterpiece, you’re well-prepared for success. Happy tiling!
blog, commercial blog, how to articles
When it comes to tiling projects, using the right adhesive is crucial for achieving a durable and long-lasting finish. Properly applied adhesive ensures that tiles adhere securely to the surface, preventing cracks, loose tiles, and water damage.
In this comprehensive guide, we will walk you through the essential steps and best practices for using adhesives in your tiling projects, enabling you to achieve professional results and create beautiful tiled surfaces that stand the test of time.
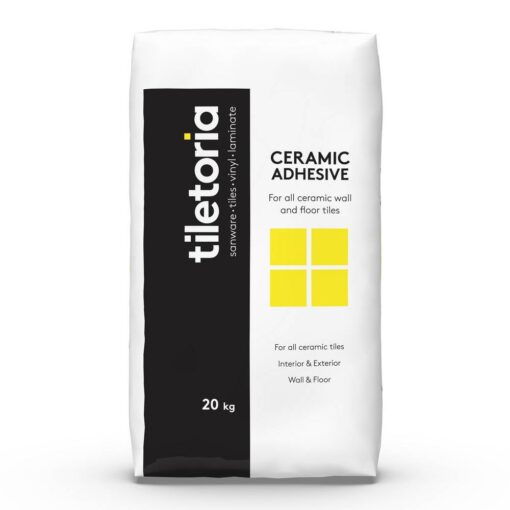
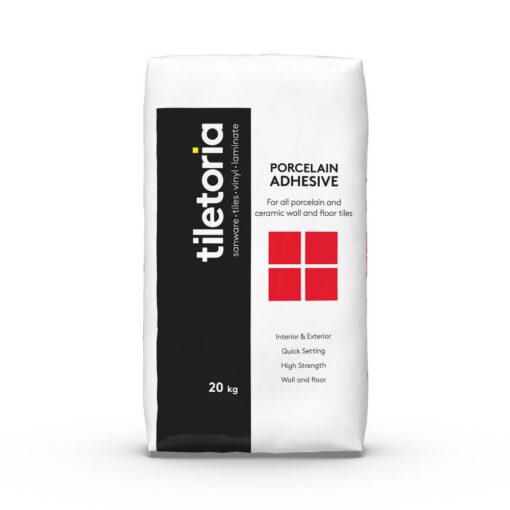
1. Select the Right Adhesive:
Choosing the correct adhesive is the first step towards a successful tiling project. Consider factors such as the type of tiles you are using, the substrate (surface) you are tiling on, and the environment in which the tiles will be installed.
Different adhesives are formulated for specific applications, such as ceramic, porcelain, or natural stone tiles. Select an adhesive that is suitable for your specific tile type and the surface you are working on to ensure proper adhesion and longevity.
2. Prepare the Surface:
Proper surface preparation is vital for optimal adhesion. Ensure that the surface is clean, dry, and free from dust, grease, or any other contaminants. Remove any loose or uneven areas and repair them before applying the adhesive.
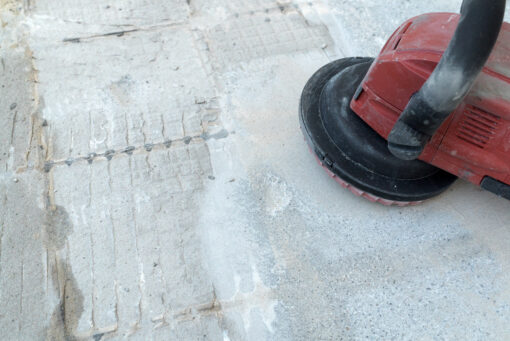
If the surface is particularly smooth or non-porous, consider roughening it with sandpaper or using a suitable primer to enhance the bond between the adhesive and the surface.
3. Mix the Adhesive:
Follow the manufacturer’s instructions to mix the adhesive correctly. Use clean water and gradually add the adhesive powder while stirring to achieve a smooth and lump-free consistency.
Avoid preparing more adhesive than you can use within the recommended pot life to prevent waste and ensure the adhesive remains workable.
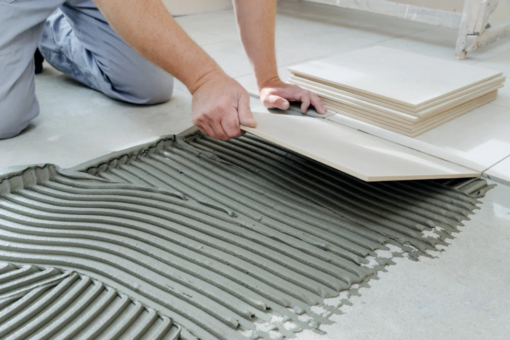
4. Apply the Adhesive:
Using a notched trowel, spread the adhesive evenly onto the surface. The size of the notches on the trowel should be determined by the tile size and thickness, as well as the substrate condition.

Apply the adhesive in small sections, working in manageable areas to prevent it from drying out before placing the tiles. Keep the trowel at a consistent angle to ensure a uniform adhesive bed.
5. Tile Placement:
Carefully press each tile into the adhesive, applying even pressure to ensure good contact and proper adhesion. Use tile spacers to maintain consistent spacing between tiles and achieve straight grout lines.
Check periodically with a level or straightedge to ensure that the tiles are aligned correctly and flush with each other. Wipe off any excess adhesive that squeezes out from the joints before it dries.
6. Allow for Proper Drying and Curing Time:
Follow the manufacturer’s instructions regarding drying and curing time. Allow the adhesive to set for the recommended period before applying grout or subjecting the tiled surface to any moisture or foot traffic.
Proper drying and curing time will ensure that the adhesive reaches its maximum strength and bond.
Using adhesives for tiling requires attention to detail and adherence to proper techniques. By following this guide, you can achieve professional results in your tiling projects.
At Tiletoria, we offer a wide range of high-quality adhesives suitable for various tile types and applications. With the right adhesive and proper techniques, you can confidently tackle any tiling project and enjoy beautiful, long-lasting results.
Visit our showroom in Cape Town or Johannesburg to explore our selection and consult with our knowledgeable staff.

blog, commercial blog, floors, woodlook
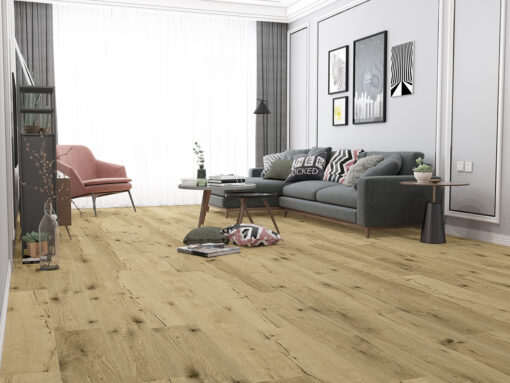
When it comes to selecting flooring for your home or office, vinyl flooring has emerged as a popular choice due to its durability, versatility, and aesthetic appeal. With a wide range of options available, choosing the right vinyl flooring can seem overwhelming.
In this comprehensive guide, we will walk you through the key factors to consider when selecting vinyl flooring, ensuring that you make an informed decision that meets your style preferences and functional needs.
Determine Your Flooring Requirements:
Before diving into the vast array of vinyl flooring options, it’s essential to identify your specific requirements. Consider factors such as the room’s foot traffic, moisture levels, and desired level of comfort.
High-traffic areas, such as hallways or commercial spaces, may require a thicker wear layer for enhanced durability, while moisture-prone areas like bathrooms would benefit from waterproof vinyl flooring options.
Explore Different Types of Vinyl Flooring:
Vinyl flooring comes in various types, each offering distinct benefits. Sheet vinyl is a cost-effective option that provides seamless coverage and easy maintenance. Vinyl planks and tiles offer a more realistic appearance, mimicking the look of natural hardwood or stone at a fraction of the cost.
Luxury Vinyl Tiles (LVT) and Luxury Vinyl Planks (LVP) are known for their durability, water resistance, and ability to handle heavy foot traffic. Understanding the types of vinyl flooring available will help you choose the one that aligns with your style and practical requirements.
Consider Design and Style:
Vinyl flooring is available in a vast range of designs, patterns, and colours, allowing you to unleash your creativity and achieve your desired aesthetic.
Whether you prefer the warmth of wood, the elegance of stone, or the sleekness of modern designs, there is a vinyl flooring option to suit every taste.
Take into account the existing decor and colour palette of your space, and select a vinyl flooring style that complements and enhances the overall ambiance.
Assess Installation Methods:
Vinyl flooring can be installed in different ways, including glue-down, click-lock, and loose-lay methods. Glue-down vinyl requires adhesive to secure the flooring to the subfloor, ensuring a permanent and stable installation.

Click-lock vinyl utilizes a locking mechanism that allows the planks or tiles to seamlessly interlock, providing a floating floor installation that is easy to install and remove. Loose-lay vinyl features a heavy backing that helps keep the flooring in place without the need for adhesive or locking mechanisms. Consider your installation preferences and skill level when choosing the appropriate installation method for your vinyl flooring.
Evaluate Maintenance and Durability:
One of the significant advantages of vinyl flooring is its low-maintenance nature. However, different vinyl options may have varying durability and maintenance requirements. Look for vinyl flooring with a wear layer that suits your needs—thicker wear layers offer better protection against scratches and wear over time.
Additionally, consider factors such as stain resistance, ease of cleaning, and resistance to fading from sunlight. Opt for vinyl flooring that aligns with your lifestyle and requires minimal upkeep to keep it looking its best.
Choosing the perfect vinyl flooring for your space is an exciting process when armed with the right knowledge. By considering these factors, you can confidently select vinyl flooring that strikes the perfect balance between style and functionality.
Visit your neartest Tiletoria showroom in Cape Town Johannesburg today to explore our extensive range of vinyl flooring options.
Our knowledgeable staff will guide you through the selection process, ensuring you find the ideal vinyl flooring that transforms your space into a stunning and durable haven.

blog, commercial blog, floors, woodlook
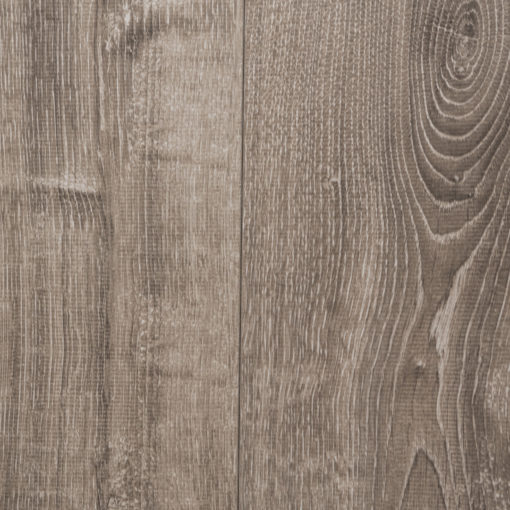
When it comes to transforming your home or office space, choosing the right flooring is crucial. If you’re looking for a flooring solution that offers both beauty and functionality, look no further than laminate flooring. Laminate floors have become increasingly popular due to their durability, affordability, and wide range of design options.
At Tiletoria, we pride ourselves on providing the finest laminate flooring choices to suit every style and preference.
KRONOTEX Laminate Flooring:
One of our premier laminate flooring options is the KRONOTEX range, crafted in Germany. KRONOTEX is renowned for its exceptional quality and attention to detail. With a variety of decors, this range caters to diverse tastes and preferences.
Whether you desire the timeless elegance of wood grain or the captivating allure of stone textures, KRONOTEX offers laminate flooring that perfectly emulates the natural beauty of these materials.
Each plank provides an authentic look and feel, ensuring a stunning result that will impress any visitor.
Natures Floor Laminate Range:
For those seeking a more natural ambiance, our Natures Floor laminate range is an excellent choice. This collection combines the elegance of hardwood with the durability and practicality of laminate.
Natures Floor captures the essence of wood, bringing warmth and character to any space. From rich, deep tones to lighter shades, these laminates beautifully replicate the diverse colours and textures found in nature.
Embrace the cozy atmosphere of a wooden floor while enjoying the convenience and resilience of laminate.
Style Laminate Floor Range:
If you’re looking to elevate your space with a touch of timeless elegance, our Style Laminate Floor range is the perfect choice.
This collection offers a wide selection of classic designs and finishes that exude sophistication and refinement.
From rich walnut red to smooth grey, Style Laminate Floors provide the perfect balance of style and functionality.
With their sleek and versatile appearance, these laminates seamlessly integrate into any interior design, creating a cohesive and inviting atmosphere.
We understand that choosing the right flooring is essential in creating the perfect ambiance for your space. Whether you’re renovating your home or embarking on a commercial project, our laminate floors offer durability, versatility, and unmatched aesthetics.
Visit our Tiletoria showroom in Cape Town or Johannesburg today to explore our laminate flooring range and experience firsthand the quality and beauty that laminate flooring can bring to your space.
Trust us to provide you with the finest products and exceptional customer service, ensuring your flooring journey is a success.
bathroom, blog, commercial blog, how to articles
Tiling a bathroom floor is a crucial step in creating the perfect bathroom. It not only enhances the aesthetics but also contributes to the functionality and durability of the space. Having a clear understanding of the steps involved in tiling a bathroom floor is essential.
In this blog, we will guide you through the process, providing professional advice to help you achieve a flawlessly tiled bathroom floor that adds charm and elegance to your space.
1. Plan and Prepare:
Before diving into tiling, proper planning and preparation are essential. Measure the floor accurately to determine the amount of tile needed. Consider factors such as tile size, colour, and pattern to ensure they complement the overall design of your perfect bathroom. Tiletoria offers a wide range of tile options, catering to various styles and preferences.

Prepare the surface by ensuring it is clean, dry, and free of any debris. If necessary, remove the existing flooring and repair any imperfections or unevenness. Tiletoria also offers a selection of high-quality adhesives and grouts specifically designed for bathroom floors, ensuring optimal results.
Estimating the required amount of tile and the overall cost of your project is crucial. If you’re wondering how to calculate the precise tile quantity you need, explore our blog How to calculate how much tile you need. There, we provide a detailed explanation of the step-by-step process to accurately determine the tile quantity for your specific project. By following our guidelines, you can confidently plan your project and avoid unnecessary expenses.
2. Start with a Solid Foundation: Apply Adhesive
Begin by applying a suitable adhesive to the prepared floor surface using a notched trowel. Work in small sections to prevent the adhesive from drying out before laying the tiles.
3. Lay the Tiles:
Carefully lay the tiles on the adhesive, starting from one corner of the room. Use tile spacers to maintain consistent gaps between tiles for grouting. Tiletoria provides a variety of tile sizes and styles to suit your design preferences, ensuring a personalized touch to your bathroom floor.
Take time to ensure the tiles are level and properly aligned. Use a tile cutter or wet saw to make necessary cuts for tiles at the edges or around fixtures.
4. Grout the Tiles:
Once the adhesive has fully cured, typically after 24 to 48 hours, it’s time to grout the tiles. Choose a grout colour that complements the tiles and desired aesthetic of your perfect bathroom.
If you’re unsure about how to choose the right grout colour for your tiling project, we have the perfect solution. Check out our blog on How To Choose The Right Grout Colour, where we guide you through the process of selecting the ideal grout coluor to enhance the overall aesthetic of your tiled space.
Mix the grout according to the manufacturer’s instructions, and use a grout float to apply it, ensuring it fills the gaps between the tiles completely.
Wipe off any excess grout using a damp sponge or cloth. Tiletoria offers a variety of grout options, to ensure longevity and easy maintenance of your bathroom floor.
5. Finishing Touches and Sealing:
After the grout has dried for the recommended time, carefully clean the tiles to remove any grout haze. Use a suitable tile cleaner to ensure a spotless and polished finish. Consider applying a sealer to the grout and tiles to protect them from moisture and stains, enhancing the longevity of your bathroom floor. Tiletoria offer a variety of installation products to ensure your bathroom floors are affordable and resilient.
Tiling a bathroom floor requires careful planning, preparation, and attention to detail. By following our professional advice and utilizing our extensive range of high-quality tiles, adhesives, grouts, and tools, you can achieve a flawlessly tiled bathroom floor that contributes to the perfect bathroom you envision.
Take the leap and create a bathroom floor that combines functionality, aesthetics, and durability, transforming your space into a haven of beauty and style.
For more tips and advice on tiling, visit your nearest Tiletoria showroom and chat to our sales team for advice.